Showing posts with label Card Making. Show all posts

Saturday, March 22, 2014

Easter Card by Michele


Do you have lots of paper pieces and do not know what to do with them. Well I keep all my paper pieces, so when I need to do a project I am not always buying new sheets of paper. This is what I came up with.

Here is a card I made. I used a A2 card (4.25 x 5.5). I used paper from my stash that had some Easter items on it but it was not the size I needed. So I took some green card stock and did a two- tone layer. The green card stock was about 2 inches and the Easter paper was about 3 inches. I over layed the paper.


The saying is from a stamp I had in my stash. The basket, eggs, and flowers are from a die cut, I'm not sure which one it was, in my stash.  I used sticky thumb adhesive by Lifestyle Crafts, this is one I got from the adhesive club(Ask Kim about our monthly clubs). The bunny is a digital stamp I got online as a freebie from a company. I used brown fun flock for his tail and I used colored pencils to color him. I used pop up dots on him and the saying.  I am sure with all your scrap pieces you can make something wonderful. Please stop by the store for some of the items I used on this card, and can't find it just ask Kim and she will help you.

Friday, June 14, 2013

A Berry Happy Birthday with Lori

Have you been using your Copic markers lately? I pulled mine out and made this fun birthday card that will be perfect for one of my daughter's friends or one of my great-nieces.


The papers are leftovers from the Country Drive kit from Echo Park Paper, plus some cardstock from my stash. The stamp is from my stash (sorry I don't remember the brand), and I colored her with the Copics.  I cut my mats using some Sizzix dies I also had in my stash, and embellished the card with ribbon and a bling-y button leftover from a sewing project. My matted image is popped up on some foam adhesive squares. All of my paper edges are ink distressed; I used a couple of colors in my stash, but you can use the Memento ink pads or the Tim Holtz Distress Inks for this.

As usual, I made sure to stamp my image using Memento Tuxedo Black ink on the Xpress Blending Card for the easiest coloring.


I colored my image with the following colors:
  • Hair - E33, E37, E59
  • Skin - E02, E11, E13
  • Dress & Strawberry - YG03, YG06, YG07, YG09, RV21, RV23, RV34
  • Shoes - C6, 100
  • Shadow - C1, C2, C3
Items available at Cutters Creek:
 I hope you enjoyed my card today! I'd love to see what you've been coloring with your Copics lately - be sure to link them here or post them in the Cutters Creek Yahoo group.

Saturday, June 1, 2013

You're the King - Masculine Card with Lori

It's my turn today to share a masculine card with you.  This one is perfect for the King of your castle, for Father's Day, birthday, anniversary, or just because.


Neutrals or dark colors are perfect for masculine cards, and a pop of color makes them eye-catching. My papers are from Graphic 45's Kraft Reflections paper pad. This is no longer in stock at Cutters Creek, but any of the other paper pads with darker colors would be great! (Basically anything currently in the store except Secret Garden.)


Texture is also a must for masculine cards, because we tend to stick to simpler patterns for them.  I used my faux leather technique and a Tim Holtz buckle to create this "belt" on my card. I added a pop of color by making this "poker chip" using a stamp from my stash and embossing with red embossing powder on red cardstock. I made sure the tones were slightly different so it would still "read" well.


Finally, I added my sentiment, using words from two different stamp sets (you're & the) and an alphabet set (king).

Supplies available at Cutters Creek:
Other supplies:
  • cardstock
  • clear embossing ink
  • red embossing powder
  • sentiment stamps
  • Tim Holtz buckles
I hope I gave you some new ideas for your masculine cards today. Thanks for stopping by!

Thursday, May 23, 2013

Teacher Card with Lori

The end of the school year is upon most of us in the next couple of weeks. I like to send the teachers a little something in a card to say thank you for their efforts. My son is not likely to appreciate anything too girly, and since I want him to sign it, I went with this easy number:


The entire thing is cut from the Cricut Wild Card cartridge, using My Mind's Eye papers and cardstock. The Stella & Rose - Mabel paper pad I used is not in the store, but many of their lines have the same muted feel. I think it looks a bit like a county fair, which I think is pretty cool!

To add to the rustic look, I used Tim Holtz Distress Ink in Spiced Marmalade and Evergreen Bough to edge all of my cut papers.

 After assembly, I added accents with Distress Stickles in Spiced Marmalade, Broken China, and Clear Rock Candy. I also slightly curled up the bottom ends of the ribbons.


It's a great way to accent small bits, or to draw attention to a certain part of a single color item, like this sentiment.


I cut the matching envelope from the cartridge, and also ink distressed the edges of the closed envelope to coordinate.


Items available from Cutters Creek:

Other items:
  •  Cardstock

I hope you enjoyed today's project; I had a great time making it! Thanks for stopping by.

Thursday, May 2, 2013

Elegant Cards Made Easy with Graphic 45 & Lori

May is a busy month - on top of all the "usual" things, we Mother's Day and graduations to contend with! Which makes it even more important than usual for me to be able to get projects done quickly, and still look like I put plenty of effort into them.  At least I know cards can be a snap with Graphic 45.  My preferred card size is 5x7, and thankfully G45 has some great 4x6 images in many of their collections which are perfect for that size card.  Here's a beautiful (but quick!) card perfect for Mother's Day, a birthday, and more:


I chose an image I loved from the Secret Garden 12x12 paper pad, along with a coordinating print, and decided to use them with a kraft card base.  I cut the print to 4.75" x 6.75", and inked the edges of it and the image panel using Faded Jeans Distress Ink.  I cut a piece of cream cardstock to 4.25" x 6.25", and inked the edges of it and the card base with Antique Linen Distress Ink.

I layered the image on the cream cardstock, and the coordinating print on the card base.  I added some silver Glitter Tape to opposite corners of the matted image, then adhered it to the card front using foam adhesive. Finally, I used several colors of Copic Spicas to add more sparkly details to the image:


The closeup photos just do not do the actual image justice. I just love how a little sparkle makes these images shine! (No pun intended, lol.)

Cutters Creek supplies used:
Other Supplies: cardstock in kraft and cream (I used CTMH)

I hope today's post has given you some ideas - I'd love to hear what you think!

Thursday, March 28, 2013

Wedding Card with Lori

Hello! Seems it's been a while since I've been here; the germs have been rocking our house a little hard this month.  Anyway, today I have a pretty wedding easel card to share with you.  The hubs came home last week and told me he needs a card for a coworker getting married.  Since he'll be delivering it in person, I was happy to make it thick and chunky because I don't have to deal with mailing it, lol.  Here's what I came up with:


I pulled out one of my few wedding stamps (I think it's Bildmalarna) and my Copic Markers.  I knew I wanted to use that beautiful doily die again, so I cut a circle from Xpress Blending Card to fit the center. I stamped my image on the circle and colored it with my Copics.


I made my 6x6 easel card using CTMH cardstock and Authentique papers from my stash.  I placed the stopper for my easel near the top of the inside instead of the traditional placement near the bottom so it would stand up almost straight. I made sure to pop up the top strip with foam adhesive to keep it from popping closed.  I also added some rhinestone brads for bling.


I raised the doily off the card front using more foam adhesive for added depth and interest.  I embellished using Prima Fairytale Roses and Cutters Creek branded flowers.  I inked the CC flowers to darken them a bit since they were the same shade as the darker Fairytale Roses, and I wanted to add a little more color variety. The flowers are all adhered using Glossy Accents.


It's hard to see in the pictures, but I added sparkle to the eyelet areas of the wedding dress using a clear Copic Spica pen. 


Supplies available at Cutters Creek:
Other Supplies Used:
  • Cardstock
  • Pattern Paper (I used Authentique)
  • Ink to sponge flowers & paper edges (the Tim Holtz Distress Ink pads in the store would work great)
 

Wednesday, January 23, 2013

Sparkly Valentine with Lori

Today I have a bit of a non-traditional Valentine to share with you.  I'm using non-Valentine paper and a non-Valentine image, but by focusing on the red and adding some sparkle and some little added bits, it would make a fun Valentine for a special someone (who might be just a little bit grumpy, lol).

I started with the Miss Caroline Dilly Dally 6"x6" pad from My Mind's Eye, a Gorjuss Girl stamp from my stash (sorry, she's discontinued), and my Copic Markers and Spicas.  This is how it turned out:


 I can honestly say that I am in love with this little grouch!  I stamped my image in Memento Cocoa Brown on Xpress Blending Card, then chose the papers I wanted to use with her.  I wanted the red & white polka dots for a mat to put the focus on the red. Then I decided that the ticket pattern would make a great background and I could treat it like a kissing booth.  I cut a ticket shape from a Cricut Cartridge (I think I used Art Philosophy, but there are tickets on a number of cartridges), and stamped the sentiment with an alphabet set in my stash.  I didn't worry about making it straight, letting it be fun & child-like.  

I colored my image with Copic Markers to match the papers I chose (see list below).  Then I used Copic Spicas in Red and Lipstick to trace the letters on the tickets and go over all of the hearts on the girl's dress and her barrettes.  Finally, I trimmed all of my papers to size and added borders using a Chocolate Copic Spica.  I sponged the edges of the papers and the card base with coordinating inks and adhered everything, adding ribbon from my stash to the ticket paper. After assembly, I added my ticket using foam adhesive squares, and added some Kaisercraft adhesive pearls in Lemon.

 Here's an angle that shows how glittery the Spica Pens make everything!:


Products available from Cutters Creek:
Here's a closeup of the colored image, followed by a list of the colors I used:

Skin: E00, E02, E11, E13, YR000, R20
Hair: YR21, YR23, YR24
Shoes: E15, E37, E59
Clothes: BG11, BG15, BG18, R24, R27, R29
Shadow: W1, W3, W5

Now it's your turn!  Grab some papers  an image that may not say "Valentine's Day", but includes one color you can focus on to bring your theme through.

Monday, August 27, 2012

What do you do with your scraps?

For the longest time I used to hang on to every little scrap of paper/cardstock I had left after a project but it soon became a big box of unused stuff and no idea what I had in there so I decided I would hang on to my scraps for a month and reserve one day a month to use them up and making cards... I wish I could say kept this up over the year but I would be lying! So, tonight I decided it was time to break open that box and start using up those scraps..... Here is my first card for the night..

I hope this inspires you to use up those scraps and build a nice supply of cards!

~Tee


Tuesday, August 14, 2012

All Occasion Card by Tee

I love to make "all occasion" cards and keep them in my stash for when I need a last minute card for a Thank You, Get Well Soon, Congratulations or whatever the occasion might be. 

Below is a sample of one of my recent "all occasion" cards using Echo Park paper, Cricut Art Nouveau, Diamond Stickles and some tulle for a bow. I usually make a batch of these at a time, I did 6 of these cards and used scraps of cardstock for the flowers in red, pink (as shown here) and yellow.


Thursday, July 26, 2012

Christmas in July with Lori and Sarah Kay

Who's ready to start their Christmas crafting?  I especially love to get started on Christmas cards early so I don't feel so rushed!  I don't like to spend a lot of extra money on stamps just for Christmas, so I thought I would show you how just changing the colors can make many of your regular stamped images great for Christmas.  Kim has a bunch of stamps that would be perfect for this, and I especially like the cute Sarah Kay stamps!

If you stopped by my blog on Tuesday, you saw this same image colored in "everyday" colors great for whatever occasion you'd like.  So today, I colored it in with traditional Christmas colors and voila, perfect for Christmas wishes!


Doesn't she look like she just got that sweet little kitty for Christmas? I layered her on some cute papers from Echo Park's 6x6 Season's Greeting pad and added Making Memories paper flowers from my stash and some American Crafts Glitter Tape to complete the look.  (By the way, I'm sure it's not recommended, but I used one of my border punches to punch the Glitter Tape into scallops.)


I forgot to write down the exact numbers I used, but as I remember these are the Copic Markers I colored her with: R24, R29, R39, Y11, Y13, Y15, G03, G05, G07, E000, E00, E02, E13, E15, E37, C1, C3, C5, W1, W3, W5. I'm not sure how well you can see in the photo, but I added a bit of a yellow glow to the left edge to give it the appearance of a fireplace.

Supplies used for this card:
Thanks for stopping by today!  I hope to see you again soon.


Sunday, May 13, 2012

My Mind's Eye & Ecstasy Crafts with Kim B


My craft room seriously looks like hurricane Kim blew through it and left a mess for me to clean up!  Although I was so productive and got a lot done in a couple of days, I so need to clean up so I can begin once again.  Are you like me and are one of those crafters that loses their mojo when you can't even see your craft table any more?  Please leave me a comment regarding my project or any awesome "clean as you go tips" that you would like to share.  So on with my project!

I actually made two cards as I really loved the new My Mind's Eye papers (and more releases are coming!) that recently shipped to Cutters Creek.  I used the Follow Your Heart Be Happy 6x6 paper pad.  It is just simply scrumptious!  Both of my cards are 6x6 and I loved cutting two color blocks from one side and the cutting the other two color blocks from the other side.  This is one of the things I so love about double sided paper, you just can't go wrong!  The floral embellishment is from Ecstasy Crafts and so is the "happy birthday" in the corner.  I just love these peel off sentiments because I don't have to search for an ink pad, ink, acrylic block, etc...  And I also love that you can color these right in the sheet with your copic markers and change the color any way you want.  "Happy Birthday" started off as gold and now it is blue!


Here is my second card and it is also done with all the same products.  It just amazes me that you can get so many different looks out of the same products!  Although this time I left the sentiment gold. 

I hope you have enjoyed my cards today!  Please leave me a comment, even if it is a great "clean as you go" tip!  Thank you so much!


Wednesday, May 2, 2012

Krafty Card for Baby with Lori

So, I've been seeing a lot of all-white cards on Pinterest lately.  Super cute, but of course I feel the need to be different... plus, I needed a baby shower card and I wanted a bit of a vintage feel.  I also wanted to add just a bit of color to the monochromatic base.  So... ta-da!


This is a pretty easy technique to do - the trick is just finding embossing folder patterns that work well together.  You can usually do pretty well by choosing one large-size pattern, one medium pattern, and one small pattern.  Also, try to keep the styles similar - I went traditional, but you could also go all modern or all grungy (think Tim Holtz folders).

Every embossed pattern here is a separate piece of cardstock, layered up.  My focal image is also popped up using foam adhesive tape for added dimension.

I used a variety of border punches to stack "eyelet" borders along the bottom of the card.  At the top of the stack, I added pale pink ribbon and a bow trimmed with my I-magicut ribbon cutter.

Here's a list of the supplies I used to make this card:


Cutters Creek
Other
  • Close To My Heart kraft cardstock
  • Close To My Heart Baby Pink cardstock
  • Close To My Heart Mocha Opaques adhesive pearls
  • Cricut machine and Mother's Day LE mini
  • pink ribbon to match CS
  • Fiskars border punches, Diamond and Effervescence
  • Fiskars embossing border punch, Scalloped Daisy
  • Sizzix/Basic Grey embossing folder, Santa Baby
 That's it for today - thanks for stopping by!

Monday, April 23, 2012

Never-ending Card Fun with Mandie

Hey everyone, it's Mandie from Mandie's Scrapping and I recently learned how to make Never-ending Cards and was talking about how much fun they are with a friend and she asked me to create one for her. She was going to surprise her daughter with a Disney Vacation for her birthday and wanted to let the card do the talking so this is what I came up with!

This is the first view of the card, I used my Memento Tuxedo Black Ink to stamp my Snow White (her favorite princess) and then colored her in with my Copic Markers. The "5" is cut with my Cricut and I stamped the background on the white pieces with a variety of clear stamps. Then I used my Stardust Gelly Roll Pure Glitter Pen to add the glittery swirls to the 5. To get to the 2nd "page" of  the card you simply open it from the center to reveal...


...Page 2! The princess here are cut from a sheet of patterned paper and I used some vellum stickers as an accent. I used my Stardust Gelly Roll Pure Glitter Pen to add glitter to my stickers and to my stamped phrase that reads "Where does a Princess say 'Dreams really do come true'?" To reveal the answer you fold back from the center again and the answer is....


...Disney World (of course)!If you'll notice that one page 3 your side images stay the same. It's one thing you will want to remember if you decide to try one of these yourself! I used more stamps and of course that amazing Stardust Gelly Roll Pure Glitter Pen for more - GLITTER - really, you can't have too much glitter, ever! From here you simply open the card out from the center again to reveal...


...the final page! I spent a long time coloring in these beautiful princesses. I used my Copic Cardstock and Copic Markers and practiced the techniques I recently learned. The images are all stamped in Memento Tuxedo Black Ink, of course. I left the 2 center squares blank so that my friend could write her own personal message to her little girl because I'm sure this card will be a treasured possession for a long time!

I even created a custom envelope with my Scor Pal, with a Velcro closure (I cut it into the shape of a heart) for the little girl to be able to keep her card in! I stamped all of my images in pink on pink cardstock and again used my Stardust Gelly Roll Pure Glitter Pen to add a touch more glitter. As I side note, you will want to make sure you are using a STRONG adhesive for this project. I would recommend either your Pink ATG or my favorite - Scor Tape! I hope you will give making a fun, interactive card a try soon!

Friday, April 20, 2012

Numeral Birthday Card with Lori

So, a cute little girl I know just had her third birthday.  Since we've been out of town, I wanted to make something quick & simple that wouldn't take much brain power on my part!  And of course it had to be girly & cute too.

I pulled out my Cricut Gypsy and got to work (you could also use Cricut Craft Room).  I chose the Hello Kitty Font cartridge from my list, selected the Shadow feature and chose a 3.  Returning to my mat, I sized the 3 to 5" wide and copied it to make a second 3.  I selected a single 3 and flipped it vertically.  I moved the 3s around so they were touching along the top edge, and welded them together.  I cut this top-folding card from some bright pink CS in my stash.  Next, I chose the Silhouette feature and chose 3.  I sized it to 5" wide, and cut it from some American Crafts glitter cardstock in Carrot.  I layered this cut on the card front, using Scor Tape to attach it.   Finally, I dug out some matching paper flowers from my stash, layered them together on an American Crafts Pearl Brad, and attached it to the front of the card with a Glue Dot.  Finally, I stamped Happy Birthday inside, and I was done.


Pretty simple, but super cute with plenty of bling.  It took me longer to dig out matching flowers and a stamp than to make the rest of the card!

Items available from Cutters Creek:

Thursday, January 19, 2012

Mandie's Mosaic Card

Hey everyone! I wanted to share a card that I created with some leftovers from a really fun project that I've been creating! I used free-hand cut squared from the Echo Park Paper's For the Record 6 x 6" Paper Pad (but really you could use ANY of their beautiful lines for this project). I just cut up a whole bunch and then inked the edges by running them across the Walnut Stain Tim Holtz Distress Ink Pad. Next I started randomly gluing them down to form this the mosaic pattern. Well, that of course wasn't enough so I used a few stamps from my stash to add a little bird here, a butterfly or five there and the word "Hi!" so I can use this card for any occasion.


Well, it looked pretty cool but of course I felt it needed more... so I pulled out this package of "spritz screens" that I picked up on clearance somewhere I decided to use the bird shape. I just wanted a subtle pattern so I grabbed my Walnut Gold Glimmer Mist... and after 2 spritzes I realized - I'm going to need ANOTHER bottle, LOL! Well, I grabbed the plain gold and misted and then got called away buy the kids. Well, there my card sat for several days, with the screen on top and the Gold Glimmer Mist in blobs all over the screen. Well, when I came back and took off the screen I thought the effect just wasn't big enough, so I laid my screen back down and grabbed the Walnut Stain Distress Ink again.


This time I used the foam applicator to add a bit of ink around the image so it would pop more and still have the beautiful glimmer. Well, I liked it but... I thought, "I wonder if I can use the screen like a stamp and put some of that Rock Candy Distress Crackle Paint on my card? That would REALLY finish it off nicely!" So, I grabbed the bottle, coated my screen really well and slapped it (carefully) into place. Then I smooshed it down REALLY well to make sure I got the Crackle on good. Well... I must had waited a tiny bit too long (like 10 seconds) because when I started to peel my screen up, the paper started to come too. Luckily I had started pulling up slowly and when I realized what had happened. I simple smooshed that screen right back into place and LEFT it there! Well, I LOVE the way it turned out! The Glimmer Mist that had dried onto the screen looked like I was trying to do it that way. And inking around it really made it pop just right. It's funny how some times the accidents in crafting and experiments really can make all the difference! Oh, and for those who were worried that I no longer have that screen... you can all sleep easy because I had purchased two boxes thinking maybe I could use one as some sort of page accent! Yep, my inner hoarder paid off... now I've gotta place an order for some more Walnut Gold Glimmer Mist....

Pin It

Friday, November 25, 2011

Asian Themed Birthday Card by Chris

I decided not only make a gatefold card, which I haven’t done in a while, but also, to use my neglected Copic Markers. I had a free digi image already printed and some paper that had an Asian flavor to it—a perfect match.


I started with a 5.5 x 12 inch piece of plum Bazzill Card Stock and scored it at 2, 4, 8, and 10 inches with my Scor-Pal and creased the folds. On the front panels I layered black Card Stock (1 ¾ x 5 ¼ inches) and decorative Card Stock (1 ½ x 5 inches). Inside I put another piece of decorative Card Stock (3 7/8 x 5 7/16 inches). All the decorative panels were edged with Tim Holtz Milled Lavender Distress Ink.


I colored the geisha; then hand trimmed her and mounted her with my Zig Glue Pen onto some black Card Stock, which I also hand-trimmed with my Cutter Bee Scissors. She was mounted with Pop Up Glue Dots on a two-layer panel. The black piece is 3 1/8x 4 ¼ and the plum piece is 4 1/8 x 3. Using my ATG, I glued one half of the panel she was on and set it on the left front of the card. To finish the card I added some red Twinkle Jewels (Skittles) on the front panel, and used one of my Parisian Accents from the Spellbinders Shapeabilities set to cut a black Card Stock label for inside. The sentiment was printed on my computer using a free font.

The geisha girl is colored with:
Hair: C5, C7, C9
Skin: E00, E000, E50
Teapot: C1, C2, C3
Kimono & hair flower: R29, R39, R46
Flowers and butterflies: YR21, YR23, BG72, G82, YG61
Socks & Cat: C1
Sandals: E13, E35
Shadow: BG000

Monday, November 21, 2011

A Beautiful Autumn Card by Chris

I am still working on ways to use and reuse many of my cool items from Kim. One that kept looking at was the Cuttlebug Owl Flourish Embossing Folder, which I just didn’t want to do as an embossed card front again and I wanted to try out a new technique I learned, but what to do, to merge them?

I started with a center step card. The base was 11 by 5.5 inches and I had some cute paper that looks like tree bark. I decided to use my Scor-Pal and I cut both sides one inch in from the edges and from 1-inch mark to about 6.5 inches. Both sides were then scored between the cut line and the edge at 1 inch (mountain), 2 inch (valley), and 6.5 inches (mountain) and the center piece was scored at 5.5 inches (mountain). I then folded them to make my card shape.

Link
I used my Cricut cartridge Stretch Your Imagination (check with Kim if she can get you this one) and cut the squirrel and nuts with the shift key at 4 inches. I made a shadow piece and using Pop Up Dots raised the acorns up slightly. I used my ATG to glue it down to one of the side steps. I then took my Owl Flourish and embossed some Core’dinations Cardstock, sandpapered the raised image, and fussy cut the owl and flourish out of the paper. I glued this right along the top of the lower fold in the center and added some Cinnamon Stickles for the eyes. I then cut the word "Autumn" from the Stretch Your Imagination cart at 5 inches and rubbed the edges with some Walnut Stain Distress Ink. The shadow is cut from Chestnut American Crafts Glitter Cardstock. I did a multi-cut of 2 to get this out and inked the cut edges with Walnut Stain. I used my Zig Glue Pen to attach the word to the shadow and then pop dotted the shadow up along the base.
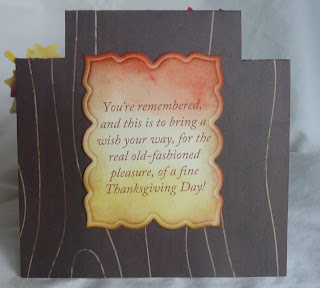

The card needed a sentiment and I decided to use my Spellbinders Labels Twenty Three, printed the sentiment with my computer and inked the edges with Vintage Photo, Mustard Seed, and Ripe Persimmon Distress Inks and glued it to the back of the card.


The card still needed some pizzazz. Taking a fall leaf stamp, a Clear Tim Holtz Distress Ink Pad, my Embossing Magic pad, and some white embossing powder I stamped and embossed the image several times on cream cardstock. I then used several of my Distress Inks (Dried Marigold, Mustard Seed, the Limited Edition of the Fall Colors, Walnut Stain, Spiced Marmalade, and Crushed Olive) and applied them directly to the paper smearing them alongside of each other over the leaves. Then I took my Tattered Angels Dazzling Diamonds and sprayed the heck out of each of the leaves. It looks a mess but be patient. Set them aside and let them dry—totally dry, no rushing. You get a blended, shiny and crisp texture to the cardstock when it dries. (It works terrifically on watercolor paper too.) When the leaves were totally dry, I fussy cut them out and used pop dots to arrange them on the card. I do so hope you can see the shine in the pictures, but if not—take my word for it, it’s great!

I’m thinking that this might look lovely as part of a table centerpiece rather than mailing it out. What do you think?
Related Posts with Thumbnails
