There are no up and coming babies that I know of in my family but I thought this Noah's ark stamp I have is so cute that I really needed to finally use it.
I first heat embossed the stamp with WOW embossing powder then I used my alcohol markers to color the stamp. I added some fun details such as clear glitter to the sheep and Noah's beard plus flocking to the waves. I brought everything together by layering my card front and adding a little yellow and white twine bow.
Items from Cutter's Creek Store
WOW embossing powder
Doodle Twine assortment pack - Boy
2 way Zig glue pen
Hope your day is filled with rainbows and sunshine. Jearise :)
Showing posts with label Doodlebug Twine. Show all posts
Tuesday, July 15, 2014
Wednesday, September 4, 2013
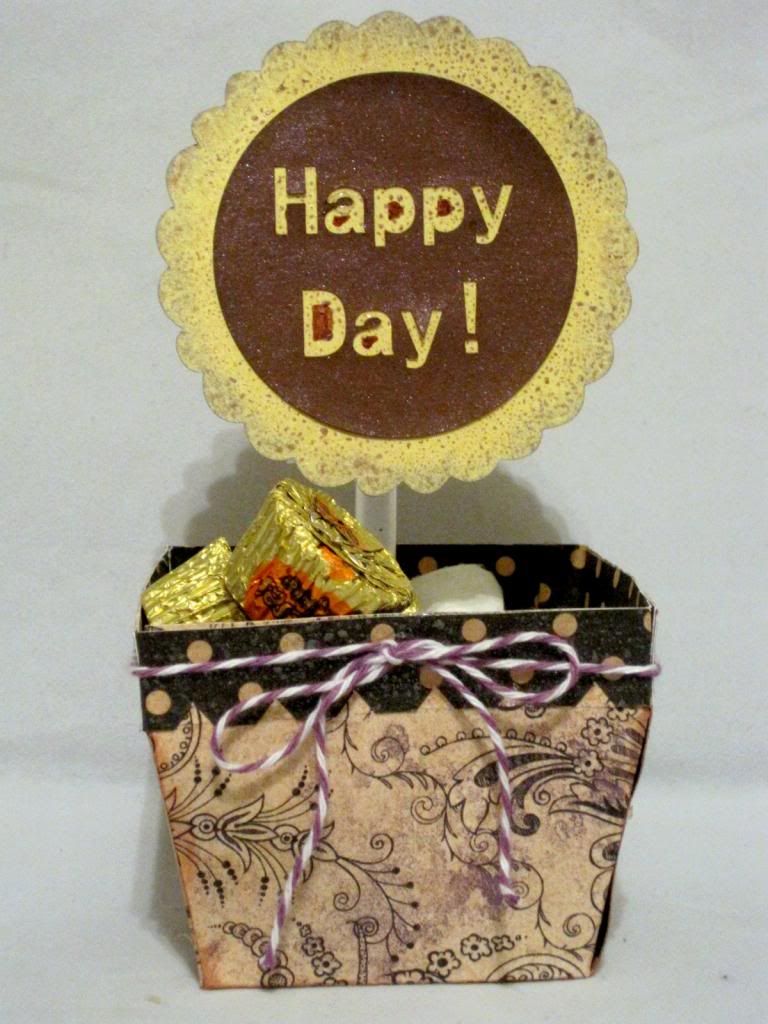
Flower Pot Box by Jearise
Today I have a flower pot box that I designed and made for a friend's birthday and then filled with her favorite candy.
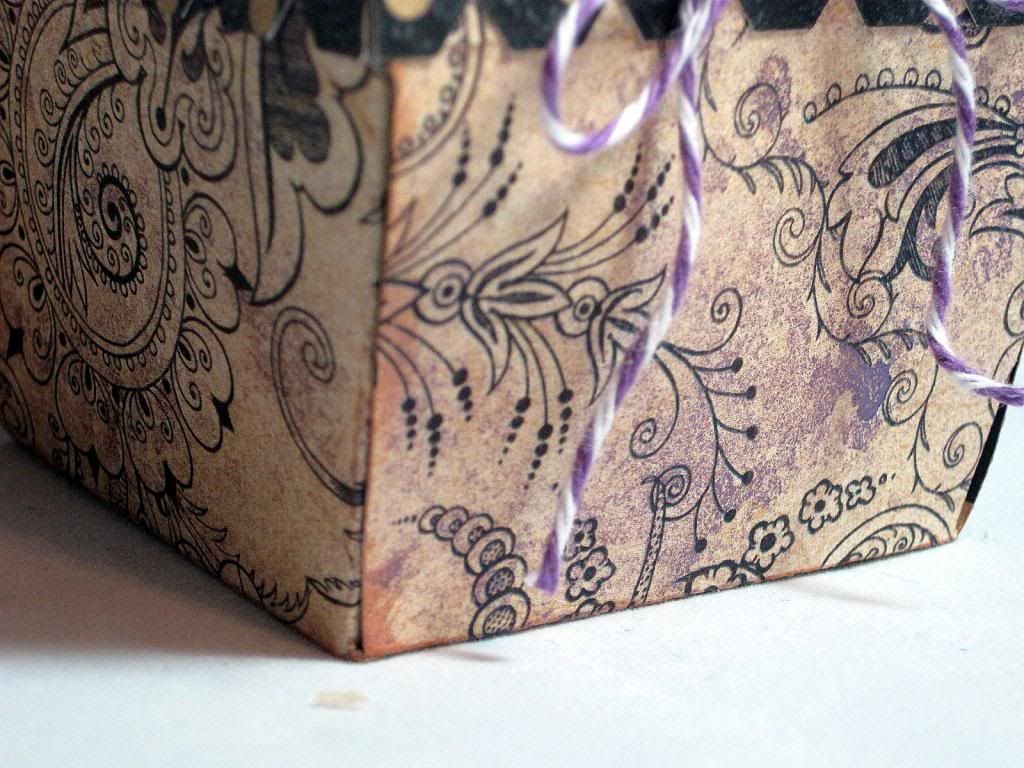
Here is a close up of the glimmer mist and the twine that I used.
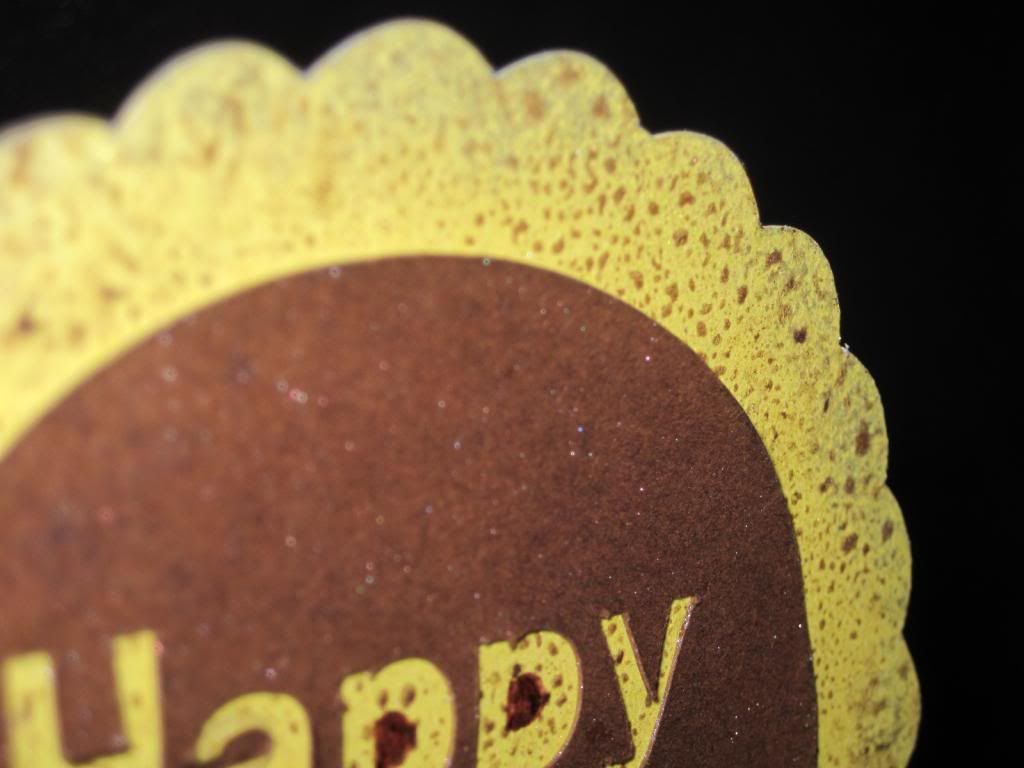
Here is a close up of the flower. I love the way I did this. I used Distress Ink to ink the outside of the flower and then when that dried I sprayed my flower with Perfect Pearls Mist. The Perfect Pearls looks like it's still wet when it's not.
Products Used:
Graphic 45 paper
Tim Holtz Distress Ink pad in Shaded Lilac
Perfect Pearls Mists - Forever Violet
From Kim's Perfect Pearls Mist club. You can email her about the club and her many different clubs where new releases come first.
ATG Tape dispenser
Scotch Quick Drying Adhesive
Doodle Twine
Thanks for stopping by today and I look forward to next time.
Here is a close up of the glimmer mist and the twine that I used.
Here is a close up of the flower. I love the way I did this. I used Distress Ink to ink the outside of the flower and then when that dried I sprayed my flower with Perfect Pearls Mist. The Perfect Pearls looks like it's still wet when it's not.
Products Used:
Graphic 45 paper
Tim Holtz Distress Ink pad in Shaded Lilac
Perfect Pearls Mists - Forever Violet
From Kim's Perfect Pearls Mist club. You can email her about the club and her many different clubs where new releases come first.
ATG Tape dispenser
Scotch Quick Drying Adhesive
Doodle Twine
Thanks for stopping by today and I look forward to next time.
Saturday, June 29, 2013
Thank You Card by Deanna M
My crafty mojo decided to take a short vacation. Imagine that! I spent some time looking through my latest PaperCraft magazine and found some inspiration. Here is what I made for you.
I started with a coral card stock card base cut and scored to make a 4 1/4" X 5 1/2" card. I then cut a white mat at 4" X 5 1/4". I used some Doodlebug Twine and some Washi Tape from We R Memory Keepers (Kim can order this). I created a banner out of the Washi Tape. When I cut my "V" shape in the end of Washi Tape I make a small cut right in the center of my tape, I then cut into the V from each lower corner. Makes it easier for me to get my "V" shape centered.
Next I cut another piece of the coral paper at 3/4" X 4" and ran it through my eBosser and embossed it with the border embossing folder that came with my Anna Griffin Foundry embossing folder. I am part of a Cuttlebug Embossing folder Club that Kim is currently running. If you are interested in any of the Anna Griffin embossing folders, just let Kim know and she can order them for you.
I adhere my coral embossed strip of paper with my ATG gun. I stamped my sentiment using some Coral Pigment Ink from my stash.
The card is simplistic in design but I love it.This was a quick easy card to make.
Now a short quiz. How many of you that order the Washi Tape dispenser actually have your Washi Tape on it????? I finally took the time this weekend to put all my tape on the dispenser and I LOVE IT!!! It makes using the Washi Tape so easy. It spins around so selecting multiple colors is a snap. So if you haven't added your tape to your dispenser you should. If you don't have a dispenser check with Kim to see if she can still order them.
I started with a coral card stock card base cut and scored to make a 4 1/4" X 5 1/2" card. I then cut a white mat at 4" X 5 1/4". I used some Doodlebug Twine and some Washi Tape from We R Memory Keepers (Kim can order this). I created a banner out of the Washi Tape. When I cut my "V" shape in the end of Washi Tape I make a small cut right in the center of my tape, I then cut into the V from each lower corner. Makes it easier for me to get my "V" shape centered.
Next I cut another piece of the coral paper at 3/4" X 4" and ran it through my eBosser and embossed it with the border embossing folder that came with my Anna Griffin Foundry embossing folder. I am part of a Cuttlebug Embossing folder Club that Kim is currently running. If you are interested in any of the Anna Griffin embossing folders, just let Kim know and she can order them for you.
I adhere my coral embossed strip of paper with my ATG gun. I stamped my sentiment using some Coral Pigment Ink from my stash.
The card is simplistic in design but I love it.This was a quick easy card to make.
Now a short quiz. How many of you that order the Washi Tape dispenser actually have your Washi Tape on it????? I finally took the time this weekend to put all my tape on the dispenser and I LOVE IT!!! It makes using the Washi Tape so easy. It spins around so selecting multiple colors is a snap. So if you haven't added your tape to your dispenser you should. If you don't have a dispenser check with Kim to see if she can still order them.
Labels:
Anna Griffin Embossing Folders,
ATG,
Deanna M,
Doodlebug Twine,
eBosser,
Washi Tape,
Washi Tape Dispenser,
We R Memory Keepers
Wednesday, May 29, 2013
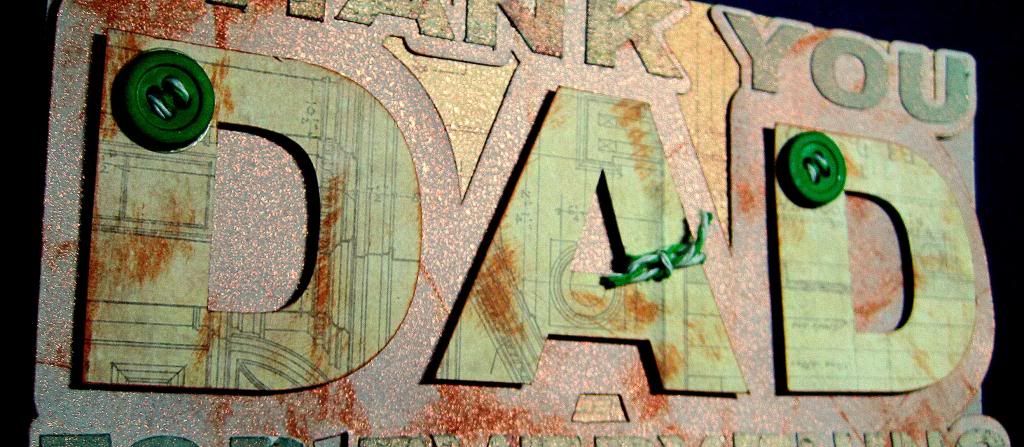
Thank you dad by Jearise
Father's Day is a special time to say thank you dad for all you do and that is why I put together this special Father's Day card.
I used the Tim Holtz Idea-Ology Paper Stash Paper Pad-Kraft Resist to make the card. This paper is great for making masculine projects.
I have to show you a close up side view so you can see the Glimmer Mist I used. I just love this stuff and find I spray it on almost all my projects now just to give them that little extra touch. Also, these mist that add a touch of glimmer and glitz to your projects come in almost every and any color you can think of.
(I must add that my letters are more of the yellowish color like in the first picture but every time I tried to get a good picture of the Glimmer Mist, the letters would turn out more green in color.)
Here's a close up of the "D" and the "A." You can see how I used Tim Holtz Distress ink pad in Tea Dye to give them a distressed look.
My final touch came with the buttons and twine. I used Doodle Twine in the Primary Colors Pack - green.
I used my go to glue - Scotch Quick-Dry Adhesive and my go to tape gun - Scotch Advance Tape Glidder to hold it all together.
Thanks for taking a peek today and I hope I've given you some Father's Day inspiration.
Jearise from Lorby's World saying so long for now and looking forward to next time.
I used the Tim Holtz Idea-Ology Paper Stash Paper Pad-Kraft Resist to make the card. This paper is great for making masculine projects.
I have to show you a close up side view so you can see the Glimmer Mist I used. I just love this stuff and find I spray it on almost all my projects now just to give them that little extra touch. Also, these mist that add a touch of glimmer and glitz to your projects come in almost every and any color you can think of.
(I must add that my letters are more of the yellowish color like in the first picture but every time I tried to get a good picture of the Glimmer Mist, the letters would turn out more green in color.)
Here's a close up of the "D" and the "A." You can see how I used Tim Holtz Distress ink pad in Tea Dye to give them a distressed look.
My final touch came with the buttons and twine. I used Doodle Twine in the Primary Colors Pack - green.
I used my go to glue - Scotch Quick-Dry Adhesive and my go to tape gun - Scotch Advance Tape Glidder to hold it all together.
Thanks for taking a peek today and I hope I've given you some Father's Day inspiration.
Jearise from Lorby's World saying so long for now and looking forward to next time.
Thursday, May 9, 2013
Birthday Card
This is a birthday card I made for my niece who turned 8 over the weekend. All of the paper used on the card is from My Mind's Eye (Indie Chic) and the bakers twine is from Doodle Twine. The colors I've chosen to use are orange, green, and blue. All of these products can be found in the Cutter's Creek Store. Hope you enjoy my post.
Thursday, March 7, 2013
Baby Mini Album by Deanna M
We hope you are enjoying our full week of projects in honor of National Crafting Day. Today is my day and I have for you today a Baby Girl Mini Album I made for a friend of my daughter's who is having a baby in May.
I cut the album using my Silhouette Cameo at 5". All of the patterned paper in the book is cut at 4 1/2" and is from Prima. I used the Sweet Fairy collection which is currently sold out in the store. If you are interested in it, let Kim know and she may be able to order it for you.
I also use Stickles, Memento Ink, Zip Dry and Scotch Quick Dry Adhesives to adhere my elements to the album along with some stickers from my collection. The book is bound using some Doodlebug Baby Girl twine assortment.
Now, I have a video for you that walks you through the book page by page.
Labels:
Deanna M,
Doodlebug Twine,
Memento,
National Crating Month,
Prima,
Scotch Quick Dry Adhesive,
Stickes,
Zip Dry Glue
Thursday, February 21, 2013
Craft Some Organization by Laura C
I'm trying to be more organized....and this simple project is
an easy way to do just that! I picked up one of the jumbo
clothespins (you can find them at a lot of craft stores right
now) and fixed it up to become somestylish organization!
an easy way to do just that! I picked up one of the jumbo
clothespins (you can find them at a lot of craft stores right
now) and fixed it up to become somestylish organization!
cut out. I used Echo Park Hello Summer....it's sold
out in store...but Kim may be able to order....but so
many of the Echo Park kits lend themselves to home
decor projects!! And one of the best adhesives for
this type of project....Scor Tape. It will hold the paper
to the wooden clothespin without any problem--it's
truly my "go to" adhesive for any home decor type
of project! To finish the piece off, decorate as you'd
like....I added stickers, and some Thickers to dress it up.
Then it was just cutting 3x5 index cards in half and they
fit right into the Mini Kraft Bags by Canvas Corp
(Kim also had these....she can re-order!). I'm finding
so many uses for these....just love them! Great for
holding journaling on a LO or holding a tea bag or a gift
card....they are awesome! I fussy cut out the clouds,
and added alpha stickers to spell the days of the week
and a little twine made them super cute....it looks great
sitting on my counter in my kitchen! I can menu plan and
write a "2 do" list for each day...it helps keep me organized!
Have you ever made a "crafty" organization item? Please share!!
Sunday, January 20, 2013
Be Mine by Deanna M
I have another Valentine Day card for you today. I do think this card would work great for an Anniversary or even a Birthday too. Or just to say Hello to someone, and let them know you are thinking about them.
So the last card I made used some Hero Art stamps. While I later found out that Hero Arts makes a die that fits those stamps. (Yes, Kim can order Hero Arts products. Just contact her through Customer Service at Cutters Creek.) Of course I had to get them. Then this idea popped into my head and this is what I came up with.
My card is a 4 1/4" X 5 1/2" white card stock card base. I love using the Bazzill smooth white card stock for my card bases. It is a good sturdy paper and since it is smooth everything you layer on top lies nice and flat.
I added a black mat cut to 4" X 5 1/4" and then the patterned paper mat cut to 3 3/4" X 5". I added some Washi Tape from American Crafts at the bottom of my patterned paper for some color. For my heart balloons I cut both sizes of the small dies out of some patterned paper. For my sentiment I stamped that in some Memento Tuxedo Black ink on some red card stock. I used my eBosser to cut all the hearts out. Got to love the eBosser! I did use my magnetic shim which works great to help keep your dies in place. In case you are wondering, the machines shipping now come with the magnetic shim. For those of us that got in on the first shipment they did not but Cutters Creek sells them.
I then attached some of the Doodlebug twine to each of my hearts and adhered them to my card with some foam tape. The red heart and pink heart are both on two thicknesses of foam tape and the rest is on one thickness. Finally, I doubled some of the pink and white striped twine and tied all the strings together in a bow. I added a couple of pink heart stick pens that are from My Minds Eye and some white stitching with my gel pen.
I had a lot of fun making this one and with the eBosser doing all the work it went together really quick.
Labels:
American Crafts,
Deanna M,
Doodlebug Twine,
Memento,
Washi Tape
Thursday, December 20, 2012
Easy Gift Bags With Lori
With Christmas rapidly approaching and teacher gifts finally completed, I realized I needed some git bags to pop them in. Scor Pal to the rescue! You can use your Scor Pal to make nearly any size bag you want, and I can show you how.
Based on the size of my gift, I decided to make a bag 6" wide by 2.5" deep. (Sorry, I can't show the actual gifts yet, since they are being given Thursday & Friday and I don't want to spoil the surprise, just in case!) So, it's easy to figure out how much paper you need based on the size of the bag, plus a 1/2" - 1" flap for adhering. Just add up all of the sides: 6 + 2.5 + 6 + 2.5 = 17 Since this is larger than 12 inches, I know I will need 2 sheets of cardstock. I will need a flap on each piece to attach them, and I choose a 1/2" flap, so I will need 2 sheets cut to 9" x 12". The 12" is height plus bottom, so lay your cardstock on the Scor Pal vertically, like this:
Next, score the cardstock for the 2 side measurements and flap.
When you have scored both lines, your cardstock should look like this:
Next, you will rotate your cardstock one turn (90 degrees). It doesn't matter which way you turn it, as long as you do both sheets of cardstock the same way. When you are done, the cardstock will look like this:
Next, you will cut the flaps for the bottom of the bag:
The arrows I drew in show where pieces are cut to make the flaps. Note that the piece we cut completely out in the previous step is next to a bottom flap. Next, we need to attach the two pieces of cardstock and assemble the bottom of the bag.
Lay your cardstock so the fold of the skinny side flap is a "mountain" fold. Put your adhesive on the top side of this skinny flap on both pieces of cardstock. Now adhere the flap on the first piece of cardstock to the "inside" of the second piece of cardstock. Then adhere the flap on the second piece of cardstock to the inside of the first piece of cardstock.
Next you will put adhesive on the "outside" of the smaller side flaps, and fold over one of the larger side flaps on top of them. Set it flat on the table and push down the smaller flaps from the inside of the bag to make sure they are adhered.
Finally, you will put adhesive on the "inside" of the final flap and adhere it to the rest of the bottom. Your bag is now finished. If you are going to want to put a topper on your bag, you can use your fingers to crease the small sides in half partway down the sides of the bag.
Now, on to the fun part - making the bag pretty! Here is how mine turned out:
I opted for a simple topper since my paper had a pretty design. The 6"x6" paper pads in the store are perfect for this! I just folded mine in half. I wanted to make my bag reusable, so rather than permanently attach the topper, I wanted to tie it on. I held my folded topper over the folded bag and punched 2 holes through all of the layers at once. I used eyelets from my stash to reinforce the holes in the topper only.
Since my paper had a pretty design, I left it alone and just traced over some of the design elements with my Copic Spica pens.
I also traced over some of the stamped elements on this tag with the Copic Spics pens. I reinforced the hole in the tag with another eyelet. I threaded twine through the holes in the bag & topper, then through the tag and tied it in a shoestring bow. Easy to open and easy to reuse! (Note: if you want to see the gifts I made, you can visit my blog Friday to see them.)
The following products to make this are available in the Cutters Creek store:
Based on the size of my gift, I decided to make a bag 6" wide by 2.5" deep. (Sorry, I can't show the actual gifts yet, since they are being given Thursday & Friday and I don't want to spoil the surprise, just in case!) So, it's easy to figure out how much paper you need based on the size of the bag, plus a 1/2" - 1" flap for adhering. Just add up all of the sides: 6 + 2.5 + 6 + 2.5 = 17 Since this is larger than 12 inches, I know I will need 2 sheets of cardstock. I will need a flap on each piece to attach them, and I choose a 1/2" flap, so I will need 2 sheets cut to 9" x 12". The 12" is height plus bottom, so lay your cardstock on the Scor Pal vertically, like this:
Next, score the cardstock for the 2 side measurements and flap.
When you have scored both lines, your cardstock should look like this:
Next, you will rotate your cardstock one turn (90 degrees). It doesn't matter which way you turn it, as long as you do both sheets of cardstock the same way. When you are done, the cardstock will look like this:
| This corner piece I have scribbled through gets removed completely. |
Next, you will cut the flaps for the bottom of the bag:
The arrows I drew in show where pieces are cut to make the flaps. Note that the piece we cut completely out in the previous step is next to a bottom flap. Next, we need to attach the two pieces of cardstock and assemble the bottom of the bag.
Lay your cardstock so the fold of the skinny side flap is a "mountain" fold. Put your adhesive on the top side of this skinny flap on both pieces of cardstock. Now adhere the flap on the first piece of cardstock to the "inside" of the second piece of cardstock. Then adhere the flap on the second piece of cardstock to the inside of the first piece of cardstock.
Next you will put adhesive on the "outside" of the smaller side flaps, and fold over one of the larger side flaps on top of them. Set it flat on the table and push down the smaller flaps from the inside of the bag to make sure they are adhered.
Finally, you will put adhesive on the "inside" of the final flap and adhere it to the rest of the bottom. Your bag is now finished. If you are going to want to put a topper on your bag, you can use your fingers to crease the small sides in half partway down the sides of the bag.
Now, on to the fun part - making the bag pretty! Here is how mine turned out:
I opted for a simple topper since my paper had a pretty design. The 6"x6" paper pads in the store are perfect for this! I just folded mine in half. I wanted to make my bag reusable, so rather than permanently attach the topper, I wanted to tie it on. I held my folded topper over the folded bag and punched 2 holes through all of the layers at once. I used eyelets from my stash to reinforce the holes in the topper only.
Since my paper had a pretty design, I left it alone and just traced over some of the design elements with my Copic Spica pens.
I also traced over some of the stamped elements on this tag with the Copic Spics pens. I reinforced the hole in the tag with another eyelet. I threaded twine through the holes in the bag & topper, then through the tag and tied it in a shoestring bow. Easy to open and easy to reuse! (Note: if you want to see the gifts I made, you can visit my blog Friday to see them.)
The following products to make this are available in the Cutters Creek store:
- Scor Pal
- 6"x6" paper pads - I used the Echo Park Paper Season's Greetings pad
- Scor Tape
- Copic Spica Pens - I used Clear, Gold, Lipstick, and
- Doodlebug Twine
- Distress ink pads on Peeled Paint and Fired Brick
- cardstock in coordinating color(s)
- Cricut Artiste cartridge (for tag)
- stamps of your choice (for tag)
- eyelets and punch (I used a Crop-a-dile)
Sunday, December 9, 2012
Gift Tags and More! by Deanna M
For these tags I cut some Bazzill white card stock 3" X 3". I then used cut some patterned paper 2 7/8" X 2 7/8" and 2 3/4" X 2 3/4". I used papers from the Echo Park Holly Jolly and Season's Greetings and My Minds Eye Winter Wonderland. The upper left tag I added a piece of white card stock that I rounded the corners and then stamped it with some embossing ink and embossed it with the WOW! Cable Car Red Embossing powder. For the tag with the Trees and the Stocking I used some of the stickers from the Holly Jolly collection. The Poinsettia tag was made using the Spellbinder Poinsetta die. I inked the poinsettia with some of the Festive Berries Distress Ink and I added some gold Liquid Pearls to the center. I am going to try to get a better picture of the tags in the morning, hopefully it will be much brighter than this even. Finally I used my crop-a-dile and punched a hole in the corner of each tag and added some Doodlebug Twine.
Labels:
Deanna M,
distress ink,
Doodlebug Twine,
eBosser,
Echo Park Paper,
My Minds Eye,
WOW Embossing Powder
Friday, September 21, 2012
Halloween ATC by Chris
I usually create a project as I go along, but this time I
did all the pieces first and then just put it together.
I started with a block of wood 2.5x3.25 and painted it with
black acrylic paint. While it was drying, I stamped several images on Inkessentials
Shrink Plastic Sheets with black Ranger Archival Ink (you could use Stazon
too) and set that aside to dry. I just love the Pixie
Cottage’s Hannah the Witch and La-La
Land’s Skeleton Luka! They shrunk down to such a perfect size for the block.
I had several metal Halloween metal charms that I cut off the links, and then,
colored them and my stamped images with my copic
markers. Once they were all colored, I used my heat gun to shrink them. I
then used Tim
Holtz’s On the Fence die, which I inked with Weathered
Wood Distress Ink, and my Happy
Hauntings cartridge to cut out a 2” blacked out house and the pumpkin treat
box (cut at 6 inches). I created a couple of banners using paper from my stash
and Doodle
Twine Halloween selection.
All paper edges were inked with Black
Soot Distress ink and some “ground” was made using Gathered Twigs Distress
ink. Everything was adhered with either Glossy
Accents or Scor
Tape. A few added stickers from last year’s Echo
Park paper finished the project, and all I need to do is add a treat to the
pumpkin for my granddaughter. Happy Haunting to all of you.
Labels:
Chris,
Doodlebug Twine,
Happy Hauntings,
Inkessentials Shrink Plastic Sheet,
Tim Holtz Die,
Tim Holtz Distress Ink Pads
Sunday, June 24, 2012
Happy 4th of July by Deanna M
I have a quick 4th of July card for you today. Perfect to use as a party invitation or to just let someone know you were thinking of them.
My card base is white Bazzill Simply Smooth card stock cut and scored to make a 4 1/4" X 5 1/2" card base. I added a dark blue mat cut at 4" x 5 1/4" and a red mat cut at 3 3/4" X 5". Both of these mats are Core' de nations Card stock (Cutter's Creek is out of this paper but Kim can likely order it for you). I then used a piece of the Whitewash Cut and Emboss card stock. I ran that through the Cuttlebug and embossed it with the Stars embossing folder and sanded it so that the red from the back side showed through. I cut the 4th of July image from the Stand and Salute cartridge at 2 1/2". I cut the shadow twice once out of white and once out of red and offset them just slightly. I cut the top layer out of a dark blue and added some Midnight Blue stickles to the blue layer. Popped up the sentiment with some foam tape. I also added some blue and white and red and white Doodlebug bakers twine to my card. Finally I added a couple of star buttons from my stash and threaded them both with more of the twine and tied a knot.
Labels:
Cuttlebug,
Deanna M,
Doodlebug Twine,
Stand and Salute,
Stickles
Saturday, May 26, 2012
Flip Flop Grad Card by Laura C
It's that time....gotta get some graduation cards done!! Have you played with "flip flop" cards? Fun and easy, and everyone thinks they are so cool! (At least my kids do!....lol). Here is the card I made for the daughter of a friend of mine:
Hopefully you can see the dimension here, and here is the other side:
There are a lot of good tutorials on you tube for this style of card, but here are the details as well:
Ok, clear as mud? Hope not! It sounds so odd when you write it out....but I really think the pic above spells it out! Hey....let me know, because I will do a video for this if you would like!!
Hope you give this card a try!
Hopefully you can see the dimension here, and here is the other side:
This has all been decorated up with MME Be Amazing, I also used Distress Ink in Vintage Photo and Black Soot for the stamping and distressing. The hexagon border was fussy cut from the 6x6 MME Be Amazing papers....love those trendy shapes! Then just simple Black and white twine and a button finish it off. The bee and sentiments were stamped. It's very simple, but fun! It also would be very easy to make a little pocket on the back side to put in some money or a gift card.
There are a lot of good tutorials on you tube for this style of card, but here are the details as well:
The pencil lines show the outline of the card center....I've marked where the fold lines are, and which are cut lines. I really like just using a paper trimmer....it has markings that make this pretty easy....I will tell you how I lined it up, please refer to the drawing tho'....it spells it out really well!
Cut a piece of cardstock to 5&1/2" by 6&3/4". Line up horizontally in your paper trimmer (just as the pic is lined up above)....line the left edge up at the 2&3/4" mark on the trimmer, and here score (with scoring blade) from the top of the cardstock down to the 1&1/4" mark (using the ruler on your trimmer blade slide). Then score from 4&1/4" on down (again, using the ruler on your slide). Then turn the paper around and do the same to the other side. You should end up with the 1&1/4" area in the middle of the card as seen above....and these will be your fold lines only. Next, you need to cut the hole....so you put the paper in your trimmer longwise this time (the 6&3/4" is vertical) lining up the left edge of the paper at the 1&1/4" mark. Use 1&1/2" as your start (on the trimmer slide....this time with the blade to cut) and cut to 2&3/4", then lift and move the blade to the 4" mark and cut down to 5&1/4". Flip the cardstock and repeat on the other side....you have your 1&1/4" cuts on each side done. Then to make the 3" long cuts...you line the cardstock up with the 6&3/4" horizontally again, at the 1&1/2" mark on the trimmer, and then use the marks on the blade slide to cut from 1&1/4" to 4&1/4". Flip and do the same on the other side.
Ok, clear as mud? Hope not! It sounds so odd when you write it out....but I really think the pic above spells it out! Hey....let me know, because I will do a video for this if you would like!!
Hope you give this card a try!
Thursday, April 26, 2012
Cupcake Box by Tee
Hi everyone, this is Tee and my first project as a guest designer here at Cutters Creak. I am excited to share with you the cupcake box I made using the Sweet Tooth cartridge. Cricut made it easy to ensure a cupcake fits in each box by providing recommended cutting sizes on each project. I cut my box at 11" using cherry patterned paper and bazzill paper.
I covered my icing with stickles and added two different widths of ribbon for a big bow on the back. I then cut a 2" rosette from the Ribbons and Rosettes cartridge and rolled paper with twine to make a candle. I then added some stickles to the top of the twine. I also added rhinestones to some extra bling.
I hope you enjoyed my project as much as I enjoyed eating the cupcake I used as
a prop for this box.
Labels:
Doodlebug Twine,
Rhinestones,
Stickles,
Sweet Tooth Boxes,
Tee
Thursday, January 12, 2012
Happy Days Layout with Lori
There are so many style option with the Happy Days collection from Echo Park Paper, it seems like I can just keep making things that look "new"! So I thought I'd share a layout I made last weekend.
The fun retro patterns and bright colors go great with all of those "little kid" pictures I'm trying to catch up on. This is my almost 11yo daughter, about 9 years ago, beginning her art "career". (She is becoming a pretty accomplished cartoonist, so I'm very glad to have captured this!) For a girly feel, I grabbed the small flower print paper from the collection, and add the mini polka dots and just a bit of the stripe. Sticking with the retro feel, I cut my title with my Cricut from the Nifty Fifties cartridge and added some of the mini alpha stickers from the collection.
I wanted to add a journaling block to my layout, but the flower ones in the collection weren't colors I wanted to use, so I picked the one with the big green car on it and just used embellishments to cover up the car.
I used some o the flower stickers in the collection, along with some flowers cut with the Cricut and a flower made with gathered crochet lace. I just threaded some bakers twine through the holes in the lace and pulled it until I could gather it into a loose circle. I threaded the leftover twine through a button and tied it into a bow, and used that for my flower center. The sentiment at the top of the journaling card is stamped, and the rest is stickers from the collection.
Items available at Cutters Creek:
I wanted to add a journaling block to my layout, but the flower ones in the collection weren't colors I wanted to use, so I picked the one with the big green car on it and just used embellishments to cover up the car.
Items available at Cutters Creek:
- Happy Days collection kit from Echo Park Paper
- ATG Adhesive Refills
- Nifty Fifties Cricut Cartridge (special request, and Kim can get most cartridges)
- Doodle Twine bakers twine
- cardstock from Bazzil
- brads from my stash
- Art Philosophy Cricut cartridge & all other items from CTMH
Saturday, December 17, 2011
Baby Shower Card by Chris
I love my Nestabilities Labels Four and have used 3 graduated sizes here to make this shower card. I cut four labels—2 from the largest die, skipped a size and did one each of the next two dies. All edges were inked with Tattered Rose Distress Inks.
To assemble the card base I scored the back piece straight across the top of the side parentheses. I then used my ATG gun to glue above the score line and glue the two pieces together and trimmed off the bottom of the card so it would stand as an easel. The yellow layer was glued down next and the green swiss dot layer was mounted with pop ups. I wrapped the bakers twine around the top and bottom.
To make the stork and baby I used New Arrival Cricut Cartridge and cut the baby at 2 inches. The face is one of Peachy Keen stamps. (I used Just Baby Face Assortment which I bet Kim can get for you if you want.) The stork was cut at 3 inches. To make this stork I cut 2 extra body pieces because I wanted to make the wings look as if they were flapping in flight. All three pieces went through my Cuttlebug D'vine Swirls embossing folder. I didn’t want the neck and face to have the swirls so I left those parts hanging out as it went through my Big shot. I glued the first layer down. The next two layers I trimmed off the neck and head and glued down only the part closest to the neck. I inserted pop ups between the wings to raise them up and then layered the baby bundle over his beak. The top of the bundle is glued down, but the bottom is raised on another pop up. (Lots and lots of dimension in this card.)
To finish off the card I made a rosette using Tim Holtz Alterations Paper Rosette (which Kim had special ordered for me) and a Winter Twinkle Jewel on the outside and a sentiment on the inside.
These Products can be found at Cutters Creek:
Spellbinder Dies
Tim Holtz Distressed Inks
Twinkle Jewels
Peachy Keen Stamps
Doodlebug Bakers Twine
Sunday, December 11, 2011
Ho Ho Ho Garland
I have a garland or banner that I made to decorate my office at work. All of the colors and patterned paper were printing and cut on my Imagine using the Snow Angel Imagine Cartridge and the Mr Frosty Patterned Imagine Cartridge. The stocking is cut at 5" using the Simply Charmed Cartridge. This picture was taken with my cell phone at work hanging on my white board in my office.
Here is a close up of one of the stockings. I adhered all the layers with some Scotch Quick Dry Adhesive. The letters were added with some ASI Kool Tac Clear Foam Pads. I cut the patches for the toe and heel of the stocking out of white card stock as well as the top cuff. I used my Xyron to add some adhesive to the top of each of these white pieces and then covered them with Ultra Fine White Flower Soft. Finally I used my Crop-a-Dile to punch a hole at the top of each stocking. I ran someDoodlebug Twine through the holes to hang my stockings. Below are close ups of the other stockings.
Wednesday, December 7, 2011
Quick & Easy Cards with Lori
So, we're getting closer to Christmas here - who else needs some quick & easy cards? Ecstasy Crafts to the rescue! Some of my favorite images are "Gorjuss Girls", and Cutters Creek carries a beautiful sheet of "Winter Friend" images to make two cards. Best of all, they are currently on sale for 15% off - but you better hurry, there are only 4 left in stock as I type this! Of course, if those are all gone, there are lots of other awesome choices from Ecstasy Crafts available; just have a look around.
Here are the two cards I made, keeping it simple:
Using a white 5"x7" card base, I assembled my EC image. Then I used a pin clip to hold my "title" like a sign, and added a little bow of Doodle Twine to it. I added some black organdy ribbon beneath the image, then layered on some ribbon printed with a sentiment from my stash. I colored over a few little details in the image using a Copic Atyou Spica glitter pen in Black for a tiny bit of bling, but it doesn't show well in the photo.
Again I chose a 5"x7" white card base and layered my image onto it. I repeated the layered ribbon and added an accent made of white & black paper flowers and a blue plastic flower, held together with a black brad center. I again posted my "title card" in a pin clip and tied it with some Doodle Twine. This time, I highlighted some areas of the image using a Sakura Jelly Roll Stardust pen in clear.
Thanks for stopping by and checking out my quick Gorjuss Girls! I have a more time-intensive, stamped and colored image over on my personal blog today if you'd like to check it out.
Here are the two cards I made, keeping it simple:
Using a white 5"x7" card base, I assembled my EC image. Then I used a pin clip to hold my "title" like a sign, and added a little bow of Doodle Twine to it. I added some black organdy ribbon beneath the image, then layered on some ribbon printed with a sentiment from my stash. I colored over a few little details in the image using a Copic Atyou Spica glitter pen in Black for a tiny bit of bling, but it doesn't show well in the photo.
Again I chose a 5"x7" white card base and layered my image onto it. I repeated the layered ribbon and added an accent made of white & black paper flowers and a blue plastic flower, held together with a black brad center. I again posted my "title card" in a pin clip and tied it with some Doodle Twine. This time, I highlighted some areas of the image using a Sakura Jelly Roll Stardust pen in clear.
Thanks for stopping by and checking out my quick Gorjuss Girls! I have a more time-intensive, stamped and colored image over on my personal blog today if you'd like to check it out.
Tuesday, November 15, 2011
Holiday Cards....Day 2
Today's cards.....more simple easy designs, and
again, all from that same awesome paper set...
the Echo Park (EP) Season's Greetings collection.
These 2 cards are a similar design....but have a very
different look.
The card above, starts with a kraft base. The strip
on the left, with the poinsettias, is from the border
strip paper in the set....I just love the variety on
that sheet for making cards!! The punched edge
adds a bit of elegance to the card, along with the
pretty bling swirl from Want2Scrap. I used the
"Merry Christmas" sentiment, from the EP
Season's Greetings chipboard.
I did "fussy cut" the large poinsettia that is
under the word "Christmas" from the same
poinsettia paper the base piece is cut from.
The papers were inked with Vintage Photo
Distress Ink.
The next card:
paper, a rectangle of red in the middle, and then layered
on another piece of the border strip....that pretty holly,
then simply added the Season's Greetings sticker from
the set, a bit of Doodlebug Twine wrapped on the left
side, and Want2Scrap red pearls finish the card off, as
yummy berries, and an accent on the upper left corner.
Hope you enjoy today's cards....and maybe get a little
inspiration to make your own cards this year! It can
be a fun, quick project, and friends and family
will appreciate the special touch!!
Come back tomorrow to see what's in store....and
make sure to leave a comment here AND on my
blog HERE for a chance to win some blog candy
this week!!
Shop Cutter's Creek for all your cardmaking needs!!
Echo Park Season's Greetings 12x12 paper
Echo Park Season's Greetings chipboard
Distress Inks (Vintage Photo)
Want2Scrap Bling (Pearls and Swirls)
Doodlebug Twine
Thursday, November 10, 2011
Teacher Gift with a Sense of Humor from Lori
I will be the first to admit that this is not an appropriate gift for every teacher - heck, probably not even most teachers! But you know the one: the teacher with a great sense of humor, who's probably been around the block a few times... she's the one who will appreciate this.
(I'm thinking I may keep this one for myself and use it for PTO meeting notes!) I think these papers from Graphic 45 with the oversized images are perfect for covering composition notebooks. After trimming down the main image to fit, I added a "ruler" strip along the binding edge.
I find this portion of the image pretty hilarious, so I wanted to highlight it. I used an old paper tole technique, and cut around a portion of the image then adhered it using the Kool Tak clear 3-D foam squares.
Finally, I wanted to add a fun touch and cover some extra images on the main paper. I cut out some of the flash card images from a paper, and adhered three of them directly to the paper below. I wrapped the remaining two with Doodlebug Doodle Twine and popped them up using the 3D clear foam squares.
I can't wait to make another of these with the Christmas papers to keep me organized through all the shopping, baking, and entertaining coming up!
Supply List:
(I'm thinking I may keep this one for myself and use it for PTO meeting notes!) I think these papers from Graphic 45 with the oversized images are perfect for covering composition notebooks. After trimming down the main image to fit, I added a "ruler" strip along the binding edge.
I find this portion of the image pretty hilarious, so I wanted to highlight it. I used an old paper tole technique, and cut around a portion of the image then adhered it using the Kool Tak clear 3-D foam squares.
Finally, I wanted to add a fun touch and cover some extra images on the main paper. I cut out some of the flash card images from a paper, and adhered three of them directly to the paper below. I wrapped the remaining two with Doodlebug Doodle Twine and popped them up using the 3D clear foam squares.
I can't wait to make another of these with the Christmas papers to keep me organized through all the shopping, baking, and entertaining coming up!
Supply List:
- ABC Primer 12x12 paper pad, Graphic 45
- 3D Clear Foam Pads, Kool Tak
- Cutter Bee Scissors, EK Succcess
- Advanced Tape Glider, 3M
- Doodle Twine Assortment in Primary, Doodlebug Design
- Composition Notebook
Subscribe to:
Posts (Atom)