Showing posts with label Copic Spica Markers. Show all posts

Tuesday, March 19, 2013

Quick and Easy Easter Basket by Deanna M


Welcome Tutorial Tuesday! Hope your week is off to a great start.  Today I have for you a quick and easy Easter basket. Perfect for a hostess gift, gift for co-workers, friends, just about anyone, or the center of your Easter table.

I happened to come across this great tutorial at Scor-Pal on making a box. I knew I wanted to make a simple basket and wanted it 4" across the bottom and I wanted 3" sides. Based on the formula in this tutorial (4+3+3 which is the box size plus two times the height size) I knew I needed to cut a 10" square to make my box and then score each side at 3". I then cut the flaps as indicated in the tutorial.

This picture is from the tutorial

I adhered my box using scor-tape. My handle which was just the 2" X 12" strip of patterned card stock I cut off to make my 10" square. I attached my handle to my box behind the outside flap so the bottom of my handle was hidden.

Now that the basket was together, it was time to decorate it. I cut my rabbit from the Easter 2010 Cricut cartridge at 2 1/2".  I ran the rabbit through my Xyron sticker maker upside down so the sticky was on the front of my bunny.

Okay so now I have a confession to make. I thought that at some time in the past I had purchased the Earth colored Ultra Fine Flower Soft. However, if I did, I sure couldn't find it and was not where I store my flower soft. So now I had a dilemma. I wanted to make my rabbit furry, so what to do? I took some of white Ultra Fine Flower Soft and added several drops of  ginger alcohol Ink to it in a plastic sandwich bag and rubbed it around in the bag to get the color I ended up with. However, I also ended up with ginger colored hands and it had a bit of an odor to it from the alcohol ink. So while it worked in a moment of panic I plan to get some of the Earth colored Ultra Fine Flower Soft when Kim has it back in the store. Just much simpler to us.Once I had my bunny sticky and the flower soft the color I wanted I added it to the front of the bunny and pressed down on the flower soft (that's how I got the colored hands) to be sure it stuck to the adhesive. I then added a bow at his neck and a google eye to him and adhered him to my basket.


Next I cut the grass. The grass is also from the Easter 2010 cartridge and was cut at 1 1/4". Each strip is actually 2 of the images that I flipped and welded together on my Gypsy. You could do the same thing with the Cricut Craft Room if you don't have a Gypsy or Design Studio. I cut my grass out of some Core' denations paper and the light green is actually the back side of the card green. I adhere the grass to my box at the bottom and then fluffed up the grass to give it some dimension

For my Easter eggs, I cut these from the Doodlecharms cartridge using real dial size and 3/4" and 1". Before cutting the eggs I grabbed some scraps of card stock in pink, yellow and lavender. I used my WOW! Funky Border Strips clear stamps and several colors of distress ink to create some patterned paper to cut my eggs from. If you haven't tried any of these clear stamps you should. WOW! makes them so they work really well with their embossing powders (just a suggestion all you WOW! club members). Kim carries several of their stamps sets. It is worth checking out.


On the lavender paper I used the Peacock Feathers Distress ink and the small dot border stamp. On the Yellow paper I used Shaded Lilac and the small squares border stamp. On my pink paper I used the Squeezed Lemonade and the Pickled Raspberry distress ink and the single row of dots border stamp. I first stamped the Raspberry and left about an 1" between the two rows, then went back and stamped the Lemonade between the Raspberry.

Once I had the eggs cut out I used my Spica Pens to add a little glitter to the eggs and then adhered them to the front of my basket.

I hope you enjoyed seeing my basket and will check out the awesome products used from Cutters Creek. And remember if something is ever out of stock just contact Kim through the Customer Service link and ask if she can order it for you. She is great about special ordering so never hesitate to ask.

I hope you all of a great rest of your week. I would love to know what you think of my basket.

Saturday, December 8, 2012

3D Christmas Card


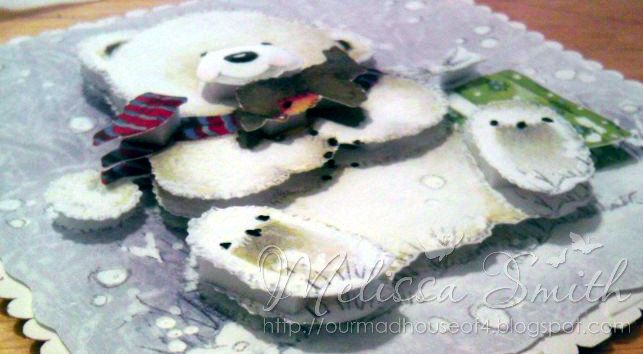
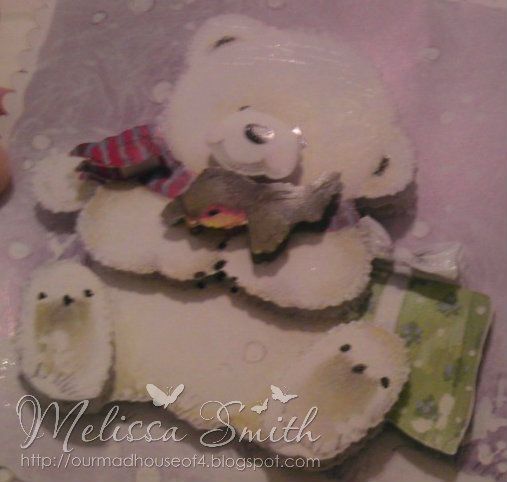
Here is a simple Christmas card made from the 3D White Bear.  It is a very simple and quick card.


After I used the Foam pads to "build it up", I used my pitch black and clear spicas and my cool grey copics to add a little depth and glimmer to the  images.  I wish the pictures would show much it made it sparkle for snow.


Overall, I love the final product and how fast it went together.  I am definitely going this route for future Christmas cards as it is a huge time saver and still has a personalized touch!


Enjoy!


Stash: Paper

Monday, June 7, 2010

Copic Mondays-More Copic Basics by Laura Burleson

Did you know that some inks can ruin your Copic Markers?

Are some papers better than others for coloring your images?

Did you know that you can actually ruin your markers coloring on some surfaces?

If you are like me, I had no idea that some basic items I use for crafting could be damaging to my Copic markers. Granted, you can replace the nibs, so damage wouldn't be permanent. Still, I would rather do all I can to prolong my marker's life.

Copic markers have a shelf life of three year when kept properly capped. I know I would never let mine sit that long without use, but it is nice to know that they are made to last.


Okay, back to inks. Copic officially endorses using Tsukineko Memento or Brilliance Inks, Tim Holtz (Ranger) Distress Inks, A Muse Ink, and Stewart Superior Palette Noir Ink. Cutters Creek carries both Tsukineko Inks and Ranger Inks. You can add clear embossing powders or heat set the inks for your best results. Embossing inhibits the "running" or "bleeding" of your inks when coloring. Never use colored embossing powders. Colored powders react with the markers. Never use solvent based inks with your Copic Markers. These products are intended for use with water-based media, and they don't work well with Copics. Staz-On inks will stain will run and make a messy image, but worse yet, it ruins the nib on your markers. Stampin' Up, Close to My Heart, and other water based inks will run and discolor the nibs on your markers.

There is only one time you would use Staz-On inks with your Copics. If you wanted to color a vellum image, you would stamp the image on the front (glossy) side of your vellum. You then color the image from the back (rough) side of the paper using your Copics.

Now as for paper. Choosing a good paper is very important. You need one that allows the ink to soak into the paper, but also allows you to move it around while you are coloring. When a paper is super glossy, the ink will just float on the paper. It doesn't stick or soak into the paper. If a paper is too soft, then you aren't able to control the ink. It will bleed outside your image lines too quickly. You want to test your paper for saturation and bleeding before using it to color a project.

Copic International recommends two main papers for coloring with your Copic Markers, Bazzill (Prism) Simply Smooth Cardstock in Ivory or Neenah Classic Crest Solor White or Ivory 80# Cardstock. Bazzill papers are available from Cutter's Creek in both white and ivory. These papers absorb your inks beautifully without feathering too quickly. They allow you to work well with wet inks and blend your colors so nicely. You won't believe the difference!

Lastly, let's visit things that can ruin your Copic Markers. Never color over any glitter pens except your Atyou Spica pens. The Spica pens are made with special glass glitters that will not clog or gum up your marker's nib. Never color over Opaque White, White Out, Acrylic Paints or gel pens. These will ruin the marker ends, and once clogged, the inks will not flow properly onto your projects. White out has actual paper fibers in the liquid that will glob up in the marker tip. Color your projects first, and then add any gel pen accents. If you have colored over these products, don't worry. Your marker nibs are replaceable.

Copics are amazing markers. All of the basics to get you started are available at the Cutters Creek Store. If you need help selecting markers, papers, or inks, please ask. Kim or I will be happy to assist you!

Cutters Creek always stocks:

Copic Markers
Copic Spica Pens
Replacement Nibs and Nib Tweezers
Tsukineko Memento or Brilliance Inks
Tim Holtz (Ranger) Distress Inks
Bazzill Cardstock

Resources: Copic Markers/Imagination International Inc., Marianne Walker, and Jennie Lin Black, Regional Certification Instructors

Monday, May 24, 2010

Father's Day Cards with Melissa


So one neat benefit of making cards for the Cutters Creek Design Team is that I can get holiday cards completed early. Like today, I am showing my Father's Day cards and it is still MAY!Yoohoo!! Hopefully today's post will inspire a few of you to get your cards completed early too!For my cards, I started with a stamped image from my stash. I knew it was the PERFECT representation for Father's Day and what the men in my family mean to me and my children. I didn't want everyone to be the same, so I used cool greys and blues to color the suits. All I did was include more or less of the middle shades and they each turned out looking completely different from one another which is fantastic! The markers I used are towards the bottom of the post, but if you want to know specific groups used, just leave a comment with a way to contact you and will send the info :o)

I wanted to personalize a few of the "D's" on the front so I roughly (I am a colorer NOT a drawer!) drew a Batman emblem for my dad, after all he is Bruce Wayne, and a toilet and plunger for my Grandpa - -He and my Grandmother owned a Plumbing business for 20 years. I decided I wanted to make an easel card after all of my figures were colored. I loved Beate's tutorial on SCS, but I didn't want to waste any paper. I found a more economical way on Created by Katie Cotton. I folds great and stands nicely - -I didn't have to weigh down the face of the card so that it wouldn't flip up! I cut the layering pieces with my We R Memory Makers Ultimate Cutting Kit. I cut in 1/4" increments so the layers were vi sable but thin. I pulled some phrase stamps from my cabinet, crossing my fingers I had something for Father's Day......humm . . . . maybe I should post about organization later . . . . .
Back to the card :o) I found a PERFECT stamp set from ages ago that is from Close to My Heart. It says "You are my Hero" How great is that!?!? It also had a matching design that said "Happy Father's Day" for the inside of the card. I used 2 different sentiments for my husband's card and my dad's. Yes, I am a Daddy's girl thru and thru!
Next, I assembled the card, barely resisting to add more embellishments as this is a Man's Card. . . spoken in a deep voice :o) And tada, a quick, simple, meaningful Father's Day card! I hope this gave you some ideas!
Here are the Copics I used I forgot to include the Spicas so those are listed as well:
Copic Atyou Spica Glitter Pen Gold, Silver, Sky Blue, Red


Tuesday, April 20, 2010

Once Upon A Princess by Melissa


Hi everyone! For my project, I decided to share my birthday gift for my *nieces* this year. Between March and October every year I have 9 birthdays in my family for little girls. This year, with the release of Once Upon A Princess, I knew it was the perfect gift for these girls ranging from 2-7 years. Today I am just going to share one set I did this week as it can be a little overwhelming seeing all 9 sets together!!! I had a handful of DVD tins in my stash so i am using these to store the dolls and outfits in as well as using the Cricut magnetic sheets so the dresses stick right on with no tearing! The whole back of the paper doll is a magnet, but each of the outfits is only a strip. To preserve the doll and outfits from wear and tear, I put 2 coats of Mod Podge I picked up at Michaels over it and let it dry over night for each coat.


I cut out the doll shape on Prism White and colored in the skin tone using my copics to add in some detail. Her outfit is cut with Bazzill Dotted Swiss cardstock . For the other 3 outfits, I used Core'dinations Gemstone cardstock as you can't have a princess outfit without sparklies!!! For the pajamas, I used Core'dinations Core Impression and Basic Grey Nook & Pantry. I colored in the bunny slippers with copics as well.

Additional Cutters Creek Products used:
Quickie Glue Pen
Scor-tape: 1/8" and 1/4"
Textile Embossing Folder
Atyou Spicas set A
Copic Sketch; 100, BG18, C2, C4, E00, E02, E50, R24, R81, R85

Tuesday, March 2, 2010

Kim B's Every Day Paper Doll

Here is a simple scrapbook page I did using the Every Day Paper Doll Cricut cartridge. I cut the cat image and used my spicas to to draw in the cut lines and my copics to give the kitty some blush. I then taped a piece of glitter paper using my scor tape, behind the cat's nose and added some glossy accents to the nose, and finished off with some googly eyes. I then matted my photos and started putting my page together. This was another easy page, as I kept is very simple so that I could show off what I really want to be seen, my dear grand daughter. Many of these supplies are available over at Cutters Creek!

Suppiles:
Every Day Paper Doll Cricut Cartridge
Scor Tape
Glossy Accents
Spica Glitter Pens
Copic Markers
Rhinestones
Card Stock
Alpha Stickers

Friday, February 26, 2010

A Child's Year by Kim B

I have had A Child's Year for a while now and have just cracked the clam shell on this Cricut cartridge. (Shame on me!) I wanted the focus to be my daughter in law and my grand daughter in this layout, so as much as I like to bling up my pages, I tried to keep it simple. A Child's Year is perfect for this as there are many silhouettes for you to choose from and these all allow you to make a simple cut to make a big statement. I did use my Leave It To Weaver Fiskars punch (one of my personal favorites) to weave in some ribbon and added Petaloo flowers and used one of my spica glitter pens to journal my thoughts about these two little ladies. Scrapbooking can be as simple or as detailed as you need, just remember it is your way. Stop by Cutters Creek and pick up some supplies and start scrapping.
Supplies:
A Child's Year Cricut cartridge
Fiskars Punch
ribbon
Petaloo flowers
Copic Spica glitter pens
card stock

Friday, February 12, 2010

Angela's Valentine Box


I may be dating myself, but when I was in grade school the weekend before Valentine's Day we had to make a box for our classmates to deposit all of our Valentine cards into. The idea being that all of your Valentine's would be delivered into your decorated box for you to take home. I loved this, but I was one of four children so I am not sure my Mom was as thrilled with this assignment! (picture four kids tearing apart the house trying to find shoe boxes to decorate) I decided for my granddaughter Grace's first Valentine's Day I wanted to make her a box.


I used a bunch of paper, punches, and ribbon I had on hand and then pulled out the Pink Cat Studio Stamps, my Copic markers, Spica glitter pens and of course Nestabilities. Now I just need to fill the box with some Gerber apple snacks and an outfit and drop it in the mail.

All these products can be purchased at Cutters Creek.
Supplies:
Pink Cat Studio Stamps
Copic markers
Spica glitter markers
Spellbinder Dies
Ribbon
Adhesive
Crop A Dile
Eyelets
Card Stock

Monday, December 28, 2009

Lea's Little Christmas Tree


For this image Lea has used a technique known as "Direct to Rubber." See how the tree looks as though she has hand painted it rather than using a stamp? That is the beauty of this technique! By using a solid rubber stamp, adding color and shading directly to the image before you stamp it, you are treated to a light watercolor effect that is very different from a starker stamped image.

Want to know how to make your project look even better? Well here is a tip from Lea herself on how to use this technique to the fullest!

"Direct to Rubber is a technique that I love to use. It gives me the freedom to change and manipulate images based on the look and feel that I want. To get the best image I always lightly spritz my stamp with Copic's blending solution right after coloring. This adds back any moisture that may have evaporated as I worked. Then, once the image is damp I immediately stamp it. The result is a watercolor effect that I love!"

Also, keep in mind that it is important that you use the Copic Blender Solution and NOT Ranger's. The Ranger solution has resins in it that can really mess up your lungs. To use the Copic Blender Solution hold the stamp out away from your body and spritz. You will be thrilled with the unique the results!

Personally, I love how Lea has used her Spica pens to add a little bling to her tree! The sparkling decorations give it that final touch and makes it "Pop!" I just got my very first set of these pens, and I love them so much that I am often tempted to color my own walls. They give a subtle sparkle that is classy and fresh all at the same time.

If you have any questions for Lea about this project or about Direct to Rubber stamping, just ask! I am sure that she would love to help!

Lea's Little Christmas Tree was created using the following products:
  • Copics - YG67, YG63, E35
  • Copic Spica - Mint, Garnet
  • Copic Blending Solution in a Ranger Mini Mister
These products can be purchased directly from Cutters Creek by clicking here!

Thank you Lea for another great project! Now, I'm off to go try this technique!
Related Posts with Thumbnails