Showing posts with label Christmas. Show all posts

Saturday, December 8, 2012

3D Christmas Card


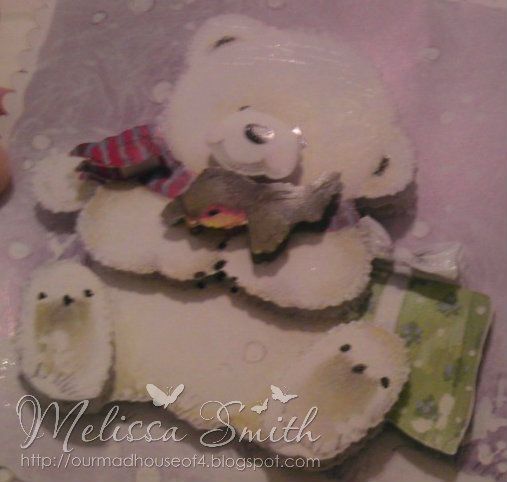
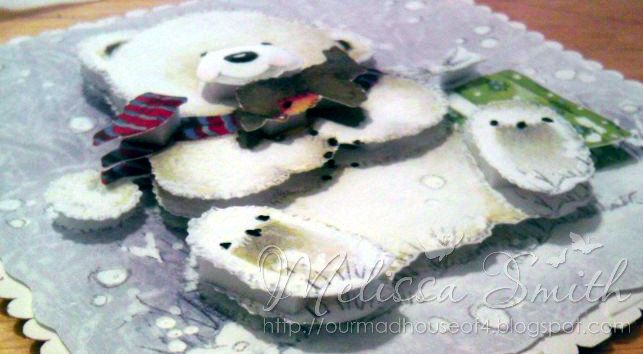
Here is a simple Christmas card made from the 3D White Bear.  It is a very simple and quick card.


After I used the Foam pads to "build it up", I used my pitch black and clear spicas and my cool grey copics to add a little depth and glimmer to the  images.  I wish the pictures would show much it made it sparkle for snow.


Overall, I love the final product and how fast it went together.  I am definitely going this route for future Christmas cards as it is a huge time saver and still has a personalized touch!


Enjoy!


Stash: Paper

Thursday, December 6, 2012

Easy Christmas Decor with Lori

I don't know about you, but I feel Christmas sneaking up on me FAST! We always like to add something new every year, but we are starting to run out of room for anything too large.  So this cute little decor piece was the perfect answer - small and quick.  I started with a wood block, originally intended for a rubber stamp, that I had in a little stash of mine.  It's about 5 something inches by about 6.5" or so.

Next I painted it with some green craft paint I had on hand.  I think it would have looked awesome with a Distress Stain instead, but I haven't started collecting those yet!


 I painted it on in a very thin coat, using a dry brush, so the grain shows through the paint.  I pulled out my Echo Park Season's Greetings Collection kit and got to assembling.  ALERT!: Kim has only two of this collection left in stock, so if you want it you better jump on it fast.


I cut a piece of pattern paper smaller than the block, leaving a nice border, and distressed the edges.  I then pierced holes all the way around and added pen stitching between the holes using a Copic Multiliner 0.5 tip.  I attached it to my block using ATG tape, but if you're concerned about lifespan you can use Scor Tape.


I selected a large tree sticker for my focal image, and added some details with a Copic Spica pen in Clear.


Finally, after adhering the sticker to the block, I added more details.  The border and ornament banner are also from the sticker sheet, and the "sign" is cut from one of the other papers in the collection. I added sparkly details ont eh word "trees" with a Copic Spics pen in Mint, matted it on black cardstock and adhered it with foam adhesive. I removed the prongs from a brad in my stash and attached it to the top of the tree with a Glue Dot, then added ornaments with Christmas Red and Gold Stickles.

This will make a cute little addition to our Christmas decorations and, other than drying time for the paint and Stickles, only took about 10 minutes to put together!

Items available at Cutters Creek:
Friday, November 30, 2012

Nativity Card

Hi!  With Christmas right around the corner, I have been feeling a little overwhelmed with the daily schedule my family has and have been dreading making my cards this year.  I found myself trying to find alternatives to my usual elaborate cards as I just don't have the time with an active infant trying to crawl everywhere!

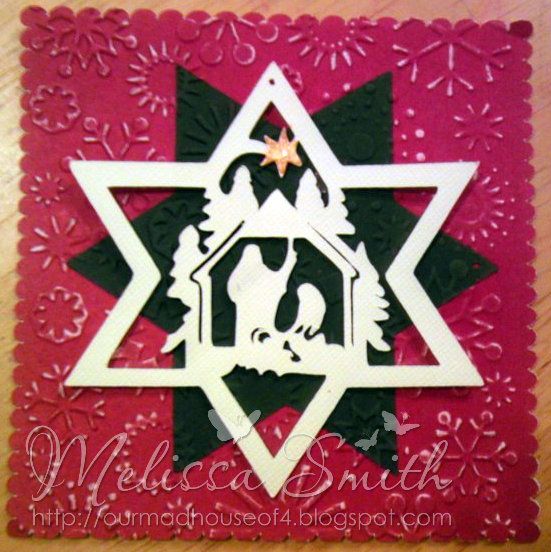
Here is a very simple Christmas Card I made using scraps found in my paper drawer with an SVG image I found here.  I love all of his designs and they are so versatile with every project I have been making lately.  I than used my cutting machine to cut out the base, the star and the nativity scene.  

I adhered the star to my base and ran it through my Big Shot with the Cuttlebug Snowflakes folder and than used a file to make the white stand out a little more.  I used clear mounting tape to place my image for a 3D effect.  I thought about lining up the image with the green star, but I found I liked the layered look better.  I think it makes it pop a little more.  For the final touch, I added Liquid Pearls for the star.


thanks for looking!


Embellishments: Snowflakes, Liquid Pearls
Other: ATG, Big Shot, File Set, Kool TAC
Stash: Paper

Saturday, November 10, 2012

Simple Christmas Card by Tee


Hi Everyone, I want to share with you a simple card I made using the new December 25 Cricut Cartridge and Plantin Schoolbook.  

Supplies Used
White Ink
Diamond Stickles
Candy Cane Stickles
Golden Rod Stickles
3D Dots
6x12 Cardstock (folded in half)
Black Cardstock

After I created my card I used a white ink pad and swirled it around on the cardstock to give it a flurry snowy look... I then cut out the City border from Plantin Schoolbook using the fit to length feature at 6 1/2" and cut the Santa from December 25 also using the fit to length feature at 5 1/2.  I added both to my page using 3D dots to pop up Santa.   Then I added a big blog of Candy Cane Stickles to the reindeer's nose, Diamond Stickle dots all over the page to make it look like snow (or someone said stars, ok).  Finally, I trimmed my border to 6" and used the Golden Rod Stickles on the buildings to make it look like lights coming from the windows.
Beginning to end (not including drying time) this card was finished in about 15 minutes..


Friday, October 5, 2012

Christmas with My Mind’s Eye by Chris


I made this quick and easy Christmas card in less than ten minutes. I started with brown kraft paper folded to a 5x7 card size. I then cut the lighter swiss dot piece from My Mind’s Eye All is Bright pack at 4 &/8 x 4 1/8 inches. The darker piece (the reverse side of the swiss dots) was cut to 3 1/4x 4 7/8 and glued slightly overlapping the lighter piece. I fussy cut the word Joy from a chevron piece in the same pack and glued it over the seam. Then using my distress ink Peacock Feathers, I stained a piece of seam binding, crumpled and dried it, tied it into a two loop bow and attached with a Glue Dot .

Tuesday, July 31, 2012

Ecstasy Craft Sneak Peak-Part 2 by Deanna

I have another sneak peak for you of some of the awesome holiday Ecstasy Craft items that Kim has just added to the store.


These are called Reddy Die-Cuts and this is Popcorn the bear. As you can see I got 4 cards from one package. As you can see they come with a background paper to build your image on. Building the image is easy as 1,2,3. All of the punch out items are numbered in the order that you layer them. It took me just about an hour to make all 4 cards which is fast for me. The individual card toppers measured just under 4" so I cut 4 white card stock card bases at 4 1/4" X 8 1/2" and scored and folded them to make four 4 1/4" square cards and rounded the corners. These will fit in a standard size A2 envelope so you won't have to pay extra postage to mail a square card.

On this little guy I added some Frosted Lace Stickles between the snowline and the sky and also on the 4 larger snowflakes. (sorry it doesn't show up better in the photo).

On this one I again added some Frosted Lace Stickles to the snowline and I also added some Stardust Stickles to the stars by the moon.

For this one I added some Ultra Fine White Flower Soft to the snow along the top of the fence and also to some of the snow on the tree limbs.

On this one I again added some Stardust Stickles to the fireworks in the sky.

Check out the dimension you get with these wonderful little layered images.These were quick and easy to make and are beautiful as is without any additions. It is a fun and quick way to make some cards to give as gifts or to mail to family and friends.


There are some great new Flower Soft products that have been added to the store just in time for your holiday crafting so be sure to check them out. Also be sure to check the  new CHA 2012 Release section of the store to find out the latest and greatest additions including these wonderful Ecstasy Craft items.


Thursday, July 26, 2012

Christmas in July with Lori and Sarah Kay

Who's ready to start their Christmas crafting?  I especially love to get started on Christmas cards early so I don't feel so rushed!  I don't like to spend a lot of extra money on stamps just for Christmas, so I thought I would show you how just changing the colors can make many of your regular stamped images great for Christmas.  Kim has a bunch of stamps that would be perfect for this, and I especially like the cute Sarah Kay stamps!

If you stopped by my blog on Tuesday, you saw this same image colored in "everyday" colors great for whatever occasion you'd like.  So today, I colored it in with traditional Christmas colors and voila, perfect for Christmas wishes!


Doesn't she look like she just got that sweet little kitty for Christmas? I layered her on some cute papers from Echo Park's 6x6 Season's Greeting pad and added Making Memories paper flowers from my stash and some American Crafts Glitter Tape to complete the look.  (By the way, I'm sure it's not recommended, but I used one of my border punches to punch the Glitter Tape into scallops.)


I forgot to write down the exact numbers I used, but as I remember these are the Copic Markers I colored her with: R24, R29, R39, Y11, Y13, Y15, G03, G05, G07, E000, E00, E02, E13, E15, E37, C1, C3, C5, W1, W3, W5. I'm not sure how well you can see in the photo, but I added a bit of a yellow glow to the left edge to give it the appearance of a fireplace.

Supplies used for this card:
Thanks for stopping by today!  I hope to see you again soon.


Related Posts with Thumbnails