Showing posts with label Tee. Show all posts

Monday, March 25, 2013

Cricut Easter Basket by Tee

For my last project at the Cutters Creek I wanted to share with you an Easter Basket I made using the Spring Cottage and Easter Magic (CCR Exclusive).

I cut the basket at fit to page and the rabbit at about 3" I inked the edges of the rabbit with some pink ink then covered in Glossy Accents then dipped in some super fine glitter.  Finished it of with some Ribbon and aged the basket a bit. Love Love how it turned out!!


Hope you all have a wonderful Easter! I also want to take a moment to thank Kim for having me on her Design Team and each of you, the readers, for all our your support. I will miss you!

~~Tee

Saturday, March 2, 2013

3D Cake Box

Many of you know my love for 3D projects. I made this box using circles from Cricut then cut some strips of paper to make the box and lid. On Top is a flower, inked and stickled. I love how this turned out! I have a video on my blog on how to take basic shapes (like a circle on this project but a heart in the video) to make it a 3D project. hope you check it out.

~~Tee


Friday, February 22, 2013

Rabbit Chinese Take Out Box

Hi Everyone and Happy Friday - Today I am here to share with you a cute little Easter Rabbit basket made with Cricut Sweet Tooth's Chinese take out box and Cricut George Basic Shapes.

Here is the how-to:
Cut and assemble the Chinese take out box at 6 1/4" from Sweet Tooth

From George:
Face: Circle at 2"
Ears: Long Oval 2" (white with shadow turned on)
Paws: Oval at 1"
Nose: Heart at 1"

I inked the everything in Pink and added some ribbon to the chinese take out box only because I didn't have grass - so need to get some grass....
If you don't have the Sweet Tooth cartridge - It is a must have - Kim can special order it for you.
~Tee


Friday, February 8, 2013

Hershey Nugget Valentine Mailbox by Tee


Hi Everyone, I wanted to share with you a quick and easy tutorial on making these adorable mini valentines mailboxes using two Hershey Nugget candies.  These are so simple to make!!!


Supplies:
Two Hershey Nugget candies (dark chocolate with almonds are my favorite)
Two strips of cardstock (3 1/2 x 1 & 4 x 1 1/4)
One strip of Pattern paper (4 x 1)

Round the corners of the 3 1/2 x 1 piece of cardstock then stack the two chocolates in the middle of the strip. Add a strong adhesive (I used score tape)  to one end and fold up. 

Fold up the other side of the cardstock as seen here

Glue the strip of pattern paper to the cardstock and wrap around the chocolate. I start at he bottom and fold up over the top and back around to the bottom. Trim excess paper to the paper lines up at the bottom but doesn't overlap.  Add a strip of paper for a mail flap and decorate as desired. 

Monday, January 28, 2013

Sweet 16 Birthday Card - by Tee

 Hi Everyone, Happy Monday to you. Today I am sharing with you a card (well, I made 50 of them but who's counting) for a Sweet 16 Birthday Party.

I used Teresa Collins Sophisticated cricut cartridge for the frame, the shoe is a svg file. I inked the edges then I added stickles to the zebra printed pattern paper and the frame. Added some rhinestones and a big black bow.

I love how this turned out but by invite 10 I was so done with them.. :)

Wouldn't think make a great birthday card too?

~Tee


Friday, January 18, 2013

Oh Wow oh Wow - Embossing Powders by Tee

 Hi Everyone, I want to share with you a project I made at CHA this past week using the Wow Embossing Powders and some of their newest stamps and powders called Girls Night Out and Vodka Sparkle....

I first inked the dress form with versamark and added a coat of pink embossing powders.....Inked again and added a second coat.. I then added a coat of the extra thick for that glossy glassy look on top.

I then used the embossing pen and draw on the bottom of the dress and added some new vodka sparkle...

The wings has three coats of silver then while the embossing was still wet I pressed a decorative stamp into... Look how lovely they turned out..

The tag was stamped with one of their new burlap stamp pads and first embossed in silver than stamped again and embossed in black.  Love these embossing powders


Saturday, November 10, 2012

Simple Christmas Card by Tee


Hi Everyone, I want to share with you a simple card I made using the new December 25 Cricut Cartridge and Plantin Schoolbook.  

Supplies Used
White Ink
Diamond Stickles
Candy Cane Stickles
Golden Rod Stickles
3D Dots
6x12 Cardstock (folded in half)
Black Cardstock

After I created my card I used a white ink pad and swirled it around on the cardstock to give it a flurry snowy look... I then cut out the City border from Plantin Schoolbook using the fit to length feature at 6 1/2" and cut the Santa from December 25 also using the fit to length feature at 5 1/2.  I added both to my page using 3D dots to pop up Santa.   Then I added a big blog of Candy Cane Stickles to the reindeer's nose, Diamond Stickle dots all over the page to make it look like snow (or someone said stars, ok).  Finally, I trimmed my border to 6" and used the Golden Rod Stickles on the buildings to make it look like lights coming from the windows.
Beginning to end (not including drying time) this card was finished in about 15 minutes..


Tuesday, September 25, 2012

Cricut Flower Shoppe Flowers by Tee


I have gotten a lot of very positive feedback on my roses made with the Flower Shoppe cartridges that I decided to make a video to walk you though making them.


See the video here:


I cut my flowers at 2 1/2" and inked with Tim Holtz Distressed Inks.

I hope this video inspires you to make your own! If you do, please make sure you post so I can see.


Tuesday, August 14, 2012

All Occasion Card by Tee

I love to make "all occasion" cards and keep them in my stash for when I need a last minute card for a Thank You, Get Well Soon, Congratulations or whatever the occasion might be. 

Below is a sample of one of my recent "all occasion" cards using Echo Park paper, Cricut Art Nouveau, Diamond Stickles and some tulle for a bow. I usually make a batch of these at a time, I did 6 of these cards and used scraps of cardstock for the flowers in red, pink (as shown here) and yellow.


Monday, July 23, 2012

Halloween in July - Witches Hat by Tee

With everyone doing "Christmas in July" I decided that Halloween was not getting enough attention so why not do Halloween in July?

I made this Witches Hat by cutting a circle and a cone made in MTC then embellished it...


My paper is Echo Park (love it) and flowers were cut using Cricut's Flower Shoppe (shocker).... I also added some ribbon and straight pins from my stash. Everything is inked in black and of course some diamond stickles (since I seem to stickle everything).


Hope this inspirses you to start your Halloween decorations in July and not let Christmas in July get all the credit :).

~Tee


Monday, July 9, 2012

A Ladies Diary Tio by Tee

Look what I did with three pieces of Graphic 45's a Ladies Diary patterned paper, one sheet of tan cardstock, half a sheet of chipboard and embellishments from my stash....

First, I cut my chipboard into three pieces 3x6, 1x6 and 6x6. I then cut apart my patterned paper and used Scotch Quick Dry to glue the papers onto the chipboard. Then I got out my Tim Holtz Distressed Ink Pads in Frayed Burlap and Victorian Velvet and went around all the edges using Tim Holtz foam applicator.


  I used my Cricut and Flower Shoppe Cartridge and cut some rolled flowers at 3" and 2". I applied a heavy coat of Victorian Velvet.I used a straight pin and some beads used several glue dots to hold it in place.I added some stickles and rock candy to finish it off.


I then made a Dresser Card


And finally a small gift box.

Thursday, June 28, 2012

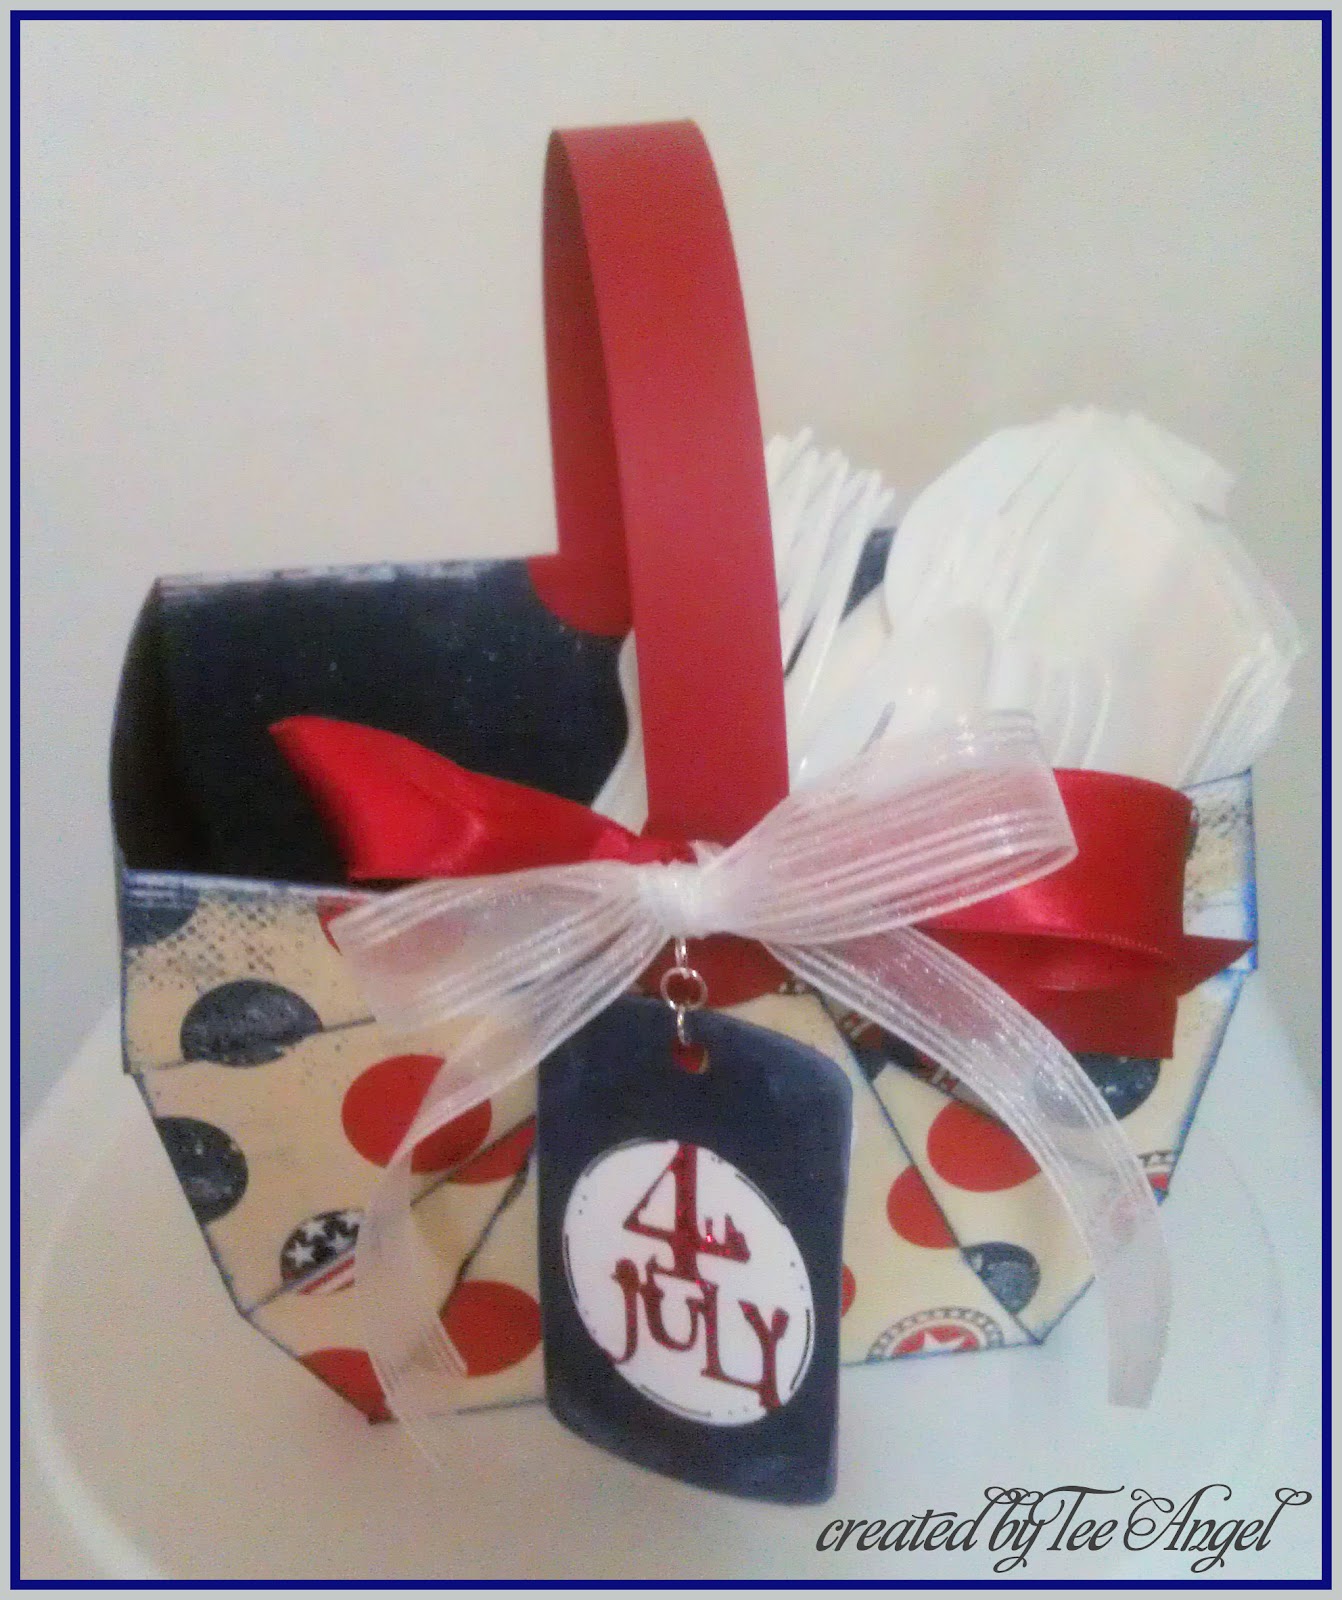
4th of July Basket Tutorial by Tee


Hi All, 4th of July is just around the corner. I wanted to make something to hold the silverware (err plasticware) and napkins for each table. I saw this basket online somewhere and wish I could give credit to it's original designer but I can't find the website so I recreated it by memory and am here to share with you how I did it.

Supplies:
12x12 Sheet of Paper (or 6x6, 9x9)
ScorePal
Adhesive
1 1/4" circle punch (or cut from your cutter)
Embellishments of your choice


Let's get started.
1) Score your paper at 4" and 8". Turn and Score again at 4" and 8" (basically divide your paper into three sections)


2) Cut down the score lines at 4" and 8" down 4". (basically down one box on each end, see sample)
Then cut the center flap into a triangle and both side flaps into thirds. It will look like this.


3) Add adhesive on two of the three strips as see here


4) Bring the strips up on each side as show here


5) Hold the triangle flap up and mark where the one set of flaps hang over the triangle flap and trim.


6) Adhere the triangle flap and cut off the tip or fold it over to hide.


7)  I then cut two circles, folded them in half and cut a slit down the middle. I cut a strip of paper to use as the handle and added on end into the slit in the circle.  Adhere the circles over the tip of the triangle flap then decorate..........

 Hope you enjoyed the tutorial and make one of your own.... ~~Tee
Related Posts with Thumbnails