Showing posts with label distress ink. Show all posts

Tuesday, October 15, 2013

Fight Like a Girl!!! By Deanna M

I am sure you are aware that October is Breast Cancer Awareness Month and the Cutter's Creek Design Team is encouraging all women to get their annual mammogram!!! So I have a Breast Cancer Awareness card for you today!


My card is a center panel step card, and is cut with my Silhouette Cameo. I used a white card stock base and some pink Core' dinations card stock. I embossed the small side pieces with the Juliet Damask Anna Griffin Embossing border folders and the center decorative piece with the main embossing folder. Kim, can order this folder for you.

I cut the ribbon symbol with my Silhouette and using some Glue and Seal added some Spun Sugar Distress glitter. (Yes, this is a special order item, but please just ask)! I attached this to the card with some foam squares.

My sentiments were stamped from the Jillian Vance Design stamps with some Worn Lipstick Distress Ink. I used two sentiments from the set.

I just want to encourage all of you women out there to be sure you get your annual screenings. Thanks so much for visiting us here at the Cutters Creek Design Team Blog.

Monday, August 26, 2013

Aged to Perfection by Deanna M

My stepdad is turning 83 this week so I though I should get a card made for him. This is what I came up with.

My card base is Kraft card stock cut and scored to make  9" x 4" card base.  I like using Kraft card stock as  base for my masculine cards. it seems to go well with the masculine colors I use for my cards.  Now here is a tip for you.  I really wanted to use patterned paper from my Swagger paper pad (Kim can order this for you) but it was a 6" X 6" paper pad and my card base was bigger.  What I did was I took 2 pieces of the blue paper and cut them to 3 3/4" in width. I left one at 6" and cut the other one to 2 3/4" and adhered both pieces to my card base.  Next I took two different patterned papers and cut them in varying heights but all at 3 1/2" wide.  I then alertnated the papers leaving  small gap between them. No seam from the blue show through and I was able to use my smaller paper on a bigger card.

My bottle was cut at 7" from the County Fair Cricut cartridge.  (Kim can order that for you too).  I cut the base out of some yellow card stock, I inked the cork top with some Tim Holtz Gathered Twigs Distress Stain.  The bottle was cut out of some dark  from the Tim Holtz Kraft core card stock.  I covered the entire green bottle with some Glossy Accents and let it dry overnight. Once the bottle was dry I used my Glossy Accents to adhere all my layers together.  I then wrote on the label Est. 1930 the year he was born.

The last thing I did was cut a tag using Tags, Bags, Boxes, and More.  I cut my tag out of Kraft card stock at 2".  Once cut I spritzed it with water and wrinkled it up then smoothrd it back out and hit it with my heat tool to dry it.  After it was dry I distressed the edges lightly with a pair of scissors then inked it with some Tea Dye distress ink. I stamped my sentiment with some Vintage Photo distress ink I rubbed some kitchen twine with my blending tool to give it an aged look then tied the sentiment tag do the bottle.  I adhered the bottle to my cardbase with some foam tape and added a glue dot to the back of the tag so it would stay where I wanted it too.

All of the adhesives I used in the making of my card I got while I was part of Kim's adhesive club.  It was a great way to stay supplied with some great adhesives and maintain my budget.  One final word on Glossy Accents,  my son was repairing the little wooden slides for a couple of dresser drawers.  He wanted to use some wood glue to help hold the new slides in because the screws were short. He also wanted to add some adhesive to the cracked slides. However we couldn't find the wood glue. Glossy Accents to the rescue. The glossy accents and a couple of wood clamps and a half hour and presto, repair complete.

 Cutters Creek Products I Used:
 Glossy Accents
 Distress ink
 Foam Squares

Friday, August 9, 2013

Shadow Box by Jearise

Today I would like to present a shadow box I made that is going to be auctioned off this weekend. I love making shadow boxes and just adding the 3D effects that make it all come together.

I didn't add the frame for this picture because I was getting a glare from the glass.  Here are a close up of my flowers.
I used the Cricut Flower Shoppe cartridge to make the flowers. Please email Kim if you are interested in this great cartridge. I then used Perfect Pearls Mists in Heirloom gold to spritz the flowers.

This is where your journaling can be written or you can stamp a sentiment here.
I used CUTTLEBUG 5X7 Embossing Plus-Fanciful Labels to cut out the label and then I lifted the flap and used Tim Holtz Distress Ink in Tea Dye to ink the raised part.

The center paper where the photo goes is from the 6 x 6 Authentique bundle which was one of the pads that I received in Kim's 6 x 6 paper pad club. Please email Kim if you're interested in future clubs.

Here is the final picture with the frame on.
I used an Adirondack Acrylic Paint Dabber in gold to paint the outside of my plain black frame and give it an antique look.

I also used my ATG gun to adhere the photo area and tag to the background paper and I used Glue Dots to adhere the flowers.

Bye for now! Jearise

Wednesday, June 12, 2013

Masculine Card by Jearise

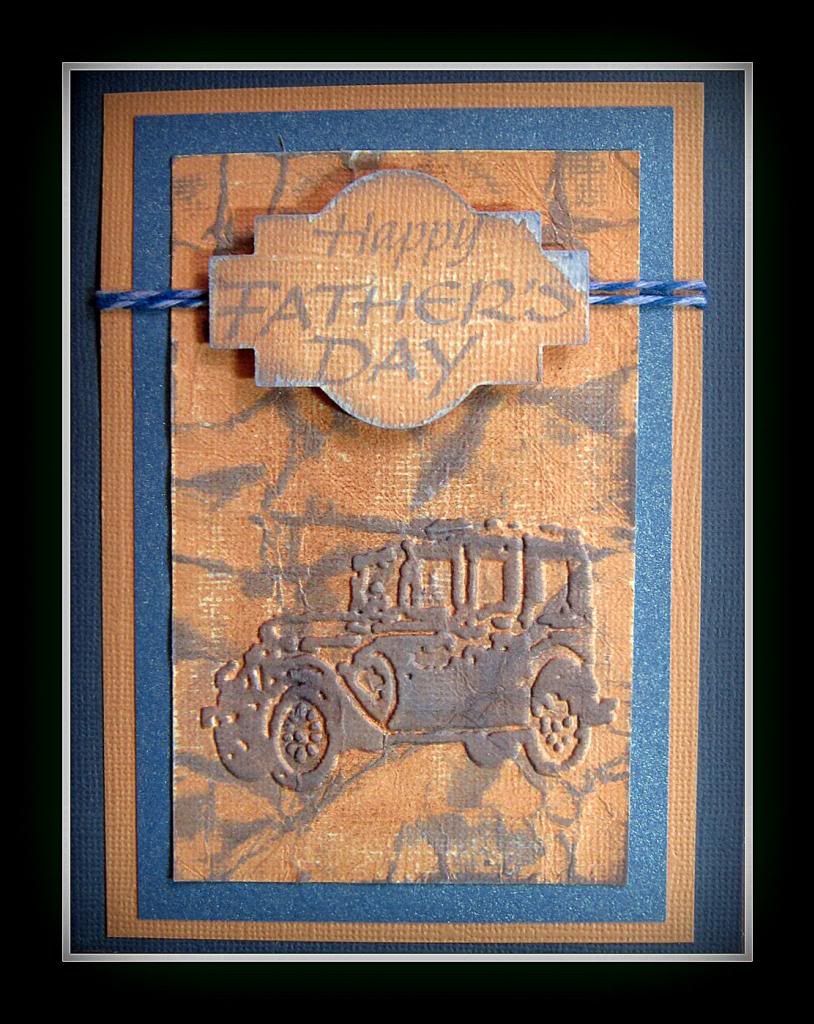
Today I made another Father's Day card but this time I used a fun and interesting technique. I'll start by showing my card I made and then I have included a tutorial as to how I did it. I hope you like it!


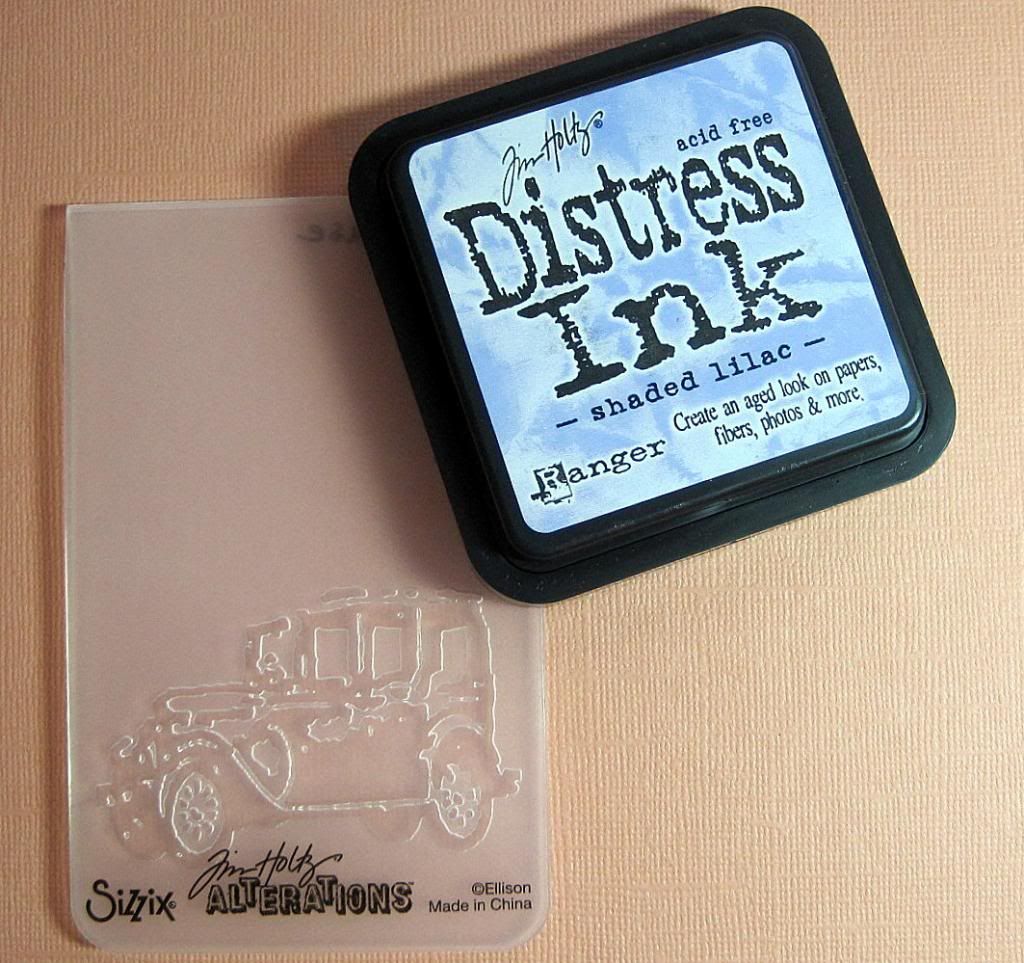
 Here is a picture of three of the four things you'll need to make this card.
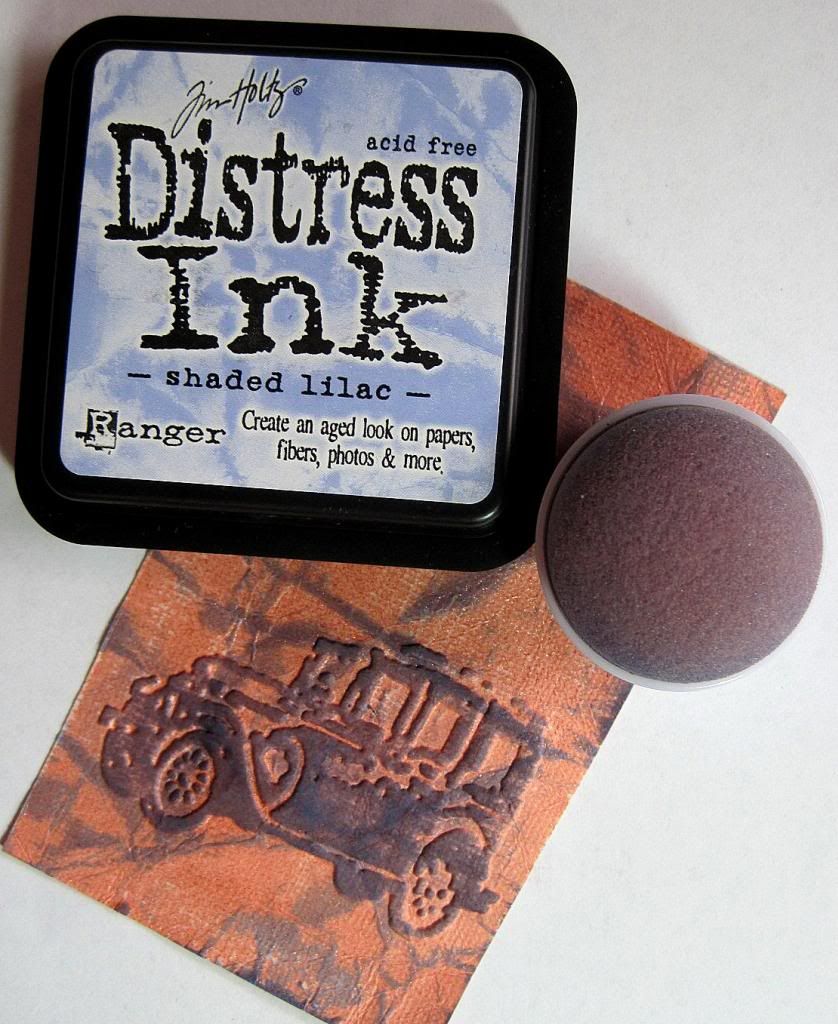
Tim Holtz Distress Ink in Shaded Lilac
Tim Holtz embossing folder for Sizzix
Core'dinations paper
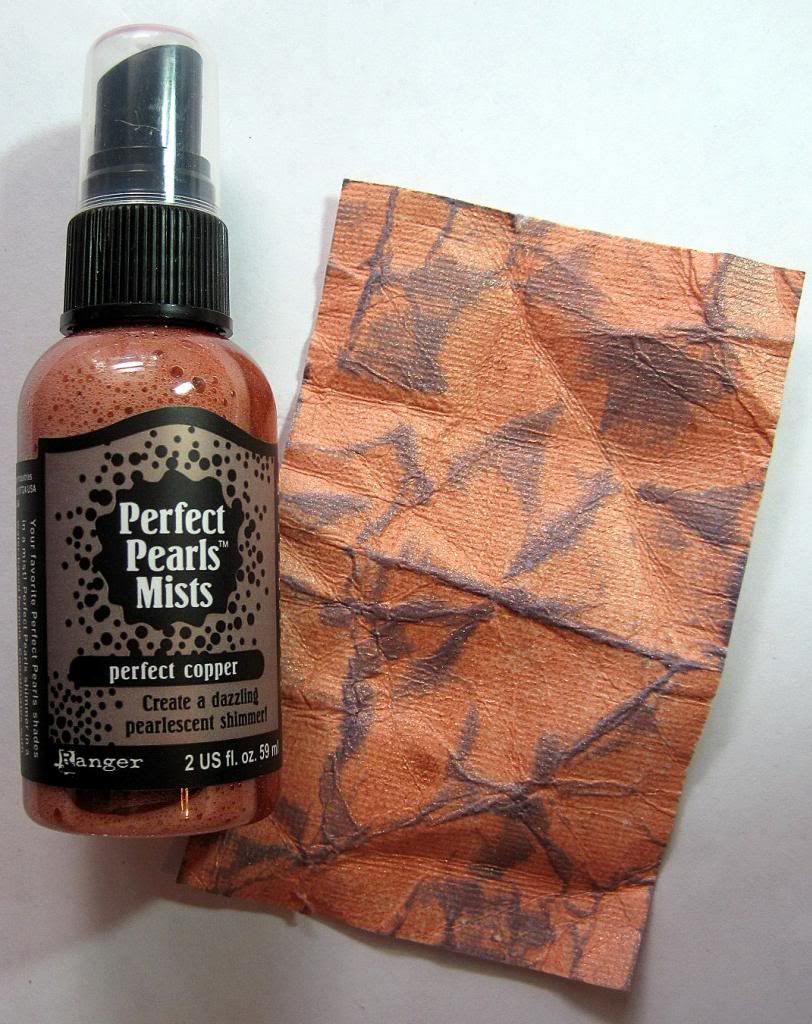
Perfect Pearls Mist

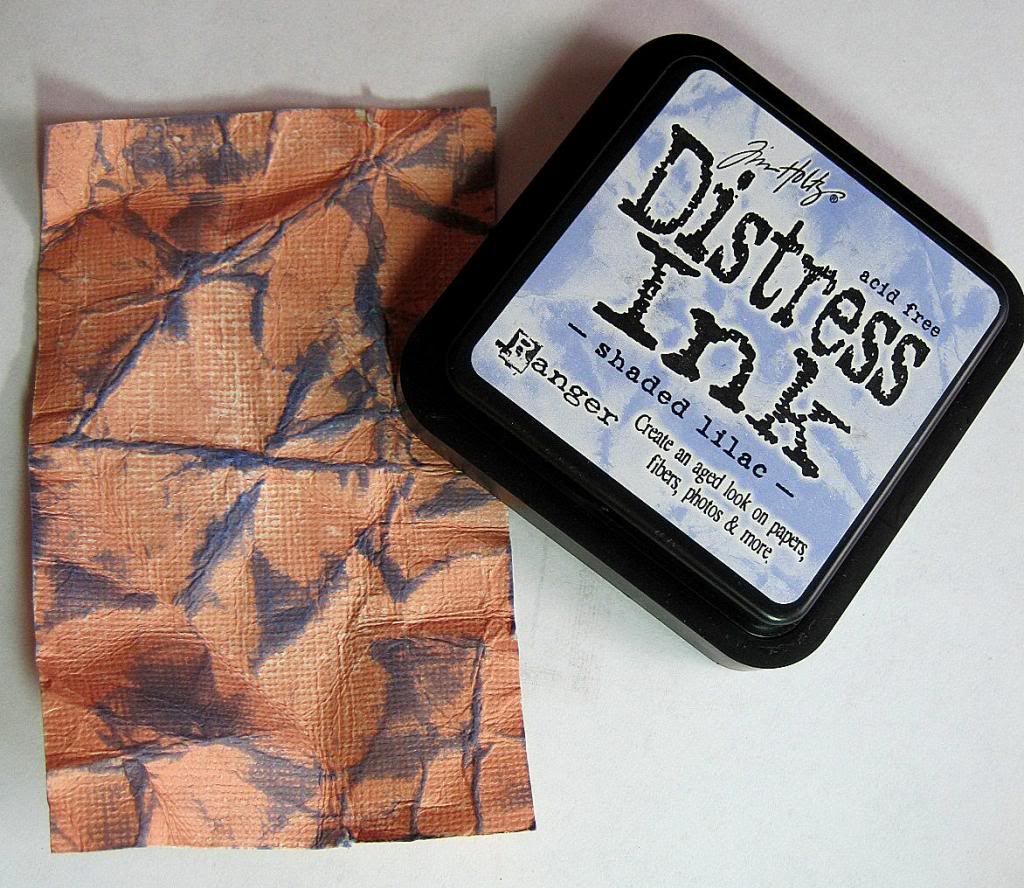
1. Sand and crumple the paper and then open it back up and lay as flat as possible
2. Gently run ink pad over paper so it just touches raised crinkled parts.
3. Spray paper with Perfect Pearls Mist.
4. Put paper in embossing folder and run through your Cuttlebug machine.

5. Take a sponge daubber and gently rub ink over just the embossed image.
And that's it!
I was going to have this as a birthday card but needed another Father's Day card and thought it would be perfect. I sanded and inked and stamped the sentiment and added some Doodle Twine. I thought the white stood out too much so I rubbed my twine on my ink pad to give it a soft shade of blue where the white is. Finally, I assembled the card with my ATG tape gun.

Thanks for stopping by today.


Thursday, May 23, 2013

Teacher Card with Lori

The end of the school year is upon most of us in the next couple of weeks. I like to send the teachers a little something in a card to say thank you for their efforts. My son is not likely to appreciate anything too girly, and since I want him to sign it, I went with this easy number:


The entire thing is cut from the Cricut Wild Card cartridge, using My Mind's Eye papers and cardstock. The Stella & Rose - Mabel paper pad I used is not in the store, but many of their lines have the same muted feel. I think it looks a bit like a county fair, which I think is pretty cool!

To add to the rustic look, I used Tim Holtz Distress Ink in Spiced Marmalade and Evergreen Bough to edge all of my cut papers.

 After assembly, I added accents with Distress Stickles in Spiced Marmalade, Broken China, and Clear Rock Candy. I also slightly curled up the bottom ends of the ribbons.


It's a great way to accent small bits, or to draw attention to a certain part of a single color item, like this sentiment.


I cut the matching envelope from the cartridge, and also ink distressed the edges of the closed envelope to coordinate.


Items available from Cutters Creek:

Other items:
  •  Cardstock

I hope you enjoyed today's project; I had a great time making it! Thanks for stopping by.

Friday, April 19, 2013

G45 Trinket Box by Laura C

Today is another Graphic 45 Secret Garden project,
and in honor of National Recycling Month, I've done
an upcycle project.  I took a plain little cardboard box 
with drawers, painted it with white gesso, and then
decorated it to make a sweet little trinket box:


I used the 12x12 Secret Garden papers to cover all
the sides, top and bottom, and drawer fronts.  I also
fussy cut the birdcage and flowers on the cage. 

All pieces were inked with Vintage Photo Distress Ink,
and then adhered to the box with Scor-Tape.

I used the Secret Garden sticker sheet (Kim can order)
to add the drawer corners, the "friends" and the 
"buckles" on the top drawer are the upside down
tags from the sticker sheet embellished with 
Want2Scrap pearls.  I added a fancy knob, some 
Prima Fairytale Roses in pink and a bow that is white 
seam binding dyed by simply dragging it across
pads, and then getting it a tiny bit wet using a 
Inkssential Mini Mister and rolling it in a ball.  
I dry it very carefully using a heat gun, but it can 
air dry too with a little patience ;)

The sides were decorated with stickers and bling:


Hope you enjoyed this little upcycle post, and a little
teary knowing it's my last post for Cutter's Creek.
I've been on the team for a number of years, and 
thought it was time for me to step down.  I have a
 lot of fun things happening, and have only so many
hours in a day!....lol.  I'll miss posting, but I plan
on still visiting with everyone....stopping by often,
 maybe even drop by with a post now and again 
and I will always welcome visitors to my blog:
 http://scrapaddict4life.blogspot.com/

Thanks everyone for your support, sweet comments,
and especially to you Kim....for being a wonderful
"boss" but definitely a friend all these years! 

Friday, March 22, 2013

Ahh the Country.....

Graphic 45 French Country that is!!  I've made a mini album
using the 8x8 pad, sticker sheet, and the two 12x12 sheets,
"A La Carte" and "Bon Appetit".   Another option from this
 collection (or any G45 collection) is matching chipboard pieces,
you can find them HERE.  G45 collections are great
to use for a mini album.....so many options!

I've included a picture of each page....this is a simple
6x6 album, that I made from a 12x12 chipboard sheet. 
You get 4 pages  from one sheet if you cut carefully, 
and I added a couple of die cut tag pockets too.
Instead you can use a paper lunch bag folded in half, 
it works great....folds to almost a perfect 6x6, and the 
opening of the bag serves as the pockets.  The album is ring
bound. Just two holes punched in the left side, bound with
metal book rings, then dressed up with ribbon.

So starting with the cover:


I like having a lot of tabs sticking out to give it interest....some
ribbon, some stickers, some paper folded and staples using
the Tiny Attacher.  They give it a lot of texture and fun!

Pages one and two....you can see the tag pocket on
the right.....next picture.....

shows the card pulled out of the pocket....just made with 
cardstock and decorated on each side, here is the back:

And the pic of the full page:
 

Pages 5 and 6.....and leading into the next tag pocket:


And the slide out....it's a good idea to keep a low profile
and minimal embellishment on the pocket pages to make
them easy to slide in and out:


And yep, you guessed it....back of the pocket page:


Pages 7 and 8:
 

Pages 9 and 10:


And last but not least.....the back cover....


I did add a bit of Want2Scrap pearls here and there....
always a nice, but low profile embellishment for a mini.
Also distressed all the edges with Black Soot Distress Ink.
I also used Scor-Tape to put these together....because 
even with people paging thru them over and over, they
will stay together....Scor-Tape holds really well!

Do you have a special event to make a mini album for?
Or just want to try one for fun?  Check out the G45 
collections....there is probably one that will work perfectly!

Thanks for stopping by today! 

Friday, March 15, 2013

Quick Cards by Laura C

One of the best ways to build a stash of cards to have on hand
is to grab a paper kit and enjoy an hour or two of creative bliss!

I absolutely love Echo Park paper collections....they contain
stickers (usually 2 sheets, one with alphas) and of course,
the gorgeous and versatile Echo Park paper!  I'm a huge
fan of their journal boxes too....they are great starting
points as inspiration for quick and easy cards!

This particular set was made using the "Note to Self" collection
from Echo Park....many to choose from at Cutter's Creek,
and a great quick craft if you only have a little creative time,
 but are itching to have some crafting fun!!

 And here are the close ups:


Just a few Want2Scrap pearls, a bit of twine and Black Soot
Distress Ink, is all I added to this kit....they are great for
card making, in addition to scrap booking--give it a try
sometime....it's definitely a great way to use your scraps too!

Remember, it's National Craft Month....grab a kit and get crafting!

Monday, January 28, 2013

Sweet 16 Birthday Card - by Tee

 Hi Everyone, Happy Monday to you. Today I am sharing with you a card (well, I made 50 of them but who's counting) for a Sweet 16 Birthday Party.

I used Teresa Collins Sophisticated cricut cartridge for the frame, the shoe is a svg file. I inked the edges then I added stickles to the zebra printed pattern paper and the frame. Added some rhinestones and a big black bow.

I love how this turned out but by invite 10 I was so done with them.. :)

Wouldn't think make a great birthday card too?

~Tee


Sunday, December 9, 2012

Gift Tags and More! by Deanna M

Well, I finally got my Christmas tree decorated this morning. So now I have a place to put those presents I have been buying once they are wrapped. However, before I can wrap them I decided I better get some gift tags made so I know whose gift goes to who. (I am famous for wrapping presents and putting them under the tree without tags. Keeps everyone guessing).

For these tags I cut some Bazzill white card stock 3" X 3". I then used cut some patterned paper 2 7/8" X 2 7/8" and 2 3/4" X 2 3/4". I used papers from the Echo Park Holly Jolly and Season's Greetings and My Minds Eye Winter Wonderland. The upper left tag I added a piece of white card stock that I rounded the corners and then stamped it with some embossing ink and embossed it with the WOW! Cable Car Red Embossing powder. For the tag with the Trees and the Stocking I used some of the stickers from the Holly Jolly collection. The Poinsettia tag was made using the Spellbinder Poinsetta die. I inked the poinsettia with some of the Festive Berries Distress Ink and I added some gold Liquid Pearls to the center. I am going to try to get a better picture of the tags in the morning, hopefully it will be much brighter than this even. Finally I used my crop-a-dile and punched a hole in the corner of each tag and added some Doodlebug Twine.
Next I made a couple of gift card holders. I found the directions here. Again my paper is from the Echo Park paper pads. I rounded the corners of the top of the gift card holders and the stamped my sentiment with some Evergreen Bough Distress Ink. I die cut the sentiments out using a Spellbinder die and my eBosser.

Thursday, November 8, 2012

Le Cirque Card with Lori

I recently received the Le Cirque 12x12 paper pad from Graphic 45, and my first thought was "Why the heck didn't I get this a LONG time ago?!"  I have to admit that I have a personal problem with modern-day clowns; I find them terribly creepy (probably thanks in no small part to horrible movies like It and Killer Clowns From Outer Space).  But I digress...

I love the vintage circus designs on these papers, including the clowns.  I have a few other fun projects on mind for these papers, but I wanted to start with something small, and I really liked an elephant image I found in the corner of one of the papers.  So I made a fun card with it using a sketch that fit my elephant image.


I love the slightly chaotic feel of the mix of patterns, "controlled mayhem" as one of the papers says!  I backed the elephant image with black cardstock, and edged everything else with black distress ink  for definition.  For contrast, I added sparkle & shine using some gold ribbon from my stash and some Copic Spica pens.


I used Sky Blue on the flowers and for the faux stitching around the square block, and I used Red & Olive on the flowers in the elephant image.


I adhered the bottom two layers with ATG adhesive and the square block and elephant image with foam adhesive squares.  I used Scor Tape to adhere the ribbon, and Glue Dots for the flowers.

I hope you enjoyed today's project as much as I did making it.  Thanks for stopping by!

Sunday, November 4, 2012

The Stockings Were Hung... by Deanna M


I  have a quick and easy card Christmas card today. It is not too early to start on yours as well.

I started with a white card stock base scored and folded to make a 4 1/4" X 5 1/2" card base. I added a dark green mat cut at 4" X 5 1/4" and then my patterned paper mat cut at 3 3/4" X 5". My patterned paper is from the Echo Park Holly Jolly 6"x 6" paper pad. I then cut a red mat at 4 3/4" X 3 1/2". I ran that through my eBosser (love this great machine!) and embossed all but the last inch or so of the paper using the Tiny Mosaic Cuttlebug embossing folder. I then used a sponge dauber to sponge Black Soot and Fired Brick distress ink randomly over my "bricks". My stocking was cut from the Tis the Season cricut cartridge at 3". Again this paper is from the Echo Park Holly Jolly 6"x 6" paper pad.

My sentiment was embossed using the WOW! Tea Garden Green embossing powder.  I attached my stocking to the front of the card with some foam tape and added an adhesive nail head from my stash. 

Wednesday, June 6, 2012

Birthday Card by Chris


I couldn’t resist. Remember Lori’s sweet numeral 3 card using her Gypsy and Hello Kitty cart? Well, I have a grandson who loves Superman and has a 3-year birthday coming up, so I decided to adapt her card. I used SCAL3 with my Black Cat and made one numeral 3 at approximately 4 7/8 x 4 ¼. (The font was Cooper Black.)  I then made a shadow layer which I duplicated, flipped vertically and unioned into a topfold card. I cut the cardbase from blue cardstock and the top layer from red and used my ATG to put them together.  I trimmed the bottom of the 3 a fraction of an inch so it would stand and then colored the superkid with my Copics. I just love my paint dauber, which was just the perfect size for coloring in the yellow circle with Mustard Seed Distress Ink. I added the “g” with a mini stamp I have and attached him with an action wobble. Another birthday card done with many thanks to Lori for the original idea.

Reds: R 24, 27, 29
Blues: B 12, 14, 16, 18
Skin:  E00, 21, 50
Hair: YR 31, Y11, Y21

Tuesday, April 10, 2012

Mother's Day Card by Deanna M


Guess what I have for you today! Remember those wooden laser embellishments by Kaisercraft Kim shared awhile back? I was able to get some of the Dress Forms and have a Mother's Day card made with them. I am loving these embellishments. They are so thin but still add a bit of dimension to your card.

Check out the cute dress forms you get in the package. Don't be surprised to see more projects featuring these cute dress forms. (If you are interested in these please let Kim at Cutter's Creek know, she can special order them for you. If there is enough interest, we may be able to convenience her to carry them in the store.)

Okay, on to my card. I started with a cream colored card stock card base cut and scored to 4 1/4" X 5 1/2" My first mat is cut at 4" X 5 1/4" and it is from the Mod Squad Core'denations Cut and Emboss paper. I used the reverse side of one of the papers. To be frugal, I cut the base layer of my dress from the same piece of paper, I used the front side of the paper for the base layer. I cut the dress from the Nifty Fifties cartridge at 5 3/4". The patterned paper top layer for the dress is from the Howdy Doody My Minds Eye 6" X 6" paper pad. The patterned paper behind my dress is also from the same paper pad cut at 3 3/4" X 5".  I inked the edges of all of my papers with some Antique Linen Distress Ink.

The dress form I used is the first on on the left in the picture above. I used some Oil Slick Glimmer Glaze to paint the legs on the dress form and the top little circle. (Glimmer Glaze is a special order item that I know Kim would be very happy to order for you if you are interested, just ask) I sprayed the remainder of the dress form with some Old Lace Glimmer Mist and inked it lightly with some Antique Linen Distress Ink.

I used some Scotch Quick Dry Adhesive to adhere my dress layers together and adhere them to the wooden dress form and then adhered the dress form to my card.

To finish my card, I added a piece of lace from my stash. I adhered the lace with some of the 1/8" Scor-Tape. I added a small pearl to the center of the belt area of the dress, and then 3 larger pearls to the lower side of the card. I stamped my sentiment with some Walnut Stain Distress Ink.
Related Posts with Thumbnails