Showing posts with label Halloween. Show all posts

Monday, October 31, 2011

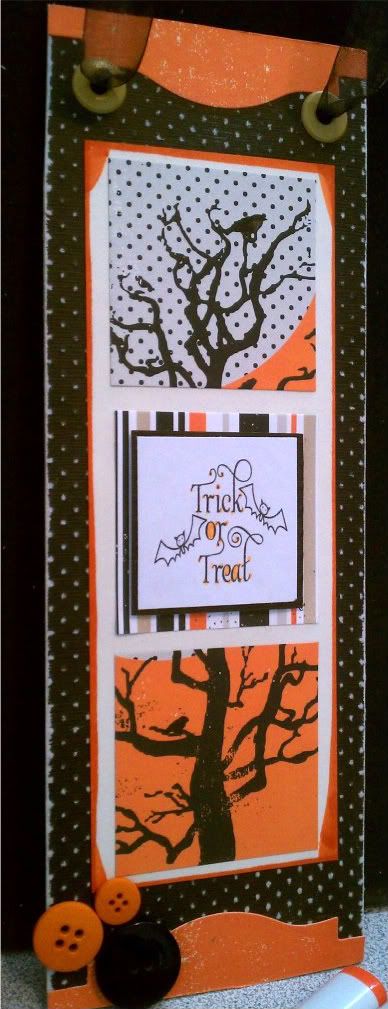
Melissa's Halloween Door Hanger

I started with an inspiration from the Sept/Oct issue of PaperCrafts Magazine (from page 60 if you have it).  I loved the idea of a holiday door or wall hanger.  My project ended up being 12" tall by 4" wide if you want to make one of your own. 

I took the cardboard from some empty cereal boxes and double layered for extra thickness.  I than cut some black paper from the Bazzill Dotted Swiss Pack and filed it down to make the dots pop.  Using my Spellbinders Labels 18, I cut out the largest shape on a sheet of orange paper from my Echo Park Apothecary paper pack.  I trimmed off the edges and added it to the top and bottom of my hanger.

I took a cream piece of paper from my stash and traced the edges of it with my copic YR18 for some added pop and added 3 squares of paper from the Echo Park Apothecary pack.  I added holes and eyelets with my big bite as the thickness of the cardboard and paper made it a little difficult with my cropadile. 

I added buttons from my stash and colored some white ribbon with my Copic 110 to add some black.  I printed the sentiment for free from here, trimmed and lined it with some left over black paper and used Kool Tak to make the sentiment pop up.

Then for extra, I went over the sentiment with my Spicas and the birds in the trees.

Hope you like it!! 
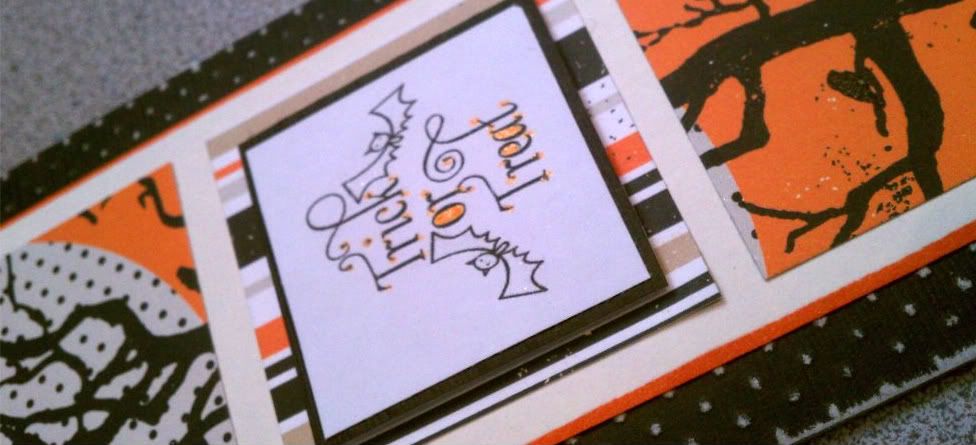

Image:  PaperCrafts Magazine Trick or Treat
Paper:  Bazzill Dotted Swiss, Echo Park Apothecary
Ink: Memento Tuxedo Black, Copics, Spicas
Embellishments: Spellbinders Labels 18,
Other: ATG, Big Shot, File Set, Kool TAC, Big Bite, Scor-Tape
Stash: buttons, ribbon, eyelets, cardboard, cream paper

Thursday, September 29, 2011

Lori's a Real Witch Today! - with Echo Park Paper

Hello and welcome to one more project for Echo Park Paper month here at Cutters Creek!  I've been feeling a little witchy lately, and I LOVE the Echo Park Apothecary Collection, so I thought I'd sneak in a Halloween decor project that is super easy.


Ta-da!  Are you impressed?!  The bottom circle for the hat brim is 7.5", but you can make this any size you'd like.  The top of the hat is just a cone rolled from an arc of cardstock.  If you don't have a compass (arc? compass?  what's with the geometry today?), which I don't, you can make your own with a pen or pencil with string tied to it (I used ribbon).  I did not measure; I just guessed and eyeballed it.  Hold the end of the string on the corner of the paper, stretch it taut, and use the pencil to draw a curve (arc) on the cardstock from one side to the next.  Once the cardstock is cut, line one straight edge with Scor Tape.  Roll it into a cone and press the Scor Tape to seal.

The fancy design on the hat brim is actually a leftover negative piece from a previous Cricut cut.  (You can see it on this project.)  After adhering the design to the cardstock base, you'll want to adhere the cone.  The easiest way to do this is with the iBond cordless hot glue gun.  I used a black glue stick from the Solid Color set, figuring it would blend in with the dark purple cardstock and black sheer ribbon I was using.  After adhering the cone, I added a 3/4" strip of the orange diamond paper as a hat band then glued down the sheer black ribbon, rolling it as I moved around the hat.

I used another 3/4" strip of the same paper to add a ribbon to the side of the hat.  On top of that I layered a cobweb cut from the cobweb pattern paper and a rolled ribbon flower using sheer black ribbon and a 2" Gluber, then embellished with some clear sparkly adhesive gems.  I added a couple more cobwebs cut from the paper as well.  I used Black Diamond Stickles to outline all of the cobwebs, and added some more sparkly gems to the other two webs.  I created the spider by tying pieces of black hemp cord, then unsticking enough of the Scor Tape to stick the end of the hemp cord down into the top of the cone and readhering the Scor Tape.

 Finally, I cut a label from the "Labels" sheet, curled the ends slightly, and adhered it to the front of the hat.  Other than drying time for the Stickles, this project took very little time -  I just played and enjoyed myself!  I'm already thinking of what I can make for Christmas next...
Related Posts with Thumbnails
