Thursday, February 27, 2014
Aged to Perfection! by Deanna M
With the coming of Spring (we all hope) comes for me a lot of birthdays. So, I decided I better get a jump start on some of the cards I am going to need.
I recently heard of a sunburst or starburst card and of course I had to give it a try. I started with 4 different pieces of patterned paper cut 1 1/2" X 4". Take each strip and cut it diagonally corner to corner to form two triangles. Lay your triangles out point side down and decide on the pattern you want.
Next, cut a piece of scrap card stock 2 3/4" X 5". First thing to do is to find the center of the paper along the 5" side. I drew a line from top to bottom to mark my center. Next I covered the entire piece of card stock with some Glue n Seal. Starting from the center of your card stock you start applying your triangle pieces being sure to let the hang off of each end of the paper a bit and be sure you are covering the entire piece of card stock. You may have to adjust your placement to be sure the corners are covered. One done allow it to dry and the cut all the overhanging excess paper off.
Next I adhered the entire panel to another piece of white card stock cut at 3 3/4" 5". And, Joy of Joy's I got to try out my new mini perfect layers when I cut my black mat. I used the 1/8" side and it was fast an easy to get a perfectly centered mat behind my image layer. I also added a 1/2" x 5" piece of black card stock to the front of my card.
I then cut a butterfly out at 2 3/4" using my Cameo and some green and black card stock. Before adhering the layers together I decided I wanted to glitter my butterfly. I pressed the black layer of the butterfly into my Versamark embossing pad and sprinkled it with some Ranger Sticky Embossing powder. I think everyone should have some of this embossing powder it is awesome, because, when you heat it up it goes from the white powder to shiny and becomes sticky. I then sprinkled the layer with some of the Black Soot Distress Glitter and then briefly heated the whole thing again to make sure the glitter was permanently adhered. It was quick and easy with the Sticky Embossing powder and I don't have glitter falling off my project. If you would like some of the Sticky Embossing powder shoot Kim and email and she can special order for you. It is so worth it. The Distress Glitters are also a special order item and they are all gorgeous. Some of the prettiest glitter I've seen.
Once I had the butterfly done, I adhere the two layers together with some Scotch Quick Dry Adhesive. I adhered the butterfly to my card front with some of the Clear 3D foam pads. I stamped my sentiment with some Memento Tuxedo Black Ink and added some bling to finish it off.
Thanks for visiting. I hope you will get in touch with Kim to get your Sticky Embossing powdered ordered. You won't regret it!
Wednesday, February 12, 2014
Raven Hair Beauty by Fran
I found a free digital image that I love. But I had no clue on how I was gone to color it. After much thought I chose my Copic Markers. The image is mostly colored black but using dark greys to give it the appearance of looking black. Black and red are the hardest colors to blend and shade. But I think it turned out pretty good. The rest of the colors came from the “E” family of Copic Markers. I Just used the Warm Greys and Skin tone colors. I used a Prisma colored pencil, white for the highlights on the hair.
The card dimensions are 5-1/2” by 6”. The card base is made from Bazzill Simply Smooth, white card stock. The other papers are from my stash. The corners and filigree came from the Silhouette store and cut using the Silhouette. I popped up the image using 3-D Adhesive Foam Pads. The image’s ears and belt are decorated with Gold Vinyl stickers. And I added the same colored vinyl stickers to the borders of the black card stock. I used two types of adhesive: ATG Tape Glider and Glossy Accents. And to finish the card off I used a Wink of Stella Brush marker in Clear Glitter.
If there is anything that I used but isn’t listed in the Cutters Creek Online Store you can always contact Kim Bush here. Kim is the one who got my Silhouette Portrait for me.
Thank you for stopping by and have a wonderful day!
Fran
Wednesday, July 3, 2013
Vintage 4th by Jearise
This card was easy to make and I like the way the look turned out in the end. I used Graphic 45 (Le Cirque Collection) paper for the striped background. I then used a blue designed 6 x 6 sheet from Echo Park's For the Record 2 pad (Email Kim if interested) for the middle and finally I used used Bazzill paper (Email Kim if interested) to stamp my generic design on.
To get my vintage look, I used Tim Holtz Ranger Distress Ink in frayed burlap and inked the edges and ran the pad across the surface of my bottom and middle. I then used my finger to smudge the ink and to lesson it's color. For the stamped middle, I used Tim Holtz Ranger Distress markers (Email Kim if interested) to color a acrylic stamp. Once the image was stamped, I sprayed it with Perfect Pearls Mist in heirloom gold. Finally, I layered my card using my ATG tape and gun and added the peals for something a little extra.
Happy 4th of July everyone!
Monday, October 31, 2011
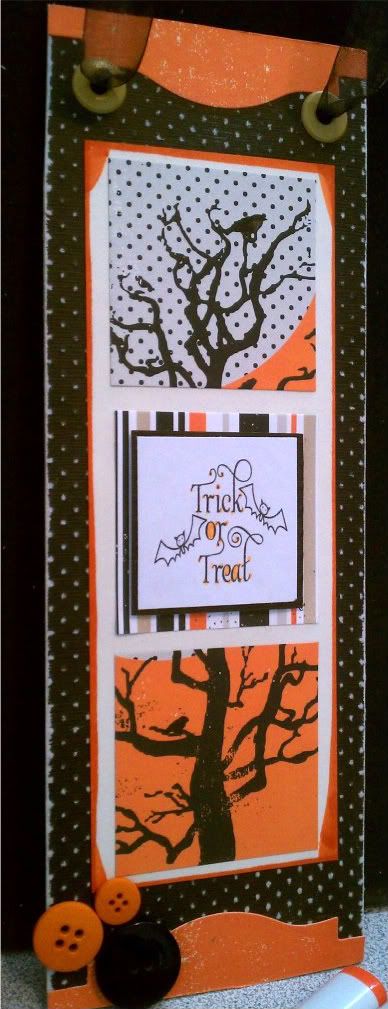
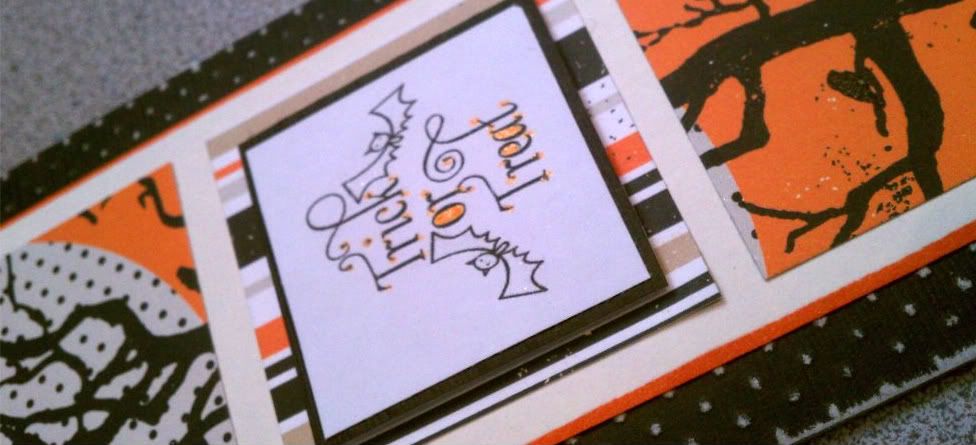
Melissa's Halloween Door Hanger
I took the cardboard from some empty cereal boxes and double layered for extra thickness. I than cut some black paper from the Bazzill Dotted Swiss Pack and filed it down to make the dots pop. Using my Spellbinders Labels 18, I cut out the largest shape on a sheet of orange paper from my Echo Park Apothecary paper pack. I trimmed off the edges and added it to the top and bottom of my hanger.
I took a cream piece of paper from my stash and traced the edges of it with my copic YR18 for some added pop and added 3 squares of paper from the Echo Park Apothecary pack. I added holes and eyelets with my big bite as the thickness of the cardboard and paper made it a little difficult with my cropadile.
Paper: Bazzill Dotted Swiss, Echo Park Apothecary
Ink: Memento Tuxedo Black, Copics, Spicas
Embellishments: Spellbinders Labels 18,
Other: ATG, Big Shot, File Set, Kool TAC, Big Bite, Scor-Tape
Stash: buttons, ribbon, eyelets, cardboard, cream paper
Saturday, January 29, 2011
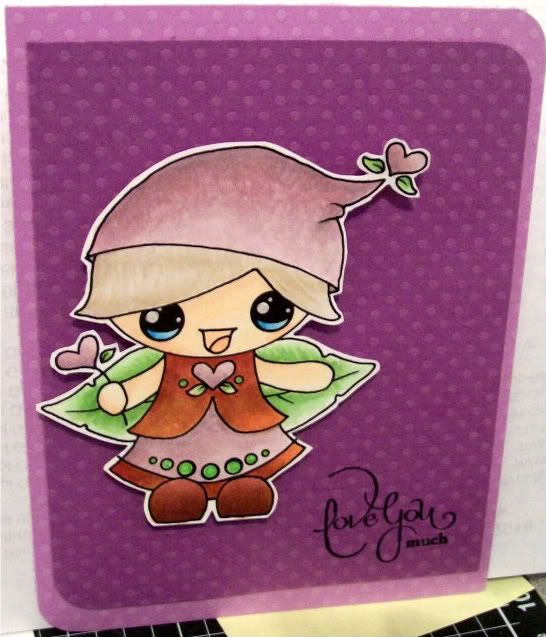
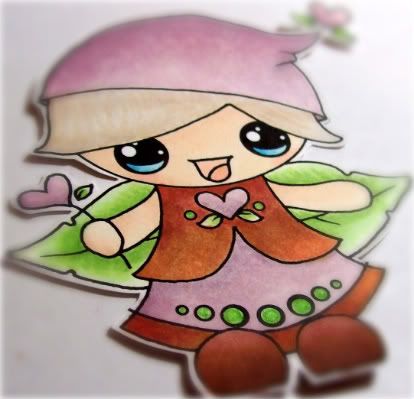
Simple Valentine's Card
Paper: Dotted Swiss MultiPack
Ink: Memento Tuxedo Black, Copics, Atyou Spicas, Smooch
Stash: corner rounder
Wednesday, December 15, 2010
Mandie's Poinsettia Card

I've had this cartridge for over a year and have made a few cuts with it here and there but never really thought about using the card bases. I really didn't know where to begin. I thought it would be nice if the layers were made to fit the card bases but I didn't see how to make them fit.... or could it be as simple as cutting the card and measuring the design? Couldn't be that easy, right? Well, it is! I cut my card base from the poinsettia cut on the Winter Woodland cartridge at 5". Then I used my Scor Pal to score my card.

Then I grabbed my Tim Holtz Design Ruler to measure the height of the poinsettia in the center of the card. It was about 3 3/4" tall so I cut the poinsettia at 3 3/4" with Real Dial Size off. Well, I looked at the cut that was way too small and turned Real Dial Size ON and tried again. Perfect fit! The cut normally has a set of leaves with it that aren't on the card front so that is what happened. Anyway, I didn't toss that 1st cut, I decided to layer it on top of the other one after I distressed them both with the Tim Holtz Frayed Burlap Distress Ink. I also cut the center of the flower at 5" (Real Dial Size OFF). Before gluing anything down though I pulled out a roll of packing tape and some clear micro beads that I've had unopened forever.... you could also use glitter for the same effect. Now, laid my card face down on my Bazzill Splat Mat (make sure you have a non-stick mat and NOT paper under your card) and carefully tore a strip of packing tape (don't get your fingerprints on it) and stuck it to the back of my design. You will need 2 strips to cover the whole opening, one strip for each side. Then pull your card up and add your beads or glitter to the sticky part. I love the stained glass effect my transparent beads created here.

Once it's totally covered I used my Zip Dry Glue to adhere my large poinsettia flat to the card base. Then I used some Pop Up Dots to attach the smaller flower after bending the petals a bit for more dimension. Then I used the Pop Up Dots cut in half to pop up the flower center. Finally to finish off my card I used my Crop-A-Dial to punch a hole about an 1" from the top and bottom along the score line and tied a ribbon through the holes. The directions seem like a lot but it took me about 15 minutes to whip up this card and I think it is so pretty!
Shopping List:
Winter Woodland Cricut Cartridge
Scor Pal
Tim Holtz Design Ruler
Tim Holtz Frayed Burlap Distress Ink
Bazzill Splat Mat
Zip Dry Glue
Pop Up Dots
Crop-A-Dial
Wednesday, September 29, 2010
Two Quick and Easy Cards with your Cricut by Mandie
Both card bases are 4” x 5 ½”.
First we have my Santa Card. I used the Paper Doll Dress Up Cricut Cartridge to cut out my Santa at 3”.
For the Santa suit and hat I used plain red card stock. I actually cut the jacket and hat twice, the second time I used a white textured paper to look like swirly fur and then just trimmed out the “trim” pieces. Before gluing down the trim I used a glue pen and added Chili Pepper Red Stampendous flocking. Then I used my Quickie Glue Roller Pen to adhere all of the pieces to my Santa. Then I grabbed a sheet of green from my Bazzill Dotted Swiss Multi-Pack and a scrap from a Christmas Paper Stack and a piece of the red leftover from cutting the Santa Suit and adhered them to my card. Then I used the Christmas Red Stickles to add a little bling to my card.
For my second card I used the Christmas Cheer and Opposites Attract Cricut Cartridges. I cut the wreath from Christmas Cheer at 3 ¼” and if you look closely the leaf layer is cut from a scrap of embossed cardstock that I had embossed with one a folder from the Plum Blossom Cuttlebug Folders Set. I cut the smaller wreath and berries at 2 ¾” and then adhered them all together. Then I used the
Christmas Red Stickles on my berries for some sparkle. Next I grabbed my Opposites Attract Cricut Cartridge and some American Crafts Gold Glitter Paper and cut the word “Joy” (it’s already welded on the cartridge) with the Opposite Font feature at 2”. Then I used my D’Vine Swirl Cuttlebug Folder to emboss my piece of red cardstock.
Hope you enjoy both of these cards and please stop by my personal blog: Mandie’s Scrappin if you’d like
to see more of the cards I created. I will also be posting some info about a great Blog Candy giveaway on my blog at the end of the week!
Cutters Creek Shopping List:
Cricut Cartridges:
Paper Doll Dress Up
Christmas Cheer
Opposites Attract
Other Supplies:
Chili Pepper Red Stampendous flocking
Christmas Red Stickles
Bazzill Dotted Swiss Multi-Pack
Plum Blossom Cuttlebug Folders Set
American Crafts Gold Glitter Paper
D’Vine Swirl Cuttlebug Folder
Quickie Glue Roller Pen
Sunday, August 8, 2010
Peace on Earth ~Flower Soft Card ~By Laura B.
This was a fast and easy card to make. It took more time to drag out supplies than to finish the card. I sprayed some of my Bazzill white cardstock with the Tattered Angels Midnight Blue Glimmer Mist. I let it dry overnight in anticipation of making this card, and another similar one. I cut the branch using my Winter Woodland Cricut Cartridge. I only cut the branch layer at 2" using brown cardstock.
I stamped my sentiment on my dry and misted cardstock (cut at 4" by 5-1/4") using Tuxedo Black Memento Ink. I matted the piece on a midnight blue cardstock cut at 4-1/8" x 5-3/8" using my Glue Glider Pro.
I added my snowflakes using some glitter stickers I had in my stash, and I covered them with Polar White Flower Soft instead of glitter. I added more Flower Soft Glue to the snowflakes to make them fluffier, and then added more Flower Soft. I also used my Flower Soft Glue to add "snow" to my tree branch.
I really wish the picture could show you the "glisten" a bit better from the Polar White Flower Soft It does look like falling snow! It must look good. My hubby actually called it "cool".
Products Available at Cutters Creek:
Cricut Winter Woodland Cartridge
Cricut Machine
Cricut Spatula
Flower Soft Glue
Flower Soft Polar White
Tattered Angels Glimmer Mist in Midnight Blue
Glue Glider Pro
Thursday, July 22, 2010
Merry Christ"Mouse" in July by Laura C.
This sweet little mouse is coming to wish you a Merry Christ"mouse" in July!! Made with a standard 5 1/5x4 1/4 base of red cardstock, inked with black chalk ink. Next is white bazzill prisma cardstock a 5 1/4x 4" piece, embossed with the A2 swiss dot cuttlebug folder and then the corners rounded. I colored the Stampabilities "Dear Santa I Ate Your Cookies" stamp with copics, added some flower soft to the little hat for some extra texture, and a bit of diamond stickles to the flame. I layered this with some paper from my stash, and added a border with a 1 1/4" piece of patterned paper, a ribbon, and another piece of the red cardstock cut using the Spellbinders scalloped rectangle die (I just trimmed off one long edge to use as the accent). If you type up a cute sentiment like "Hope you have a Merry Christ"mouse" for the inside, you'll
have a card ready to give a special someone!
Available at Cutter's Creek:
Bazzill Prisma Cardstock (white)
Copic Markers
Stickles (Diamond)
Stampabilities House Mouse ("Dear Santa I Ate Your Cookies")
Flower Soft (Polar White & Red)
A2 Cuttlebug Folder (Swiss Dot)
Spellbinders Die (Scalloped Rectangle)
Thursday, July 15, 2010
Sympathy Card by Vicki
It's always a sad day when someone passes away...and it's hard to create a card in the heat of all those emotions. I can never come up with an idea that is subtle and sensitive, but still shows some originality and creativity. Then, I got my hands on one of the Cuttlebug Oriental Weave folders, and I knew that it was perfect for just these occasions.
The final product is a simple, subtle card that relays my thoughts and still allows me to be a designer.
Cutters Creek products used:
Bazzill card stock
Cuttlebug Oriental Weave folders
Tim Holtz Distress Ink Pads in Walnut Stain
Cricut Expression/Cricut Wild Card cartridge
Design Studio
Sakura Quickie Glue Pen
We R Memory Keepers Corner Chomper
Tuesday, July 6, 2010
Asian Inspired Birthday Card by Chris
I have several embossing folders and hardly ever use them. So, I challenged myself to put them to good use on upcoming projects. Here I’ve made a birthday card for my DIL, using the cherry blossoms from the Plum Blossom set.
Monday, June 7, 2010
Copic Mondays-More Copic Basics by Laura Burleson
Did you know that some inks can ruin your Copic Markers?
Are some papers better than others for coloring your images?
Did you know that you can actually ruin your markers coloring on some surfaces?
If you are like me, I had no idea that some basic items I use for crafting could be damaging to my Copic markers. Granted, you can replace the nibs, so damage wouldn't be permanent. Still, I would rather do all I can to prolong my marker's life.
Copic markers have a shelf life of three year when kept properly capped. I know I would never let mine sit that long without use, but it is nice to know that they are made to last.
Okay, back to inks. Copic officially endorses using Tsukineko Memento or Brilliance Inks, Tim Holtz (Ranger) Distress Inks, A Muse Ink, and Stewart Superior Palette Noir Ink. Cutters Creek carries both Tsukineko Inks and Ranger Inks. You can add clear embossing powders or heat set the inks for your best results. Embossing inhibits the "running" or "bleeding" of your inks when coloring. Never use colored embossing powders. Colored powders react with the markers. Never use solvent based inks with your Copic Markers. These products are intended for use with water-based media, and they don't work well with Copics. Staz-On inks will stain will run and make a messy image, but worse yet, it ruins the nib on your markers. Stampin' Up, Close to My Heart, and other water based inks will run and discolor the nibs on your markers.
There is only one time you would use Staz-On inks with your Copics. If you wanted to color a vellum image, you would stamp the image on the front (glossy) side of your vellum. You then color the image from the back (rough) side of the paper using your Copics.
Now as for paper. Choosing a good paper is very important. You need one that allows the ink to soak into the paper, but also allows you to move it around while you are coloring. When a paper is super glossy, the ink will just float on the paper. It doesn't stick or soak into the paper. If a paper is too soft, then you aren't able to control the ink. It will bleed outside your image lines too quickly. You want to test your paper for saturation and bleeding before using it to color a project.
Copic International recommends two main papers for coloring with your Copic Markers, Bazzill (Prism) Simply Smooth Cardstock in Ivory or Neenah Classic Crest Solor White or Ivory 80# Cardstock. Bazzill papers are available from Cutter's Creek in both white and ivory. These papers absorb your inks beautifully without feathering too quickly. They allow you to work well with wet inks and blend your colors so nicely. You won't believe the difference!
Lastly, let's visit things that can ruin your Copic Markers. Never color over any glitter pens except your Atyou Spica pens. The Spica pens are made with special glass glitters that will not clog or gum up your marker's nib. Never color over Opaque White, White Out, Acrylic Paints or gel pens. These will ruin the marker ends, and once clogged, the inks will not flow properly onto your projects. White out has actual paper fibers in the liquid that will glob up in the marker tip. Color your projects first, and then add any gel pen accents. If you have colored over these products, don't worry. Your marker nibs are replaceable.
Copics are amazing markers. All of the basics to get you started are available at the Cutters Creek Store. If you need help selecting markers, papers, or inks, please ask. Kim or I will be happy to assist you!
Cutters Creek always stocks:
Copic Markers
Copic Spica Pens
Replacement Nibs and Nib Tweezers
Tsukineko Memento or Brilliance Inks
Tim Holtz (Ranger) Distress Inks
Bazzill Cardstock
Resources: Copic Markers/Imagination International Inc., Marianne Walker, and Jennie Lin Black, Regional Certification Instructors
Wednesday, May 5, 2010
Mother's Day Card by Laura B.
Beginning at the front your first fold will be a mountain fold on the 2" score line. Your fold on the 10" line will be a valley fold. For the center of the card you will fold the top and bottom strips the same way, and then the middle strip will be folded the opposite way. Fold the top and bottom strip on the 4" score line using a valley fold. Fold the middle strip on the 4" score line as a mountain fold. Fold the 8" score line on the top and bottom strip as a mountain fold. Fold the 8" score line in the middle as a valley fold. Use your bone folder to make nice crisp folds.
For the butterflies, I used different punches and I embossed scraps of paper using my heat tool.
I added my fibers using Beacon's 3 in 1 adhesive. The lavendar pearls are from Kaisercraft.
For my sentiments, I stamped them using my Inkadinkado stamps on a strip of Bazzill Ivory cardstock cut at 3.5" x 2".
I arranged various embellishments from my "leftovers" drawer to pull the card together.
Products available from Cutters Creek Store:
ScorPal
Bazzill Cardstock
Cuttlebug & Cuttlebug Folders
Beacon 3 in 1 Adhesive
Kaisercraft Pearls
Glue Glider Pro
Inks and Embossing powders
Ranger Heat Tool
Fiskars Craft Knife
Tim Holtz Design Ruler
Monday, May 3, 2010
Copic Mondays-More Marker Basics
We have been talking about coloring and color combinations in our recent articles. Are you new or relatively new to Copics? Do you have a bunch of markers, but you really aren't sure what ones to purchase next?
In Wendy's first Copic Mondays article she took you all through each type of Copic Marker. She explained the difference between Sketch, Ciao, and the Spicas. She also reference the Copic Color Wheel, remember? Did you all print one out?
This has to be my single most valuable Copic resource. I have the chart printed on the two main cardstock papers I use for my stamped images. Each tine I get a marker, I color in that box on the chart. Now you are probably saying, "Why on earth does she do two of those?" Well, your markers will color slightly different on each cardstock that you use. Sometimes it is a subtle difference, but it can be different. When you are trying to make that perfect project, it is important to know how your markers are going to color on your chosen materials.
Of course you don't need to make a full chart to check colors on every single project. It is, however, a good idea to check your colors on a scrap sheet of paper before coloring on your project.
Here are samples of my two main charts:
I know it is difficult to see the subtle differences in the photos, but there is a difference in the coloring on the two pages.
So how do you know what colors you want before you purchase?
When selecting your first colors, you want to buy in lots of three in your color range. As Wendy discussed, it gives you an option for a highlight color, main color, and shading color. My biggest question was still, "Okay, so which ones?"
Last week we covered my favorites for hair colors. In week 3 we looked at skin colors. So this week here are some of my other favorite color combinations:
Pinks: R81, R83, R85 (Mauve pink) or RV02, Rv21, RV23 (Girly Pink)
Oranges: YR00, YR12, YR16, or YR18 (Pumpkin Orange)
Yellows: Y00, Y11, Y21 (Buttery Yellow)
Yellow-Red: YR21, YR23, YR26 (Mustard Yellow)
Reds: R02, R22, R27 (True Red) or R22, R24, R29 (Rich Red)
Blue (for jeans): B91, B93, B95 or B97
Blue Green (Water) BG10, BG11, BG13
Lavender: V01, V12, V15 or V17
Yellow-Green: YG01, YG23, YG25 or for a softer look YG01, YG13, YG17
Green: G40, G21, G24 (Mossy Green) or G40, G94, G99 (Olive Green)
Brown: E31, E33, E35, E37
Blue: B24, B26, B29
For Shadows use C1, W1 or T1
Here is what they look like grouped together:
I hope this helps to give you a better idea of selecting colors in groups for highlighting and contrast. Leave me a comment to let me know what you would like to see in future posts on Copic Markers. I can't wait to attend the certification class and share more great techniques with you! Happy Monday~
Laura
All markers used in this post are Sketch Markers by Copic. All markers are available from Cutters Creek. The cardstock used was the Bazzill (Prism) white cardstock.
Monday, April 26, 2010
Copic Monday-Hair Coloring by Laura Burleson
For blond hair, I use YR23, Y23 and E35.
For brunette hair, I use E29, E25, and E31.
For auburn hair, I use E13, E17, and E19.
For black hair, I use C3, C5, and C9.
For grey hair, I use C1, C3, and C5.
This is a completed example of blond hair using the Y23, YR23 and E35:
When coloring hair use the same technique used for the skin. Lay down your lightest color for the entire head of hair. Next add in your darkest color, then your mid-range color. For images like the Pink Cat Studios characters, you will not have a lot of hair color definition.
This image shows a completed brunette using E25, E29, E31.
When coloring images more detailed images with more hair color lines, you will be able to add more depth to your hair color. You will have a greater area and more hair texture to cover. When you have images that have definite hair strand lines. Use strokes in those same directions to give the hair flow. Practice making short controlled strokes before starting to color your image.
For this image I started with my Y23 for blond hair. I used strokes that followed the natural hair growth.
After laying down my lighter color as the base. I added in my YR23 color. Again following the lines of the hair growth. Remember you can always go back and add more coloring as you progress through each step.
Lastly I added in my darkest color. I started from the roots of the hair and made it a bit darker using short feather-light strokes. I used more dark near the neckline and back of the hair. Remember your light source like we discussed previously. You want to layer in your darker colors where the hair would naturally be darker.
Here is a second example using the Auburn hair colors and the same image.
Coloring hair is an easy technique to master when you have the right colors. For all of my examples, I used the brush end of my Sketch Copic Markers. Enjoy trying these techniques! Please post your images. I would love to see your work.
Thanks for looking~
Laura
Cutters Creek Products Used:
Copic Sketch Markers - Colors listed above
Pink Cat Studios Stamps
Bazzill (Formly Prism) Cardstock
Memento Ink (Tuxedo Black)
Wednesday, April 21, 2010
It's All About Me by Laura B.
Have you ever thought about doing a layout just about you? It is a bit harder than I thought it would be, but it was very rewarding.
I pondered what I really wanted to say about me. What was my life like right that very minute. What did I want to remember? How did I feel? What were my favorite things?
I decided not to use any photos of me, but to instead include my favorite things. We all have those papers, embellishments, stickers, brads, ephemera, etc., that we just love. If you are like me, you save the small bits of your favorites, because you know you will find somewhere else to showcase them! For me, this became my showcase.
For the first page, I used journaling strips to describe me today. The date was November 15, 2009, and these were the things that really struck me as important facts, thoughts, and feelings I was having right now.
I typed all of my journaling onto my Bazzill cardstock, and then cut it into strips using my Cutter Bee Scissors. I ran strips of Scor Tape on the back of each strip for adhering them to my layout later.
Next I got out my 12x12 white Bazzill cardstock and started by drawing my grid. I wanted to have a grid and block system for this layout.
Each block measures 2.75" x 2.75". I used a 1/4" frame around the page and then a 1/8" space between the interior blocks. I drew my grids very lightly with pencil so they could be erased later.
For page one, I used 14 patterned paper squares from a paper collection in my stash that had been very well loved. Pink, black and white were colors that were currently my favorites. I adhered all of my blocks using my Glue Glider Pro. I left two spaces open for my title *see photo below*. I erased all of my pencil lines at this stage.
Next I added my journaling strips to random blocks. I left some blocks blank for embellishments. I added in buttons from my granny's button box, flowers from various sources, brads, Kaisercraft pearls and Kaisercraft rhinestones, ribbons, lace, pearl strands, and even staples.
I cut my title from thick cardstock and then used my Fiskars Corrugator to give it texture. I added the date using my Copic fineline marker in black.
For page two, I wanted to just have fun with it. I used the exact same layout for my page, but this time I only used nine 2.75" x 2.75 inch blocks.
This is where all of my favorites from my stash came into play. Everything on here was something I loved at the moment. Everything from paper, buttons, ribbons, pearls, rhinestones, stickers, pins, rub-ons, ephemera, and on and one was used to make this page. I was so grateful to have so many types of adhesive to use! I used my Glue Dots, Scor Tape, Glue Glider Pro, Fast Dry Adhesive and Beacon 3 in 1 Adhesive.
Just have fun and make a layout that says this is me. It is fun to look back and see how much I have changed in such a short period of time. My thoughts, concerns, worries and favorites are all different today versus just a few months ago.
Enjoy yourself and let your creativity flow~
Stop by Cutters Creek for these products:
Copic Markers, Scor Tape, Kaisercraft Pearls & Rhinestones
Monday, April 19, 2010
Copic Mondays Installment #3
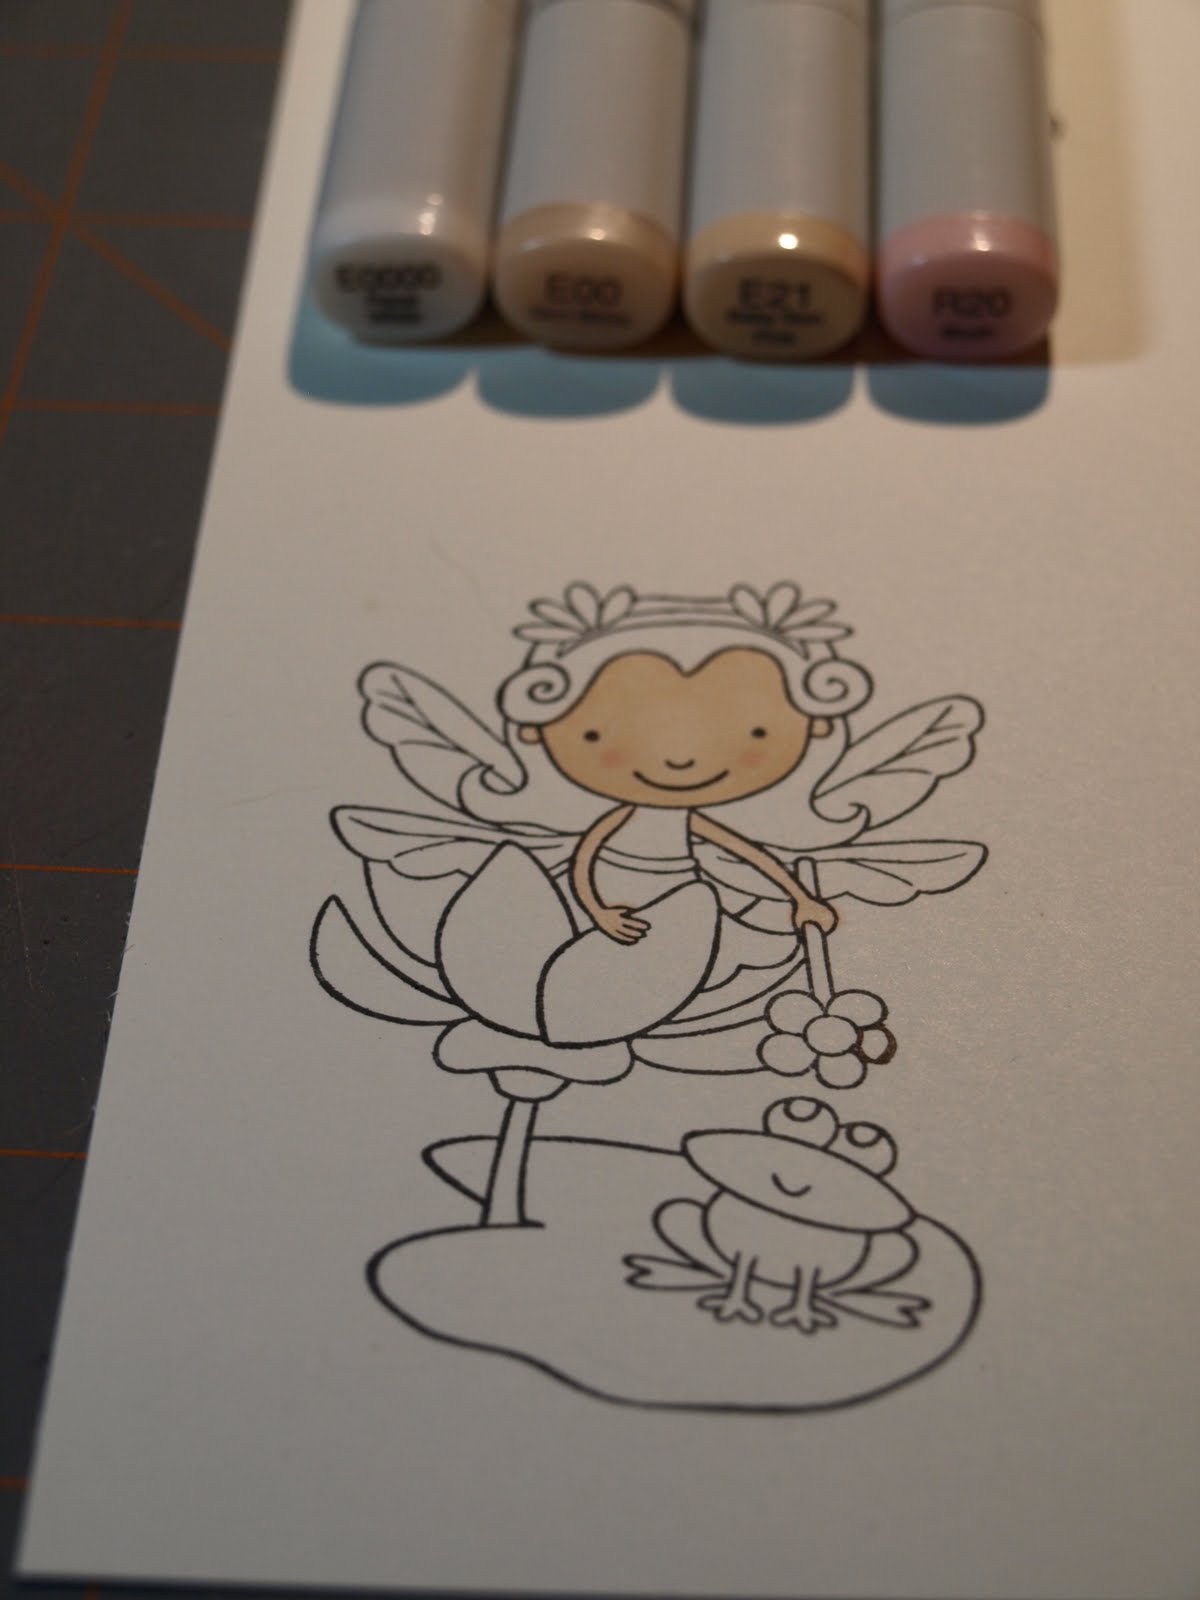
One of my first questions was, "Well, that is great, but how do I make the skin look like skin or the jeans look like jeans?" Like many of you, I wanted to be able to color basic images I had in my "stash" or ones I had traded with others.Today let's start with the skin tones. I had heard I needed E000, E00, E11, R20 (Blush) for skin, but how do I combine those to really make it look like skin? Could I do it? I was surprised the answer was yes. Let me show you what I learned!
First stamp your image on quality cardstock using a good ink like Memento Black Ink. I love the Bazzill cardstock at Cutter's Creek, and that is what I used. The stamp in this project is from Pink Cat Studios (Enchanted Lily Collection).
First you want to cover the entire area using your E000 or E0000. You don't have to worry about perfection, here. You are putting down your "base" coat. Work in small circles to get good coverage. Take your time, and get the feel of your pens.
Next we are going to add in E00. Again working in small circles. Choose where your light source will be, and leave those areas of the face lighter in your coloring. For my project, the light was coming straight on to Lily's face. I let her nose and forehead be slightly lighter than the rest of her face.
Next I added my facial shadows using E21. Around the hairline, the lower part of the face and ear area would all be the darker parts of the face. This is a a subtle variation in color. I lightly outlined the areas I wanted darker. Go sparingly. You can always return and add more color if you feel your shadows aren't quite right.
To give her cheeks a cute "glow", I reached for my R20. I made two small circles of blush area on her cheeks. I like this technique for cartoon type images.
Next I returned to my E00 to blend the colors together. Again, I kept the areas of the nose and center forehead lighter.
For her arms I used the E00 and the E21 for some shadow with the same technique.
Next time we are going to do the hair colors. I am going to cover the basic colors you will need for blond, brunette and auburn and black hair colors. I will be making Lily a blond, but you can do any hair color you choose.
Thanks for following along! I can't wait for the next installment!
Cutters Creek Products Used:
White Bazzill Cardstock
Copic Sketch Markers, E000 (or E0000), E00, E21 and R20
Memento Black Ink
Pink Cat Studios Stamps - Enchanted Lily
Thursday, January 28, 2010
Lea's Love

Nothing says L-O-V-E like our children. Make your layouts soft and sweet for Valentines’ Day. Added touches like stickers and dimensional pieces bring out the sweetness of your little ones. Pastel chalks are a perfect way to add extra color, soft yet vibrant. Pebbles Chalk palettes have so many colors along with shades, that it is easy to create a dimensional element in no time.
The technique used is called the One Color Pull-Out. This is where you use only 1 color of pastel in each area of the image for shading. Apply the color chalk you want in areas that the shadows would be and pull the color out from the shadow with the color lightening the more you pull the color out. Leave white areas for the highlights. Make sure you stamp your image in permanent ink such as Memento’s Tuxedo Black. Added touch: Edge little word die cuts with chalk as well. Not always necessary, but if you’d like, use an archival spray sealer to seal the chalk.
Supplies:
- Cardstock (Bazzill)
- Pastel Chalks (Pebbles Basic Palette)
- Photo’s or copies of photo’s
- Permanent ink, Memento’s Tuxedo Black (Tsukineko)
- Stickers and word die cuts
- Floral outline Stamp
- Memory and Craft Dot n’ Roller Dispenser (Glue Dots)
- Scissors (Tonic)
- Optional: Tortilla Stump (paper rolled to a point to use in fine areas of pastel work)
Saturday, January 16, 2010
Lea's Little Lovely
This is not your typical Valentine's Day card but it does cover the theme of love! - Postcard size piece of Bazzill Cardstock
- Small Manila Tag
- Ranger Daubers in: Dandelion, Angel Pink, Bamboo Leaves and Tangelo
- Orange Brad
- Glue Dots
Tuesday, January 5, 2010
Lisa's Warm Wishes!
Warm Wishes, a Happy New Year Card!A Flower Soft Card Project!
Supplies Include:
• Flower Soft Topper – Festive Teddies
• Flower Soft in - Poppy Red and Polar White
• Flower Soft Adhesive
• Glossy Accents Adhesive
• Stickles - Icicle, Starry Night, Lavender, Xmas Red, Champagne
• CuttleBug Machine
• Bazzil Swiss Dot Card Stock
• Spellbinder Die – Labels 4
• Nestabilities Embossing Set –Winter Border Set
If you have any questions about Flower Soft or any of the projects I create, please feel free to leave a comment! As always....