Showing posts with label Core'dinations. Show all posts

Monday, January 27, 2014

What Does the Fox Say? By Mindy

That is a very popular question lately and I think I've found the answer. I will reveal it at the end if the post.
I made a quick and easy Valentine's card using my Cricut, the Wild Card 2 cartridge, and some My Mind's Eye paper. I have to admit, that little fox is what sold me on this cartridge. 

I used some core'dinations cardstock for my base and sanded it to bring out the embossed design. I then cut the heart and the adorable little fix out of different patterned papers from the My Mind's Eye  6x6 pack. I finished the card off with some faux stitching and some googly eyes.
Now to answer everyone's question, what does the fox say?

Happy Heart Day of course, it's almost Valentine's Day!

Cutters Creek Shopping List
My Mind's Eye papers
Core'dinations Cardstock


Saturday, June 22, 2013

4th of July Tag by Michele

Hello everyone, hope your weekend is off to a great start.  For my project this week I decided to do a tag.  I used Tim Holtz & Ranger distress paper by Core'dinations , the colors are barn door and faded jeans and the tag was some red cardstock stash I had.  I cut out the tag(6inch) using Tags, Bags, Boxes and More with my cricut.


  The stars, firecrackers and flags I used from Lifestyle Crafts(Quickutzs), die cuts. I used some red ribbon from my stash to attach to the top. 


close up


I think I am going to hang it on my door so when people come up they will see it.

I hope you liked this simple project for the 4th.

 If you liked any of the products I have used and would like to get them please contact Kim here, and she will help you get these things and anything else you might be looking for.
Thanks for stopping by have a great weekend.

Wednesday, June 12, 2013

Masculine Card by Jearise

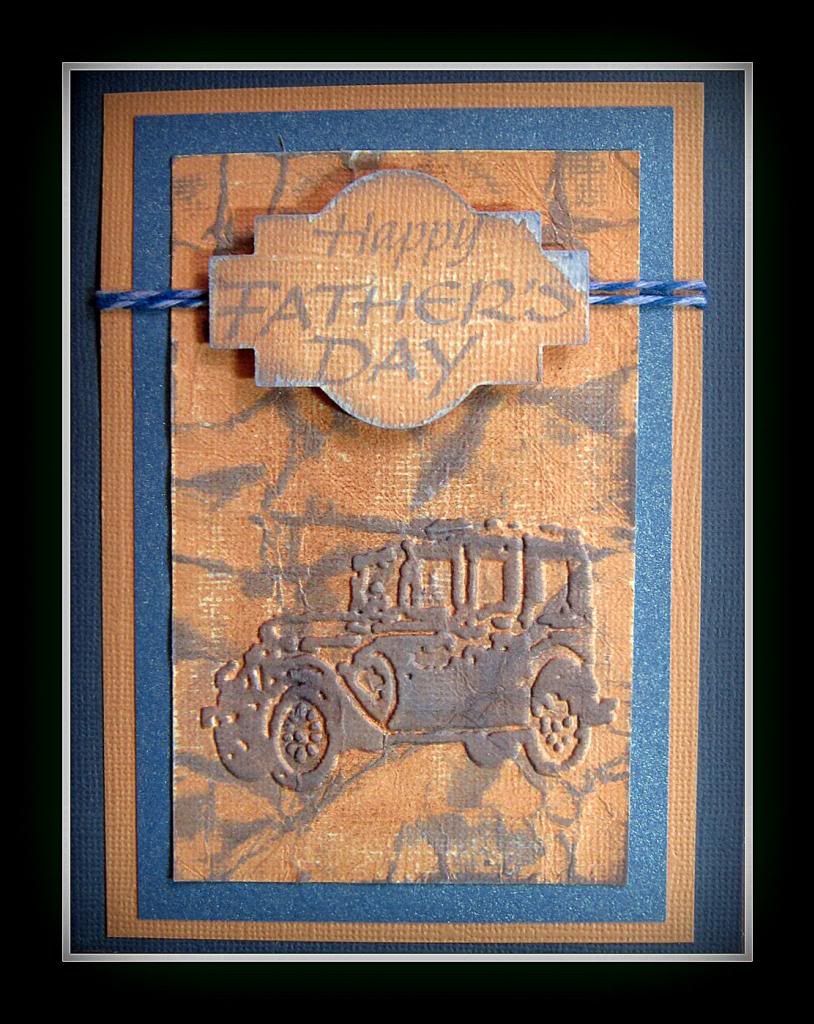
Today I made another Father's Day card but this time I used a fun and interesting technique. I'll start by showing my card I made and then I have included a tutorial as to how I did it. I hope you like it!


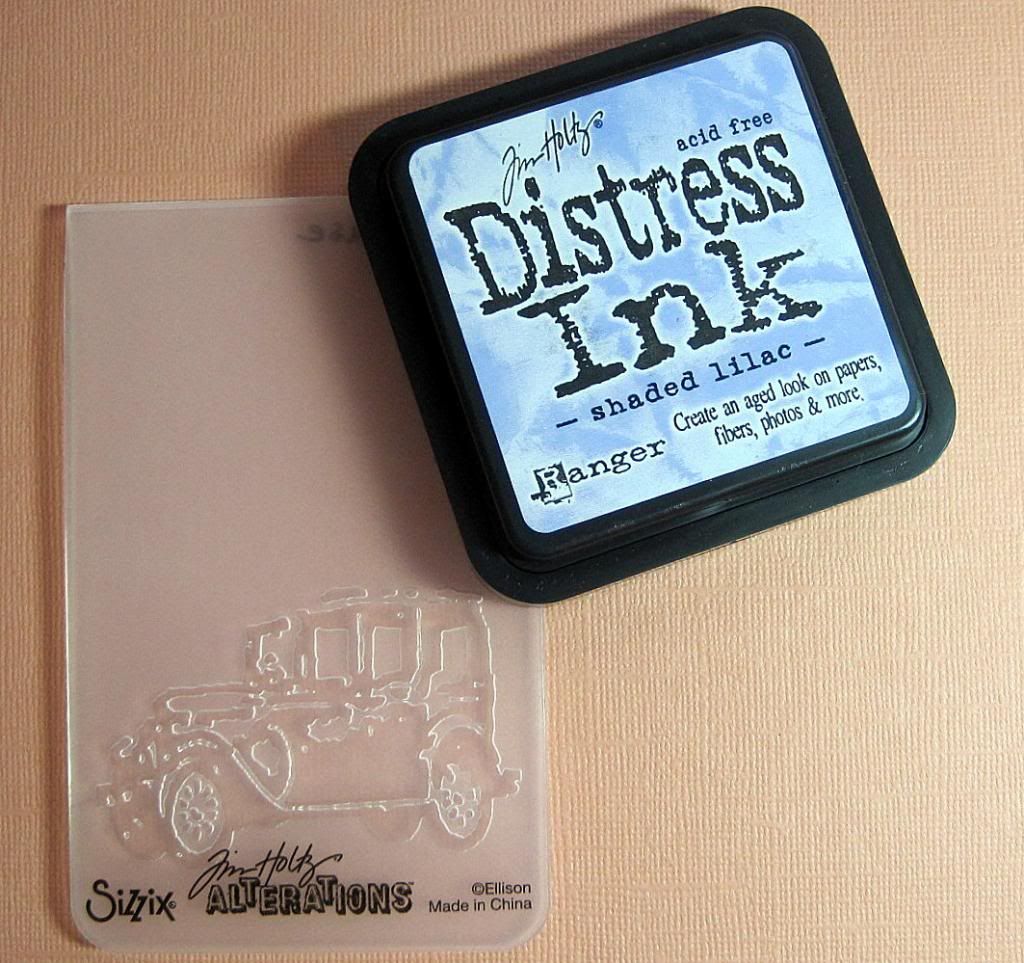
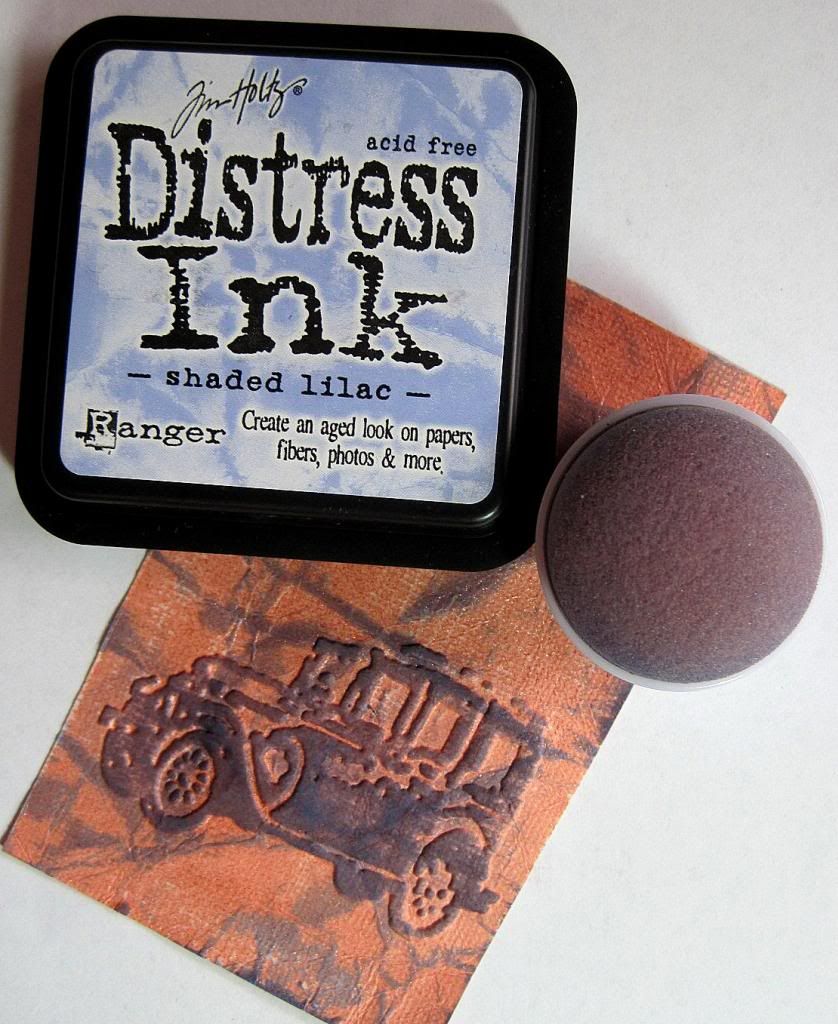
 Here is a picture of three of the four things you'll need to make this card.
Tim Holtz Distress Ink in Shaded Lilac
Tim Holtz embossing folder for Sizzix
Core'dinations paper
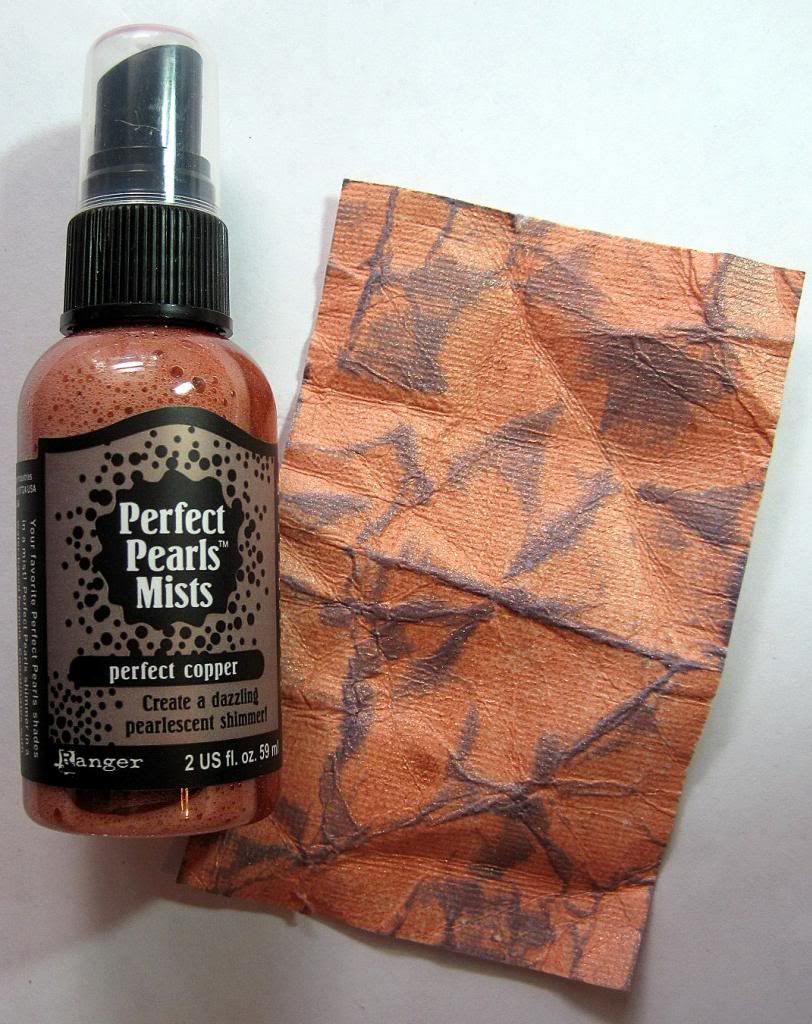
Perfect Pearls Mist

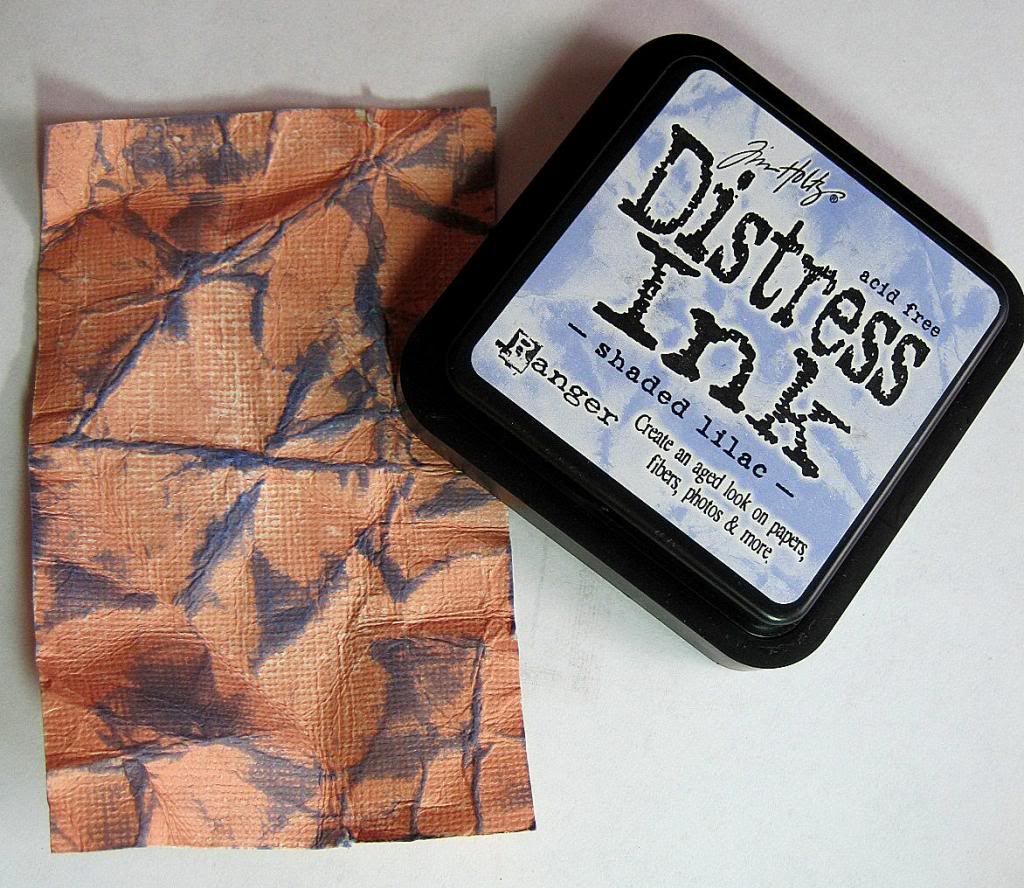
1. Sand and crumple the paper and then open it back up and lay as flat as possible
2. Gently run ink pad over paper so it just touches raised crinkled parts.
3. Spray paper with Perfect Pearls Mist.
4. Put paper in embossing folder and run through your Cuttlebug machine.

5. Take a sponge daubber and gently rub ink over just the embossed image.
And that's it!
I was going to have this as a birthday card but needed another Father's Day card and thought it would be perfect. I sanded and inked and stamped the sentiment and added some Doodle Twine. I thought the white stood out too much so I rubbed my twine on my ink pad to give it a soft shade of blue where the white is. Finally, I assembled the card with my ATG tape gun.

Thanks for stopping by today.


Sunday, May 26, 2013

Family Man by Deanna M

Welcome to the start of Masculine Week here at the Cutters Creek Design Team Blog.

We know that for many of you making masculine cards can be difficult. So we wanted to help you all out by offering up a full week of ideas, just in time for Father's Day. So be sure to stop by each day this week to see all of the Design Teams inspiration.

For my card today I have a Kraft card stock base cut and scored to make a 4 1/4" X 5 1/2" card. I added a dark blue mat cut at 4" X 5 1/4". I added a patterned paper mat cut at 3 1/2" X 4 3/4". I did this so I had more of the dark blue showing.

My image is cut using the Suburbia Cricut Cartridge at 4". (Check with Kim, she can order it for you. It has some great silhouette images on it of men, women, and children. Kim can be contacted through the store here. Be sure to browse around while visiting the store.) The rug is a Silhouette cut that was cut at approximately 3 1/4".

I used Scotch Quick Dry Adhesive to put my cuts together. I really like using this adhesive for things like this because it gives you a few seconds to get your cut layers lined up. It is awesome adhesive if you haven't tried it yet. My sentiment is stamped with Memento Tuxedo Black ink. I adhere the rug to the card front with the Scotch Quick Dry Adhesive. The other man in the chair and the sentiment are attached with foam tape.

My blue mat and the base layer of the man are cut from some Tim Holtz Core' denations kraft core card stock. I know Kim can get this for you because she ordered it for me.

The patterned paper I used for the background and the rug are all from a 6 X 6 paper pack by Fancy Pants called Swagger. Its a great pack for masculine card. Kim doesn't carry this but can special order it for you, just ask.


I chose this image because it reminded me of my grandfather. I remember when I was a child visiting my grandparent. Grandpa would come home at night and sit down in his chair in the living room and read the paper. I have a lot of happy memories about my grandparents.

I hope you will find plenty of inspiration throughout this week. Please let us know if you find it helpful in when you need to create a masculine card.

Wednesday, May 15, 2013

A Golden Tag by Jearise

Hello,

Today I have another tag to show you. I was never one for tags but have started making a few lately and love what I can do with them. I think I like the idea of working on a smaller scale.

I started with Core'dinations papers and used the Sweet Tooth Boxes cartridge to cut out this lovely tag. There are more then boxes on this cartridges (Check with Kim about ordering it.)

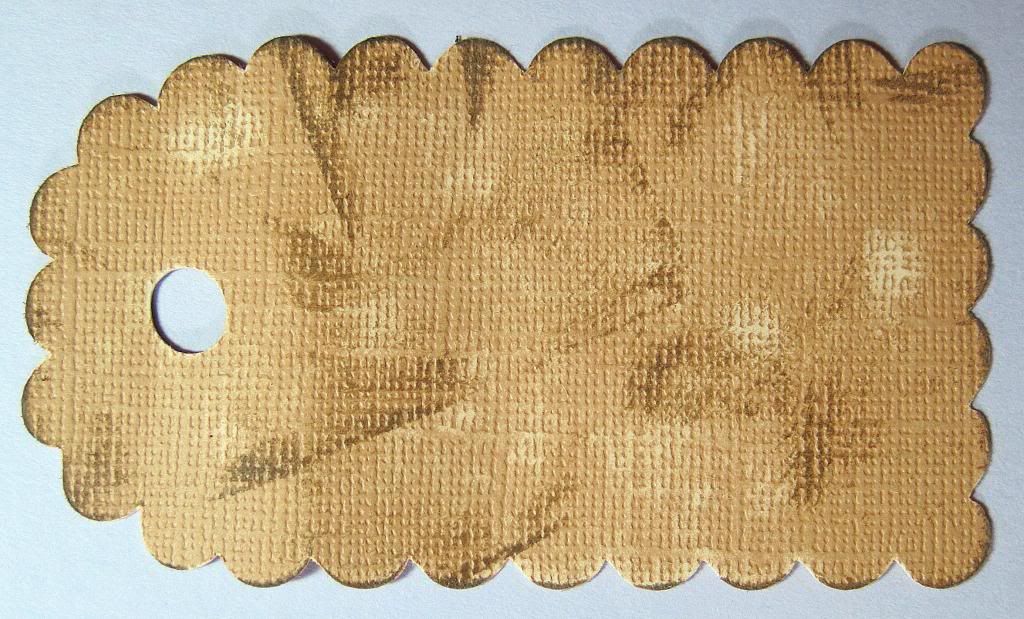
I then sanded and used Tim Holtz distress ink (frayed burlap pad) on the tag.

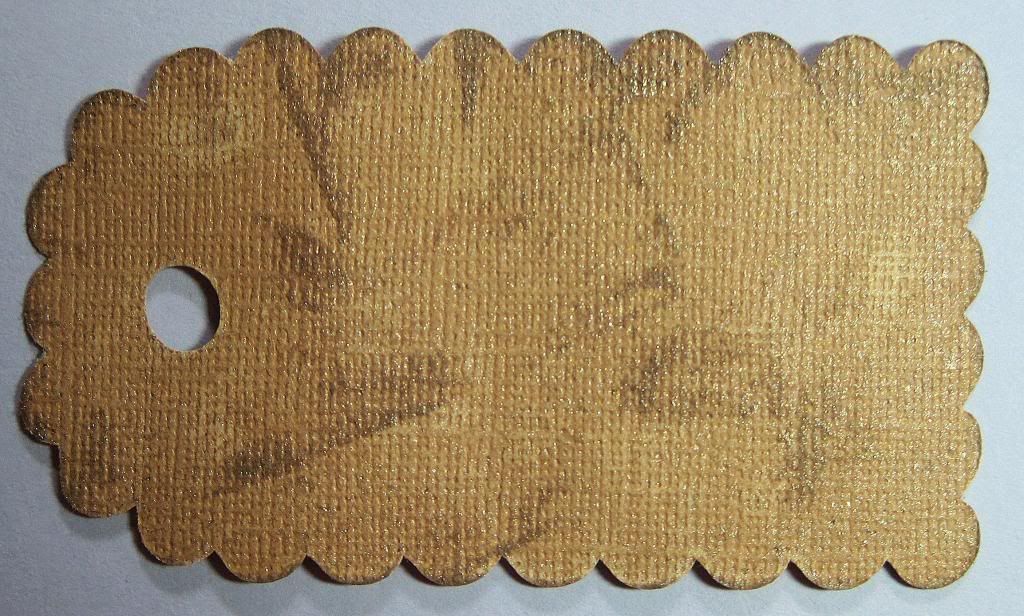
Next I added Perfect Pearls Mist (heirloom gold). It's hard to see unless you enlarge the pictures.
Finally I ended up with this...
The flower is from the Flower Shopped cartridge by Provo Craft (Check with Kim about ordering it.) and I used Tattered Angels (Starfish) for the flower petals and Stickles (yellow) for the center.

It's been a pleasure to show you another tag and I hope that I have inspired you to try a tag if you haven't made a few already.

Thanks for stopping by,
Jearise from Lorby's World

Saturday, May 4, 2013

What’s Cookin’?


I think this is the first time in a very long time I had no clue what type of greeting card I was going to make.  So I checked my files and found a digital image by Mo Manning I had for a long time and never used it.  So I dusted it off and colored it with my Prisma Colored Pencils.  Once I started coloring my mojo was coming back!
(Those of you that use Prisma Colored Pencils and the Gamsol technique here are the colors I used to color the image: Sienna Brown, Terra Cotta, Black Grape, Marine Green, Warm Grey, Dark Brown, and Poppy Red).
(I didn’t use  Prisma Colored Pencils for the skin. I used Skin Tones by Lyra which comes with 12 beautiful skin tone shades).
OLYMPUS DIGITAL CAMERA
My card base is made from plain white card stock using Spellbinders Grand Nestibilities S4-161 Labels one.  Then I used Spellbinders Nestabilities Labels one for my image and the label behind the image.  The labels were cut using my Cuttlebug.
All the flowers surrounding my image on the front and inside of the card was made with two punches from EK Success called Retro Flower.
The flourishes in each of the two corners on the front of the card were created using a die from Memory Box called Elegant Scrollwork.  The flourishes were also cut out using my Cuttlebug.
Papers:  Green paper is from the 6x6 Paper Pad called This & That by Lori Whitlock.  The Orange paper is by Core’dinations.  And the Purple paper is from my scraps stash.
I used two beautiful colors of Stickles Glue by Ranger called Lavender and Distress Stickles called Wild Honey.
Inside my card I used the same papers as the outside.  The sentiment was typed in WORD sized at 28 point; I colored the font using a color from WORD that closely matched the orange paper.  Then I used a Spellbinders Shapeabilities called Ribbon Banners.  The printed sentiment fit exactly on the banner I chose to use (there are 4 in the set). 
I used two types of adhesives for my card:  Glue dots (super-strength) by Glue Dots and Glossy Accents by Ranger.
You can get the following items from the Cutters Creek Store:
If there are any items that I used and you would love to purchase them just give Kim Bush a holler and she may be able to special order them for you.  You can contact Kim here.
Thank you for stopping by,
Fran

Friday, June 22, 2012

Window Card by Deanna M


I saw the idea for this card last December in a card making magazine and have been wanting to make one. My card base is white Bazzill Smooth card stock cut and scored to make a 4 1/4" X 5 1/2" card base. My patterned papers for the curtains is from the My Minds Eye paper pad Miss Caroline All Dolled Up. Using the Plantin Schoolbook Cricut Cartridge I cut the scallop at 1" and then trimmed it to fit across my card. My "curtains" are cut at 1 7/8" X 4". I ran the paper through my paper crimper to get that pleated look. For my window I cut the image from the Christmas Solutions cartridge at 3" out of the Mod Squad Cut and Emboss Paper by Core'denations. I then cut the view for my window from a scrap from the Echo Park Summer Paper pad from last summer. I adhered the view down straight to my card. I attached the window with some of the ASI 3D Clear Foam. I also attached the curtains and the valance with some foam tape. To finish it off, I added a couple of bows.

Tuesday, May 1, 2012

Tuesday Tutorial-Spellbinder Edgeabilties Dies by Deanna M

So I have a video for you today on using the Spellbinder Edgeabilities dies. These are new to me and I learned a couple of things so just thought I would share what I found out for anyone else who hasn't used these. I used the Spellbinder Edgeabilities Decorative Inserts and the Classic Edges Two set.


Now, here is a photo of the card I made and shared in the video.


As I said I used the Spellbinder Edgeabilities Decorative Inserts and the Classic Edges Two for the the bee border. My card base is 4 1/4" X 5 1/2" Yellow Core'denations card stock ( suspect Kim can special order this card stock for you). I added a black mat cut at 4" X 5 1/4" mat and then a paper patterned mat from the My Minds Eye Howdy Doody 6" X 6" paper pack cut at 3 3/4" X 5". This paper already had a flower image in the upper left hand corner that worked perfectly with my bee. I cut the bee at 3 1/4" from the Garden Soup Cricut Cartidge (another item that Kim can likely special order for you.) I added my bee border and some black and white gingham ribbon to my card. Then used some foam tape to add my bee to my card and added some buttons from my stash with some glue dots. I am so pleased how this card turned out. Thanks for visiting us.

Tuesday, April 10, 2012

Mother's Day Card by Deanna M


Guess what I have for you today! Remember those wooden laser embellishments by Kaisercraft Kim shared awhile back? I was able to get some of the Dress Forms and have a Mother's Day card made with them. I am loving these embellishments. They are so thin but still add a bit of dimension to your card.

Check out the cute dress forms you get in the package. Don't be surprised to see more projects featuring these cute dress forms. (If you are interested in these please let Kim at Cutter's Creek know, she can special order them for you. If there is enough interest, we may be able to convenience her to carry them in the store.)

Okay, on to my card. I started with a cream colored card stock card base cut and scored to 4 1/4" X 5 1/2" My first mat is cut at 4" X 5 1/4" and it is from the Mod Squad Core'denations Cut and Emboss paper. I used the reverse side of one of the papers. To be frugal, I cut the base layer of my dress from the same piece of paper, I used the front side of the paper for the base layer. I cut the dress from the Nifty Fifties cartridge at 5 3/4". The patterned paper top layer for the dress is from the Howdy Doody My Minds Eye 6" X 6" paper pad. The patterned paper behind my dress is also from the same paper pad cut at 3 3/4" X 5".  I inked the edges of all of my papers with some Antique Linen Distress Ink.

The dress form I used is the first on on the left in the picture above. I used some Oil Slick Glimmer Glaze to paint the legs on the dress form and the top little circle. (Glimmer Glaze is a special order item that I know Kim would be very happy to order for you if you are interested, just ask) I sprayed the remainder of the dress form with some Old Lace Glimmer Mist and inked it lightly with some Antique Linen Distress Ink.

I used some Scotch Quick Dry Adhesive to adhere my dress layers together and adhere them to the wooden dress form and then adhered the dress form to my card.

To finish my card, I added a piece of lace from my stash. I adhered the lace with some of the 1/8" Scor-Tape. I added a small pearl to the center of the belt area of the dress, and then 3 larger pearls to the lower side of the card. I stamped my sentiment with some Walnut Stain Distress Ink.

Tuesday, March 20, 2012

M-Bossibilities Tutorial by Deanna M


I just received a couple of the M-Bossiblities by Spellbinder and of course had to try them out and wanted to share how fun these are.
Splendid and Simplicity M-Bossiblities


I embossed a couple of the 4 1/4" X 5 1/2" Cut and Emboss paper packs from Core'denations. What great papers, I love them and they are the perfect size for cards. Look at the great colors you get.


Top side
Colored Side
This card is a 4 1/4" X 5 1/2" white card base. I cut a red mat 4" X 5 1/4" and my embossed white washed mat was embossed with the Splendid M-Bossibilites folder that I sanded with my sanding block. My butterfly is cut at 2.75" from the Once Upon a Princess cartridge. I used Elegant Edges to cut the scalloped oval and stamped my sentiment with some Festive Berries Distress Ink which was part of the Limited Edition Winter colors. Finally I finished off the butterfly with some Diamond Ice Stickles and added to my card with some clear foam squares.


Here is a short video to show you how you can use the M-Bossiblities and the Cut and Emboss paper. There are several different types of the Cut and Emboss paper I am showing you just two same with the M-Bossiblities folders. Be sure to pop on over to Cutterscreek.com to check out the assortment available through the store.

Tuesday, January 10, 2012

Double Dutch Fold Card

My Tuesday Tutorial post for you today is a card I saw on Splitcoast Stampers called a Double Dutch Fold Card. Of course I had to give it a try.

This card fits in a standard A2 envelope. I started with a piece of Bazzill White card stock cut at 4 3/16" X 9" and scored at 5 1/2". I also cut a piece of the white card stock 2" x 8 1/2" scored at 2 1/8" and 6 3/8". I used my ATG Gun to adhere the the larger piece to the smaller piece centering it between the folds of the smaller piece. When finished the top folds down and the two smaller sides fold in like a gate fold card. I then cut a dark turquoise mat from Core' denations card stock. For the larger flap I cut the blue mat at 4" X 3 3/4". The smaller flaps I cut the blue ( think I didn't write it down sorry) at 2" X 1 7/8". The polka dotted patterned paper is from  the Echo Park Paper Pad. The patterned paper was cut 1/4" smaller than the blue mat.  I cut my cupcake from the Sweet Tooth Cricut cartridge at 3 1.2". I cut the heart out of red paper from my stash and then used some Magenta Stickles on the heart to give it some sparkle. Finally I add some faux stitching and doodle dots to the chocolate layer.
I sure hope you will give the card a try. It was a lot of fun to make something a little out of the ordinary.

Monday, November 21, 2011

A Beautiful Autumn Card by Chris

I am still working on ways to use and reuse many of my cool items from Kim. One that kept looking at was the Cuttlebug Owl Flourish Embossing Folder, which I just didn’t want to do as an embossed card front again and I wanted to try out a new technique I learned, but what to do, to merge them?

I started with a center step card. The base was 11 by 5.5 inches and I had some cute paper that looks like tree bark. I decided to use my Scor-Pal and I cut both sides one inch in from the edges and from 1-inch mark to about 6.5 inches. Both sides were then scored between the cut line and the edge at 1 inch (mountain), 2 inch (valley), and 6.5 inches (mountain) and the center piece was scored at 5.5 inches (mountain). I then folded them to make my card shape.

Link
I used my Cricut cartridge Stretch Your Imagination (check with Kim if she can get you this one) and cut the squirrel and nuts with the shift key at 4 inches. I made a shadow piece and using Pop Up Dots raised the acorns up slightly. I used my ATG to glue it down to one of the side steps. I then took my Owl Flourish and embossed some Core’dinations Cardstock, sandpapered the raised image, and fussy cut the owl and flourish out of the paper. I glued this right along the top of the lower fold in the center and added some Cinnamon Stickles for the eyes. I then cut the word "Autumn" from the Stretch Your Imagination cart at 5 inches and rubbed the edges with some Walnut Stain Distress Ink. The shadow is cut from Chestnut American Crafts Glitter Cardstock. I did a multi-cut of 2 to get this out and inked the cut edges with Walnut Stain. I used my Zig Glue Pen to attach the word to the shadow and then pop dotted the shadow up along the base.


The card needed a sentiment and I decided to use my Spellbinders Labels Twenty Three, printed the sentiment with my computer and inked the edges with Vintage Photo, Mustard Seed, and Ripe Persimmon Distress Inks and glued it to the back of the card.


The card still needed some pizzazz. Taking a fall leaf stamp, a Clear Tim Holtz Distress Ink Pad, my Embossing Magic pad, and some white embossing powder I stamped and embossed the image several times on cream cardstock. I then used several of my Distress Inks (Dried Marigold, Mustard Seed, the Limited Edition of the Fall Colors, Walnut Stain, Spiced Marmalade, and Crushed Olive) and applied them directly to the paper smearing them alongside of each other over the leaves. Then I took my Tattered Angels Dazzling Diamonds and sprayed the heck out of each of the leaves. It looks a mess but be patient. Set them aside and let them dry—totally dry, no rushing. You get a blended, shiny and crisp texture to the cardstock when it dries. (It works terrifically on watercolor paper too.) When the leaves were totally dry, I fussy cut them out and used pop dots to arrange them on the card. I do so hope you can see the shine in the pictures, but if not—take my word for it, it’s great!

I’m thinking that this might look lovely as part of a table centerpiece rather than mailing it out. What do you think?

Saturday, August 6, 2011

Congrats by Melissa

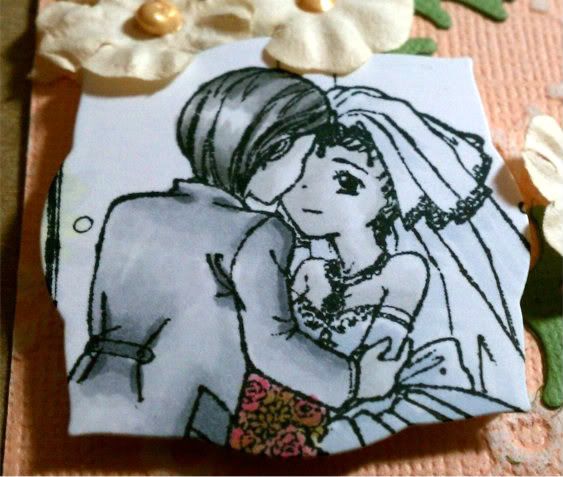
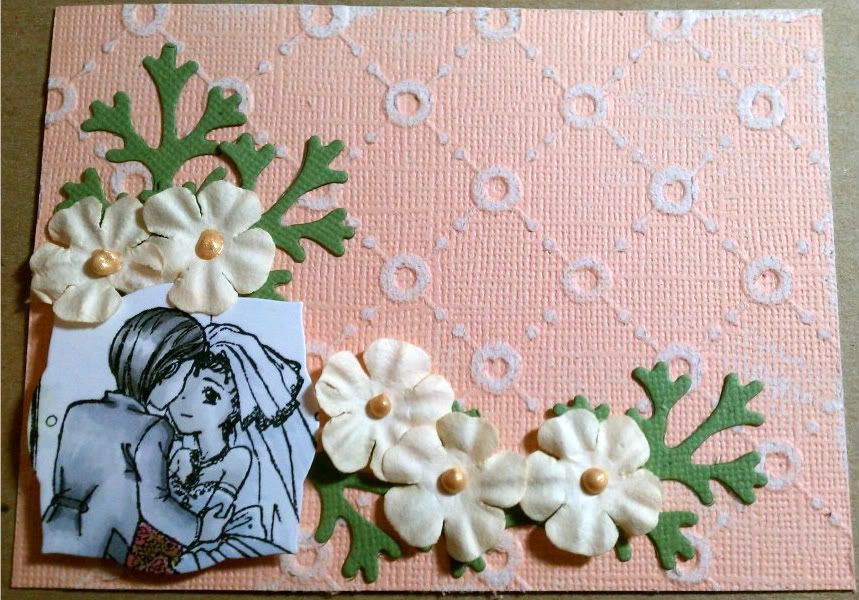
So I made a really simple congrats card for a bride and groom.  The total card size is 3 1/2x 4 1/2.  So it's great to slip in with a gift.  

I started coloring this adorable image from InStyle Stamps; the Wedding Couple.  I colored in all grays to make it classic looking.  Once done, I used my Labels Three to cut out the area around their faces.  


I sanded my base paper which came from the Cosmo Cricket Core'dinations pack.  I than used my Big Shot again on leaves from the Foliage set.  I used some paper flowers from my stash and used some Gold Liquid Pearls for added effect.

What do you think?


thanks for looking!!

Paper: Bazzill Simply Smooth, Core'dinations
Ink: Memento Tuxedo Black, Copics,
Embellishments: Liquid Pearls
Other: ATG, Glue Pen, Spellbinders: Foliage and Labels Three, Big Shot
Stash: Kaisercraft paper flowers: cream

Groom Hair: T1, T3, T4, T6
Skin: T0, T1
Dress: C1, C2
Veil: C00, C1
Flowers: R83, R85, E04, YG91, YG93, YG95

Wednesday, May 25, 2011

Chris' Key To My Heart Card

Have you tried the Cuttlebug Embossing Plus folders yet? They make putting together a card or a layout a breeze allowing you to cut and emboss in one step. Here I used the Vintage Collage set to make my DH’s Father’s Day card. To start I used a Kraft paper base cut and folded to a 5x7 size. I then used one of the Oriental Weave embossing folders with Core’dinations Cardstock, which I sanded to bring out the blue core. This embossed layer was matted on two slightly larger rectangles—one blue and one red—using Scor-Tape.


I then took two chipboard letters and sprayed them with Rum Punch Glimmer Mist (a fantastic new color), and set them aside. I also cut a length of seam binding and sprayed that with the mist and scrunched it up as I dried it with my heat gun. I then tied 3 knots in it and adhered it to the left edge of the card with Glue Dots.

Next I used my Vintage Collage set to cut out the pointing hand, the key, and the heart. Since I wanted each one to be different colors, I cut three times. Before I removed the finger from the folder, I lifted the inking panel and used Tea Dye Distress ink on the hand and Faded Jeans Distress ink on the cuff of the shirt. I used American Crafts Glitter Cardstock (Chestnut) for the key (you can’t really see the embossing, but the glimmer is sufficient for me), and a piece of scrap red cardstock for the heart.

To assemble the card I Scor-Taped the rectangle close to the upper right-hand corner. Using quick-drying glue and some pop dots, I laid out the letters, hand, and key, added a few words typed and colored on my computer and edged the heart with Christmas Red Stickles. And since my DH is an oldies fan, I think he’ll love having a line from the Isley Brothers song on the cover of his card.

Wednesday, May 18, 2011

Melissa's Anime Image

So today, I wanted to show some really simple, lovely cards I made using one of the oriental weave embossing folders from Cuttlebug.  I was trying to think of an image that would compliment the embossing folder.  So I went to my favorite site for anime images; http://www.deviantart.com/

I LOVE this site.  One of my favorite artists is Princess Elemmiriel.  She has the most gorgeous line art to color.  I chose Lady Rose Dragon . . . I can't tell you how many cards and miscellaneous items I have made with this image in particular.  So while I waited for my printer ink to dry - -you can never wait too long - -I embossed a beautiful Jade Green and a Silver Gray paper from Core'dinations Gemstone pack with my oriental weave embossing folder.  I would highly recommend this paper as well!   I centered them on some back cardstock from my stash and started coloring my images.  Bytheway, these cards are the standard A2 size :o)

So I tried to stay with complimentary colors to the papers I chose.  You don't have to use all the colors I did to get the same effect; I just started tossing in colors while I was playing.  I really tried for a dramatic look with the eyes and lined them with a multiliner and with spicas.  What do you think?


Hair: YR000, E50, E21, E11, E97, E99, E37, E29

Skin: E50, E00, E21
Eyes: G20, YG11, YG17
Makeup: R12, R02, R32, Pitch Black Spica, Peach, Clear
Hairband/Trim: Y32, Y35, Y17
Dress: BG10, BG11, BG23, BG13
Flowers: RV02, R12, R02, R32, R35
Shadows: C00, C1


Hair: C00, C1, C2, C4, N4, N6, N9, 0- Blender
Skin: E50, YR000, E00, YR01
Eyes: G20, YG11, YG17
Makeup: R12, RV91, RV93, Pitch Black Spica, Peach, Clear, Silver
Hairband/Trim: N1, N4, N6
Dress: BG10, BG11, BG23, BG13, BG45
Flowers: BV0000, BV00, BV02
Shadows: C00, C1


thanks for looking!!!


Photobucket


Paper: Bazzill Simply Smooth, Core'dination Gemstone,
Embellishments: Liquid Pearls
Stash: Black Cardstock

Thursday, May 5, 2011

Paper Pieced Frame by Laura C

This project would be a welcome addition to any mom's picture gallery! It's a paper pieced picture frame, and a great quick project.... and yes you still have time to make it for Mom's Day!!

Start with a coordinating paper collection like the 6x6 paper pad Echo Park (For The Record) and add some coordinating cardstock from Core d'nations (Black Magic Hocus Pocus used here....the soft green blue to emboss a piece of the Core d'nations (cut to the size of the folder). The raised area is then sanded to reveal the color beneath. Next I cut 1 & 3/8" squares of one of the patterned and one of the solid colors from the Echo Park paper. I cut pieces of the embossed brocade to fit once I pieced my frame together. The edges on my frame are rounded.....so I used a corner rounder on those four pieces. I also used the new Floral Doily Accents Spellbinders dies to make corners out of black cardstock. The paper pieces were inked with Black Soot Distress Ink, and I used a gold ink on the Doily Accents to make them look like metal. See below:


Next I prepped my wooden frame by rubbing it with Black Soot ink to cover anything that might show between my paper "tiles" (I buffed off excess ink with a paper towel). See below:


To finish, each tile was attached with Scor Tape, and once they were all adhered, I sanded around the edges to make them look like they are a part of the frame. I went back and re-inked the edges with the Black Soot (but it looks cool just sanded too!!). A few embellishments from my stash in the bottom right corner (used my Tissue Tape dispenser!) and peeking out from behind is another die from the Floral Doily set. I used regular adhesive to attach the corners, and pic matted in black finishes it off.

A great gift for Mom or anyone on your gift list!! Or, if you don't know what to get Dad.....make one with tiles made only out of the brocade....it looks like tooled leather (you can even shine it up with glossy accents!).

Happy Crafting!

Available at Cutters Creek:

Echo Park 6x6 For the Record paper pad
Core d'nations Cardstock (Black Magic Hocus Pocus)
Spellbinders Dies (Floral Doily)
Tim Holtz Distress Ink (Black Soot)
Ideology Tissue Tape Dispenser
Cuttlebug A2 Embossing Folders (Brocade)
Scor Tape

Wednesday, April 20, 2011

Melissa's Easter Card

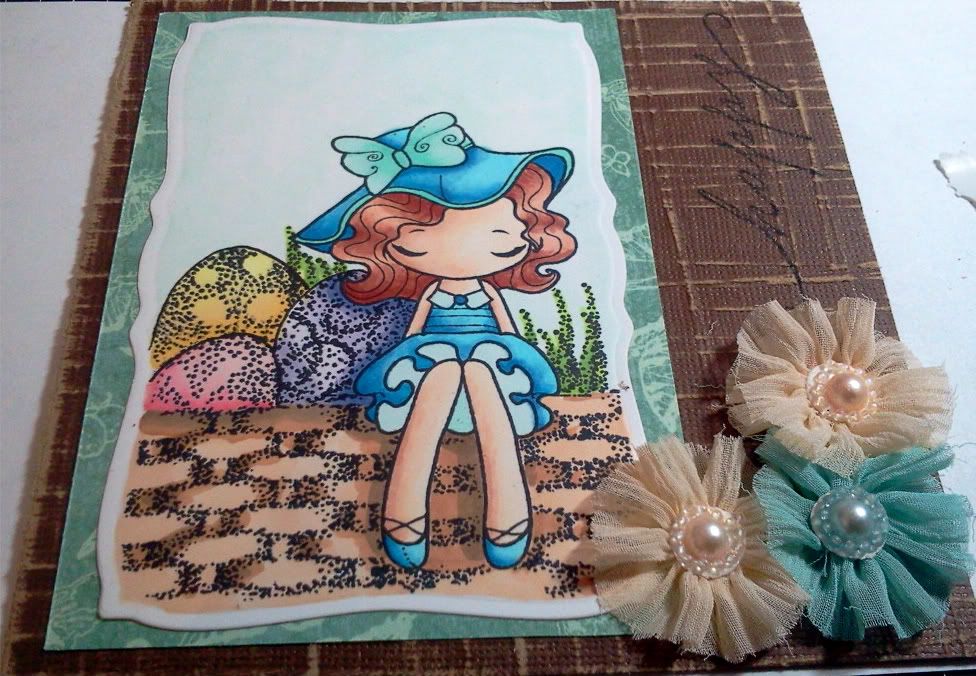
So I am trying so new techniques I learned at the Copic Intermediate Certification and decided to use the Miss Anya Dressy Collection as the stamps leave so much open for interpretation as far as shading and placement.  Making an Easter card I decided she should be sitting on the edge of a basket.  There was a lot of stamping and post-it notes involved; just as a reminder or hint, make sure you wash your hands between cutting the image on the post- it note and  placing it on your stamped image.  Ink spreads in case you didn't know :o)

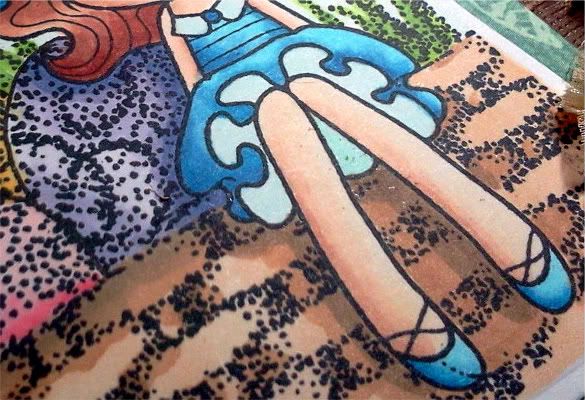
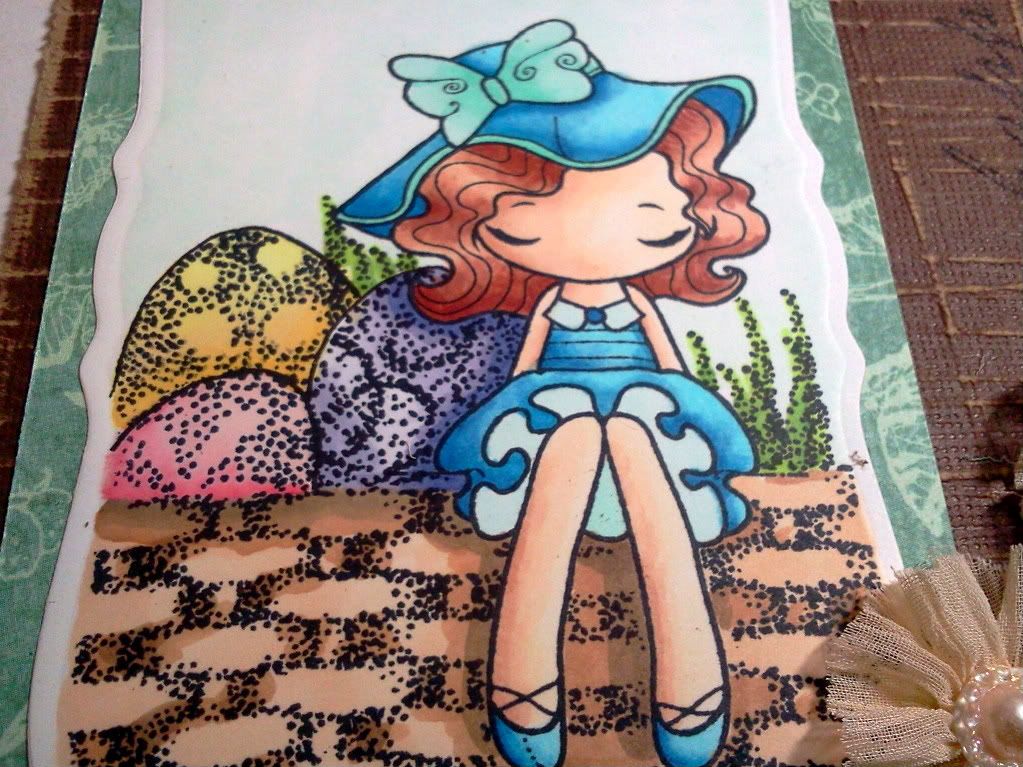
I used the Linear Light template from Marianne Walker's Shadows and Shading Book to determine my light source to create a  more realistic picture; the upper right side.  Now, I colored my images paying attention to shadows and cast shadows in particular.  Cast shadows are shadows created by an object being reflected on another surface.  Does it look like shadows of her legs on the basket and her hair and side on the eggs?


I cut out the stamp using Curved Rectangles, embossed the edges and placed this over some Graphic 45 paper to make it pop!  I than took some Core'dinations paper and sanded it to use as my card base.  I stamped 'happy' on the top right, 'Easter' is on the inside, and used the new Prima Flowers as a corner accent.  What do you think overall? 


Photobucket

Stamps: TGF- Miss Anya Dressy, CTMH Eastertime (Stash)
Paper: Bazzill Simply Smooth, Graphic 45, Cosmo Cricket
Ink: Memento Tuxedo Black, Copics
Embellishments: Prima Flowers: Aurora. Splash
Other: ATG, Curved Rectangles, Embossing Mat, Scor-Pal

Stash: Post-It Notes, Shadows and Shading Book by Marianne Walker

Basket:  E21, E34, E44
Sky:      G0000
Eggs:     BV0000, BV00, BV11, BV04
             R30, R32, R35
             Y11, Y32, Y35
Grass:   YG23, YG03, YG17
Skin:     E50, E00, E11, E13
Hair:     E11, E13, E17, E19
Dress:   B00, B14, B16, B26
Trim:    BG10, GB11, GB23 
Related Posts with Thumbnails