Showing posts with label Copics. Show all posts

Monday, February 24, 2014

Rock Star! By Fran


I made this card with my oldest grandson in mind.  He will be 17 in April! Where does the time go?  I used a digital image by Simply B Stamps.  What a challenge for me when it came to coloring the image.  But I do have to say it came out nicely. Below is a photo of the card and you can tell me what you think.

OLYMPUS DIGITAL CAMERA

Details:  Cardstock by Neenah – Embellishments by Fran using a You Rock Digital Papers and Elements by Ziggle Designs – The hands are a font called Zoeilyhands – Star is a Die Cut called Stacking Stars – Glossy Accents Wink of Stella Clear Glitter used on hands and star to create added dimension –Image colored with Copics (C3, C5, C7 Grey on Suit); (C5, C7, C9 on Hair); Guitar (Boo); (E47 dark brown, Eyes); (E000, E00, E11, R20 Skin); Small dots around image created with a Sakura Gel Pen (Blue Glaze).  Last but not least the card is all held together using Scotch Quick-Dry Adhesive. And 3-D padded foams for dimension.

Here are the items you can purchase from the Cutters Creek Online Store:

Inkssentials Glossy Accents

Copic Markers

Scotch Quick-Dry Adhesive

3-D Padded Foam

If there are any products I used but are not listed in the Store just contact Kim here.

Thank you for stopping by and hope that my project gave you some incentive. Have a wonderful day!

Fran

Saturday, December 8, 2012

3D Christmas Card


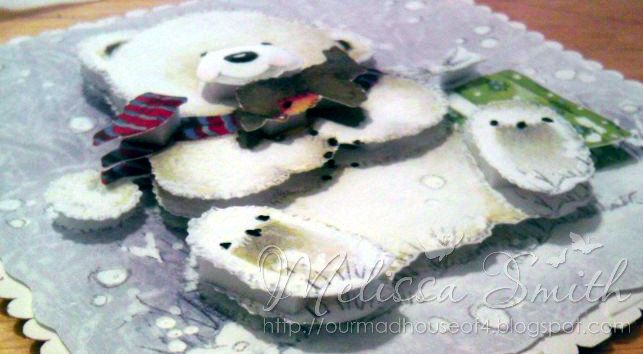
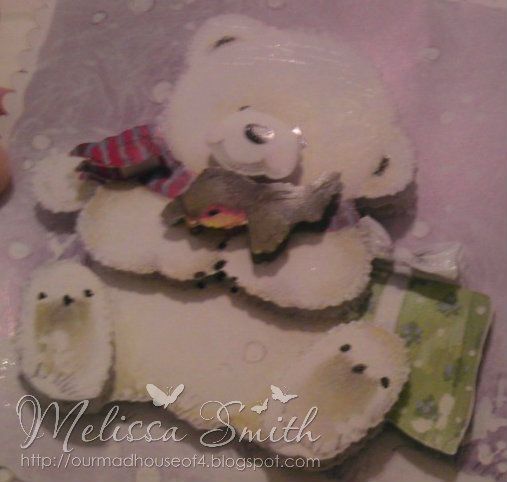
Here is a simple Christmas card made from the 3D White Bear.  It is a very simple and quick card.


After I used the Foam pads to "build it up", I used my pitch black and clear spicas and my cool grey copics to add a little depth and glimmer to the  images.  I wish the pictures would show much it made it sparkle for snow.


Overall, I love the final product and how fast it went together.  I am definitely going this route for future Christmas cards as it is a huge time saver and still has a personalized touch!


Enjoy!


Stash: Paper

Monday, April 23, 2012

Never-ending Card Fun with Mandie

Hey everyone, it's Mandie from Mandie's Scrapping and I recently learned how to make Never-ending Cards and was talking about how much fun they are with a friend and she asked me to create one for her. She was going to surprise her daughter with a Disney Vacation for her birthday and wanted to let the card do the talking so this is what I came up with!

This is the first view of the card, I used my Memento Tuxedo Black Ink to stamp my Snow White (her favorite princess) and then colored her in with my Copic Markers. The "5" is cut with my Cricut and I stamped the background on the white pieces with a variety of clear stamps. Then I used my Stardust Gelly Roll Pure Glitter Pen to add the glittery swirls to the 5. To get to the 2nd "page" of  the card you simply open it from the center to reveal...


...Page 2! The princess here are cut from a sheet of patterned paper and I used some vellum stickers as an accent. I used my Stardust Gelly Roll Pure Glitter Pen to add glitter to my stickers and to my stamped phrase that reads "Where does a Princess say 'Dreams really do come true'?" To reveal the answer you fold back from the center again and the answer is....


...Disney World (of course)!If you'll notice that one page 3 your side images stay the same. It's one thing you will want to remember if you decide to try one of these yourself! I used more stamps and of course that amazing Stardust Gelly Roll Pure Glitter Pen for more - GLITTER - really, you can't have too much glitter, ever! From here you simply open the card out from the center again to reveal...


...the final page! I spent a long time coloring in these beautiful princesses. I used my Copic Cardstock and Copic Markers and practiced the techniques I recently learned. The images are all stamped in Memento Tuxedo Black Ink, of course. I left the 2 center squares blank so that my friend could write her own personal message to her little girl because I'm sure this card will be a treasured possession for a long time!

I even created a custom envelope with my Scor Pal, with a Velcro closure (I cut it into the shape of a heart) for the little girl to be able to keep her card in! I stamped all of my images in pink on pink cardstock and again used my Stardust Gelly Roll Pure Glitter Pen to add a touch more glitter. As I side note, you will want to make sure you are using a STRONG adhesive for this project. I would recommend either your Pink ATG or my favorite - Scor Tape! I hope you will give making a fun, interactive card a try soon!

Sunday, February 19, 2012

An Action Wobble Birthday Card with Chris


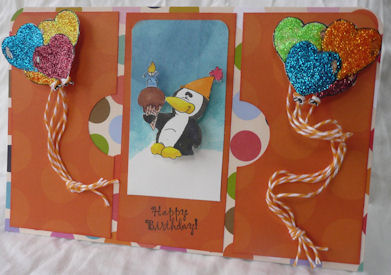
I’m into easy lately and this card is no exception. I started with a 8.5x11 piece of white cardstock and folded it in half. I layered a 5.5x8.5 piece of patterned cardstock on top. Then I took a third piece and cut it into three pieces. One was 5.25x2.5 and the other two were 5.25x2.75 inches. The two sidepieces had a half of a 1.5-inch circle punched out of their “center” sides. All the orange pieces were edged with Ripe Persimmon Distress Ink. I used my ATG to glue all the layers down and my ½ inch corner rounded to clip the two top corners.

The balloons on the outside panels were a digi image that I painted with Stickles (Picket Fence, Firefly, Orange Peel, Ruby Slippers, True Blue, Yellow) and fussy cut out. I then used some mini and macro Glue Dots to hold the pieces of twine to the back of the balloons, knotted the other end and adhered that with another Glue Dot. An Action Wobble backs each balloon cluster.

The center panel has a 2 1/8x4 inch white cardstock that was brayered with Broken China and Faded Jeans Distress Inks, had its top two corners rounded with the ¼ inch rounder, and was glued down. The penguin (another digi image) was colored with my Copics: R35, Y17, Y06, Y15, E11, E23, E25, E27, B32, B34, C9, and W8. He is also mounted on a Wobble. (I attached it to the digi first and trimmed around the image so you wouldn’t see the Wobble.) Finally, a Happy Birthday stamp and the card is good-to-go.
Pin It

Monday, February 6, 2012

What's New At Cutters Creek?

Hello, Everyone! Today I thought I would take a few minutes to show you a few of the products that are coming to the Cutters Creek Store, fresh from CHA! These are a few of the products that I can't wait to get into my hands.. you can check out ALL of the new additions by clicking HERE! *Please note that the expected ship dates are listed in the individual product posts*

First up are the new Graphic 45 papers: Olde Curiosity Shoppe, Little Darlings and Kraft Reflections:


To see the individual papers in the Olde Curosity Shoppe line click HERE and HERE.


To see the individual papers in the Little Darlings line click HERE and HERE.


To see the individual papers in this line click HERE.

Next on my list are the NEW Copic colors... aren't these delicious?

You can purchase them as a set by clicking HERE or individually from THIS link.

Another thing I can't wait to try is...


...the new Spectrum Noir Alcohol Ink Markers from Crafter's Companion. I know they won't replace my Copics anytime soon, but they sure are a nice, cheap addition to help round out my collection. We look forward to giving these a test run very soon! Just click HERE to order up a set to try for yourself.

Finally the last thing on my MUST list is this:


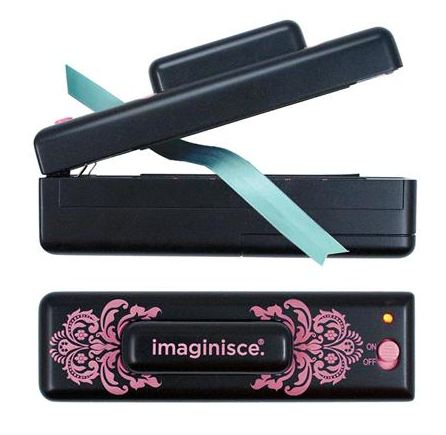
That's right, the Imaginisce I-magicut Ribbon Cutter. If you click HERE it will link you to the video that shows how to use it. After you've watched the video and realize this is a MUST HAVE tool, you can click right HERE to order one! This one is on it's way to me right now! And I will be posting MY trial runs with it, right here on the blog. For those of you that don't know, I hoard my fair share of ribbon... and probably actually a LOT more than my fair share, LOL! I'm looking forward to no more frayed edges!!!

Well, that's all from me for now, but check back often! Or just sign up for the e-mails and have every blog post sent straight to your Inbox, so you won't miss a thing!

Monday, October 31, 2011

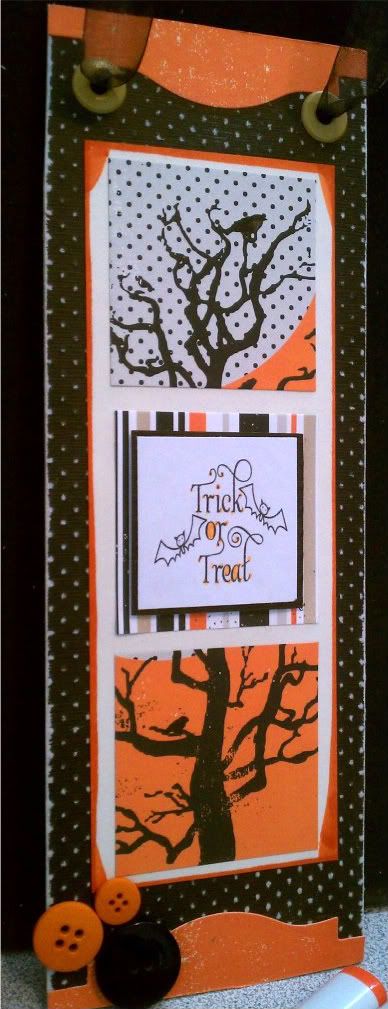
Melissa's Halloween Door Hanger

I started with an inspiration from the Sept/Oct issue of PaperCrafts Magazine (from page 60 if you have it).  I loved the idea of a holiday door or wall hanger.  My project ended up being 12" tall by 4" wide if you want to make one of your own. 

I took the cardboard from some empty cereal boxes and double layered for extra thickness.  I than cut some black paper from the Bazzill Dotted Swiss Pack and filed it down to make the dots pop.  Using my Spellbinders Labels 18, I cut out the largest shape on a sheet of orange paper from my Echo Park Apothecary paper pack.  I trimmed off the edges and added it to the top and bottom of my hanger.

I took a cream piece of paper from my stash and traced the edges of it with my copic YR18 for some added pop and added 3 squares of paper from the Echo Park Apothecary pack.  I added holes and eyelets with my big bite as the thickness of the cardboard and paper made it a little difficult with my cropadile. 

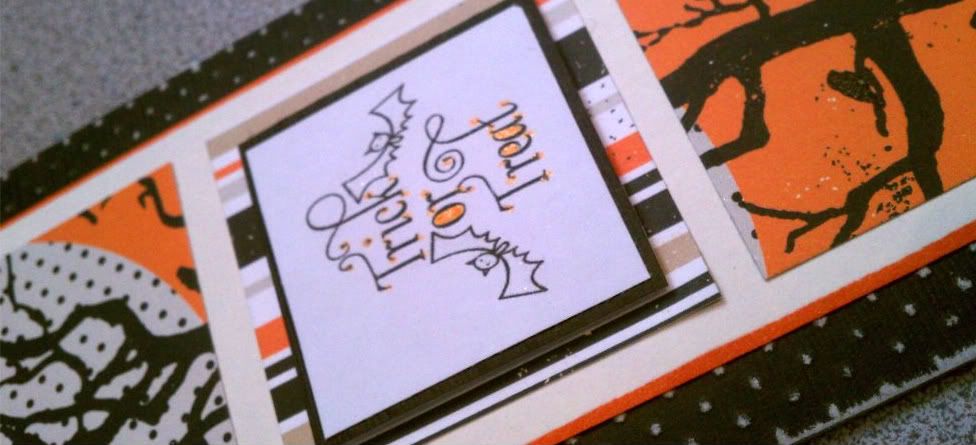
I added buttons from my stash and colored some white ribbon with my Copic 110 to add some black.  I printed the sentiment for free from here, trimmed and lined it with some left over black paper and used Kool Tak to make the sentiment pop up.

Then for extra, I went over the sentiment with my Spicas and the birds in the trees.

Hope you like it!! 


Image:  PaperCrafts Magazine Trick or Treat
Paper:  Bazzill Dotted Swiss, Echo Park Apothecary
Ink: Memento Tuxedo Black, Copics, Spicas
Embellishments: Spellbinders Labels 18,
Other: ATG, Big Shot, File Set, Kool TAC, Big Bite, Scor-Tape
Stash: buttons, ribbon, eyelets, cardboard, cream paper

Saturday, August 6, 2011

Congrats by Melissa

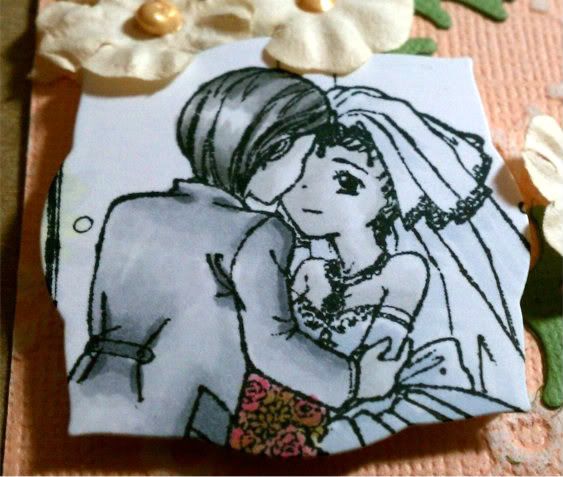
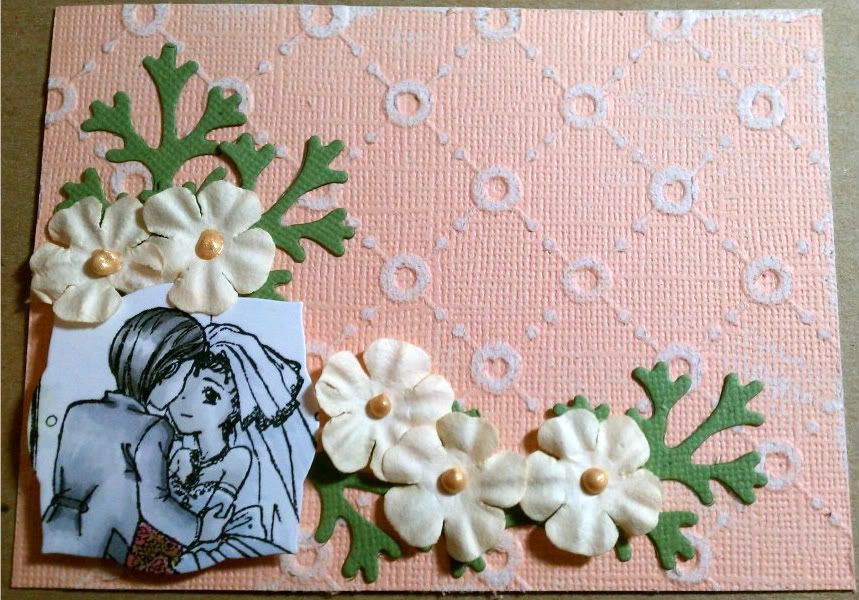
So I made a really simple congrats card for a bride and groom.  The total card size is 3 1/2x 4 1/2.  So it's great to slip in with a gift.  

I started coloring this adorable image from InStyle Stamps; the Wedding Couple.  I colored in all grays to make it classic looking.  Once done, I used my Labels Three to cut out the area around their faces.  


I sanded my base paper which came from the Cosmo Cricket Core'dinations pack.  I than used my Big Shot again on leaves from the Foliage set.  I used some paper flowers from my stash and used some Gold Liquid Pearls for added effect.

What do you think?


thanks for looking!!

Paper: Bazzill Simply Smooth, Core'dinations
Ink: Memento Tuxedo Black, Copics,
Embellishments: Liquid Pearls
Other: ATG, Glue Pen, Spellbinders: Foliage and Labels Three, Big Shot
Stash: Kaisercraft paper flowers: cream

Groom Hair: T1, T3, T4, T6
Skin: T0, T1
Dress: C1, C2
Veil: C00, C1
Flowers: R83, R85, E04, YG91, YG93, YG95

Monday, July 18, 2011

Melissa's Copic Portfolio

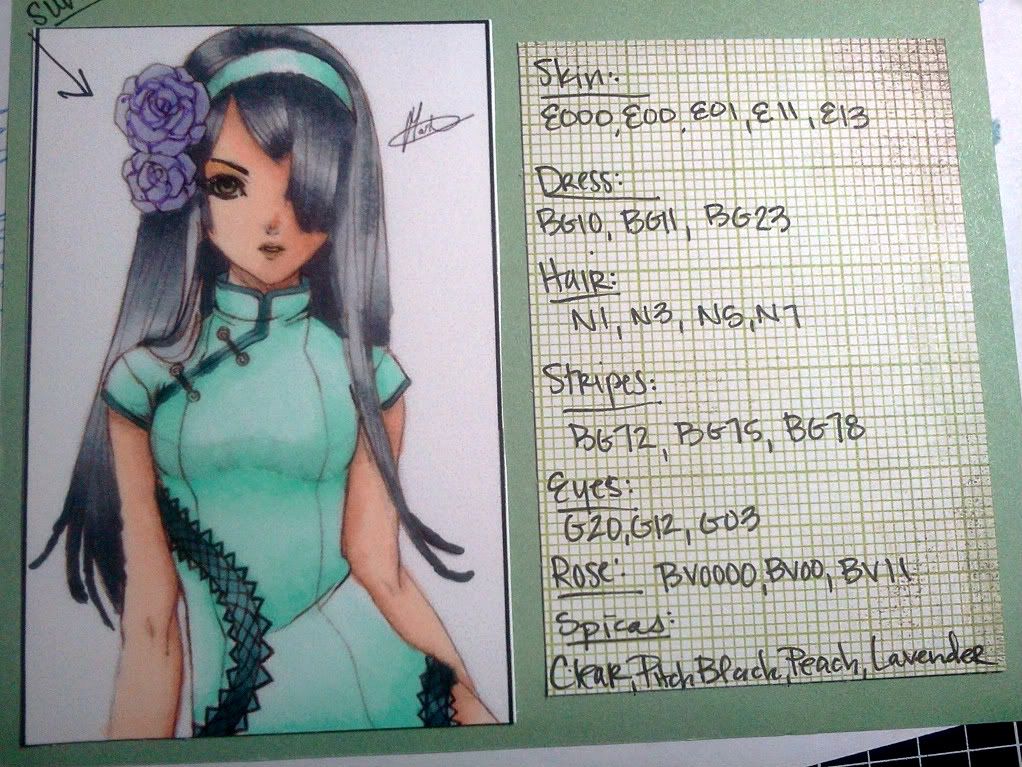
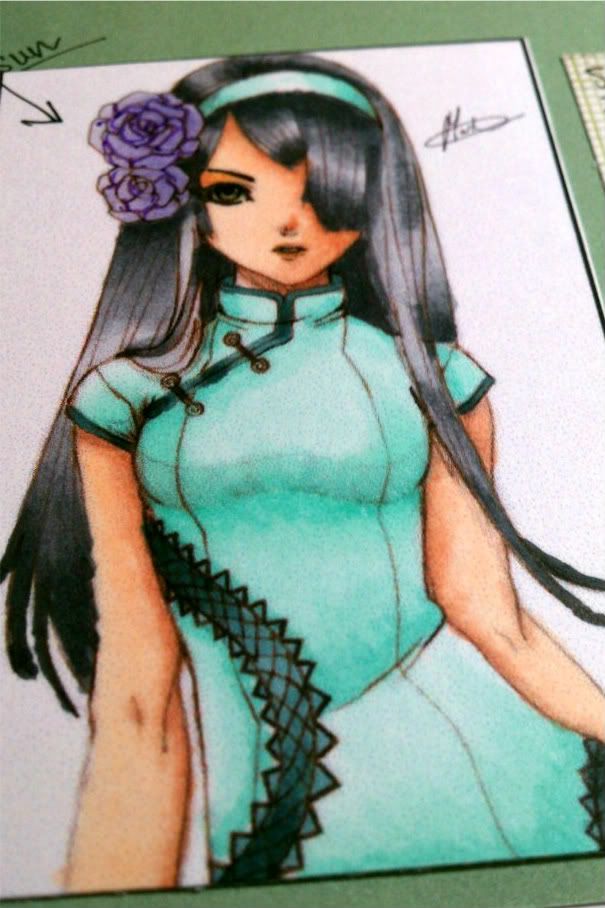
So I decided to update my Copic Portfolio with an image I used quite a bit by *Princess Elemmiriel.  Using my copics I colored my image focusing on lighting.  I have the sun coming from the upper right, so the shadows would be on the right of the body and more specific areas like where her waist is bent, the arm slightly covered by her dress, where her hair covers her face and dress, her nose, and what would not be hit directly by the light.


Definitely one of my favorite images to color.  The main reason I put this image in my portfolio is because of the size.  Usually when I color this image, I tend to use a larger version and the card ends up around 5x7.  This image was printed at 2x3 so it was a challenge to color with the shading at so small a size.  I really like how it turned out.                                                                                                                        Are you working on a portfolio?  It is a good reference tool and it helps you have a comparison of how much your coloring has progressed from when you start.  It is also a good way to keep track of favorite color combos, techniques and samples you have made.  I tend to color two of every image I use as it helps me practice in a way, but also I can get two cards done at once but that also can turn out so differently from one another.

thanks for looking!


Ink: Memento Tuxedo Black, Copics, Copic Multiliner
Embellishments:
Other: ATG,
Stash: green paper

Monday, May 30, 2011

Melissa's Miss Anya

So, I decided to try again with a purple colored card.  I think this one went a little smoother :o)  I started with one of the images from the Miss Anya Dressy Collection - -I love these images by The Greeting Farm!  I also stamped it on a post it so I could stamp the leaves and flowers without worrying about my image being ruined. 

I colored my image with my copics and used B000 and G0000 to blend in the background as sky and grass - - just very light colors, but enough to show the white edges on the Curved Rectangle where is was embossed.  The background paper is from Prima Reflections and I used different papers in the collection for the butterflies as well.

Hope you like it!!


Paper: Bazzill Simply Smooth,  Prima Reflections,
Ink: Memento Tuxedo Black, Copics,
Embellishments: Martha Stewart Punch (Stash)
Other: ATG, 1/4" Scor-Tape, Glue Pen, Curved Rectangles, Big Shot
Stash: Purple Cardstock, Post-it Notes

Hair: E11, E97, E99, E19
Skin: E50, E00, E21, E11
Dress: BV0000, V93, V95, V99
Flowers: Y000, Y11, Y15
Leaves: YG13, YG17, YG23
Background: G0000, B000
Shadows: N0, N1, N3

Photobucket

Monday, May 16, 2011

Howdy Card by Mandie

Howdy, ya'll! Thanks for dropping by the blog today! Since my card has a sort of Western theme I thought I'd get in the spirit of things! LOL! I'd like to share this fun card that I made.


I had so much fun creating this one! I started with a 5x6.5" card blank. I cut a sheet of black card stock to 5"x6.5" to cover the front. Then I used the Echo Park's For the Record 6x6 paper pad and cut my papers down. The floral is 4.75 x 2.5" and the newsprint is 4.75 x 3.75". I stamped out the Cheeky Shooter image using my Memento Tuxedo Black Ink. I didn't have a red marker that matched my papers so I decided to stamp my image on a piece of red and white polka dot paper from the paper pad and cut out the elements that I wanted red (hat, scarf and skirt). Before I glued them down I colored the rest of my image. For the skin tones I used Copics E000, E00 and E11 and the cheeks are R20. I used Bic Mark-It's to color the rest because I'm still trying to build my Copic collection. I used my Quickie Glue Roller Pen to adhere the red paper to my image. Then I trimmed my white sheet to about 3x3.25" and inked the edges with Tim Holtz Walnut Stain Distress Ink. Then I added the black mat to make it pop even more. I also inked all of my papers before adhering them. I decided that I wanted to add a bit more texture to my card and normally I'd grab some ribbon. Since we are talking about Cuttlebug techniques this month I decided to pull out my machine! I used the Gridlock Texture Fades embossing folder and embossed my strip of gold cardstock (I think it's 2" wide). Then I inked up a sponge dauber with more Distress Ink and swirled it over the pattern and the edges. Then I used the alphas from the For the Record Collection (not currently in the store, but I bet if you asked real nice Kim could get it) to spell out "Howdy". I still wanted just a little more... something, so I decided to add some Bling! I pulled out my i-rock and added some black gems under the letters. I am thrilled with how this card turned out!!!

Cutters Creek Shopping List:
Echo Park's For the Record 6x6 paper pad
Cheeky Shooter
Memento Tuxedo Black Ink
Copic Markers: E000, E00,E11 and R20
Quickie Glue Roller Pen
Tim Holtz Walnut Stain Distress Ink
Gridlock Texture Fades
sponge dauber
i-rock Gems

Wednesday, March 16, 2011

St. Patrick's Day Card with Chris

I wanted to make a special St. Patrick’s Day card for a very special friend. I knew it had to have two elements—a step card and another stained glass embellishment—and it had to fit in an A2 envelope (4.25x5.5 inches).


I started with the step card. Taking a piece of cream cardstock and my Scor Pal, I measured out a center step card. Laying the card on my Scor Pal I scored and folded as shown below. (Note the red-dotted lines should be folded as mountain peaks and the blue ones as valley folds.)


My stained glass element is the rainbow. I found a coloring book page that had one I liked and shrunk it down to a 5.5 width and then printed it out. I took a sheet of acetate and taped it over the rainbow and filled in the colors with my Stickles. I used Christmas Red, Orange Peel, Yellow, Green, Midnight Blue, Dark Blue, and Lavender. The cloud was colored with Icicle Stickles. I set this aside to dry for the night and moved on to making my background paper for the rainbow. To make this I took a scrap of cream paper and cut it 4.25x 5.5 and my homemade cloud-maker. To make your own just cut several scalloped circles at different sizes and tape the smaller ones around the largest one at varying depths.


Then using Broken China Distress Ink and my Tim Holtz blending tool, I laid it near the bottom of the paper and inked the edges. I then shifted the cloud-maker slightly to the right and slightly up the paper, inking as I covered the sheet. (Save the cloud-maker; it can be reused.) Once done, I trimmed it to the shape of the front of the card and glued it down with Scor Tape.


Going back to my computer, I found the Wish for a Friend , printed and mounted it on a piece of cardstock 2 7/8 x 3.5. Edges were inked with Shabby Shutters Distress Ink. I also put a small strip of magnetic tape on the back so it could be put on her refrigerator. I put this aside and took out my Copics and colored in a Phee McFaddell image from the internet: Greens: G05, G07, G09; Browns: E13, E17; Shirt: E0000; Skin: E000, E01. I used the Paper Doll Dress Up Cricut Cartridge to cut the pot at the end of the rainbow (4 inches) and the shamrock (2 inches). The leprechaun and the shamrock are attached to the middle step using Glue Dots. Then using SCAL and my Cri-kits pens I wrote Happy St. Patrick’s Day (1.75x.5). I used the same label from the Embossing Plus Fanciful Labels to cut both the sentiment and a piece of cardstock. I used my Cutter Bee Scissors to trim out the middle of the cardstock tag, so I could layer them and glue them together. This was mounted on the front of the card using Glue Dots. Then I trimmed around the rainbow and used Glossy Accents to glue it to the step card and used Glue Dots to put the pot over the end of the rainbow.

May you all find a pot of gold at the end of your rainbow, Happy St. Patrick’s Day!!!

Don't forget, all comments for the month of March will be entered into a drawing for a GREAT Flower Soft prize package! You can enter once per post so the more you comment the better your odds of winning!!!

Friday, March 4, 2011

Springtime Hannah by Laura C

Are you ready for spring? Wow, I sure am!! This sweet little Hannah card is a little burst of springtime until the real thing gets here!!

This started with the "Hannah On Stepping Stones" stamp.


Yes....she started out on a pond, and ended up in a garden, thanks to the magic of Flower Soft! I stamped Hannah 4 times in Tuxedo Black Memento Ink. Twice on Bazzill Simply Smooth White Cardstock, once on pink cardstock, and once on patterned paper (the pretty pink print from the Echo Park Springtime set). The white cardstock Hannah, I colored in with Copics....the skin with E00, hair E21, E33 and E57, her bow with RV02 and RV04, the leaves and stems with G21 and the stepping stones, with E33 and E57. I cut her out using the Spellbinders Nestablilities Mega Dies Labels 8 and inked around the edges with Tim Holtz Distress Ink in Bundled Sage. Next step, was to cut Hannah's dress out of the pretty patterned paper, her boots out of the pink cardstock after coloring the soles black, and to cut out the bow on the second white cardstock Hannah after coloring it.


Then I used foam tape to adhere her dress, bow, and boots, and then I filled in the original "pond" area on the stamp with Flower Soft Glue, as well as adding a bit to the flowers in her hand, and the tall cattails....sprinkled with Heather Flower Soft, and now she's in a field of flowers!! I added a little bling to her bow and her boots with Star Dust Stickles and set aside to dry. The simple card base is 5&1/2"x4&1/4" pink cardstock, layered with a 5&3/8" by 4&1/8" piece of Echo Park Springtime paper, followed by a 4&2/4" by 3&1/2" piece of pink cardstock embossed using the Cuttlebug Swiss Dots embossing folder. To finish the card, I used green ribbon from my stash....knotting each end and adhering with score tape to the pink Swiss dot layer. I used foam tape to adhere the finished Hannah image, and added Hot Pink Kaiserkraft Rhinestones in the corners.

Ahhh, a fresh breath of springtime! And don't forget to pop into Cutters Creek to check out the awesome Flower Soft collection....so many colors to choose from and soooo many ways to use it!!

Just a reminder that EVERY comment left on the blog during the month of March will be eligible for some sweet BLOG CANDY!!!

Available at Cutters Creek:

The Pixie Cottage Stamps (Hannah On Stepping Stones)
Bazzill Simply Smooth White Cardstock
Echo Park Springtime 12x12 paper set
Spellbinders Nestablities Mega Dies Labels 8
Tim Holtz Distress Ink Bundled Sage
Flower Soft Glue
Heather Flower Soft
Star Dust Stickles
Hot Pink Kaiserkraft Rhinestones
Copic Markers ( E21, E33, E57, RV02, RV04, G21)

Wednesday, March 2, 2011

Flower Soft Dimensions with Chris

Today I got out my SCAL and Cricut Expression and decided to make an A2 card using my Copics and Flower Soft. I started with a digi image an online friend sent me and colored it with my Sketch Copics. (The Hydrangea blossoms: BV00, BV02, and BV04; Leaves: G82, G94, G99; and the shadow around the flowers: BG10, C1, and 0S to blend them a bit). The butterfly was colored with my Copic Atyou Spica Pens - Set A and Set B: Black, Blossom, Buttermilk, Lavender, and Lilac. Using SCAL I cut the image with a deckled rectangle (about 3x4 inches) and then made two larger ones as mats. The purple one is about 3.5x4.5 inches and the green one is 4x5 inches. I inked the edges of both using my Tim Holtz Distress Inks. On the purple one I used Dusty Concord and on the green one I used Milled Lavender. Using 1/4" Scor Tape I mounted the purple rectangle onto the green one and then mounted the green on onto the ivory card base (8.25 x5.5 scored in half). Next I used my 1/2" Scor Tape and I wrapped the ribbon around the front of the card. I then layered the colored image over the ribbon (Scor Tape again—what would I do without it?).


To add some dimension I got out my Light Lavender and Dark Lavender - both from the Lavender and Lace Flower Soft Kit - and Pale Green Flower Soft. I started with the Dark Lavender and squeezed some tiny drops of the Flower Soft High Tack PVA Glue on selected petals. Then, working over a plastic dish, I sprinkled the Flower Soft on. I pressed it down lightly and then tapped off the excess. I repeated this process with the Light Lavender. Similarly I laid out the glue for the green, but instead of drops I made smooth smears of the glue. I set the card aside to dry.

While it was drying, I cut two one inch by 4.25 strips from where I had cut my purple deckled rectangle. On the side that wasn’t deckled I used my Martha Stewart Doiley punch. When the Flower Soft was dry, I glued the trimmed edges along the top and bottom of the card’s inside. I think the deckled edges tie the inside to the outside of the card. I will add a sentiment later when I know what I need this card for, but I am thinking it would be a lovely sympathy card.


Lastly, but not least, I used my Imaginisce I-Rock Tool and 3 I-Rock Hot Rocks Rhinestuds along the bottom edge to finish the card off.

Just a reminder that EVERY comment left on the blog during the month of March will be eligible for some sweet BLOG CANDY!!!

Monday, February 28, 2011

Copic Tutorial With Melissa

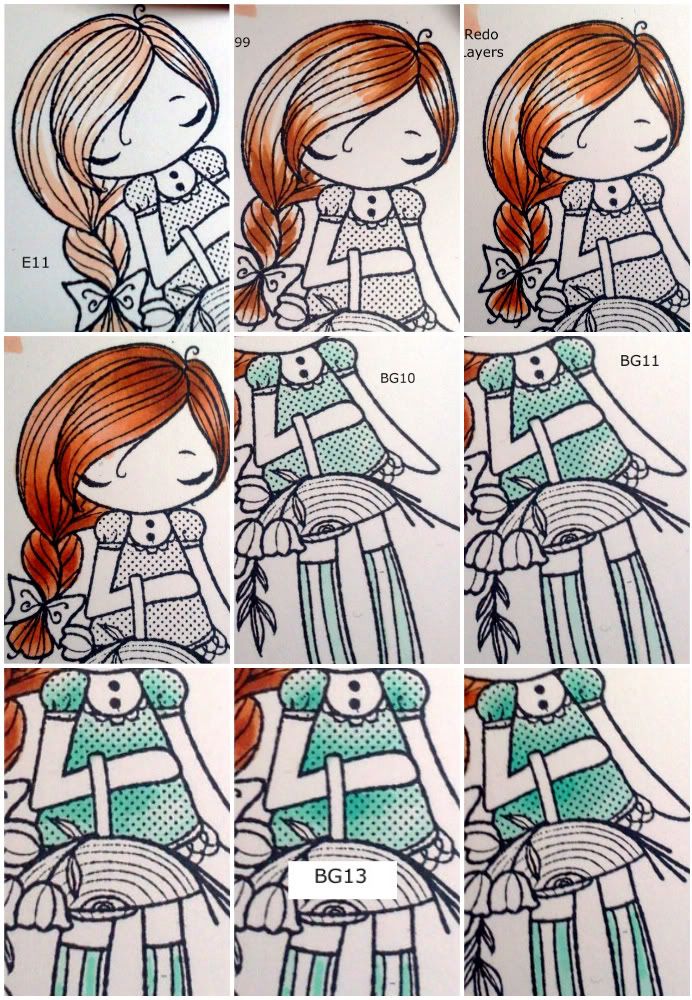
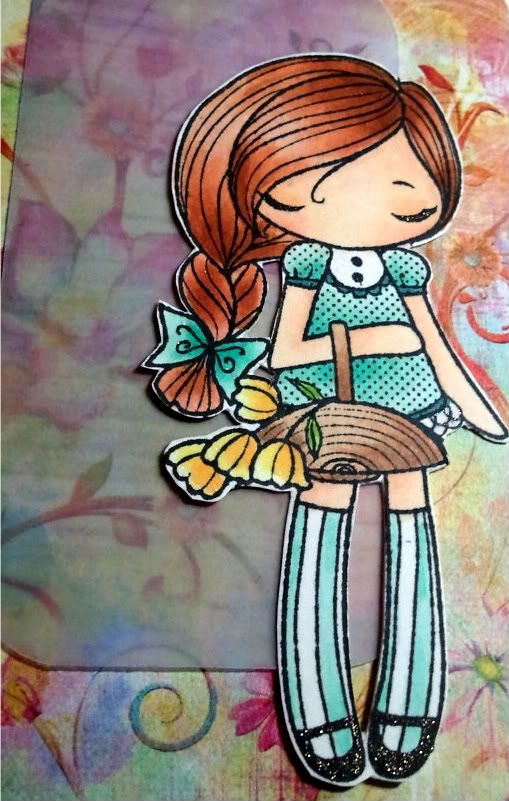
So I wanted to share with you how I color my images.  I am using an image from The Greeting Farm, Miss Anya Collection.  I LOVE these images.  They are so versatile and adorable! Usually I use the feathering technique when I color hair, but because the image is so detailed I will just blend the colors today.  I am also using my favorite color combinations today so you may see them a lot on my projects. 

Just click on the pictures for a larger view.  I started with E11 on her hair, deciding the sun is coming from the upper left of the picture.  I than added E97 and E99.  Then I went and added additional layers until I received the blending I was looking for.  If you have any questions on this process let me know and I will put a video together.   
For her dress,  I started with BG10.  I want her dress to look like a satin texture; extremely light colored but dark where there are shadows or creases in the fabric so I colored with deliberate white areas showing.  BG11 was next, with BG23 following.  BG13 was last as it is the darkest of the four colors and was only added close to the skin and basket.  I went over with BG11 to blend in the darker colors.  For her socks, I used BG11 and BG23 and blended with BG10 to give it the same satin feel.  BG18 was added on the ribbon for the dress.

The flowers were very simple. I started with Y000, added Y11 and lastly YR21 and Y35 to the very bottom of the flowers.  I used the clear spica on the very tops of the flowers to add a little shimmer. Next the leaves, YG11, YG13 and a little amount of YG17.
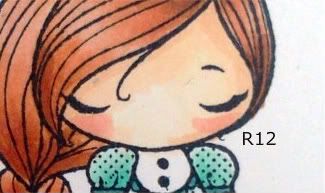
Last was the skin.  The pics are a little out of sequence and I apologize for that.  I started with E50 around the edges of the face, arms and legs.  I than added E00 under the bang and forhead, inner arms and legs under the basket.  E21 added in the same areas as E00 but in a less amount.  I than used R12 (separate picture) to add color for her cheeks; I want to make her look sunkissed.  Lastly, I went back to E50 and blend, blend, blend. 
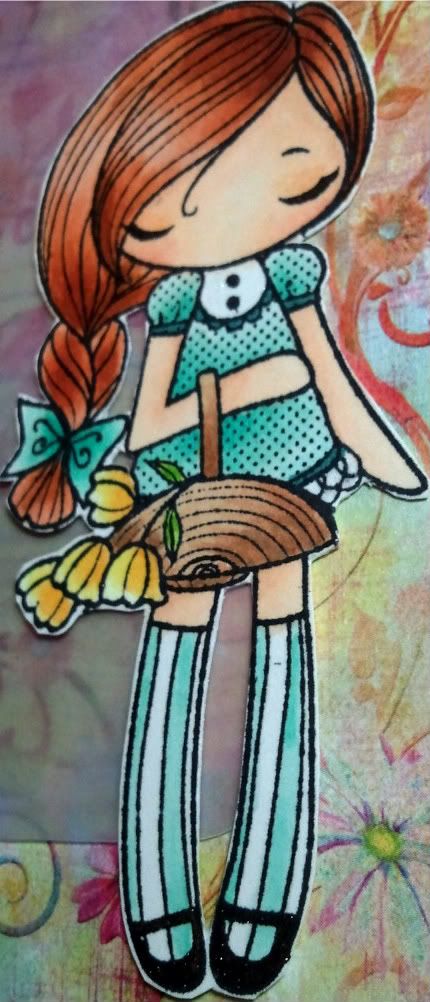
Here is the card finished.  Very simple, but I like it :o)  I used vellum for the paper behind her that was colored with BV02 to make the image pop a little more. 


And here is the image completed.  You'll notice the colors are a little more bold as the ink has settled and dried at this point.  I went over the image with my spicas (LOVE these!) and added pitch black to her shoes and eye lashes, and peach above her eyes as an eye shadow and clear on her hair dress and flowers.

thanks for looking!!!


Stamps: TGF Miss Anya Collection, SU! Well Scripted (No longer available)
Paper:   Bazzill Simply Smooth, Prima Paper
Ink:       Memento Tuxedo Black, Copics, Atyou Spicas
Stash:    corner rounder, vellum   
Skin: E50, E00, E21, R12, Peach, Pitch Black Spica
Dress/Socks: BG10, BG11, BG23, BG13, BG18, Clear Spica
Hair: E11, E97, E99, Clear Spica
Basket: E31, E33, E44
Leaves: YG11, YG13, YG17
Flowers: Y000, Y11, YR21, Y35, Clear Spica
Vellum: BV02

Monday, November 1, 2010

Featured Artist-Margaret

Boy with stocking

Angel with horn

Boy with stocking:
This card is a digital image from Mo's, just love her work. I used my Copic markers to color the image and a sheet of double sided paper by American Crafts to make my card. The paper was also a two sided paper by K&Company. I find that these make nice simple cards. One side was solid and the other stripped. I did not have single stamps to make the Happy Holidays so I only inked one side at a time. The Copic markers used were E11, E13, E25, B21, B24, B32, B34, B99, V15, R29, YR09, G28.


Angel with horn:
This card was made also by using the Copic markers and one of Mo's digital stamps. On this card I popped out a snowflake and added Stickles to her wings. I also added Stickles to the background paper and the snowflake. The Copic markers used were E11, E13, E25, Y17, Y38, RV11, RV34. The Stickles used was Crystal.

Margaret
Blog: http://margaret-ilovecrafting.blogspot.com

Tuesday, October 26, 2010

Graphic 45 Birthday Card by Chris


I love this particular image from Graphic 45 and decided to use it for my DH’s birthday card. Alone it was too plain for me so I decided to teach myself how to make a small waterfall element that would use some of the smaller images from the Graphic 45 pack and allow me to write the sentiment on the back. I used SCAL to cut the pieces and have attached the scut below for your use; but if you don’t have SCAL, I put my final measurements below also—know that you can adjust it to any size you need for your project.


Once all the pieces are cut and distress inked (Black Soot), mountain-fold on the scor lines. Then glue down the image on the first section (1 3/8 inch). Adhere this image completely. Then put strips of glue (I used my ATG) right along but under the next two score lines and align the next two squares with the first picture. Glue down just their top edges. Be sure to stay off the score lines or the waterfall won’t work. Glue the smallest strip of paper behind the first square and fold the long strip back and over this little strip. The back of the strip should be a bit longer to use as a pull-tab for the waterfall element. I added an image and ribbon to accent it and wrote on the back before I mounted it on the card. To do the word Birthday, I used embossing ink and Detail Black embossing powder. I adhered the smaller strip to the card using brads. Make sure that you do not put the brads too close to the strip because you want enough room for the waterfall to slid through. To hide the back of the brads I mounted the full image on a piece of cardstock 11.5 x 8.5 and scored it down the middle. Of course, I had to add some stickles, so I put a dab of orange peel stickles on the top of the waterfall element. To finish the card on the inside I added a Halloween border a friend made and a Disney image that I colored with my copics. The finished card is 5.75 x 8.5 inches.


Measurements:
3 Squares @ 1 3/8 inches
1 strip of paper @ 6.25 x 1.1 inches (score @ 1 3/8 inches, 2 1/8 inches, and 2 7/8 inches)
Smaller strip @ 3 x .6 inches.

SCAL: Note the long rectangle and score lines are grouped in SCAL and you may need to ungroup in order to cut.

Copics:
Rabbit: C1, C2, C3, C7
Clothes: B69, B63
Sign: G82, G99, YG 63
Horn: Y26, Y21

Resources from Cutters Creek:
Copics
Graphic 45 Halloween Wonderland
ATG
Black Detail Embossing Powder
Distress Embossing Ink
Distress Ink: Black Soot
SCAL
Orange Peel Stickles
Related Posts with Thumbnails