Showing posts with label Pink Cat Studio. Show all posts

Saturday, July 17, 2010

Beach Babe by Laura C.


I love summer, don't you?? This card is a sunny way to say hi, happy birthday, just about anything!

The base is chocolate brown in standard 5 1/2" x 4 1/4". I layered on a 5 1/4" x 4" piece of Core'dnations from the Vintage "Flower Power" collection. The sweet little girl is from the "Lily at the Beach" Pink Cat Studio collection. She's colored with Copics, and I added some Inkssentials Glossy Accents to her goggles.

And guess what?? Flower Soft isn't just for flowers!!

Polar White Flower Soft is the "white caps" on the waves with a touch of Ice Stickles in "Arctic Ice" to add a bit of bling! Last, a bit of ribbon from my stash, and the sentiment (from the Lily collection, too!) stamped in black Memento ink on a tag made with the "Fancy Tags" Spellbinder die.

Hope you enjoy this fun summer card!

Be sure to leave a comment and let me know what you think!

Available at Cutters Creek:

Core'dnations cardstock (Vintage Flower Power)
Pink Cat Studio stamps (Lily at the Beach)
Copic markers
Inkssentials Glossy Accents
Flower Soft (Polar White)
Ice Stickles (Arctic Ice)
Memento Ink
Spellbinders dies (Fancy Tags)

Sunday, July 11, 2010

Fairy Card by Mandie


Today I have created this adorable fairy card using one of my favorite stamps sets and my much neglected Cuttlebug! I always forget how much I love the texture that it adds to my projects. So I dusted off my Cuttlebug and pulled out the folders and was inspired by the texture of the one from this Cuttlebug Plum Blossom Embossing Folders Set.

I embossed a piece of 4” x 4” Core’dinations Cardstock and then sanded to reveal the green underneath. Next I stamped my fairy from the Enchanted Lily Stamp Set onto a sheet of white card stock with my Memento Tuxedo Black Ink and colored her using some markers from my stash as well as my favorite flesh toned Copics. I bought the flesh colors first because they are so hard to get right. The colors I used here were: E00 and E11 for the flesh and R20 for her cheeks.


After I had her colored just right I added a little bling with my favorite Sakura Jelly Roll Pen! I use it to add a little sparkle to a lot of my projects! Then I used a oval cutter and cut out my image and used the next size up to cut the frame from the reverse side of my cardstock.

Then I cut a 1 ½” x 4” strip of patterned paper from the Basic Grey Origins Paper Pack. I am in LOVE with the gorgeous papers in this pack! Then I adhered it all to the card base along with that gorgeous green ribbon. Then I stamped my sentiment and added the little brackets around it by hand. Then for the finishing touch I added a few Twinkle Jewels along the side of my card with some Glue Dots. I hope I will inspire you to dust of your Cuttlebug and play with those embossing folders!


Products Featured:

Cuttlebug Plum Blossom Embossing Folders Set
Core’dinations Cardstock
Enchanted Lily Stamp Set
Memento Tuxedo Black Ink
Copic Marker E00
Copic Marker E11
Copic Marker R20
Sakura Jelly Roll Pen
Basic Grey Origins Paper Pack
Twinkle Jewels
Glue Dots

Monday, April 26, 2010

Copic Monday-Hair Coloring by Laura Burleson

If you are like me you wondered how can you give texture and shading for the perfect hair color. What I have discovered is that most hair colors can be broken down into three marker colors. A light color for the highlights, a mid range color, and a dark color for the shadow areas.

For blond hair, I use YR23, Y23 and E35.

For brunette hair, I use E29, E25, and E31.

For auburn hair, I use E13, E17, and E19.

For black hair, I use C3, C5, and C9.

For grey hair, I use C1, C3, and C5.


This is a completed example of blond hair using the Y23, YR23 and E35:


When coloring hair use the same technique used for the skin. Lay down your lightest color for the entire head of hair. Next add in your darkest color, then your mid-range color. For images like the Pink Cat Studios characters, you will not have a lot of hair color definition.

This image shows a completed brunette using E25, E29, E31.


When coloring images more detailed images with more hair color lines, you will be able to add more depth to your hair color. You will have a greater area and more hair texture to cover. When you have images that have definite hair strand lines. Use strokes in those same directions to give the hair flow. Practice making short controlled strokes before starting to color your image.


For this image I started with my Y23 for blond hair. I used strokes that followed the natural hair growth.


After laying down my lighter color as the base. I added in my YR23 color. Again following the lines of the hair growth. Remember you can always go back and add more coloring as you progress through each step.


Lastly I added in my darkest color. I started from the roots of the hair and made it a bit darker using short feather-light strokes. I used more dark near the neckline and back of the hair. Remember your light source like we discussed previously. You want to layer in your darker colors where the hair would naturally be darker.


Here is a second example using the Auburn hair colors and the same image.


Coloring hair is an easy technique to master when you have the right colors. For all of my examples, I used the brush end of my Sketch Copic Markers. Enjoy trying these techniques! Please post your images. I would love to see your work.


Thanks for looking~


Laura


Cutters Creek Products Used:


Copic Sketch Markers - Colors listed above
Pink Cat Studios Stamps
Bazzill (Formly Prism) Cardstock
Memento Ink (Tuxedo Black)

Monday, April 19, 2010

Copic Mondays Installment #3

I cannot even hope to fill Wendy's shoes, but I have been doing my studying on these wonderful Copic Markers. Wendy shared with you the basic coloring techniques in her last installment, and some of her favorite color combinations. At first glance, all of those colors are so intimidating! As Wendy showed us, we can create so much depth with just three markers in the same color family.

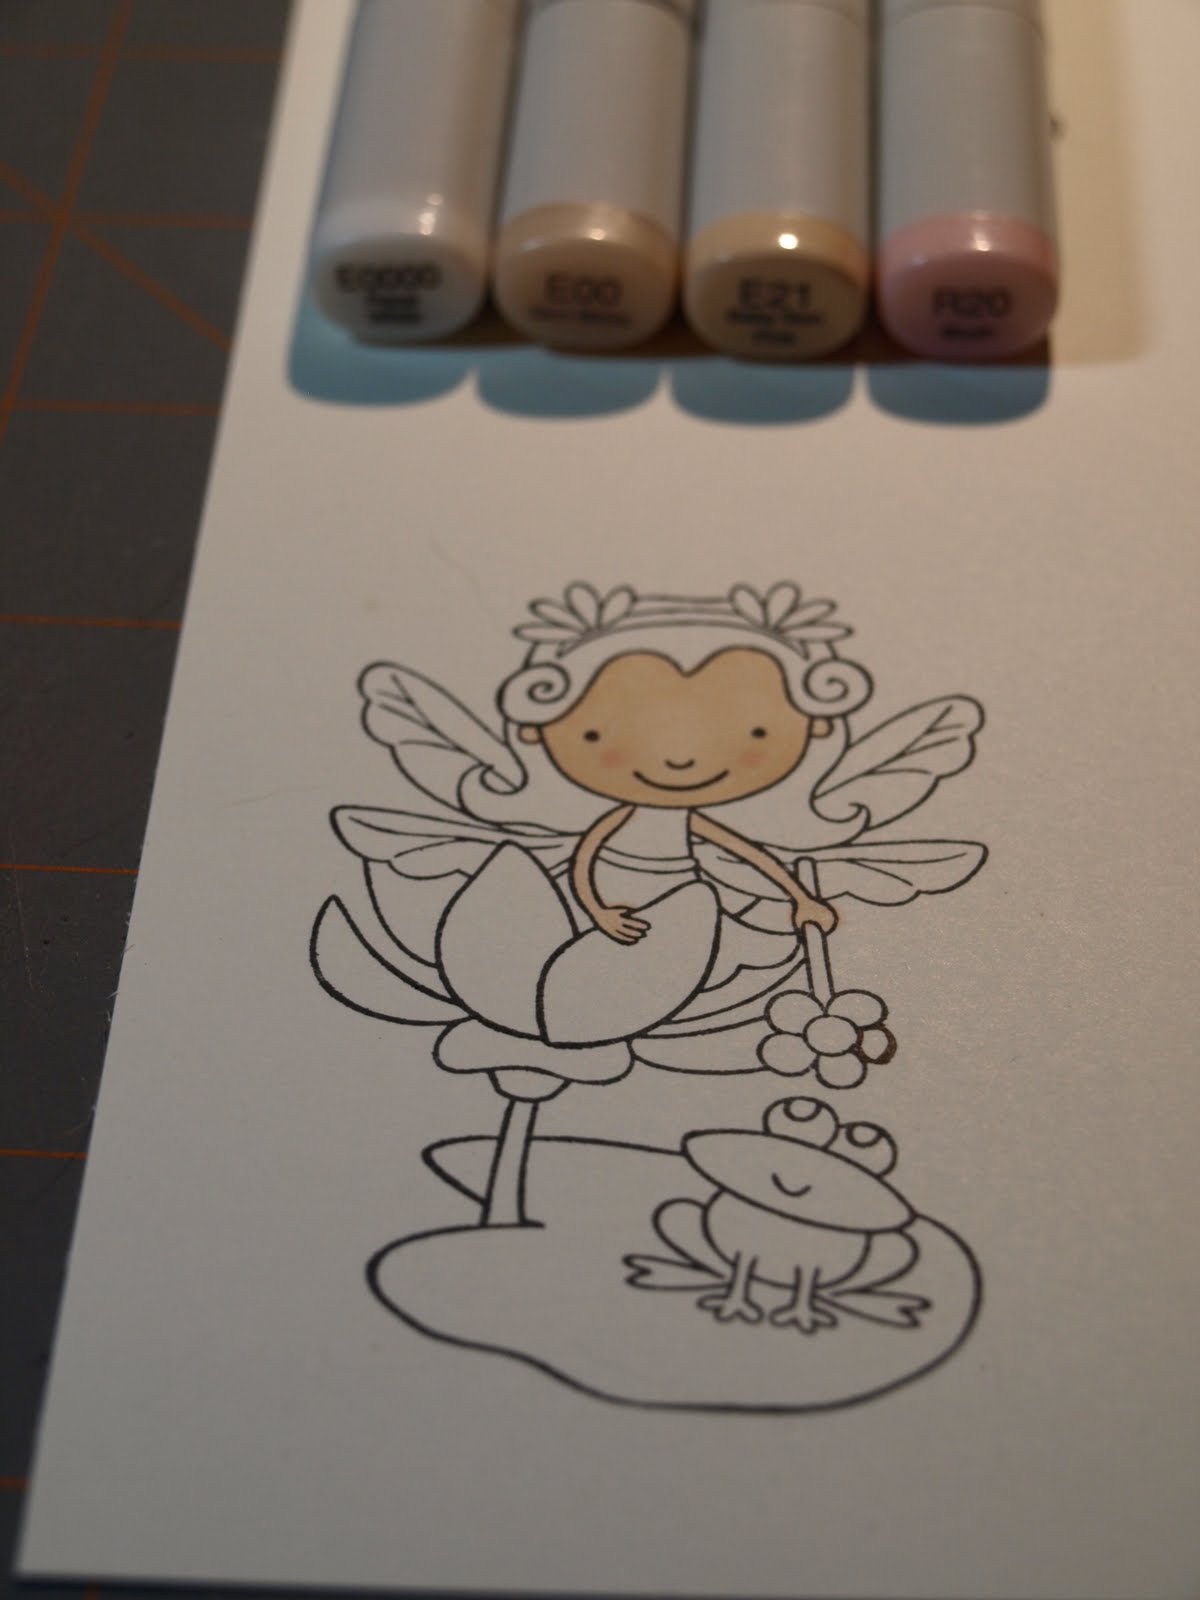
One of my first questions was, "Well, that is great, but how do I make the skin look like skin or the jeans look like jeans?" Like many of you, I wanted to be able to color basic images I had in my "stash" or ones I had traded with others.Today let's start with the skin tones. I had heard I needed E000, E00, E11, R20 (Blush) for skin, but how do I combine those to really make it look like skin? Could I do it? I was surprised the answer was yes. Let me show you what I learned!

First stamp your image on quality cardstock using a good ink like Memento Black Ink. I love the Bazzill cardstock at Cutter's Creek, and that is what I used. The stamp in this project is from Pink Cat Studios (Enchanted Lily Collection).

First you want to cover the entire area using your E000 or E0000. You don't have to worry about perfection, here. You are putting down your "base" coat. Work in small circles to get good coverage. Take your time, and get the feel of your pens.


Next we are going to add in E00. Again working in small circles. Choose where your light source will be, and leave those areas of the face lighter in your coloring. For my project, the light was coming straight on to Lily's face. I let her nose and forehead be slightly lighter than the rest of her face.


Next I added my facial shadows using E21. Around the hairline, the lower part of the face and ear area would all be the darker parts of the face. This is a a subtle variation in color. I lightly outlined the areas I wanted darker. Go sparingly. You can always return and add more color if you feel your shadows aren't quite right.

To give her cheeks a cute "glow", I reached for my R20. I made two small circles of blush area on her cheeks. I like this technique for cartoon type images.

Next I returned to my E00 to blend the colors together. Again, I kept the areas of the nose and center forehead lighter.

For her arms I used the E00 and the E21 for some shadow with the same technique.


Next time we are going to do the hair colors. I am going to cover the basic colors you will need for blond, brunette and auburn and black hair colors. I will be making Lily a blond, but you can do any hair color you choose.

Thanks for following along! I can't wait for the next installment!


Cutters Creek Products Used:

White Bazzill Cardstock
Copic Sketch Markers, E000 (or E0000), E00, E21 and R20
Memento Black Ink
Pink Cat Studios Stamps - Enchanted Lily


Tuesday, April 6, 2010

Vicki's Spring Card


Here's an easy card for a lovely spring thought! It was made from a pre-folded card & envelope set, so I didn't have to fuss with envelope sizing. First, I stamped Lily from Pink Cats Studios - Billy & Lily Sweethearts on my Prism paper with Memento Ink Tuxedo Black, and colored her with Copics. I cut her out really close with Cutterbee scissors...I love how sharp those little scissors are! Next, I used two embossed borders from the Cuttlebug Emboss A2 Border Frills set. The lace-look border was set at the bottom of the card, and I cut around the embossing to show the curved edges on the bottom. I placed the pink floral border slightly above the bottom, and used a fun, decorative ribbon between the two borders. The ribbon is held in place with Scor-Tape. I tucked Lily in to the top of the pink flower border. To show off the lace border, I used a piece of the same pink cardstock on the INSIDE bottom of the card. I highlighted a few of the flowers in the middle pink border using Flower Soft Summer blend and Flower Soft Glue. The pink hydrangea flowers are set in place with Glossy Accents and a Twinkle Jewel. I have discovered that many 'dimensional' items can be 'glued' in place with Glossy Accents - it sets up hard, so that your embellishment won't fall off! Finally, I cut my title phrase with my Cricut and the Lyrical Letters cartridge. The shadow of this font is clean, and easy to cut very small - this one was cut at 3/4".

Cutters Creek Items Used:
Pink Cats Studios - Billy & Lily Sweethearts
Prism Paper
Memento Ink - Tuxedo Black
Copic Markers
Cutterbee Scissors
Cuttlebug Emboss A2 Border Frills
Scor-Tape
Flower Soft Summer Blend
Flower Soft Glue
Glossy Accents
Twinkle Jewels
Lyrical Letters Cartridge

Sunday, February 28, 2010

Lily Ballerina Lace Card by Vicki


Here is another quick and simple card, that can be used for Valentine's...or any other special occasion. In this example, I made it a "Thank You" card, to thank someone for a special gift!

The card was cut with my Cricut Expression, using the Wild Card cartridge. I cut both the card and the matching envelope. Remember, when using Wild Card, it's easier to cut the envelope first, using the "Fit to Page" feature...and make note of the measurement it calculates to make the envelope. (It will flash briefly on your display screen before it starts to cut the envelope!) Next, make sure the "Fit to Page" feature is OFF, set your dial size to the size the display showed, and THEN cut your card.

The stamp is from the Pink Cat Studios line: Lily Ballerina Valentine. She was stamped on Prism paper using the Memento Ink in Tuxedo Black, and then colored with Copic markers. Next, she was cut out and placed on a simple circle in complementary colors. The white background really makes her "POP" on the front of the card. I then used the same patterned paper on the inside liner of the envelope to coordinate the set.

The card cutouts around the outside edge are spaced and numbered just right to 'lace' a ribbon through it.

I used my Scor Pal to score the edges of both the card and the envelope.

All the products below can be purchased at Cutters Creek:
Pink Cat Studio stamp
EZ Mount
Memento Ink Pad
Prism Paper
Copic Markers
Cutter Bee Scissors

Tuesday, February 23, 2010

Some Buggy Love U by Vicki


The first is a simple Valentine's card...quick and easy. The Pink Cat stamp: Lily Valentine Fairy is mounted on EZ Mount, so that I can add it to an acrylic block when I'm ready to stamp them! I used my Memento ink pad in Tuxedo Black, and stamped the image on Prism paper. I colored my images with my Copic Markers, and then cut close to the edges with Cutter Bee scissors. The Cutter Bee scissors are nice and small, and make it easy to get close, detailed cuts to the edge of my stamped image. And what fairy does require a little sparkle? I added Stickles to her fairy wings and the heart antennae on the fairy and the lady bug.

The heart embellishment is actually a Bazzill Chip, which I colored with simple red marker. Then, I outlined the edge with Twinkle Jewels, adhered with Mini Glue Dots.

The edges are highlighted by a simple heart punch, and then I placed white strips of paper on the inside of the card, to highlight the punch outs. I then inked the entire front of the card with a little bit of red ink, to give it some dimension.

All the products below can be purchased at Cutters Creek:
Pink Cat Studio stamp
EZ Mount
Memento Ink Pad
Prism Paper
Copic Markers
Cutter Bee Scissors
Bazzill Chips - Hearts
Twinkle Jewels
Mini Glue Dots

Tuesday, February 16, 2010

Lea's Warm Winter Wishes with Pink Cat Studio Stamps


Brrrr it’s cold outside. The snow has been falling, covering the ground in a white blanket.

Pink Cat Studios has the cutest designs just perfect for Copic markers. I love the layered look and so I decided that since snowmen are made from “circles” or balls of snow, I would concentrate my design with circles and a few squares. Twinkle Jewels adds the perfect dimension for buttons and then I actually used buttons to continue the circle theme. The background paper is pearl flowers with little circles. The ribbon tape has pink circles. As an added touch I used my Copic markers on the little metal word “Joy.” I used a tapping motion to cover the surface to give full coverage. And notice the Flower Soft? It is not just for flowers. There are so many ways to use this product.


My favorite part of this image is the little birdie, I just adore him! So even though it is cold outside and there is snow on the ground, have fun creating wonderful art with Pink Cat Studio images.


All these products can be purchased at Cutters Creek.

Supplies:
Stamp Image, Warm Winter Wishes – Pink Cat Studios
Copic Markers - BG45, Boo, YG67, YG63, RV29, RV00, RV02, V12, V15, V17, YR07,
YR04
Tuxedo Black Memento Ink – Tsukineko
Flower Soft
Twinkle Jewels
Glue Dots
Tape Runner
Buttons, DCW paper, Pearl Paper (unknown), metal word – Making Memories

Friday, February 12, 2010

Angela's Valentine Box


I may be dating myself, but when I was in grade school the weekend before Valentine's Day we had to make a box for our classmates to deposit all of our Valentine cards into. The idea being that all of your Valentine's would be delivered into your decorated box for you to take home. I loved this, but I was one of four children so I am not sure my Mom was as thrilled with this assignment! (picture four kids tearing apart the house trying to find shoe boxes to decorate) I decided for my granddaughter Grace's first Valentine's Day I wanted to make her a box.


I used a bunch of paper, punches, and ribbon I had on hand and then pulled out the Pink Cat Studio Stamps, my Copic markers, Spica glitter pens and of course Nestabilities. Now I just need to fill the box with some Gerber apple snacks and an outfit and drop it in the mail.

All these products can be purchased at Cutters Creek.
Supplies:
Pink Cat Studio Stamps
Copic markers
Spica glitter markers
Spellbinder Dies
Ribbon
Adhesive
Crop A Dile
Eyelets
Card Stock

Saturday, February 6, 2010

Carrie's Chocolate Treatbox


As I was skipping though all of my normal web-based scrapbooking haunts the other day, I can across the coolest card. In it, the designer had cut out practically the entire front of the card and replaced it with a woven ribbon mat. LOVED it! I decided to use this technique in a slightly different way for this weeks Design Team project. The result.....the super cute album card to the left that I made for my sweet hubby!

I started by plugging the new Paisley cartridge into my Cricut and hitting "fit to page". Then, using a piece of dark brown card stock I cut the card which turned out to be 4 1/2 inches. Next, I cut a piece of light green cardstock to 4 1/4 inches. This is where I built my ribbon mat.

Here's how:
  • First choose 5 or more ribbons that fall into your palette. You want the colors to blend well, and the variety is what makes it unique beautiful.
  • Then using mini glue dots, attach the vertical ribbons. You want the pieces to be side-by-side, but not overlapping. Also, only use one glue dot to attach the bottom end so that pieces can be lifted for weaving.
  • Now start on the horizontal pieces. Attach a glue dot to one end and adhere it to the paper at 90 degree angle from your vertical pieces. Weave it over and under each vertical ribbon until you reach the opposite end. Add a second glue dot to secure far end.
  • Repeat with the next horizontal weave alternating your pattern all the way to the top.
  • Once you have reached the top simply use a single glue dot to tac down the far end of each vertical piece and you are finished!
Then, all that is left is to adhere your new ribbon mat to the inside of your card front so that the mat shows through the die cut opening! To accent my mat I used two complementary colors of Kaisercraft Rhinestones and the ever sweet Pink Cat Studio's Lily Valentine Fairy.

The card style that I chose to cut is a match book card. So to add a little bling to the back, I attached a single Flower and used a Kaisercraft Rhinestone for the center. The effect is simple a sweet and is the perfect finish for my album card.

I hate that the picture for the inside of this card did not turn out. But, if you could see them, they would show two pictures of my little girl taken one year apart. The pics anchor the card on each end. In the center I put the sentiment, "What a difference a year makes when it is filled with love." I then framed the sentiment with 1/8 scor tape coated with a light pink iridescent glitter. I love how my card came out, and I can't WAIT to give it to my husband on Valentine's Day!

Carrie's Chocolate Treatbox was created using the following products:
These products can be purchased from Cutters Creek!


Friday, February 5, 2010

Angela's Sweet & Simple Valentine


I am still finishing up some last minute Valentine's cards. Today I am showing you a short and simple sweet card. I started by cutting a white card stock base and then cut the solid purple and patterned paper. I punched the corners of both the purple and patterned paper and then attached to the white card base. I attached Kaisercraft dark purple rhinestones to add extra sparkle. (Hint: I use Inkssentials glossy accents to attach rhinestones, it holds firmly and dries clear!)

Next I stamped my Pink Cat Studio stamp three times onto Prism card stock. Then I colored with Copic markers and then diecut the colored images with a Nestabilities circle die. To add contrast I layered the circles onto blue scalloped circles and to add even more detail I layered the center one onto a second larger scalloped circle. I used pop dots to give added dimension. In no time at all I have a sweet Valentine just waiting to be SWAK and dropped in the mail.
Please visit Cutters Creek for the supplies:

Copic Markers
Prism Card stock
Pink Cat Studio Stamps
Kaisercraft Rhinestones
Inkssentials glossy accents
Nestabilities
Glue Dots pop up dots

Friday, January 29, 2010

Angela's Happy Valentine

I have to admit that Angela's latest Design Team project brings a smile to my heart. I LOVE Valentine's Day. To me, one of the most important things that you can do in life is remind your loved ones how your feel about them. It is something that we should remember to do each and every day, yet something that we often take for granted. Love is in short supply, and it is something that I never want to take for granted!

Angela has created this card using a stamp from the ever popular Pink Cat Studios. By coloring the image using Copics, she is able to get a completely custom look to match any paper pack she may want to use. This is one of the best things about using stamps. Unlike stickers, rub-ons or other types of embellishments, you can use a stamp as many times as you want. The image will always be beautiful, and it will always have the exact look and feel that you want for a specific project!

If you have any questions for Angela about her beautiful card, just ask! We always love to hear from our readers.

Angela's Happy Valentine was created using the following products:
These products can be purchased directly from Cutters Creek!

Wednesday, January 13, 2010

Mandie's Thank You Fairy Much!

Ladies, I am pleased to say that the blog is back and better than ever! I know, I know, we were only gone for about three days, but I missed you guys! It's just not the same for me when we don't get to have these little daily talks. Plus, (as life has a way of getting IN THE WAY) this is as close to my craft room as I have gotten in awhile! My fellow Design Team members keep giving me these amazing ideas and I can't wait to put them to good use!

Today, Mandie is sharing a super cute take on Thank You notes that is sure to leave you with a smile on your face. What I like best about this design is that it can easily be coordinated to any color palette. All you have to do is change the color of her dress, and you are ready to go! So get those pencils out to take some notes, because Mandie is going to show us how to crank out the cards!

Take it away Mandie!

After Christmas we all have a ton of "Thank You's" to say so why not send a beautiful handmade card to say it! As soon as I saw my new Pink Cat Studio Enchanted Lily #1 Stamp Set from Cutter's Creek I knew it would be perfect to make some beautiful Thank You Cards from my daughters!

I began by making a 6" x 6" card base from white cardstock. Then I cut my sheet of patterned paper to 5 3/4" x 5 3/4". Next I adhered my ribbon to my patterned paper with Scor-Tape. Then I adhered this to my base with more Scor-Tape.

Next I cut a 3" circle from my Simply Smooth Cardstock with my Plantin Schoolbook Cricut cartridge. Then I cut a 4" blackout clover from teal cardstock with my Storybook Cricut Cartrige. I stamped my fairy onto the circle with my black
Staz-on ink.

Next I colored in my fairy. I used Copics for the flesh, E00 and E11, and rosy cheeks, R20, and was thrilled with the results! Since I am just starting my Copic collection I used purple, teal, green and yellow markers from my stash to color the rest of her.

Next I used a yellow Twinkle Jewel from the Summer colors to highlight the center of her flower wand, and added Diamond Stickles to the edge of her wings for some fairy sparkle. Then I adhered the circle into the center of the clover using my Tombo Mono Adhesive. In the
center of each petal I ahered Ocean colored Twinkle Jewels. I used foam tape to adhere my image to the front of my card. Last I stamped "Thanks fairy much!" on a scrap of white paper and adhered it to a scrap of the teal. I accented the word "fairy" with a little glitter with my Sakura Jelly Roll Stardust Glitter Pens. I adhered this to the lower right corner of my patterned paper and added a couple more Ocean Twinkle Jewels as well.

Mandie has done a fantastic job putting together this beautiful card! Let's all take a minute to show her the love!

All of the products used to make Mandie's Thank You Fairy Much can be purchased from Cutters Creek!

Saturday, January 9, 2010

New Pink Cat Images!

Okay Ladies! I am SOOOOOOOOO excited to be the one that gets to share this with you! One, because I think that these new Pink Cat stamps are just precious. And, two.....because it is my very first time to work with all my new Copics!

As soon as I saw these images at Cutters Creek, I couldn't wait to get my hands on them! They are perfect for so many different kinds of projects, and they have arrived just in time for Valentine's Day! I think that my favorite of the three is the sweet little girl in the middle sitting on her heart. I am going to take that image and stamp my daughter's name into the heart! So cute!

I've also shot each image close up so that you can get a good idea of the detail, and how each one will look on the page!

First up is Lily Valentine Ballerina! Since we are so close to Valentine's Day I choose a traditional Valentine's color scheme, and I love it! But honestly, I think that there is so much more that you could do with this image. I can see her colored in soft, sweet baby colors and used on thank you notes for shower gifts. Or, colored to match a party theme and used to decorate treat bags. So many options!

But that is one of the things that is so great about Pink Cat. These are images that you will find yourself reaching for again and again!

In keeping with the Lily theme, next up we have Lily Valentine Fairy! This little girl is so sweet! Since I colored her to go in my daughter's book, I used the pink and brown color scheme of the book as a whole. I like how this gives her a different feel and may also use this design to top the Valentine treat bags I make for my daughter's little friends. (Cut with my Cricut of course!)

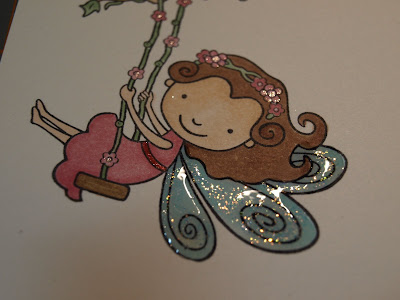
If you look closely at her wings, I colored them using my Spica Glitter pen. LOVE the effect. It makes them shimmer lightly just like fairy wings should! It is the perfect finishing touch.

For those of you who have never used Pink Cat, the first thing that you will notice is the quality of the image. The lines are clean and perfectly balanced, giving you a crisp, fresh look each and every time!

Our last image is called Pixie's Make a Cupcake, and it features Pink Cat's brand new pixie friends, Dottie, Nixi and Pippa! These cute little girls lend an element of fun that just makes you want to smile! It contagious! I think that this image is really really sweet, and I am excited to see more fun in the future with these three.

Now, each of these stamps (as well as the coordinating images in their sets) are available directly from Cutters Creek. But, you'll want to act quickly to get them in your hot little hands before Valentine's Day. Trust me ladies, they are going to literally fly out the door!

And when you get them, I would love to see what you make, so be sure to post it in the group!

If you have any questions, please feel free to ask them!

Thanks for stopping by and have an absolutely fantastic day!


Monday, December 14, 2009

Wendy's Red-Nosed Reindeer

Rudolph the Red Nosed Reindeer.....da da-da da-da da da!!! (insert music notes, you all know the tune!)

O...MY...GOSH...!!! Do you see this card! How freakin cute is that? I mean really. We will talk about the details here in a minute, but right now I just want to send Wendy some props! She has really out done herself this time!

First, ignore the image (I know...its hard) and just look at the card base. This is something that you could easily put together ahead of time and then add the appropriate image when you were ready to send. Actually, this is something that I do all the time. If I have a day when I get to camp out in my craft room, I pick a fun layout and assemble at least half a dozen blank cards. Since I am doing them in bulk, and cutting all the pieces at once, it goes together really quickly. Then, when I need a card, all I have to do I choose the image I want, color it, and I'm ready to go!

And about that image! There are so many things that I want to point out that I am having trouble figuring out where to start! Look closely at Rudolph's nose. Do you see how it seems to actually glow? This is thanks to a product called Glossy Accents. An option that we haven't touched on before, Glossy Accents would make the perfect addition to your box of tricks. Wendy has used this product to accent the little pom-poms on the hats as well as the studs on the belt around Rudolph's waist. To apply Glossy Accents, just use the precision tip to gently squeeze a small amount of product directly where you want it to go. The result is a clear, domed effect that adds shine and depth to your project. Click Here to check it out at Cutters Creek.

The image for this card is off of the Pink Cat Itty Bitty Christmas set. Wendy is really showing her Copics skills here with the shading on Rudolph! He is perfect! And, the use of an Inksentials Gel Pen on the cheeks is the perfect finishing touch. This image could be used as a card, an ornament or even as a place holder at Christmas dinner. The options are endless!

If you have any questions for Wendy about the products or techniques that she has used in this awesome card, just ask! As always, we are here to help!

Wendy's Red-Nosed Reindeer was created using the following products:
  • Glossy Accents
  • Copics
  • Coredinations, The Chocolate Box
  • Inksentials Gel Pen in White
All of these products can be purchased directly from Cutters Creek!

Thanks for sharing Wendy! As always, you have outdone yourself!

Sunday, December 13, 2009

Lea, Lily and Tweet!


Good morning ladies! I hope that all of you had a marvelous Saturday and are now sitting back and enjoying a quite Winter Sunday. For me that means having the chance to finally spend some real quality time in my craft room with my goodies. Fingers crossed...it will happen today! But, for now, I'll just have to settle for sharing this beautiful Pink Cat card that Lea made with all of you. I know....I live a rough life!

I am always excited when one of Lea's projects comes across my desk. You really have to see it in person to fully appreciate the quality of her work, but I'll do my best to put it into words! First, there is no detail left undone. Every edge is perfect, no
adhesive shows, the colors are gorgeous, and (best of all) the images are so nicely done that they look as if they are printed rather than hand colored. So not kidding! Lea is an amazing artist, and the Design Team is very fortunate to have her as part of our team. She uses her Copics to their best advantage and is able to quickly give her images life and depth with just a few colors.

Look at the layering in the image to the right. Beautiful papers in various patterns are layered just so to form a very expensive and high end look. I love the extra touch of having the word "surprise" included as part of the stamped image. I also really like how Lea has used Stickles to accent the swirls on the package. It gives just that little touch of sparkle that makes the image pop. And, even though this card looks very posh, it is actually very simple to make and there are very few supplies involved! Lea has used a DCWV card and layered on coordinating paper. Then she chose her Pink Cat image, colored it, embellished it, and added it to the center of the card. That's it! Done! This is a card that any of you could make, and I hope that you will.

If you have any questions for Lea about the supplies or techniques that she used to make this card, just ask! We are always happy to help in whatever way that we can.

Lea, Lily and Tweet was created using the following products:
  • Pink Cat Studio's Stamp Lily & Tweet
  • Copics: 0, YG63, YG67, RV32, RV34, V12, V15, V17, BG49, BG45, YR04, YR07
  • Pastel Pencils: cream, red-brown
  • Stickles - clear
  • DCWV card base
All of these products can be purchased directly from Cutters Creek!

Let's all give a huge thanks to Lea for sharing this great card!

Saturday, December 12, 2009

Angela's Hot Cup of Cocoa


Okay, let me just start by saying that I am in LOVE with this card! Seriously Angela! Could it be any sweeter? I want to adopt it and give a good forever home! The stamp is adorable, the scalloped edging is a technique that I HAVE to learn and how cute is it that the fur lining on her coat actually looks furry?!?!?!

So stinking cute!

As you may have guessed, this is the latest post dedicated to Cutters Creek's new line, Pink Cat Studios. Truly some of the cutest little stamps I have ever seen, every image from Pink Cat has enough personality to make it fun, but not so much going on that it is overwhelming to color or embellish. I promise you this, after using just one image, you are going to be hooked! These sweet and sassy images are the perfect size to set off just about any project. I have to admit, I was hooked before I even got my hands on one. I just had to see it to fall completely in love! Click here to jump straight to Cutters Creek and see the whole line. While you are there, make sure that you check out the Limitless Limbs! My favorite of the bunch!

Angela has outdone herself with all of the detailing for this card. I already pointed out the fur that lines the hood, cuffs and trim. This is a look that you can re-create at home by using your favorite adhesive and some Polar White Flower Soft. The perfect product to accent any winter scene, Flower Soft's Polar White is a true bright white that is not muted or dull in any way.

Angela has colored the image for this card (Pink Cat's Hot Cocoa Lily) using her favorite Copic markers. I love the pink tint to her cheeks, and how her bright red boots seem to jump off the page and grab your attention. Copics are the perfect medium for adding POP to your projects and (as I have recently found) they are well worth the investment! Click here to see the different options that can be found at Cutters Creek!

Let's all thank Angela for sharing this adorable card with us! Angela, please feel free to send it to me if you can't think of anyone else!

If you have any questions for Angela about the techniques that she used to create this super cute card, just ask! Any of us will be happy to answer.

Angela's Hot Cup of Cocoa was created using the following products:
  • Copics
  • Polar White Flower Soft
  • Spellbinder Nestabilities
  • Atyou Spica Glitter Pen
All of these products can be purchased directly from CuttersCreek!

Lisa's Itty Bitty Christmas Card


Well ladies, I promised....and now I am delivering! Here is the first card from the Pink Cat Studio line! Brought to us by Lisa, I think that anyone would be excited to go out to their mail box and find this sweet little card ready and waiting for them.

The stamp used for this project is from Pink Cat Studio Itty Bitty Christmas Stamp Set which you can quickly find by jumping over Cutters Creek. As you can see by the sweet little girl that Lisa used, this is a fun set that could be used for a variety of Christmas or holiday projects. My personal favorite image is the two little elves sitting on a Candy Cane that is being carried by three Gingerbread men. SO CUTE!!! I am telling you, I NEED these stamps! Click Here to see the full set.


Like Wendy did in an earlier Pink Cat Studio project, Lisa has colored this sweet little girl using Copics. You all know by now that I am a huge fan of Copics, and looking at this image will show you why. This close up shows how Lisa has colored and shaded each facet of the image to give it depth and vibrancy. The hair has two tones, the cheeks are pink, the star is shaded, and the dress has scope far beyond a traditional stick figure. The best part? This is all done without any of the annoying lines left behind by traditional markers.

Give it up for Lisa! She has done a great job!

If you have any questions for Lisa about this projects or about Pink Cat Studio stamps, just let us know! Lisa or another member of the design team will be happy to answer.

Lisa's Itty Bitty Christmas Cards was created using the following products:
  • Pink Cat Studio Itty Bitty Christmas Stamp Set
  • Copics
  • Cuttlebug Machine
  • Cuttlebug Embossing Folders - Tiny Bubbles
  • Spellbinders Dies - Classic Oval
  • Stickles - December Special Holiday Set
  • Ranger Inkssectials - Opaque Pen in White
  • Glue Dots
All of these products can be purchased directly from CuttersCreek!

Thanks Lisa for sharing this super sweet card!
Related Posts with Thumbnails