Showing posts with label Copic Spica. Show all posts

Tuesday, September 17, 2013

EEEEEEEK

Hi, it’s Mindy and  I have a Halloween card to share with you all.  My copic markers and I have a love hate relationship. I love to color with them and then I hate how what I just colored looks.  I’m trying to just have fun and color, not worry about light sources and shadows and all that.  It worked this time.  I started doubting the image and almost started over, but I made myself stick with it.    I also have a love hate relationship with my scrapbook room.  I love having a room devoted to scrapbooking, but I hate going in there because it’s such a mess I can’t find anything including my desk.   I decided it was time to tame the beast and get it organized.  I’m not all the way done, but it’s 90% better than it was.  Also, since I’ve been so busy organizing and rearranging my supplies, I’ve found all kinds of things I haven’t used in forever.  So enough with all that, let’s get to the project. 

I used the My MInd’s Eye Mischievous paper pack.   I love this paper because it’s Halloween paper, but it’s not too Halloweeny.  I colored my image with my copic markers.    I wanted the image to match the distressed look of the paper so I dulled down all the color by going over them with a pale warm grey or light tan color. 
photo (31)
After I finished coloring the image, I went over the entire thing with some old paper distress ink then I edged it with some black soot distress ink.  I went over some parts of the image with my copic spica pens, but it’s too hard to capture in the picture.  For the sentiment I used some black Wow embossing glitter.  It was great to reconnect with some of my old supplies.  Sometimes you need to deep clean your scrapbook room to remind yourself of what you have (and what you don’t have but you really really need).
One thing I discovered while cleaning was that I had a problem with my 6 x 6 pads.  I have them stored vertically in a little drawer.  When I use a pad, I put all the scraps back inside the pad.  I’ve found when I pull the pad out by the top, the scraps were falling out.  I saw this idea on Youtube and it worked great.  I put the scraps in a clear envelope and attach that to the back of the pad so the scraps and the full pieces are all together.  In this case since the pad was pretty empty, I put the pad and the scraps down in the envelope.  This has been working great. 
photo (32)   photo (33)
I hope you have enjoyed my Halloween card and that I have encouraged you to reconnect with some of your older supplies. 
Cutters Creek Shopping List
Distress Ink
Copic Markers
Wow Embossing Glitter
My Mind’s Eye paper
Clear envelopes

Wednesday, August 7, 2013

I Love Anna Griffin with Kim B.

I so love everything Anna Griffin.  She does everything with such elegance and grace.  I have met her several times and she is so sweet and loveable.  I have beautiful scrapbook pages of her and I using her products and I really treasure those pages.  My project today is using one of her new embossing folders, Rosa.

Before I start on the project, would you like to know how my customers are getting their hands on these gorgeous folders?  I think it is worth few minutes of your time to read on and find out.  Cutters Creek realized some time back that the economy was making budgets tight for many crafters however they did not want to give up their love of crafting and wanted to be able to get the newest and greatest products and also some oldies but goodies as well.  I also realized that many crafters love an array of colors to choose from however on a tight budget, they would have to pick and choose a few colors of their item of choice and just could not afford to purchase 10, 20, 30 colors but they sure did want them all!  So the Cutters Creek Clubs were born.  I often do clubs where members can collect all colors over a six month period.  I generally try and keep the Clubs around $20 and I reduce my flat rate store shipping down as well to make that $20 to include shipping charges.  My customers love the clubs because they get a monthly package of crafty goodness at a low affordable price and I usually keep what they are getting as a surprise so they get even more joy out of their purchase.  As an avid crafter myself, I put myself in my customers mindset to make selections of items I would like to receive and not just send them items to send them stuff.  The Cutters Creek Clubs are all about my customers and their joy.  My joy comes from how delighted they are each month.  We usually are running any where from 5-9 clubs at any given time and you do need to join on the onset of a Club's beginning.  If you are interested in playing along with us, please click HERE to join the Cutters Creek Store Yahoo Group to check up out.  We are a very warm and friendly group free from drama and you also get insider information and scoops and updates on products as well.  We would love to have you, so please stop by!

If you have gotten this far through my post (and I thank you for hanging in there with me), it is time to show off my project!  I made the two cards below with the Anna Griffin Folder Rosa that my Club members have received already.  My third grand daughter was due on July 28th and still has not made her entrance as of yet.  This will be my daughter's first child and we can't wait to met her, especially my daughter who is a little bit tired of being pregnant right now.  You ladies who have had children know what I mean.  One card is to my new grand daughter with a note inside from grandma with a gift of bibs that say all kinds of wonderful things about grand mothers.  The other is a card welcoming my daughter into motherhood and her gift is a beautiful necklace.  I wanted to give her something special because if you have experienced the birth of a child, you know that once the baby comes, the child becomes the one that everyone has interest in and mom is kind of forgotten a bit.  So as my daughter's mom, I want her to know that I think she is beautiful and special and I love her with all my heart.  Here are the cards:

 
The background of my grand daughter's card uses the embossing folder and my daughter's card uses the included matching border.  I love that Anna's folders also include the matching border in the package.  I also hand wrote "MOM" on my daughters card (on the baby bottle) with one of my Spica pens by Copic and then added some Stickles over top of that for some extra bling and pop.  I also inked the edges of the elements on her card with a Memento Ink Pad which is also another Club currently in progress. 
 
I hope you enjoyed my project!!  Please leave me a comment and let me know what you think.  Thank you so much for stopping by!
 
Authors Edit:  This was scheduled before the baby was born however she (Isabeau Helene) was born August 3rd weighing 9lbs 7ozs:


Thursday, May 2, 2013

Elegant Cards Made Easy with Graphic 45 & Lori

May is a busy month - on top of all the "usual" things, we Mother's Day and graduations to contend with! Which makes it even more important than usual for me to be able to get projects done quickly, and still look like I put plenty of effort into them.  At least I know cards can be a snap with Graphic 45.  My preferred card size is 5x7, and thankfully G45 has some great 4x6 images in many of their collections which are perfect for that size card.  Here's a beautiful (but quick!) card perfect for Mother's Day, a birthday, and more:


I chose an image I loved from the Secret Garden 12x12 paper pad, along with a coordinating print, and decided to use them with a kraft card base.  I cut the print to 4.75" x 6.75", and inked the edges of it and the image panel using Faded Jeans Distress Ink.  I cut a piece of cream cardstock to 4.25" x 6.25", and inked the edges of it and the card base with Antique Linen Distress Ink.

I layered the image on the cream cardstock, and the coordinating print on the card base.  I added some silver Glitter Tape to opposite corners of the matted image, then adhered it to the card front using foam adhesive. Finally, I used several colors of Copic Spicas to add more sparkly details to the image:


The closeup photos just do not do the actual image justice. I just love how a little sparkle makes these images shine! (No pun intended, lol.)

Cutters Creek supplies used:
Other Supplies: cardstock in kraft and cream (I used CTMH)

I hope today's post has given you some ideas - I'd love to hear what you think!

Thursday, April 25, 2013

Thinking of You Card with Lori

It seems that I am always needing some kind of a get well or thinking of you card.  (Maybe that's a sign of my increasing age, I don't know...) I like that kind of card to "feel" happy, and I decided some Secret Garden papers from Graphic 45 were in order.  Here's the most recent card I made:


I love the little cut-apart images G45 always seems to include in their paper pads, and these mini seed packet designs are just perfect and sunny looking. Layered on a couple of Spellbinders Nestabilities, this one was the perfect focal point for my 5x7 card.


I matted the focal image once, and popped that up with foam adhesive on a second matted blank.  I added Kaisercraft pearls to the four corners for a little something extra.


Lastly, I added some bling to my image using Copic Spicas in Orange, Lemon, Buttermilk, and Clear.  I hope you enjoyed my card today, and I hope my recipient has a sunny day after seeing it!

Items available at Cutters Creek:

Other Items Used:
  • cardstock
  • Spellbinders Lattice Rectangles
  • border punch
  • stamping ink & sentiment stamp

Thursday, March 28, 2013

Wedding Card with Lori

Hello! Seems it's been a while since I've been here; the germs have been rocking our house a little hard this month.  Anyway, today I have a pretty wedding easel card to share with you.  The hubs came home last week and told me he needs a card for a coworker getting married.  Since he'll be delivering it in person, I was happy to make it thick and chunky because I don't have to deal with mailing it, lol.  Here's what I came up with:


I pulled out one of my few wedding stamps (I think it's Bildmalarna) and my Copic Markers.  I knew I wanted to use that beautiful doily die again, so I cut a circle from Xpress Blending Card to fit the center. I stamped my image on the circle and colored it with my Copics.


I made my 6x6 easel card using CTMH cardstock and Authentique papers from my stash.  I placed the stopper for my easel near the top of the inside instead of the traditional placement near the bottom so it would stand up almost straight. I made sure to pop up the top strip with foam adhesive to keep it from popping closed.  I also added some rhinestone brads for bling.


I raised the doily off the card front using more foam adhesive for added depth and interest.  I embellished using Prima Fairytale Roses and Cutters Creek branded flowers.  I inked the CC flowers to darken them a bit since they were the same shade as the darker Fairytale Roses, and I wanted to add a little more color variety. The flowers are all adhered using Glossy Accents.


It's hard to see in the pictures, but I added sparkle to the eyelet areas of the wedding dress using a clear Copic Spica pen. 


Supplies available at Cutters Creek:
Other Supplies Used:
  • Cardstock
  • Pattern Paper (I used Authentique)
  • Ink to sponge flowers & paper edges (the Tim Holtz Distress Ink pads in the store would work great)
 

Thursday, February 28, 2013

Doily Dies with Lori

How much are you loving those new Cheery Lynn doily dies in the store?! They are just gorgeous, and I love the design I ordered to try. Due to some technical difficulties, I only have one photo of my project for you today. (Someone mislaid my camera charger...) It doesn't quite do this beautiful card justice, but for now at least, it will have to do!


I wanted to use my English Tea Party die in a different way, so I made a giant rosette.  I just cut 2 doilies from the same paper, then I scored them using my Scor Pal.  I just laid the doily on the board, lining up 2 high points across from each other on a score line and scored. Then I rotated it to 2 low points ans scored again.  I continued all the way around, then repeated for the other doily.  I cut down one score line on each doily into the center of each, then accordion folded them. I overlapped one section and adhered them to each other with a bit of Glossy Accents.

I made a 6 x 6 card base from black cardstock, and added a border of black diamond Stickles.  After that was dry, I adhered my rosette using more Glossy Accents.  I used some circle punches to create a center. I layered them with ATG adhesive and adhered the whole thing using more Glossy Accents.  I added some ribbon and a bow to balance my design.  You can't see it in this photo, but I also used Copic Spicas in Blossom, Silver, and Pitch Black to highlight portions of the picture in the center of my rosette. (I will try to add another photo once I find my charging cord!)

This particular design is currently sold out in the store, but there are lots of other beautiful designs to choose from.  Or, if this one is on your must-have list, be sure to contact Kim and ask her about another shipment.

Items available from Cutters Creek:
Thanks for stopping by today! I hope you enjoyed my project.

Wednesday, January 23, 2013

Sparkly Valentine with Lori

Today I have a bit of a non-traditional Valentine to share with you.  I'm using non-Valentine paper and a non-Valentine image, but by focusing on the red and adding some sparkle and some little added bits, it would make a fun Valentine for a special someone (who might be just a little bit grumpy, lol).

I started with the Miss Caroline Dilly Dally 6"x6" pad from My Mind's Eye, a Gorjuss Girl stamp from my stash (sorry, she's discontinued), and my Copic Markers and Spicas.  This is how it turned out:


 I can honestly say that I am in love with this little grouch!  I stamped my image in Memento Cocoa Brown on Xpress Blending Card, then chose the papers I wanted to use with her.  I wanted the red & white polka dots for a mat to put the focus on the red. Then I decided that the ticket pattern would make a great background and I could treat it like a kissing booth.  I cut a ticket shape from a Cricut Cartridge (I think I used Art Philosophy, but there are tickets on a number of cartridges), and stamped the sentiment with an alphabet set in my stash.  I didn't worry about making it straight, letting it be fun & child-like.  

I colored my image with Copic Markers to match the papers I chose (see list below).  Then I used Copic Spicas in Red and Lipstick to trace the letters on the tickets and go over all of the hearts on the girl's dress and her barrettes.  Finally, I trimmed all of my papers to size and added borders using a Chocolate Copic Spica.  I sponged the edges of the papers and the card base with coordinating inks and adhered everything, adding ribbon from my stash to the ticket paper. After assembly, I added my ticket using foam adhesive squares, and added some Kaisercraft adhesive pearls in Lemon.

 Here's an angle that shows how glittery the Spica Pens make everything!:


Products available from Cutters Creek:
Here's a closeup of the colored image, followed by a list of the colors I used:

Skin: E00, E02, E11, E13, YR000, R20
Hair: YR21, YR23, YR24
Shoes: E15, E37, E59
Clothes: BG11, BG15, BG18, R24, R27, R29
Shadow: W1, W3, W5

Now it's your turn!  Grab some papers  an image that may not say "Valentine's Day", but includes one color you can focus on to bring your theme through.

Thursday, December 20, 2012

Easy Gift Bags With Lori

With Christmas rapidly approaching and teacher gifts finally completed, I realized I needed some git bags to pop them in.  Scor Pal to the rescue!  You can use your Scor Pal to make nearly any size bag you want, and I can show you how.

Based on the size of my gift, I decided to make a bag 6" wide by 2.5" deep. (Sorry, I can't show the actual gifts yet, since they are being given Thursday & Friday and I don't want to spoil the surprise, just in case!)  So, it's easy to figure out how much paper you need based on the size of the bag, plus a 1/2" - 1" flap for adhering.  Just add up all of the sides: 6 + 2.5 + 6 + 2.5 = 17  Since this is larger than 12 inches, I know I will need 2 sheets of cardstock.  I will need a flap on each piece to attach them, and I choose a 1/2" flap, so I will need 2 sheets cut to 9" x 12". The 12" is height plus bottom, so lay your cardstock on the Scor Pal vertically, like this:


Next, score the cardstock for the 2 side measurements and flap.


When you have scored both lines, your cardstock should look like this:


Next, you will rotate your cardstock one turn (90 degrees). It doesn't matter which way you turn it, as long as you do both sheets of cardstock the same way.  When you are done, the cardstock will look like this:


This corner piece I have scribbled through gets removed completely.

Next, you will cut the flaps for the bottom of the bag:


The arrows I drew in show where pieces are cut to make the flaps.  Note that the piece we cut completely out in the previous step is next to a bottom flap.  Next, we need to attach the two pieces of cardstock and assemble the bottom of the bag.


Lay your cardstock so the fold of the skinny side flap is a "mountain" fold.  Put your adhesive on the top side of this skinny flap on both pieces of cardstock.  Now adhere the flap on the first piece of cardstock to the "inside" of the second piece of cardstock.  Then adhere the flap on the second piece of cardstock to the inside of the first piece of cardstock.


Next you will put adhesive on the "outside" of the smaller side flaps, and fold over one of the larger side flaps on top of them.  Set it flat on the table and push down the smaller flaps from the inside of the bag to make sure they are adhered.


Finally, you will put adhesive on the "inside" of the final flap and adhere it to the rest of the bottom.  Your bag is now finished.  If you are going to want to put a topper on your bag, you can use your fingers to crease the small sides in half partway down the sides of the bag.

Now, on to the fun part - making the bag pretty!  Here is how mine turned out:


I opted for a simple topper since my paper had a pretty design.  The 6"x6" paper pads in the store are perfect for this! I just folded mine in half.  I wanted to make my bag reusable, so rather than permanently attach the topper, I wanted to tie it on.  I held my folded topper over the folded bag and punched 2 holes through all of the layers at once.  I used eyelets from my stash to reinforce the holes in the topper only.


Since my paper had a pretty design, I left it alone and just traced over some of the design elements with my Copic Spica pens.


I also traced over some of the stamped elements on this tag with the Copic Spics pens.  I reinforced the hole in the tag with another eyelet.  I threaded twine through the holes in the bag & topper, then through the tag and tied it in a shoestring bow.  Easy to open and easy to reuse!  (Note: if you want to see the gifts I made, you can visit my blog Friday to see them.)

The following products to make this are available in the Cutters Creek store:

Other materials used:
  • cardstock in coordinating color(s)
  • Cricut Artiste cartridge (for tag)
  • stamps of your choice (for tag)
  • eyelets and punch (I used a Crop-a-dile)

Thursday, November 8, 2012

Le Cirque Card with Lori

I recently received the Le Cirque 12x12 paper pad from Graphic 45, and my first thought was "Why the heck didn't I get this a LONG time ago?!"  I have to admit that I have a personal problem with modern-day clowns; I find them terribly creepy (probably thanks in no small part to horrible movies like It and Killer Clowns From Outer Space).  But I digress...

I love the vintage circus designs on these papers, including the clowns.  I have a few other fun projects on mind for these papers, but I wanted to start with something small, and I really liked an elephant image I found in the corner of one of the papers.  So I made a fun card with it using a sketch that fit my elephant image.


I love the slightly chaotic feel of the mix of patterns, "controlled mayhem" as one of the papers says!  I backed the elephant image with black cardstock, and edged everything else with black distress ink  for definition.  For contrast, I added sparkle & shine using some gold ribbon from my stash and some Copic Spica pens.


I used Sky Blue on the flowers and for the faux stitching around the square block, and I used Red & Olive on the flowers in the elephant image.


I adhered the bottom two layers with ATG adhesive and the square block and elephant image with foam adhesive squares.  I used Scor Tape to adhere the ribbon, and Glue Dots for the flowers.

I hope you enjoyed today's project as much as I did making it.  Thanks for stopping by!

Monday, October 8, 2012

Bird Song Card with Lori

I'm back from my little hiatus in September, and I wanted to share a pretty card with you today. Do you ever fall in love with some papers but wonder what to use it for?  I felt that way about these beautiful Bird Song papers from Graphic 45.  I usually buy my paper to use for scrapbooking, then use my leftovers and scrap pieces for cards. I'm sure I wouldn't have a use for a whole pad of this paper for scrapbooking, so I LOVE the smaller 8x8 pads that G45 offers!


I cut the fan shape, greenery, and all of the flowers using my Cricut and the Pagoda cartridge.  The circles are also cut using the Cricut; I used the Center Point feature to cut the circle around the portion of the geisha image I wanted.  I outlined everything using a gold leafing pen, and embellished with brads and ribbon from my stash.  Everything is adhered using ATG tape and the Kool Tak clear foam adhesive pads.  Finally, I used my Copic Spica pens to glitter up lots of stuff!  I used the red on the designs on the fan, clear to outline the flowers on the background paper, and both colors on my focal image.  It's very difficult to get the glitter to show up in photos, but this one shows it the best:

I used clear on the white portion of the kimono nearest her neck, then red along the next strip.  I even used clear on the pink flowers in the image.

I hope you enjoyed today's card!  I'd love to hear your comments on it.

Wednesday, August 8, 2012

A Birthday Card by Chris


All the papers for this card are from Graphic 45’s Little Darlings. Used my ATG to adhere the blue base. I then used the largest die from Spellbinders Blossom Four and edged it with Tattered Rose Distress Inks. To give the flower a bit of depth I ran it through my Big Shot in the Whimsy M Bossabilities embossing folder and glued it down. Then I made the Happy Birthday sentiment, first cutting the paper with my Cuttlebug Embossing Plus Fanciful Labels folder, then inking (again with Tattered Rose), and embossing the sentiment with WOW! Suzy West Pantry Collection—Blueberry. This label is raised up on Glue Dots Pop Up Dots. A bit of lace trims the bottom.

I fussy cut an image from two sheets of Graphic 45 Little Darlings. I used one as a base and the other cut out parts that would give the image some dimension, using ASI (Kool Tak) 3D Foam on a Roll. Her bow is embossed with WOW! Embossing Glitter—Angel Wings. (I just love this color and sparkle!). To finish the card off I took apart some old flowers and rebuilt them with a pearl in the center. Petals and pearl were glued with Glossy Accents. Two punched butterflies edged with Tattered Rose and a touch of Spica Gold on the bodies and the card is done.

Thursday, February 16, 2012

Happy Birthday!

We have so many February birthdays in my family, it seems that's the only kind of card I can even think of during this time. For this card I broke out my trusty Cricut Imagine . This is my go to machine when I need something done quickly. The octopus is from Birthday Bash, but I filled it with colors and patterns from one of my Imagine cartridges.

I thought this little octopus was perfect for a peachy keen face stamp, so I added one and I think she looks so sweet. Cutters Creek sells a couple of different face stamp assortments from Peachy Keen and they're perfect for adding just the right facial expression to your die cuts. To finish my octopus off and give her some style, I added some faux stitching with one of my copic spica pens. I wish you could see the shimmer more in the picture it's just the right amount of bling. I also went over her face to give that a little more shine too. No self respecting octopus would head off to a birthday party without the perfect accessory and I though she would look adorable with a flower on her head. This little lily from Cutters Creek's own brand of flowers was just the perfect touch. The final element for my octopus was to attach her to the card with an action wobble so she can move like a real octopus. I finished the card off with some more faux stitching and a sentiment and it's ready to be sent off!

Sunday, July 24, 2011

Christmas in July by Chris

I am never one to be ahead of the game so this was quite a challenge for me to shift gears from all those summer projects that are lined up and think of Christmas. I knew I wanted to have nothing to do with SNOW! Searching through my stash I came across my Graphic 45 Christmas Past paper and fell in love with these angels. I fussy cut both sets of them out using my Cutter Bee Scissors and then I scanned it in and printed it on white cardstock so I would have a third layer to work with, and fussy cut that. I cut them apart for layers so they would have depth when I used them.


While I was waiting for the ink to dry on the scanned image, I cut an 8.5x11 piece of white cardstock down to 7.5x11 and scored it at 5.5 with my ScorPal. I then cut a piece of green shimmery paper at 7.5 x 5.5 and used ScorTape to adhere it to the card front. The gold rectangle is another piece of Graphic 45 cut to just a quarter of an inch smaller than the background (also glued with ScorTape). The lace stickers were in my stash and since the matched the green so well that I couldn’t resist adding them to frame the angels. Before I started to build up the angels, I used my Gold Spica pen and traced over the sentiment and glued it down. It really darkened the sentiment and gave it a soft glow that I just love.


Then, using pop dots I built the angels up. I followed the colors on the Graphic 45 and used my Pink and Melon Spica pens to highlight them and the Clear Spica to fill in the white with some sparkle. I hope you can see that because it makes all the difference in the card. My final touch was one of my PDC Poinsettia’s I had made at Christmas time. I used some Glue Dots to set it on the card. And gee, a Christmas card done in July! Maybe I need to be challenged more this summer so my Christmas letters will be all ready before school goes back into session—LOL.

Wednesday, May 18, 2011

Melissa's Anime Image

So today, I wanted to show some really simple, lovely cards I made using one of the oriental weave embossing folders from Cuttlebug.  I was trying to think of an image that would compliment the embossing folder.  So I went to my favorite site for anime images; http://www.deviantart.com/

I LOVE this site.  One of my favorite artists is Princess Elemmiriel.  She has the most gorgeous line art to color.  I chose Lady Rose Dragon . . . I can't tell you how many cards and miscellaneous items I have made with this image in particular.  So while I waited for my printer ink to dry - -you can never wait too long - -I embossed a beautiful Jade Green and a Silver Gray paper from Core'dinations Gemstone pack with my oriental weave embossing folder.  I would highly recommend this paper as well!   I centered them on some back cardstock from my stash and started coloring my images.  Bytheway, these cards are the standard A2 size :o)

So I tried to stay with complimentary colors to the papers I chose.  You don't have to use all the colors I did to get the same effect; I just started tossing in colors while I was playing.  I really tried for a dramatic look with the eyes and lined them with a multiliner and with spicas.  What do you think?


Hair: YR000, E50, E21, E11, E97, E99, E37, E29

Skin: E50, E00, E21
Eyes: G20, YG11, YG17
Makeup: R12, R02, R32, Pitch Black Spica, Peach, Clear
Hairband/Trim: Y32, Y35, Y17
Dress: BG10, BG11, BG23, BG13
Flowers: RV02, R12, R02, R32, R35
Shadows: C00, C1


Hair: C00, C1, C2, C4, N4, N6, N9, 0- Blender
Skin: E50, YR000, E00, YR01
Eyes: G20, YG11, YG17
Makeup: R12, RV91, RV93, Pitch Black Spica, Peach, Clear, Silver
Hairband/Trim: N1, N4, N6
Dress: BG10, BG11, BG23, BG13, BG45
Flowers: BV0000, BV00, BV02
Shadows: C00, C1


thanks for looking!!!


Photobucket


Paper: Bazzill Simply Smooth, Core'dination Gemstone,
Embellishments: Liquid Pearls
Stash: Black Cardstock

Thursday, March 10, 2011

Melissa's Fairy Tale Card

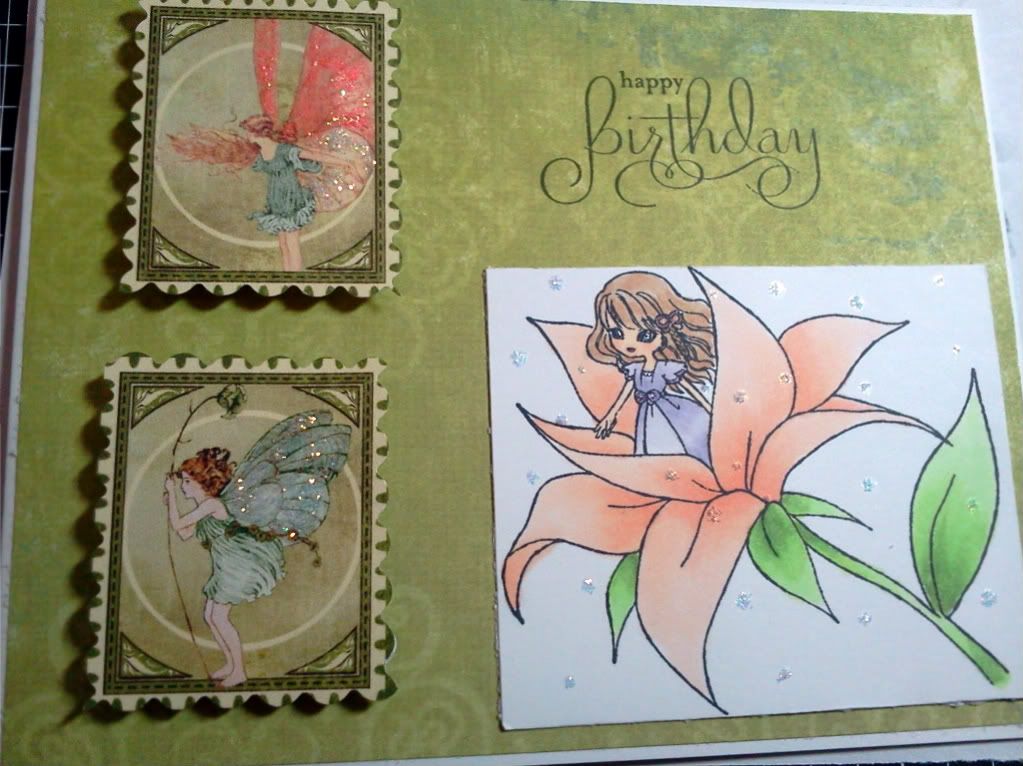
So I wanted to show some new products that Cutters Creek now has and what better way than making a card! I started with the Graphic 45 Once Upon A Springtime Paper. I have never used their paper before and I can honestly say I cannot wait to buy more! This card was a learning curve for me and I loved it!!

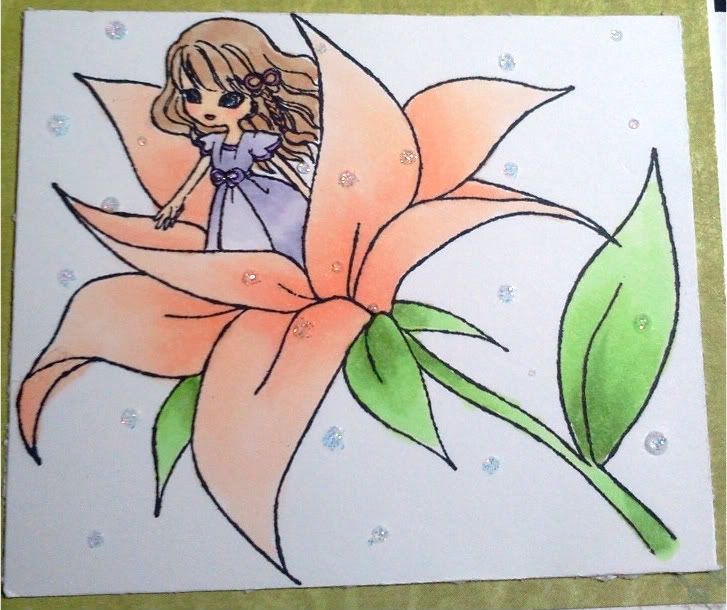
I have a tendency to lean towards mythical in stamps and papers and this just fell right into my element. I loved the fairy and butterfly theme in this collection and was trying to find the perfect stamp set to complement it. I came across a new stamp set from In Style Stamps; Fairy Tales. Perfect! There is an image of Thumbelina that would work perfectly with the fairy theme.


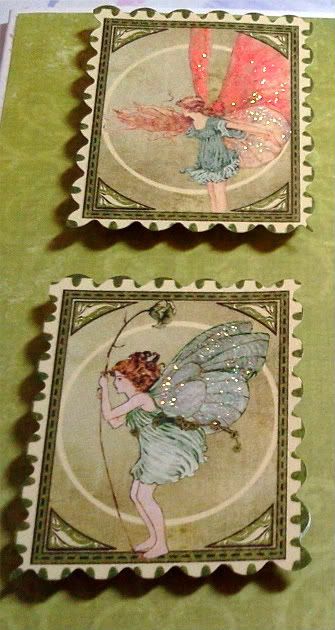
I wanted to make the wings pop from the paper and also just add a shimmer effect to the stamped image but I wanted something more popping than the subtlety of Spicas; Stickels! They were the product of the month for February and I have never used them before. I really like how it gave the fairy wings a realistic look and added a fantastic feel to the Thumbelina image.

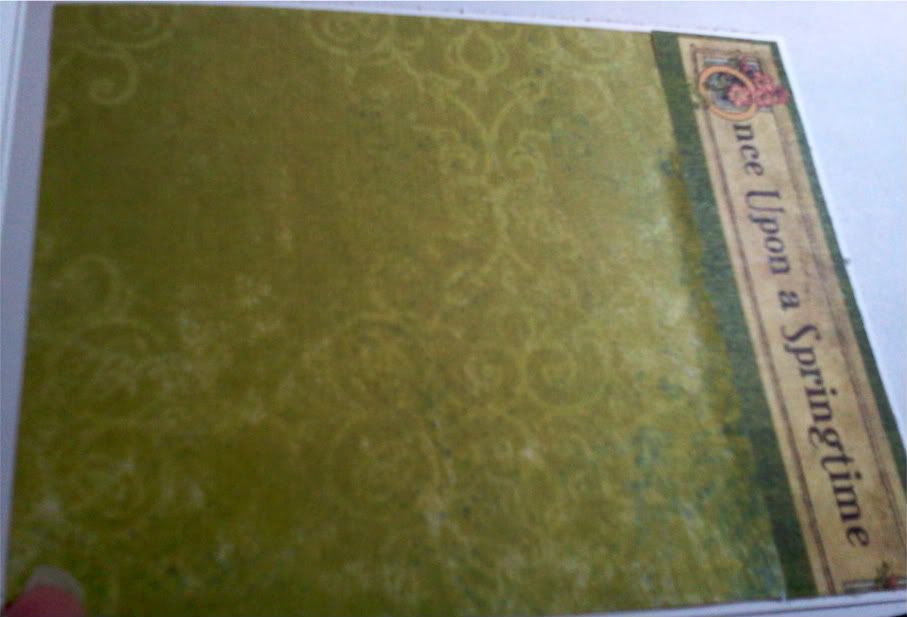
I love how I was able to blend the Graphic 45 paper with some from my stash for the inside of the card.


Let me know what you think!!

Don't forget the chance for the FlowerSoft blog candy!  A random comment will be chosen from one of the posts for March.  Good Luck!!!

Stamps: In Style Stamps Fairy Tales, SU! Well Scripted (No longer available)
Embellishments: Stickles -Tropical Tangerine, Diamond
Other: Glue Dots, ATG
Stash: corner rounder, green background paper
Skin: E50, E00, R12, Peach, Sky Blue Spica
Dress: BV0000, BV00, BV11, Lavender Spica
Hair: E42, E31, E34
Leaves: YG11, YG13, YG17, YG63
Flower: YR000, YR01, E02
Related Posts with Thumbnails