Showing posts with label Prima Flowers. Show all posts

Thursday, August 22, 2013

Get Well Card by Fran


I colored a cute Fairy and thought how nice it would be as a Get Well Card.  The image is called Peaceful Thoughts Fairy by Carmen Medlin for SCACD Digital.

OLYMPUS DIGITAL CAMERA

Note:  Color of dress is actually a deep pink.

The sentiment used on the inside of the card reads:  “Wishing You a fairy speedy recovery”.


Details:  The card measures 6” by 6-1/2”.   All papers are from my stash.  I used three circle dies measuring 5-1/2”, 5-1/4”, and 5”.  The digital image was colored using Prang Colored Pencils and Gamsol to blend the colors. 

The yellow butterflies were punched using a Martha Stewart punch.  The ribbon is made from seam binding and I colored it using Worn Lipstick Distress Ink Pad. 

All the tiny roses used are by Prima.  I added Baby Blue and Worn Lipstick Stickles to the roses and the center flower.  The center flower on the ribbon was hand made using a Retro Flower Punch. 

The digital image and butterflies have Star Dust Stickles on them for added enhancement.  The pearls are by KaiserCraft.  I rounded the bottom corners of the card using a Crop-A-Dile Corner Chomper. 

Framing the digital image are tiny dots of Baby Blue Stickles.  Everything is held together with hot glue and Glossy Accents by Inkssentials.  

The following list of products used on my card can be purchased from the Cutters Creek Store:

Tim Holtz Distress Ink Pad (Worn Lipstick)

Tim Holtz Distress Stickles (Worn Lipstick)

Tim Holtz Stickles (Baby Blue and Star Dust)

Inkssentials Glossy Accents

KaiserCraft Pearls (Bliss & Hot Pink)

Prima Roses

If you have any questions about the products you can contact Kim Bush here.

Thank you for stopping by, Fran


Friday, April 19, 2013

G45 Trinket Box by Laura C

Today is another Graphic 45 Secret Garden project,
and in honor of National Recycling Month, I've done
an upcycle project.  I took a plain little cardboard box 
with drawers, painted it with white gesso, and then
decorated it to make a sweet little trinket box:


I used the 12x12 Secret Garden papers to cover all
the sides, top and bottom, and drawer fronts.  I also
fussy cut the birdcage and flowers on the cage. 

All pieces were inked with Vintage Photo Distress Ink,
and then adhered to the box with Scor-Tape.

I used the Secret Garden sticker sheet (Kim can order)
to add the drawer corners, the "friends" and the 
"buckles" on the top drawer are the upside down
tags from the sticker sheet embellished with 
Want2Scrap pearls.  I added a fancy knob, some 
Prima Fairytale Roses in pink and a bow that is white 
seam binding dyed by simply dragging it across
pads, and then getting it a tiny bit wet using a 
Inkssential Mini Mister and rolling it in a ball.  
I dry it very carefully using a heat gun, but it can 
air dry too with a little patience ;)

The sides were decorated with stickers and bling:


Hope you enjoyed this little upcycle post, and a little
teary knowing it's my last post for Cutter's Creek.
I've been on the team for a number of years, and 
thought it was time for me to step down.  I have a
 lot of fun things happening, and have only so many
hours in a day!....lol.  I'll miss posting, but I plan
on still visiting with everyone....stopping by often,
 maybe even drop by with a post now and again 
and I will always welcome visitors to my blog:
 http://scrapaddict4life.blogspot.com/

Thanks everyone for your support, sweet comments,
and especially to you Kim....for being a wonderful
"boss" but definitely a friend all these years! 

Thursday, March 28, 2013

Wedding Card with Lori

Hello! Seems it's been a while since I've been here; the germs have been rocking our house a little hard this month.  Anyway, today I have a pretty wedding easel card to share with you.  The hubs came home last week and told me he needs a card for a coworker getting married.  Since he'll be delivering it in person, I was happy to make it thick and chunky because I don't have to deal with mailing it, lol.  Here's what I came up with:


I pulled out one of my few wedding stamps (I think it's Bildmalarna) and my Copic Markers.  I knew I wanted to use that beautiful doily die again, so I cut a circle from Xpress Blending Card to fit the center. I stamped my image on the circle and colored it with my Copics.


I made my 6x6 easel card using CTMH cardstock and Authentique papers from my stash.  I placed the stopper for my easel near the top of the inside instead of the traditional placement near the bottom so it would stand up almost straight. I made sure to pop up the top strip with foam adhesive to keep it from popping closed.  I also added some rhinestone brads for bling.


I raised the doily off the card front using more foam adhesive for added depth and interest.  I embellished using Prima Fairytale Roses and Cutters Creek branded flowers.  I inked the CC flowers to darken them a bit since they were the same shade as the darker Fairytale Roses, and I wanted to add a little more color variety. The flowers are all adhered using Glossy Accents.


It's hard to see in the pictures, but I added sparkle to the eyelet areas of the wedding dress using a clear Copic Spica pen. 


Supplies available at Cutters Creek:
Other Supplies Used:
  • Cardstock
  • Pattern Paper (I used Authentique)
  • Ink to sponge flowers & paper edges (the Tim Holtz Distress Ink pads in the store would work great)
 

Friday, March 8, 2013

Favor Boxes with Lori

Welcome back to another day of National Craft Month projects! I hope you're enjoying all of the projects, I know I sure am!

With three school-age kids, and involvement in several volunteer organizations, some of my favorite things to make are treat bags and favor boxes.  Luckily, there are a ton of them available on Cricut cartridges and as SVGs and PDFs for cutting. And you can make the same box in multiple styles just by changing the papers and embellishments.

For today's projects, I used Graphic 45 papers with a Cricut cartridge to make an elegant more "grown up" gift as well as a more fun Easter box suitable for a girl of any age. Change the papers & embellishments again, and you can make the same box into a masculine gift. I chose this particular box, because one of my favorite treats, especially for the grownups, are Ghiradelli chocolate squares.  The ones out now for Easter have a cute bunny on them, so I had to show him off!


The first box uses papers from The Olde Curiosity Shoppe.


For a simple but elegant touch, I tied some black mesh ribbon around the box lid and add a Kaiser Craft flower to the center. (These are not listed in the store, but Kim can order them.)


The frame is cut from American Crafts glitter cardstock. By the way, did you know that you can cut a frame using ANY shape on a Cricut cartridge?!  This box had a window in the top, and I found a matching shape on the same cartridge.  Just measure the approximate size of the window so you know what size to make the inner cut of the frame.  I needed my inner frame to be about 1.75", and I wanted the outer frame to be about 2".  So I moved my cutting blade in to about 1.5" in both directions on the mat to give myself a little extra room and hit the "Center Point" button.  Setting the size to 1.75", I cut the shape once.  Then I reset the size to 2" and cut the shape again.  Frame done! (Be sure to remember to turn off the Center Point  button when you are done.)

The second box uses paper from Once Upon a Springtime, which is no longer in the store.  You will find similar colors and beautiful patters in the Secret Garden papers.


For this box, I used the leftover negative cuts from my box lid and frame to make a plaque for the front of the box. I used a Studio G stamp from my stash and some Vintage Photo distress ink to stamp the "chocolate" bunny.  I also sponged on distress ink in Peeled Paint on all the edges of the box and lid.


For a more girly feel, I used Pow Glitter Paper instead of the Glitter Cardstock, because the glitter is finer.  I also added flowers and pearls.  The pink flower in the center is a Prima, the others were "built" from flowers and brads in my stash.  I added Stickles to the flowers as well.

Items available from the Cutters Creek store:

Other:
  • Artiste Cricut cartridge (box is cut at 2" high size for this project)
  • black mesh ribbon
  • white hemp twine (or use twine/ribbon of your choice)
  • flat paper flowers
  • brads
Thanks for stopping by today! I'd love to hear what you think of my project.

Friday, November 2, 2012

Triple Easel Card by Chris


I recently received my Graphic 45 Bird Song pack from Kim, and once again fell in love with this company. It’s perfect in every way for an anniversary card. I started with a piece of Bazzill cardstock cut to 11x7.5 inches. Scored and folded it in half lengthwise. Then I divided the top half in thirds (roughly 3.7 inches each), and cut from the long edge to the center score line. The center-piece was scored side to side across the middle. The two side squares were scored diagonally from the top outside corner to the lower inside corner.

Now all that was left to do was decorate. I needed 3 squares at 3.7 inches and 3 squares at 3.6 inches (Cherry Blossom sheet). I also cut 2 rectangles from my stash—one at 10 13/16 x3 5/8 inches, the other at 10 ¾ x 3 ½ inches. I then took the other 8x8 piece of Bird Song Cherry Blossom, and used my We R Memory Makers Lace Kerchief Lucky 8 punch, did a combined cut, and then cut the edged square in half to use as my mat. Layered on this was another piece of Bird Song fussy cut to imitate the inner mat created by the punch. The sentiment (computer generated) was layered on top. To make the “lip” for the card to rest against I cut a strip from the Good Fortune page and matted it with black and burgundy Bazzill paper. All cuts were inked with Tattered Rose Distress Ink and Tumbled Glass Distress Ink. To make the “lips” for the two side easels I used Prima Fairytale Roses in White and colored three of them with Glitter Glam’s Lady Bug that Kim ordered for us through the club.

The two outside panels were layered with the birds from the Tranquility sheet. [Make sure you double check, which way the panel will stand before adhering the decorative squares. (Gee, I wonder why I might be telling you that--J?)] The center panel has a Kaisercraft Wood Flourish from the Fancy Hearts packet. This heart was also painted with Lady Bug Glitter Glam and a Sharpie gold paint pen and I used Glossy Accents to attach it.

Monday, July 25, 2011

Melissa's Summer Cards

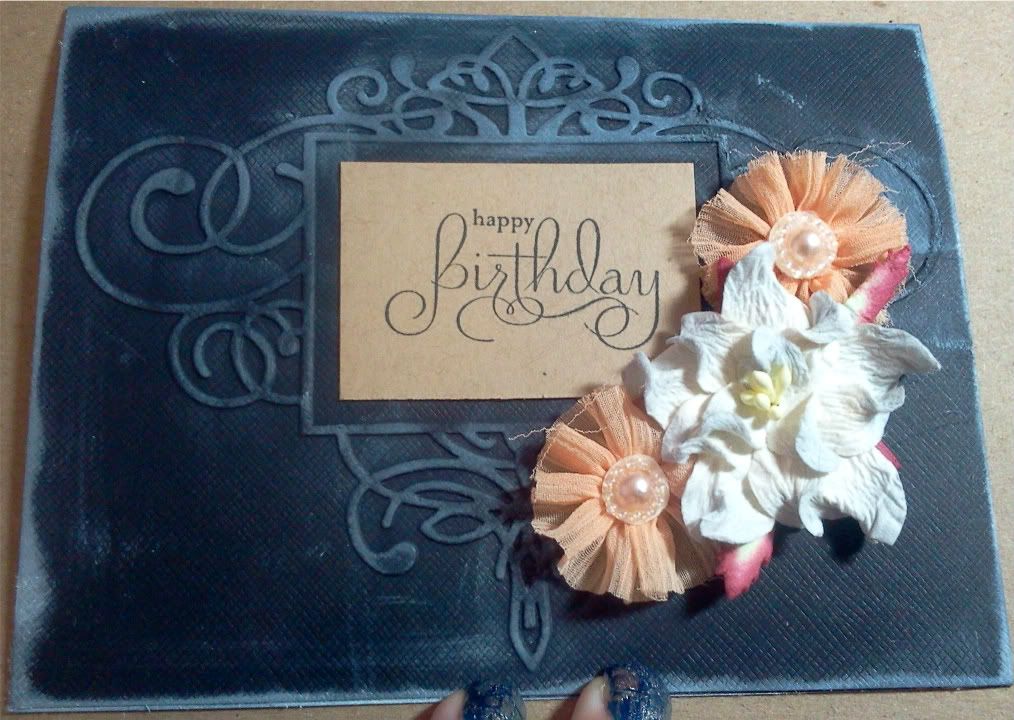
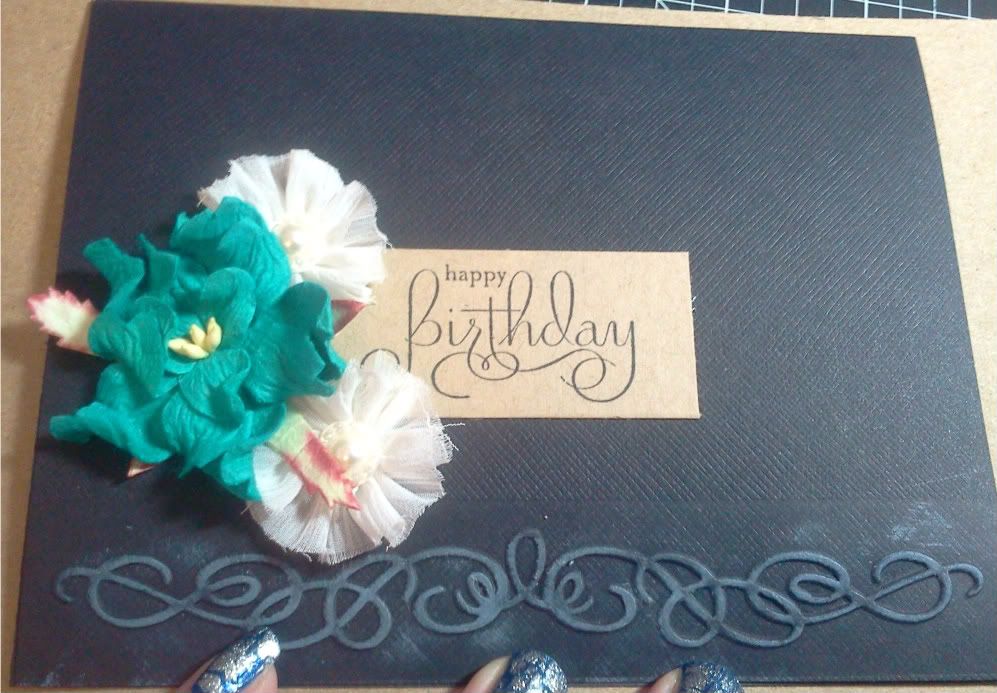
 So I was looking through my Color Inspiration Magazine that came out earlier this year and I got an idea.  Not so much the colors but the layout.  If you have it, it's on page 46 - Spread Sunshine.  I just love this simplicity of it, so here are some simple birthday cards I came up with.


I really like the look of white ink on black paper, so I wanted the white to look a little messy on the embossed images.  The first card I used Flourished Frame and added the white ink and flowers after stamping my words on some Kraft paper from my scrap paper.  Who says brown and black don't go together :o)  I topped it with someCuttersCreek branded and Prima flowers.


This card I also embossed, but with one of the images from the Organic Flourish Collection.  I also used white to enhance the embossed image but no where else.  I just really like the simple feel to it.  Both cards took maybe 10 minutes total so this was perfect for a card in a hurry or  making some for your stash of birthday cards.  And they look completely different!


thanks for looking! 


Image:  Stampin' Up -retired
Paper:  stash
Ink: Memento Tuxedo Black, white ink from stash
Embellishments:  Prima Flowers: Dimmet, Aurora. CC Flowers: Aqua Marine, B, W, G.  Organic Flourishes, Flourished Frame.
Other: ATG,  Glue Dots, Big Shot

Monday, June 27, 2011

Melissa's Favorite Things

Hi!  I'm keeping it really simple today since I'm having some technical difficulties with my internet . . . But, I decided for my favorite item this month to use my Graphic 45 Once Upon a Springtime paper - -I have been using this for everything!  I kid you not!! 


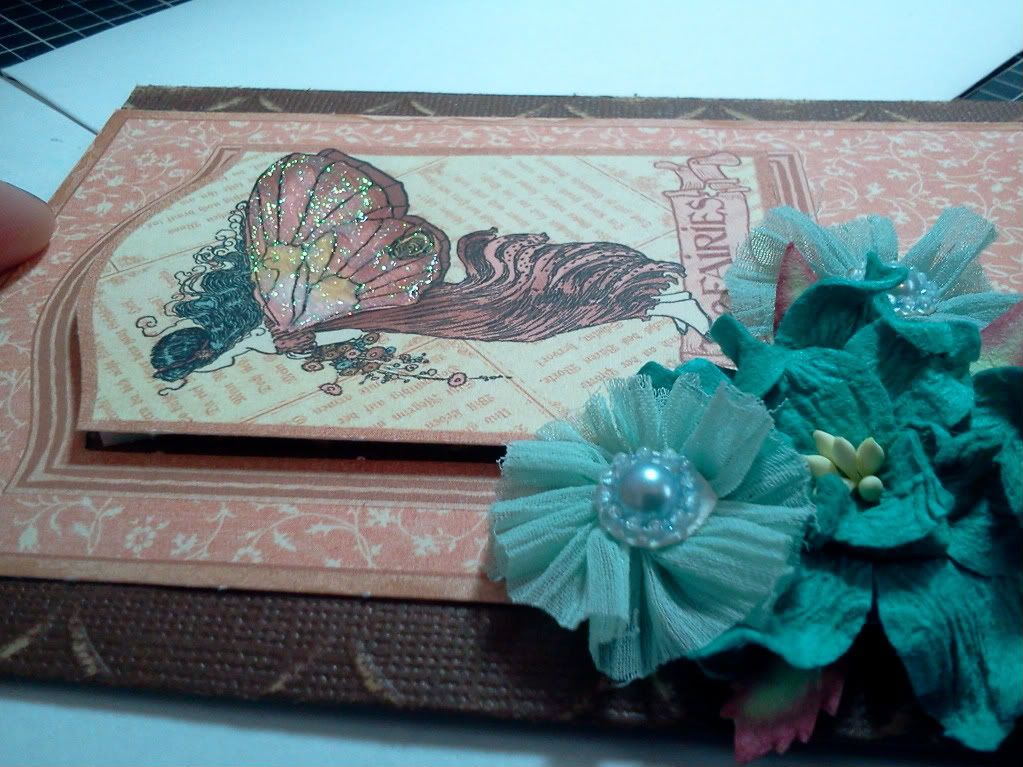
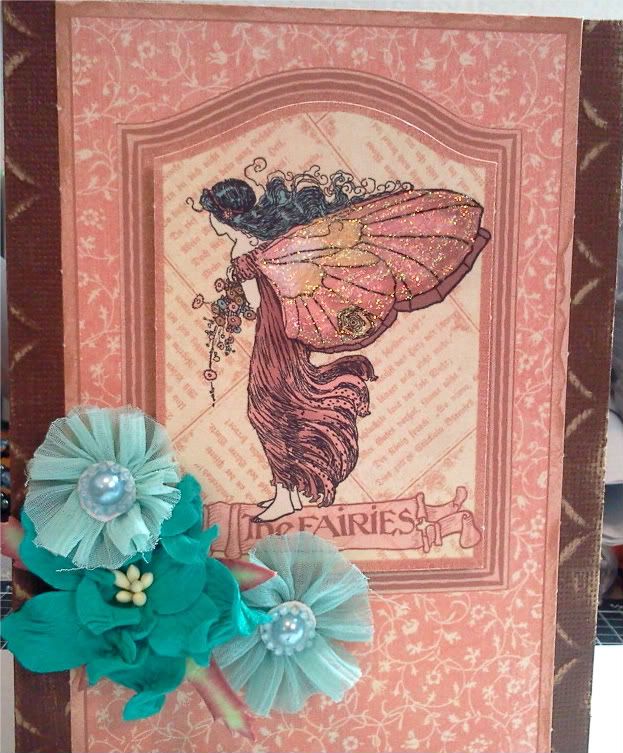
I used some scraps of my Cosmo Cricket paper for the background and sanded it.  Over this is one of the images in the back of the paper pack.  I popped out the center image and used pop dots to raise it slightly.  I then added some of the fantastic CuttersCreek and Prima flowers to add some contrast.  It was still missing something, so I used my new love, stickles, on the wings.  I love how it makes them look 3 dimensional too!!

I hope you like it!!!


 Photobucket


Stamps: none
Paper: Graphic 45, Cosmo Cricket
Ink: none
Embellishments: Stickles, CuttersCreek: Aquamarine; Prima Flowers:Splash,
Other: ATG, Scor-Pal
Stash: Pop Dots

Wednesday, April 20, 2011

Melissa's Easter Card

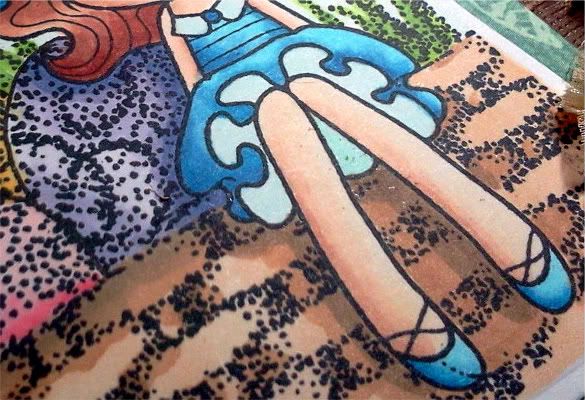
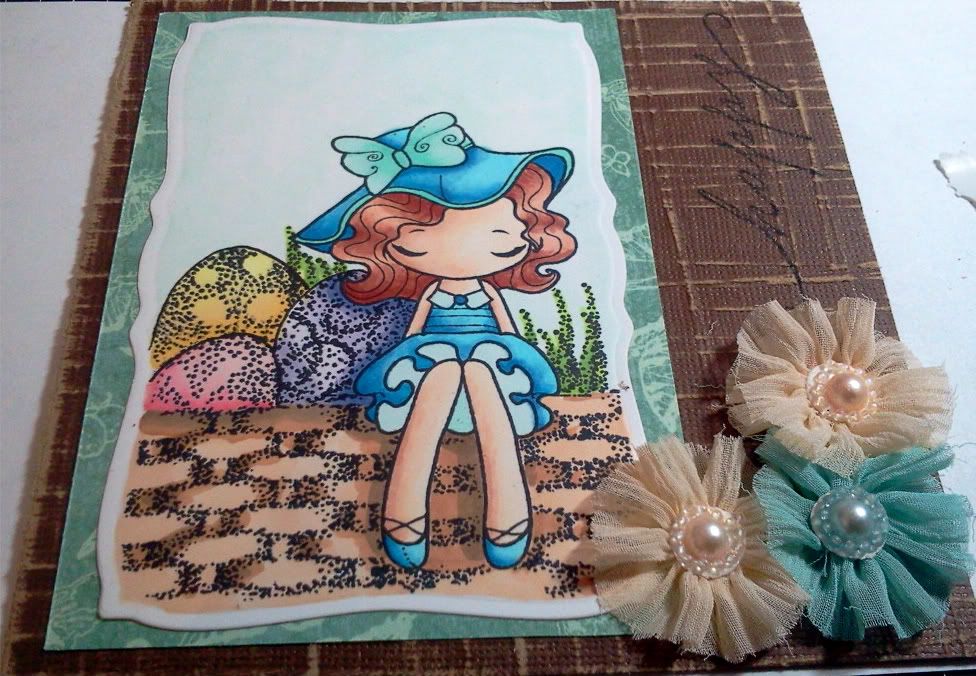
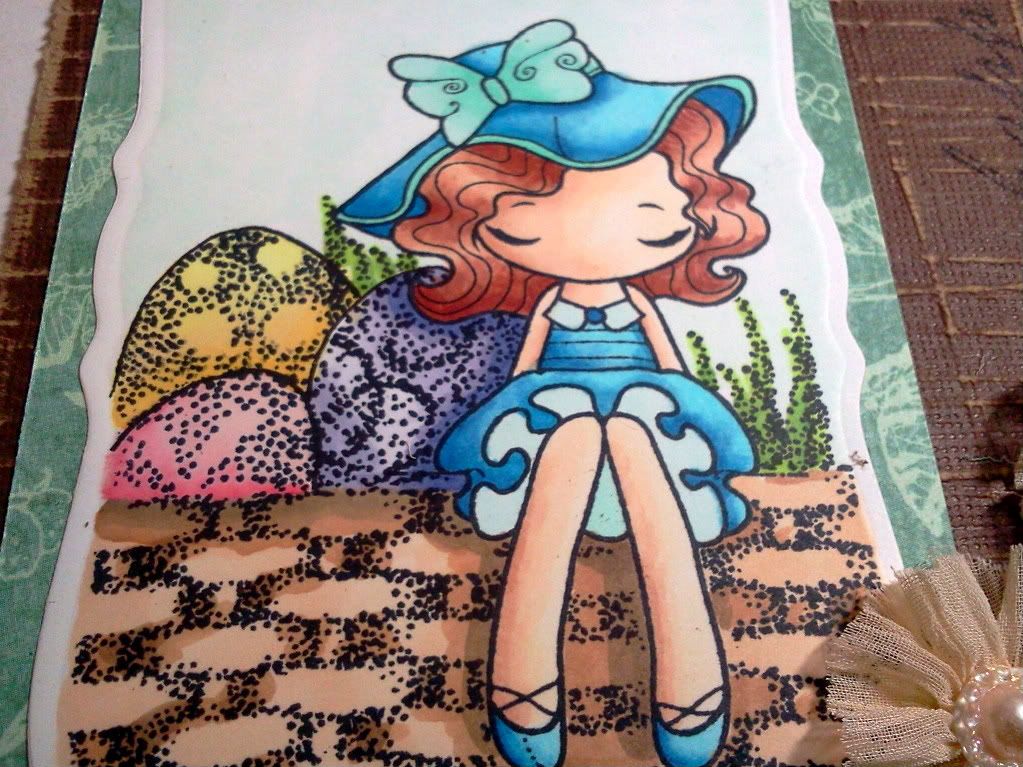
So I am trying so new techniques I learned at the Copic Intermediate Certification and decided to use the Miss Anya Dressy Collection as the stamps leave so much open for interpretation as far as shading and placement.  Making an Easter card I decided she should be sitting on the edge of a basket.  There was a lot of stamping and post-it notes involved; just as a reminder or hint, make sure you wash your hands between cutting the image on the post- it note and  placing it on your stamped image.  Ink spreads in case you didn't know :o)

I used the Linear Light template from Marianne Walker's Shadows and Shading Book to determine my light source to create a  more realistic picture; the upper right side.  Now, I colored my images paying attention to shadows and cast shadows in particular.  Cast shadows are shadows created by an object being reflected on another surface.  Does it look like shadows of her legs on the basket and her hair and side on the eggs?


I cut out the stamp using Curved Rectangles, embossed the edges and placed this over some Graphic 45 paper to make it pop!  I than took some Core'dinations paper and sanded it to use as my card base.  I stamped 'happy' on the top right, 'Easter' is on the inside, and used the new Prima Flowers as a corner accent.  What do you think overall? 


Photobucket

Stamps: TGF- Miss Anya Dressy, CTMH Eastertime (Stash)
Paper: Bazzill Simply Smooth, Graphic 45, Cosmo Cricket
Ink: Memento Tuxedo Black, Copics
Embellishments: Prima Flowers: Aurora. Splash
Other: ATG, Curved Rectangles, Embossing Mat, Scor-Pal

Stash: Post-It Notes, Shadows and Shading Book by Marianne Walker

Basket:  E21, E34, E44
Sky:      G0000
Eggs:     BV0000, BV00, BV11, BV04
             R30, R32, R35
             Y11, Y32, Y35
Grass:   YG23, YG03, YG17
Skin:     E50, E00, E11, E13
Hair:     E11, E13, E17, E19
Dress:   B00, B14, B16, B26
Trim:    BG10, GB11, GB23 

Friday, February 4, 2011

Vintage Valentine with Laura

Do you love the vintage/distressed look?
For some reason, I think a Valentine lends
itself to these types of techniques!!  
This Valentine started with a 5&1/2" by
4&1/4" kraft cardstock base.  I used Tim
Holtz Vintage Photo distress ink around the  
edges, applied with the inkssentials applicator
and foam pads. Next, is a 5&1/4" by 4" piece
from the gorgeous Graphic 45 Le' Romantique
12x12 paper pad.  This was inked with Victorian
Velvet and then distressed on the edges.  Then I
inked it with Vintage Photo and adhered it to the 
base.  I used the Spellbinders classic heart dies 
(die #2 and 3 starting from the smallest) to cut
two kraft cardstock hearts.  The larger was inked
with Victorian Velvet, then distressed, then inked
with Vintage Photo, and then sprayed with Iridescent
Gold Glimmer Mist (GM).  The smaller was very lightly
inked with Vintage Photo, sprayed with the Iridescent
Gold GM and then put Flower Soft Glue around the edge
of the heart, and used the new gorgeous Gold Flower
Soft.  While that dried, I stamped the love ticket 
from the Stampers Anonymous "Love Struck" set in 
Vintage Photo ink, on the kraft cardstock and used
more Vintage Photo ink to distress it up. I added 
Kaiserkraft "Light Pink" bling to the left edge. the
little flower stamp is also from the Graphic 45 paper
pad.  It's cut out, and distressed on the edges, and
then inked with Vintage Photo. The large heart is 
attached to the card with adhesive, and then the other
items are all added with foam tape to give some 
dimension.  The larger rose is a Prima Fairytale Rose
inked with Vintage Photo and sprayed with Iridescent
Gold GM, the smaller rose is Prima as well.  Last touch,
three more of the Kaiserkraft rhinestones next to the 
large heart.  

And that makes for one sweet little vintage Valentine!
Keep an eye out.....more to come!!

Available at Cutter's Creek:

Tim Holtz Distress Inks (Vintage Photo and Victorian Velvet)
Graphic 45 Le'Romantique 12x12 paper pad
Spellbinders Dies (Classic Heart)
Tattered Angels Glimmer Mist (Iridescent Gold)
Flower Soft (Gold and flower soft glue)
Kaiserkraft Rhinestones (Light Pink)
Prima Fairytale Roses (French White) 
 
Related Posts with Thumbnails