Showing posts with label Prima. Show all posts

Thursday, March 7, 2013

Baby Mini Album by Deanna M


We hope you are enjoying our full week of projects in honor of National Crafting Day. Today is my day and I have for you today a Baby Girl Mini Album I made for a friend of my daughter's who is having a baby in May.

I cut the album using my Silhouette Cameo at 5".  All of the patterned paper in the book is cut at 4 1/2" and is from Prima. I used the Sweet Fairy collection which is currently sold out in the store. If you are interested in it, let Kim know and she may be able to order it for you.

I also use Stickles, Memento Ink, Zip Dry and Scotch Quick Dry Adhesives to adhere my elements to the album along with some stickers from my collection. The book is bound using some Doodlebug Baby Girl twine assortment.

Now, I have a video for you that walks you through the book page by page.


I hope you will let me know what you think. Leave us a comment telling us how you have been liking the week and what you are doing during National Crafting Month.

Friday, February 1, 2013

Painting with Liquid Pearls by Deanna M


So when I was sick last month I spend a lot of time just watching card making youtube videos. I found a couple of videos the used liquid pearls to paint with and of course I had to give it a try.

I used my eBosser and the magnetic mat to die cut my violets. I then ran them back through the eBosser after removing the magnetic mat and topping the die with the rubber embossing mat and embossed them. It worked wonderfully.

To paint my violets I first laid my craft mat down. I then put some of the Squeezed Lemonade distress ink on my mat then I squirted a little dab of the Daffodil and White Opal liquid pearls in the center of the distress ink. I think added some water with a misting bottle just to the side of the ink and liquid pears. Using my brush I I mixed the ink and liquid pearls together adding a bit of water as I went. Then I painted it on the center of my violets and let them dry. After they were dry I used some Seedless Preserves distress ink and some Majestic Purple and more of the White Opal liquid pears and repeated the mixing process and then painted that color to the outer edges of my violets and then let them dry.

For the stems and leaves I used Mowed Lawn distress ink and Avocado and White Opal liquid pearls. Again I mixed them together and added water to get the colors I wanted. Added the color to my leaves and stems and let them dry.

While they were drying I put my card base together. I started with a white card stock card base cut, scored and folded to make a 4 1/4" X 5 1/2" card base. I cut a lavender mat at 4" X 5 1/4" and the patterned paper mat at 3 3/4" X 5". My patterned paper is from a Prima paper pad.

Next I used my Elegant Edges Cricut Cartridge to cut out a scalloped mat and it's shadow for my violets to be placed on. The mat was cut at 3". I ran the lavender mat through my eBosser and embossed it with the Swiss Dots Cuttlebug folder. I added my violets to the mat and attached it to my card with some foam tape. Finally I cut out a zigzag border using yellow and dark purple card stock my Silhouette Cameo and adhered them to my card. I added some Lavendar Lace Liquid Pearls to the dark purple card stock. I stamped my sentiment with the Seedless Preserves . Finally I added some Lemon colored Kaisercraft Pearls to the centers of my flowers.

Saturday, October 20, 2012

Monochromatic Card

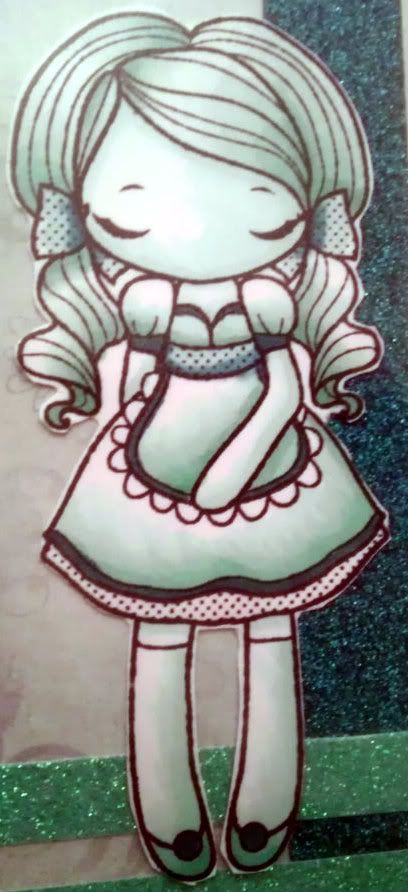
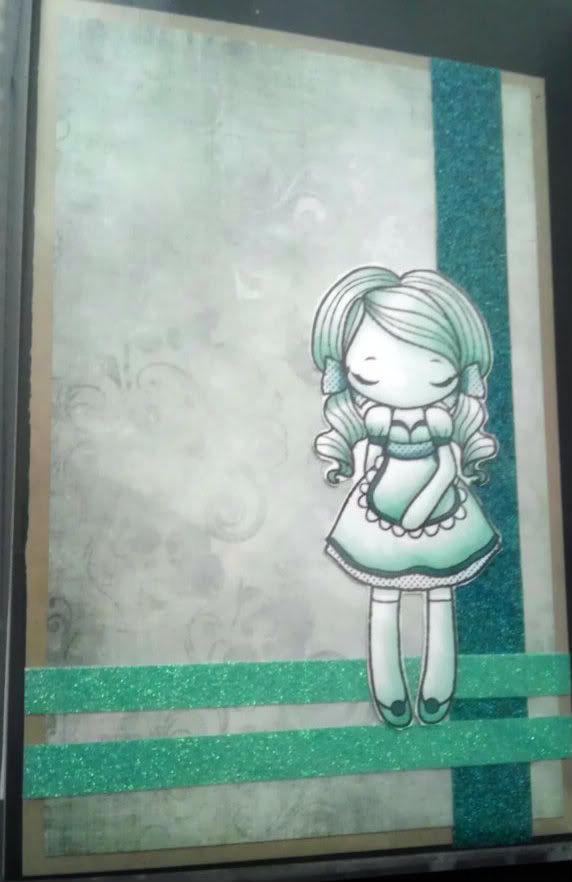
Hi!  I have a simple project today.  I was recently challenged to create a monochromatic card.  I thought it would be easy as I love coloring in shades of browns and grey. However, the rules were to color any shade BUT greys and browns.  So, I went to my next favorite group and colored from the BG family.

This was actually much harder than I thought it would be as I wanted different shading for each area and not one gradual change from light to dark.  I started with a Kraft base and added a page from the Prima Fairy tales paper.  Next I added three strips of AC Glitter Tape in shades Aqua and Peacock for added depth.  My aqua strip was actually the half-inch size so I cut it down into two 1/4" lengths.  This isn't found in the store, but you can sign up here for the next Glitter Tape club . . . totally worth it!


After coloring my image, I trimmed and placed so that there is room for a sentiment at a later time.  Right now, this is in my Copic Portfolio which I update pretty frequently so it's always good to leave them slightly neutral so you can customize it at a later date for last minute cards.


Thanks for looking and hopefully I have inspired you to try something out of your comfort range.  Feel free to share your projects!


Paper: Prima
Ink: Memento Tuxedo Black, Copics,
Embellishments: AC Glitter Tape, Peacock and Aqua
Other: ATG
Stash: Kraft Paper

Dress: BG000, BG10, BG11, BG32
Skin: BG000, BG10
Hair: BG000, BG10, BG11, BG32, BG23, BG34
Legs: BG000, BG10, BG11, BG32
Shoes: BG23, BG34, BG13
Bows: BG000, BG49


Photobucket

Wednesday, May 30, 2012

Altered Box by Pebbles

My first wooden box!


I was in my local Dollar Tree, and I came across a couple of little wooden boxes. They measure a little over 3.5x3.5, and they have hinges on them as well as a little small magnet to keep it closed. I grabbed them up and figured I would eventual do something with them...couldn't leave them there, especially only costing a $1.00 a piece! Sorry for all the pics, but I wanted to capture as much detail as possible. :)

This is the natural box when I bought it. Nice and clean! 


I used some alcohol ink to kind of stain the box. As you can see, my fingers were pretty orange by the time I was done! I'm a hands on kind of girl! :) 


I used my Prima Paper Pad-Annalee collection on the top and both layers all around the box. I used some Color me Crazy flowers on the top of the box for the start of my embellishment process. I inked the bottom flower with Glimmer Mist. I inked the second one lightly with a orange ink pad and then adorned it with a small crochet flower and added a pearl bead in the center. The rest of my embellishments, are from my stash from previous projects.


Trying to be a little more creative, I added some large beads to the bottom as feet! I had a ball creating this! Thanks for looking! 


Saturday, May 26, 2012

Mousetrap Message Holders by Pebbles

Hello everyone! A friend of mine let me in on the most creative thing I've seen in a while! The Mousetrap Message Holders!!!

I know some of you have probably already heard of these before but they are new to me and I've been having a ball creating these today! I first painted my background, then I used my Prima Paper Pad-Annalee collection at the bottom as well as the quote at the top. I tore the bottom piece and inked the edges.

I also enhanced the flowers on the paper with Diamond Stickles and Fruit Punch Stickles. To add dimension to the quote, I used Glossy Accents to cover. A couple of more embellishments, and viola! :)

On this next one I colored my background black and decided to go a little masculine. I call this one "Honey Do List".

 I used Graphic 45-Olde Curiosity Shoppe papers, tearing and cutting out symbols. I added Glossy Accents to the "HONEY" on the bottle to tie into the title Honey Do List! I also added 5 black Kaisercraft self-adhesive rhinestones.

I put magnets on the back of both so the option to put them on the fridge is there! Thanks for looking! :)

Friday, May 18, 2012

Large Mother's Day Card by Pebbles

 
My Mom and I were talking last week about some of the cards I have given her over the years and we remembered years ago I gave her one of those GIANT cards that you have to sit on the floor to display! LOL
So this year for Mother's Day I thought I would make her a not so giant card but a large one! I started by double matting a piece of printed paper from Prima Madeline collection. After that, I used my Spellbinders Labels One on the same card stock as the matting, inked the edges and stamped it with the same brown ink, then I added a little bow I made at the bottom.

 
To enhance the paper a little, I used some Cinnamon, Fruit Punch and Diamond Stickles on the flowers in both corners. I also added some sky blue pearls at the bottom of the card. Thanks for looking and I hope you had a wonderful Mother's Day!

Sunday, April 22, 2012

Birthday Card by Deanna M

20120413_1
I have for you today a birthday card I made for a friend to give to her Mom. My card base is a piece of green cardstock cut and scored to 4 1/4” X 5 1/2”. I added a mat from the Mod Squad Cut and Emboss paper pack cut to 4” X 5 1/4” and then a patterned paper mat from the Prima Botanical paper collection cut to 3 3/4” X 5. I then used Elegant Edges to cut a mat for my butterfly at 3”. I used the same paper as my first mat for the base layer of the mat for the butterfly. I then used a piece of paper from the Whitewashed Cut and Emboss paper pack for the top layer. I ran that layer through my Cuttlebug and embossed it with Sizzix Embossing folder called Dots and Flowers Embossing folder and sanded it so the colored green core showed through (and yes, Kim can order this for you. You get two folders in the package).
My butterfly on this card is once again one of the laser cut embellishments by Kaisercraft. I am so loving these embellishments. (And, yes Kim can order these for you too!) They are so easy to work with, are not too think and add a great dimension and elegance to a card. For the butterfly I started off by using my craft mat and rubbing some different colors of Distress Ink on my mat, spritzing with water and them placing the butterfly in the ink on my mat. I used Persimmon, Concord Grape and Broken China Distress Ink. I let it dry for a bit then spritzed it with similar colors of glimmer mist. Again I let that dry and then added some Glimmer Glam in Violet and a Copper color. Once again I allowed that layer to dry. I then added some Glimmer Glaze to the antenna’s and around the orange areas of the butterfly. I then went back with a bit more Persimmon distress ink. I let all that dry overnight (only because it was bedtime). The final layer I added some Pearl glimmer mist. This butterfly is so iridescent looking in person. I adhered my  the butterfly to my mat with some of the ASI Kool Tak tape clear gel foam tape.
The flower I added to the card is a Cutter’s Creek Gardenia. The flower was actually yellow but it just didn’t go with the card as well as I likes, so I spritzed it with some Honey Dew Mist glimmer mist, and problem solved. It softened the butter yellow of the flower and gave it a light green color which went much better with my card. I then stamped my sentiment with some Rusty Hinge Distress Ink. Finally I added some Copper Pearl liquid pearls to the tip of each antenna. Sure hope you have enjoyed my project and that I have inspired you to get out your goodies and make a project.

Monday, May 30, 2011

Melissa's Miss Anya

So, I decided to try again with a purple colored card.  I think this one went a little smoother :o)  I started with one of the images from the Miss Anya Dressy Collection - -I love these images by The Greeting Farm!  I also stamped it on a post it so I could stamp the leaves and flowers without worrying about my image being ruined. 

I colored my image with my copics and used B000 and G0000 to blend in the background as sky and grass - - just very light colors, but enough to show the white edges on the Curved Rectangle where is was embossed.  The background paper is from Prima Reflections and I used different papers in the collection for the butterflies as well.

Hope you like it!!


Paper: Bazzill Simply Smooth,  Prima Reflections,
Ink: Memento Tuxedo Black, Copics,
Embellishments: Martha Stewart Punch (Stash)
Other: ATG, 1/4" Scor-Tape, Glue Pen, Curved Rectangles, Big Shot
Stash: Purple Cardstock, Post-it Notes

Hair: E11, E97, E99, E19
Skin: E50, E00, E21, E11
Dress: BV0000, V93, V95, V99
Flowers: Y000, Y11, Y15
Leaves: YG13, YG17, YG23
Background: G0000, B000
Shadows: N0, N1, N3

Photobucket

Saturday, March 26, 2011

Cutters Creek Spring Blog Hop!

Welcome to the Cutters Creek Spring Blog Hop! All of our designers have created some wonderful Spring projects featuring products that you can purchase at the Cutters Creek Store! The Cutters Creek Design Team Blog is the first and last stop in the hop! Each blog along the way will have a link to the next blog in the chain. Don't forget to make sure you are following each of our personal blogs and leaving comments along the way to enter to win a box full of CHA Swag and maybe a few other goodies along the way!!!!

On the Cutters Creek Design Team blog we are featuring a gorgeous Accordion Fold Spring Card created by Chris! Take it away, Chris.....

What better way to celebrate spring than with flowers? Or even better, flowers in a garden? I wish I had a green thumb to create this in my yard or even a picket fence with which to begin, but alas my garden lives in paper—LOL.


Starting with a 6"x12" piece of white cardstock, I rounded one edge and scored it with my Scor Pal at 4" and 8". Using my cloud-maker and Tim Holtz Distress Ink in Tumbled Glass and Scattered Straw I inked my sky on the front panel and the outside panel that showed behind it. The two inside panels are covered with cardstock cut at 4"x6" from the Prima Fairy Flora 6"x6" Paper Pad. I used Scor Tape to adhere them. I then cut Flower #12 and its shadow at 4 inches from Cricut Lite Botanicals cartridge and mounted it on the inside left panel. My sentiment is printed on ivory cardstock and cut with Spellbinders Shapeabilities Fancy Tags. I also cut and embossed a piece of translucent paper with Nestabilities Labels Four (#6), which I glued down with Vellum Glue Dots then mounted the Tag on top of the label using pop dots.


To make the front of the card, I stamped several flower stamps on cardstock and cut them out. One flower was colored with Copics colors Y08, YR65 and YG23. I colored the rose with Copic color RV66. I used Flower Soft Glue and Flower Soft to highlight the different flowers. For the rose I used Peony Pink. The Dianthus is accented with Ocean and Baby Pink. And the for the Daisy I used Marigold and Citrus Crush. I set those aside to dry and took some scraps of acetate, cut them with my Tim Holtz Alterations Tattered Florals; using Staz-On Black ink I stamped the two larger pieces with a background stamp and then flipped them and colored with Copic Markers B02, B06, RV66, and RV63. Once they dried, I used my Crop-A-Dile to punch a center hole and add a rivet to each. Going back to the Flower Soft flowers, I glued a Cherry Twinkle Jewel in each center to two of the pink Dianthus flowers and a pearl in the center of the Daisy. I had one last flower to make and I used a French White Prima Rose sprayed with Perfect Pearl Mists Forever Red.


While that was drying, I used my On the Fence Tim Holtz Alterations Die to cut American Crafts White Glitter Paper and trimmed it to the width of the front panel (4 inches). I put pop ups on the back along the two railings and up each side, but didn’t glue it down yet. I started arranging the flowers behind it and decided that some grass needed to be both behind the fence and along its base for that I used—you guessed it—Meadow Flower Soft. While that was drying, I adhered the two acetate flowers using Glossy Accents and my Zig Glue Pen to put down the rose and two daisies. I decided to use a scrap of wire to create a “vine” around one fencepost and used Glossy Accents to adhere the 3 small flowers to the fence. I mounted the fence and then again using Glossy Accents added the Prima rose. The final addition was a butterfly stamp that I colored with Sand, Lilac, and Peach from the Copic atyou Spica Set B.

See, didn't I tell you her card was gorgeous??? When you complete the hop, come back here show your love for Chris and all of our designers! Leave one comment at every blog along the way and make sure you are following the Cutters Creek Design Team blog and the designer's blogs too! Now hop on over to my blog HERE! Oh, and check out the AWESOME prize we have for one lucky winner:


You will get that Springy looking tote, the Creative Options Box, Graphic 45's A Proper Gentleman, and look at all the little things in the Creative Options box! You get those too!!!

Here's a complete line up of all of the blogs in the hop in case you get lost along the way:

Cutters Creek Design Team Blog - You are Here!
Mandie's Blog - http://mandiesscrappin.blogspot.com
Kim's Blog - http://kreativekim.blogspot.com
Mindy's Blog - http://www.scrappyandpiggy.blogspot.com
Laura's Blog - http://scrapaddict4life.blogspot.com
Melissa's Blog - http://www.ourmadhouseof4.blogspot.com
Lori's Blog - http://savingmine.blogspot.com
Vicki's Blog - http://scrappyleopard.blogspot.com

Monday, March 21, 2011

Pinwheel Card with Melissa

So today I am sharing a super easy card with no stamping involved; took me less than 10 minutes from start to finish!  You absolutely have to try this!  It is simple and quick for mass production or just a quick card on the go.  I got the idea from my good friend KellyRae.  She got it from here (video included).  


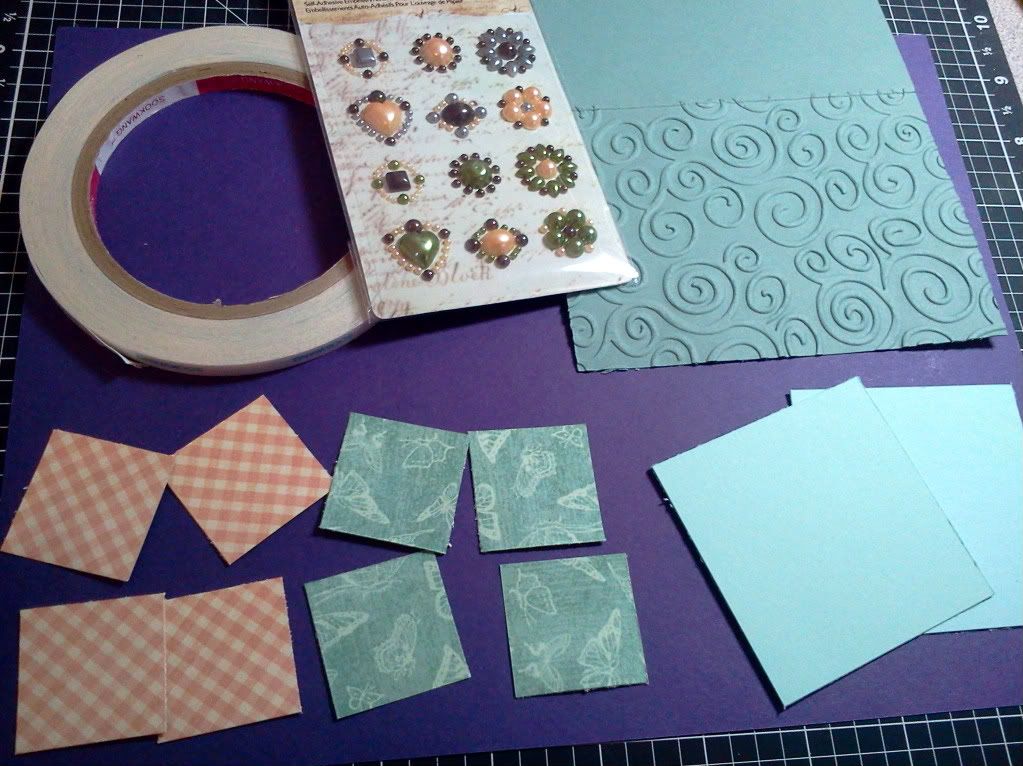
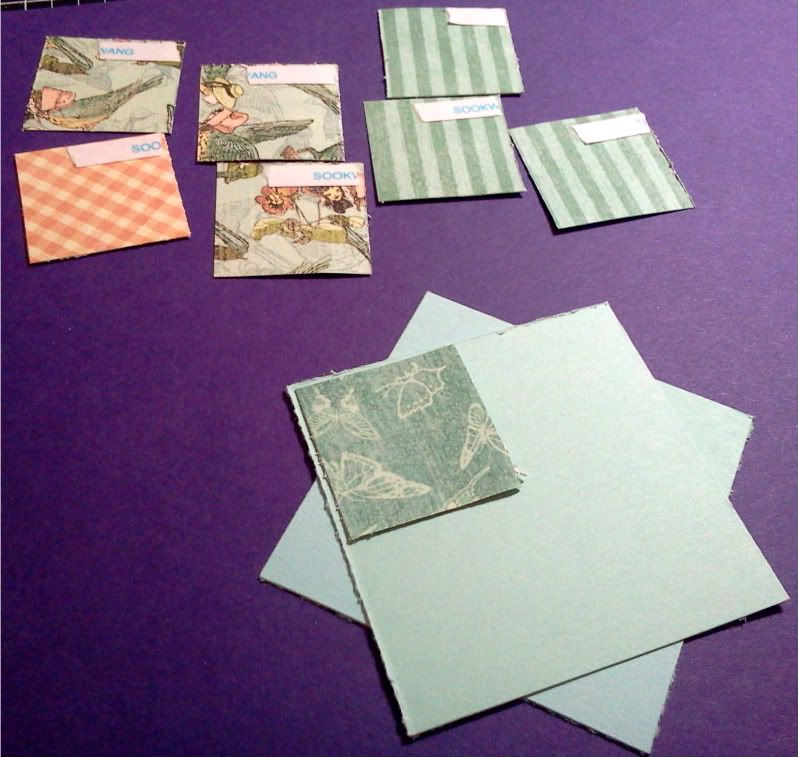
Here is what I started with:
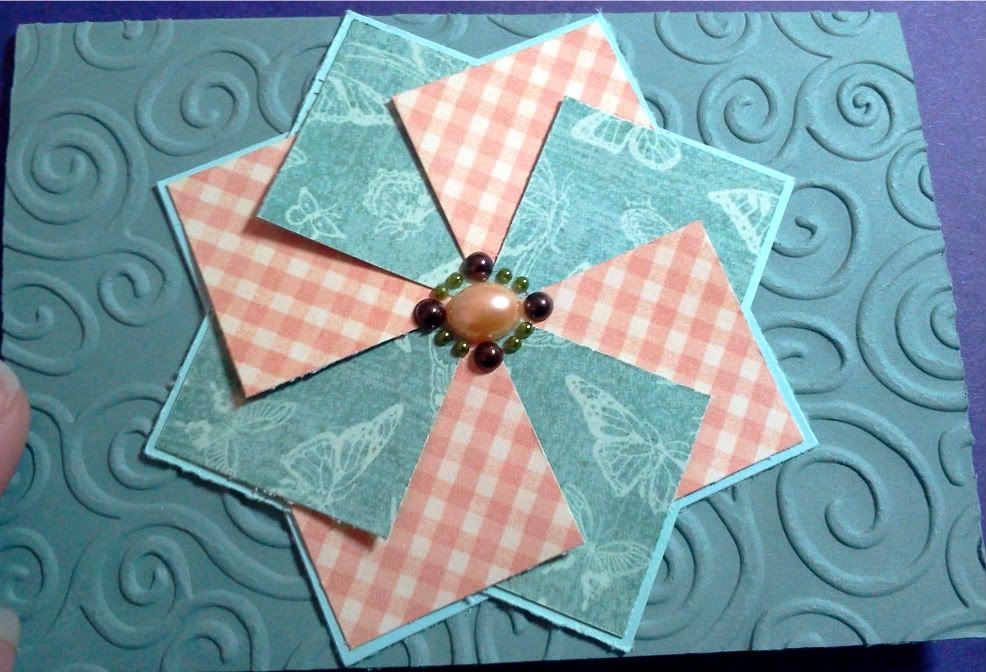
A base card of 3.5" x 5" -slightly smaller than the standard A2 card already run through my big shot with the Swirls Embossing Folder.
8- 1 1/4" squares in two different patterns
2- 2 5/8" squares as my base
Embellishment -Prima Say It In Pearls


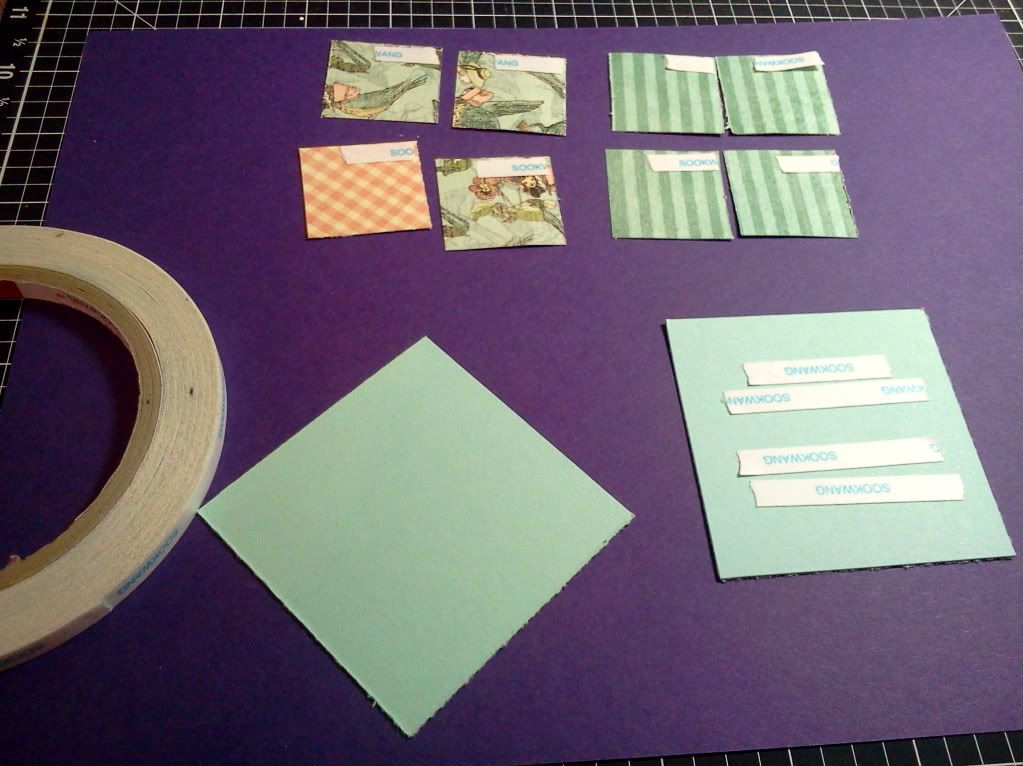
Start with putting your adhesive on the papers; make sure the tape goes in the same corner for the 1 1/4" squares on the back side of the paper.  As you can see in my pic, I didn't follow the steps on the first try :o)

Next add tape to one 2 5/8" square and place the other square across it, twisted.  


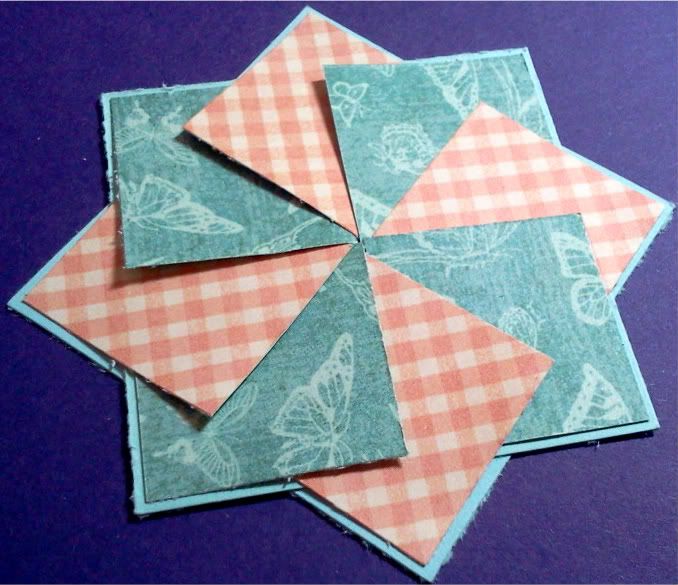
Now add your first square.  The rest is easy!  Just alternate the color or pattern papers aligning it with the corner of the base card stock.  For the last piece, you simply lift the edge of the first piece you laid down and work the last piece in so it is layered.  Very, very easy to do.

And here is the end result of the layering.  Hmm, I think I need to change my trimmer blades . . . . . 


I than added an embellishment in the center and used Scor-Tape again to adhere it to the card base.  I chose the smaller card base of 3 1/2" x 5" as I wanted the Pinwheel to dominate the card front so all of my stamping can be on the inside.  Think it worked?  


Photobucket

Stamps: none!
Ink: none!
Other: Scor-Tape, Paper Trimmer
Related Posts with Thumbnails