Tuesday, August 16, 2011

CHA Fun!

Hey everyone! We will have a great Flower Soft tutorial for you next Tuesday! I just wanted to invite you all to read about the adventures that a few of your Design Team members had at CHA over on my blog: Mandie's Scrappin'


When you are done reading don't forget to leave a comment on my blog to enter to WIN a great pair of Westcott Brand scissors!

Sunday, August 14, 2011

Too Cute To Spook

Hi!  My name is Fran and I am the newest member of Cutters Creek Design Team.  I am so happy to be part of this wonderful team.  And I hope my creations bring you lots of inspiration just like the fun they give me creating them for you.
Before I share my project with you I would love to show you what it looked like before it was done.
8-14 Photo of Card Supplies
Most of the supplies I used are in this photo except for the Cricut.  I used the Cricut to cut a couple of SVGs files using my SCAL Software.
NOTE:  The current SCAL3 Software does not support the Cricut.  Go here to view the list of machines it does support.
In keeping with the main theme of using Flower Soft.   I decided to make a greeting card using Halloween as my theme.  Oh you know Halloween will be knocking at your door before you know it.  I pulled out my Flower Soft called Autumn (beautiful mix of Fall colors).  And I added just a touch to my image and just that small accent of Flower Soft really gives your projects lots of pizzazz.  I used Aleene’s Original Tacky Glue to attach the Flower Soft.
Click on photos to view larger.
Here’s a close-up photo of the flower soft on my card.
HalloweenCard_FS-CloseUp_CuttersCreek
Here is a photo of the inside of my card.
Halloween Card_Inside_CuttersCreek
I used Core’dinations cardstock for the Tree.  And I used American Crafts Specialty Cardstock/Foil for the bottom layer of the pumpkin.  I wanted to look like a candle was inside of it.  What do you think? (Both the Tree & pumpkin were cut with my Cricut using SCAL2 Software.)
Here is the Front of my Card.
HalloweenCard_Front_CuttersCreek
The sweet image and background are Digital Stamps (La La Land & Make It Crafty).  I used Prisma Colored Pencils for all my coloring except for the skin tones.  I used Copic Markers for the skin.  I love glitter & on most of my cards you will see some Stickles.  I love that glitter glue. The three I used: Lime Green, Orange Peel, & Crystal.  The background on the background digital image was colored with Black Soot Distress Ink.  I used Copic markers on the fence and grass.
Additional elements used to create my card came from my private stash.
I hope you enjoyed viewing the details of my card.  And I especially hope that I inspired you in some way.  If you have any questions on what you have read or viewed please leave them in the comments portion and I will reply there.  Thank you and have a wonderful week ahead!
Fran

Thursday, August 11, 2011

Cards with Echo Park Paper - and a Giveaway from Lori

If you're new here and visiting from Saving My, welcome! I'd love it if you'd take a look around at some of our other projects while you're here.  But be sure to read to the bottom of this post for giveaway details.


I have been extremely lucky, and got my hands on both the 12x12 and 6x6 Country Drive from Echo Park Paper.  I immediately had a project in mind, and used some product to make three thank you cards for some very special people!  These and some other Echo Park items are due to be in stock on August 19th, but you can place your pre-order any time.


All three 6x6 cards were made with papers from the 6x6 pad, some embellishments from the 12x12 collection and a few items from my stash.  I love being able to buy both, as the smaller size prints are perfect for cards, and I like to use the Stickers and Journaling Cards on both layouts and cards. Here are the details on each card:

This first card is a recessed window card.  Rather than the typical square window, I sized it to fit one of the rectangular journaling cards in the 12x12 collection.  The sentiment and mini flowers are Sticker Elements, also from the 12x12 collection.  I popped the sentiment up on some dimensional adhesive.  Cardstock and mini brads are from my stash.

To cover the back of the recessed window (inside of card), I just used the portion I cut out of the center for the front of the card.  I also wrapped the edge of the recessed window with some narrow ribbon from my stash, adhered using Scor Tape.

This is a fun easel card, one of my favorite kinds to make.  I used my Cricut for the circle, and a Sizzix die for the scalloped circle, but you could use a Cricut or Spellbinders Nestabilities for both shapes.  I sponged the edges lightly with some coordinating ink.  I turned my Sticker Element into a pennant using a beaded pin, and placed some dimensional adhesive under the center to make it appear to be waving.  I also used the dimensional adhesive to pop up the birds. 

To hold up the card, I created a border strip using cardstock and Sticker Elements, popping up a sticker strip with dimensional adhesive.  My sentiment is another Sticker Element matted on cardstock.

Finally, I created a shaker box card.  I used a round one I had on hand, but the oval Flower Soft globes make great shakers as well!  The design in the box is another Sticker Element, and I added some heart confetti I had in my stash.  To easily hide the edges of the shaker, I cut a circle opening the right size, then cut the scalloped circle around it.

The sentiment is again a matted Sticker Element, and I used some tiny circles from the alphabet sticker sheet as faux brads.

The following items used in this project are available at Cutters Creek:
I also have a giveaway for you today!  While at CHA, the nice folks over at Northridge Publishing let us have complimentary copies of some of their beautiful publications.  Kim at Cutters Creek will be carrying several titles, so to celebrate I am giving away BOTH the August issue of Scrapbook Trends (Kim has September available for preorder) AND a copy of Cricut Cards (which Kim also has available for preorder).  In order to win, you need to leave a comment both here and on today's post over at my blog. All comments posted by Midnight Central Time this Friday August 12, will be eligible to win.  US and Canada entries only please, due to the cost of postage!  Of course, we would love it if you would also follow or subscribe to both blogs as well!

Tuesday, August 9, 2011

Hang in There-Tuesday Tutorial by Deanna


The tutorial I have for you today uses the Ultra Fine Flower Soft as flocking. I love the dimension and texture it gives to my Cricut cuts.  I started with the monkey from the Create-a-Critter cartridge and cut him at 3". I used my Imagine to color each layer (love that!). The base layer was cut with black. The next I colored to match as close to the flower soft I chose to use.

Next I ran my layers I wanted to flock upside down in my Xyron so the adhesive was on the front of my image.
I used Sand Ultra Fine Flower Soft for the main layer of my image, and Toffee Ultra Fine Flower Soft for the outer outline layer to flock the monkey. I liberally covered my image with the flower soft and patted it down to be sure I had a good covering and then tapped off the excess.
I did the same with the other layer. Here is what they look like now that each layer is flocked.
Once I adhered my layers together with some Flower Soft Adhesive. I put my card together. My card is a standard 4 1/4" X 5 1/2" card. My base is white card stock. I then added a blue mat cut to 4" X 5 1/4" and cut my patterned paper from my scrap bin to 3 3/4" X 5". I used my ATG Gun to adhered the layers together.
The vine was cut at 3" as well and colored using my Imagine. For the mat for my sentiment I used the Elegant Edges cartridge (which Kim can special order for you just ask). I colored the shadow layer with a blue color and left the top layer uncolored as I wanted it white. The mat was cut at 2". My sentiment is from the Wild Card cartridge and was colored with the same blue as my shadow layer and was cut at 4".

I just love the velvety texture I get by using the Ultra Fine Flower Soft as flocking. The Ultra Fine Flower Soft can be used to add texture and dimension to any of your projects. I hope you give it a try.

Monday, August 8, 2011

Chris’ Altered Box

An altered box is so easy to make when you have quality paper like Graphic 45. For this box I used Curtain Call and a couple of sheets from A Proper Gentleman. Inside I just measured and cut strips and glued them down with my Scor Tape. On the inside top lid I added a flower made from 3 circles of the same paper (2.5, 2, and 1.5 inches) and punched a hole in the centers. I distressed the edges with my Zutter Distrezz-It-All, sprinkled the circles with water, crumpled them and pushed a brad through it when dry. I then rubbed some Tattered Rose and some Antique Bronze Distress Stickles over the petals and set aside to dry.


The brads around the lid are actually half of a silver ribbon that I cut in half length-wise and colored with Copic Y28 Lionet Gold. This too was attached with Scor Tape (gotta love that stuff!). I then painted the lid of the box with Antique Linen Crackle Paint. (I did not use Gesso first because I wanted it to peel and show some of the gold print underneath--.) When it was dry I rubbed a bit of Black Soot Distress Ink into the cracks. Cutting out some more Graphic 45 paper I mounted them on slightly larger rectangles (from the Gentleman Collection), dampened the edges with my fingers and torn and folded/twisted the paper to make distressed frames.


To make the corner flower I cut up a used dryer sheet, sprayed it with Glimmer Mist in Sun Sisters and Santa Baby and a homemade brownish one using Distressed Walnut ink and some bronze mica powders. These were joined with a button and edged with Tattered Rose and Antique Bronze Distressed stickles. The two goldish-colored roses were made using SCAL and PDC’s cut file.


The sentiment I created on my computer and cut and embossed with the Cuttlebug Embossing Plus Fanciful Labels and Black Soot Ink. To age all the pictures and the label I smeared them with Rock Candy Crackle Paint and let them dry. Everything was adhered with Scor Tape. I then added Tim Holtz’s Ideology Film Strip Ribbon. This was tricky to curl where I wanted, but with a bit of patience and some Glossy Accents I got it to stick.


My husband is lovin’ it and has his jewelry stashed inside. What do you think?

Saturday, August 6, 2011

Congrats by Melissa

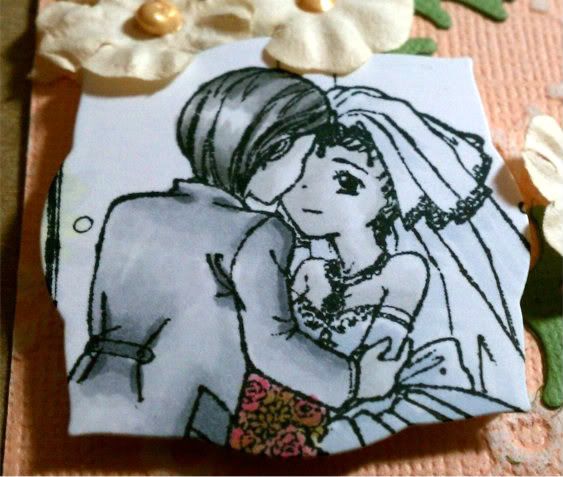
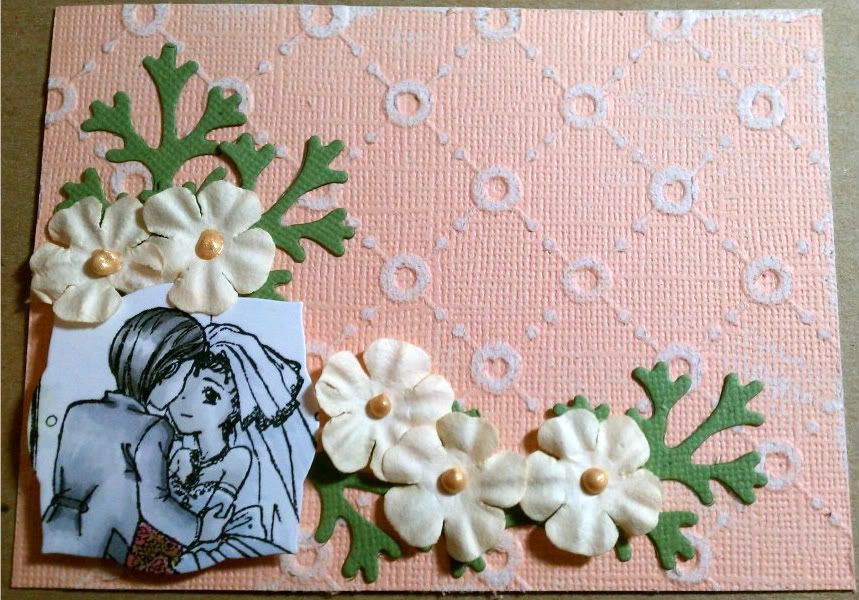
So I made a really simple congrats card for a bride and groom.  The total card size is 3 1/2x 4 1/2.  So it's great to slip in with a gift.  

I started coloring this adorable image from InStyle Stamps; the Wedding Couple.  I colored in all grays to make it classic looking.  Once done, I used my Labels Three to cut out the area around their faces.  


I sanded my base paper which came from the Cosmo Cricket Core'dinations pack.  I than used my Big Shot again on leaves from the Foliage set.  I used some paper flowers from my stash and used some Gold Liquid Pearls for added effect.

What do you think?


thanks for looking!!

Paper: Bazzill Simply Smooth, Core'dinations
Ink: Memento Tuxedo Black, Copics,
Embellishments: Liquid Pearls
Other: ATG, Glue Pen, Spellbinders: Foliage and Labels Three, Big Shot
Stash: Kaisercraft paper flowers: cream

Groom Hair: T1, T3, T4, T6
Skin: T0, T1
Dress: C1, C2
Veil: C00, C1
Flowers: R83, R85, E04, YG91, YG93, YG95

Thursday, August 4, 2011

It's A Flower Soft Christmas with Kim B


For my project, I used two of my most favorite products, Flower Soft & Ecstasy Crafts.  My card base is a 6x6 piece of white cardstock and then I cut a piece of brown cardstock and layered that on top of my card base and then added four cardstock squares to add some interest.  I made that cute koala bear from one of the Ecstasy Crafts decoupage kits and added some gorgeous Polar White to his pom pom and hat detail.  I know it does not convey well in the photo, however Polar White Flower Soft has glitter in it and gives you a beautiful sparkle to where ever you add it, not to mention that fluffy white look.  I used Flower Soft Peel Offs around the edges of the card base and corners in the red squares and then used the Ecstasy Crafts peel offs for my sentiment.  This card is clean and simple and not only the look but also making it.  Both Ecstasy Crafts and Flower Soft products are inexpensive and just make anyone from beginner crafter to the most experience crafter look like a Rock Star!  I hope you love my project!  Please leave me a comment if you like what you see or have any questions.  All these products can be found at Cutters Creek.

Products Used:
Cardstock (from my stash)
Related Posts with Thumbnails