Tuesday, August 2, 2011

Flower Soft, Not Just for Flowers

Just because a product is called Flower Soft, doesn’t mean it can only be used on flowers. When you look at the texture of this ultra fine Earth Flower Soft, you can see all kinds of uses for it- fur, dirt, or in this case- chocolate cake. I also want to show you that Flower Soft isn’t just for stamped images. I cut this piece of cake from the Cricut Sweet Treats cartridge. I pieced it together and then “painted” the Flower Soft glue onto the die cut.


flower soft 002 [1280x768]This picture is a little blurry, but you can see how the glue covers the entire layer of the cake. The Flower Soft glue has a very fine point which is great for detailed areas, but not what I needed for this project so I brushed the glue on with a small paint brush. This made it much quicker to cover a larger area. I dumped the flower soft on and then shook off the excess. Even for this large area, I only had to use a little bit of the Flower Soft- a little goes a long way.


flower soft 006 [1280x768]


Here is a close up of the piece of cake all covered in the Flower Soft. You can see how the texture of the flower soft really looks like crumbly chocolate cake and now I have chocolate cake that looks good enough to eat! I added some liquid pearls to the cherry to give it a little shine.


flower soft 005 [1280x768]


The paper and sentiment for this card are from the Cricut Imagine Yummy cartridge. This cartridge is perfect for yummy birthday cards.


Don’t be afraid to step out of the box with your flower soft- cover those die cuts and add some texture to your projects!!!


Cutters Creek Shopping List


Flower Soft ultrafine Earth


Flower Soft Adhesive


Cricut Imagine Yummy cartridge


Liquid Pearls Ruby Red

Monday, August 1, 2011

It's Beginning To Look A Lot Like Christmas & What Is CHA? by Kim B

Before I post a project, I wanted to talk a bit about CHA.  There are people out there that have no idea what CHA is, what it means, or what is going on with it.  CHA stands for the Craft & Hobby Association.  Stores and other crafty associated people pay annual dues to join the association, much like you would do if you belong to a Home Owners Association.  Although the association is involved in many things, CHA is most widely known for their big craft shows held in January and July.  This is where vendors like Ranger, Echo Park, Craftwell, etc... show store owners, design team members, professional crafters, bloggers, press, etc..... the newest products that they have been developing and show us what they look like, how they work, and let us all "play" a little bit with their newest items.  The energy and enthusiasm is high and walking the show floor is not for the feint of heart.  Although I think at some point your feet just go numb from all the walking around and the excitement of seeing what's new in the next booth just propels you forward!  The vendors have wonderful displays of all their new products and awesome completed projects done so we can see what can be done with their items.  It is fun to put faces to names and there are so many people to meet.  It is a lot of fun picking out new products for your store and getting little gifts from vendors, so you can actually take items home with you and play with them.  I know I have personally written some products off, only to find that when I return home and play that it becomes a "must have" for my store, Cutters Creek. 

I think my most favorite part of CHA is the workshops!  Not all of the vendors do this, however getting into a 2 hour workshop and actually creating a project with their products is a big selling point for me.  I have had experiences where I threw away my creation as I was just not pleased, to wanting to recreate what I have done over and over.  This go round, I was excited to try out the Tombow calligraphy pens and learn how to master them.  What I found out was that between me being left handed and the language barrier (I believe they were from Japan) that there was no way this chicky poo was going to learn quickly.  I did attempt to "mirror" what they were showing me and they did give me individual help but alas there is no way I can teach this technique as I would have to practice for days and days to "get it", however I had a blast!  I really learned a lot and I am always looking for new techniques to use in my crafting.  There is also the tried and true workshops.  I take the Flower Soft workshop every single time.  I know how to use the product, however they always put out the new products for us to use and see and as I evolve with Flower Soft, so does my use of Flower Soft.  Workshops get you thinking outside of the box, when you are familiar with the product already.  I think it was my second workshop with Flower Soft that using the peel offs gave me one of those light bulb moments.  Now I just love them and think they make even the beginner crafter look so elegant in their creation.  And!  You get so many for a couple of dollars and can use them on ANY card or scrapbook page, just not Flower Soft creations.

So here is my Flower Soft workshop creation at CHA.  It got a little smashed in my suitcase, however it was so fun to make!  I used three different styles of peel offs in this creation and there is Flower Soft Polar White in the globe to make it a snow globe that you can shake.


Sunday, July 31, 2011

The 10-Minute Notebook with Lori

Raise your hand if you've ever needed a project done, like, yesterday.  Uh-huh, I thought so.  Not that this kind of thing ever happens to me.  At least not often. Aw, who am I kidding? It's a regular occurrence. As luck would have it, the day Mandie & I were leaving for CHA I realized I should probably bring a notebook with me for a couple of the seminars I was taking. But honestly, how does it look at a craft conference if you walk in with a plain notebook?

So with 30 minutes left before I had to swing by and pick up Mandie, I pulled out a composition notebook, some Scor-Tape, a few embellishments, and a couple of sheets of paper from Graphic 45. Ten minutes later, I was ready to go with this in my bag:


Yes, I appear to be jumping the gun a little on Halloween, but I promise I'm not.  I happen to have been called the Wicked Witch of the West more than a time or two, just ask my husband.  (Honestly, I don't know where people get that idea.)  Besides, have you taken a look at that new Graphic 45 Primer paper pad?  Wouldn't that make an awesome notebook for a teacher at the beginning of the school year?

The Graphic 45 papers are perfect for a project like this.  They have lots of detail, so there's not a lot of work involved and you still get some wow factor.  I kept it all relatively flat, so as not to have something rip off while shoving it in my bag.  The ribbons are the perfect extra touch as they don't add a lot of bulk.  Note that this project requires 2 sheets of the same paper if you want the back to match the front.  I didn't think to take a picture of the back, but I used the backside of the paper on the back of the notebook, because it was the same color and a coordinating pattern.  Don't get anxious about making the edges perfect - swipe a little distress ink along all of the edges and it covers anyplace that isn't quite perfect, plus it adds dimension.

Supplies available at Cutters Creek:

Saturday, July 30, 2011

Melissa's Christmas in July


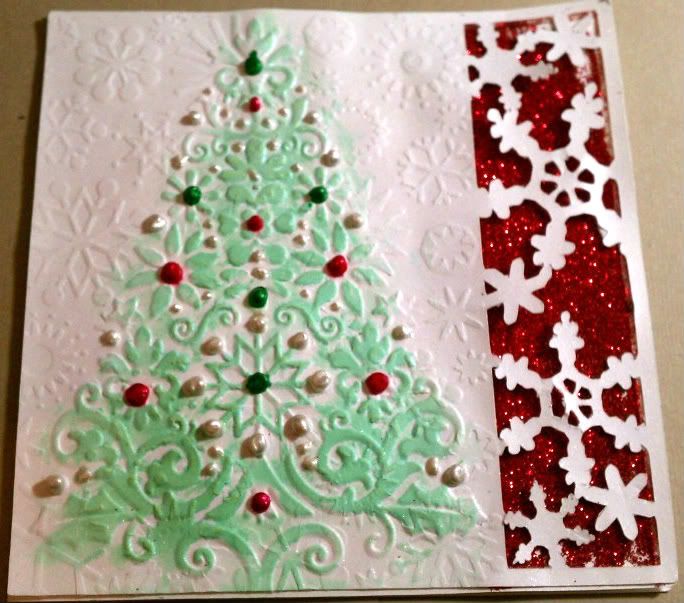
So I decided to revamp a Christmas card idea I have had for quite awhile.  I started with a snowflake border on my computer for a 5x5 card and cut it out using my Cricut.

After I cut the image, I ran the paper through my Big Shot with the Cuttlebug Snowflakes folder and again with my Lace Tree folder to soften the snowflake impressions slightly.

I used some red glitter from my stash to bring out the snowflake design.  I wouldn't recommend glitter for an area this large as it gets messy!  For future cards, I will use the American Crafts glitter card-stock.  It cuts cleanly and there is no glitter residue to be found weeks later on another project :o)

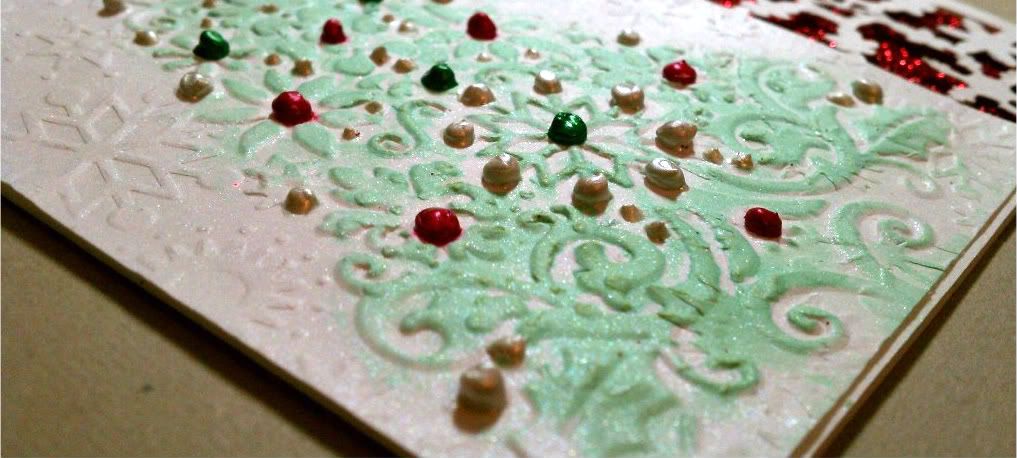
After the glitter was added I glued my embossed/cut image to the card.  It was still missing something, so I sprayed some Lily Pad glimmer mist on a tissue and ran the tissue over the raised image of my tree.  Once it was dry, I sprayed the front of the card with Dazzling Diamonds glimmer mist to add overall shimmer.  Doesn't it look pretty?


For the next step, make sure your card is completely dry!  I didn't check and noticed after the fact and had some ink running.  I used 3 different Perfect Pearls to accent "ornaments" on the tree.  What do you think??  Definitely a lot of work for a Christmas card, but you are waiting for the card to dry so much in between that it is actually pretty easy to reproduce like a production line.

thanks for looking!

Image: n/a 
Paper: Bazzill Simply Smooth 
Ink: Glimmer Mist: Lily Pad, Dazzling Diamonds
Embellishments: Perfect Pearls: Emerald Green, Ruby Red, White Opal
Other: ATG, Big Shot, Cuttlebug -Lace Tree (retired), Snowflakes, Cricut
Stash: red glitter

Monday, July 25, 2011

Bling It On!!! With Laura

This "episode" of Tutorial Tuesday....is a little light on the
"tutorial"....lol. There was truly a wonderful explanation of
the I Rock and how it works early this month (HERE), and
here is another project showing the difference it can make!
The above card is pretty, but when you "bling it on", look
what you can get:

It adds so much to your card in just seconds, it's quick and easy
and these I Rock gems HOLD!!! And it's so versatile, since you
can use it on so many surfaces!

Give the I Rock "hot rocks" a try.....you won't be disappointed!

(PS....do you like the pretty paper on the card? It's a sneak peek
of the Victoria Gardens paper from EP!! Kim has this on pre-order,
so grab it before it's gone!)

Available at Cutter's Creek:

I Rock "hot rocks"
I Rock jewel tray
Echo Park Victoria Gardens (pre-order!)

Melissa's Summer Cards

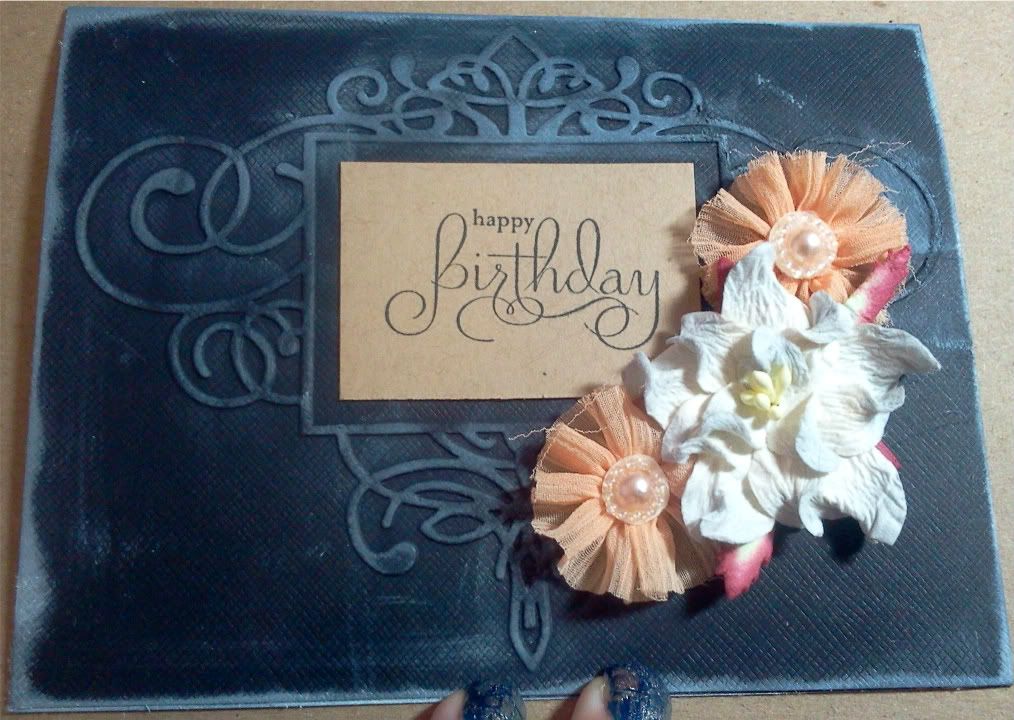
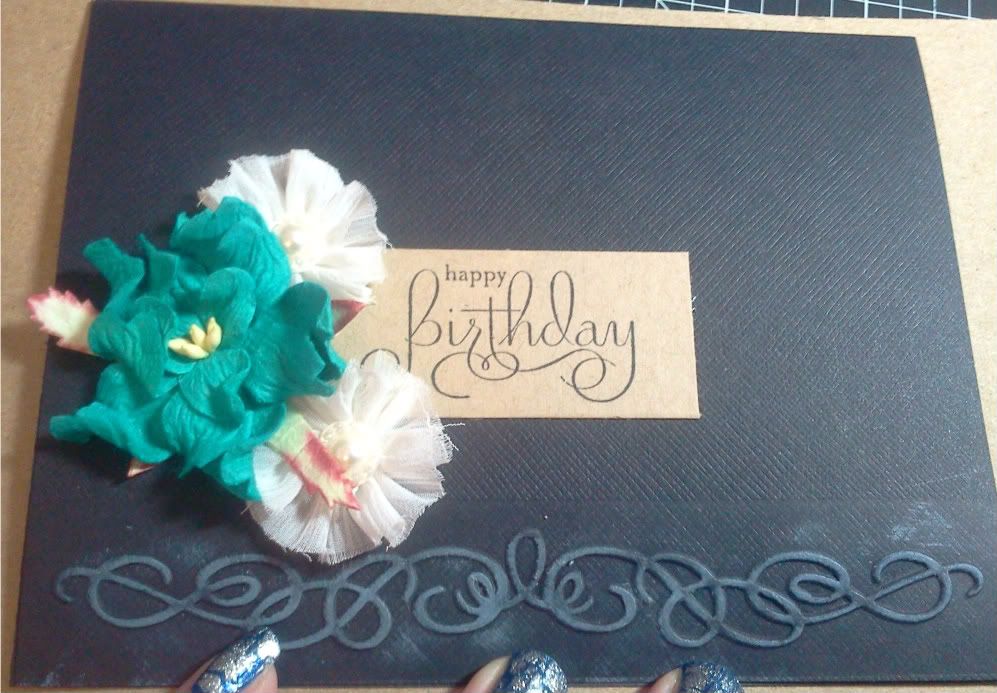
 So I was looking through my Color Inspiration Magazine that came out earlier this year and I got an idea.  Not so much the colors but the layout.  If you have it, it's on page 46 - Spread Sunshine.  I just love this simplicity of it, so here are some simple birthday cards I came up with.


I really like the look of white ink on black paper, so I wanted the white to look a little messy on the embossed images.  The first card I used Flourished Frame and added the white ink and flowers after stamping my words on some Kraft paper from my scrap paper.  Who says brown and black don't go together :o)  I topped it with someCuttersCreek branded and Prima flowers.


This card I also embossed, but with one of the images from the Organic Flourish Collection.  I also used white to enhance the embossed image but no where else.  I just really like the simple feel to it.  Both cards took maybe 10 minutes total so this was perfect for a card in a hurry or  making some for your stash of birthday cards.  And they look completely different!


thanks for looking! 


Image:  Stampin' Up -retired
Paper:  stash
Ink: Memento Tuxedo Black, white ink from stash
Embellishments:  Prima Flowers: Dimmet, Aurora. CC Flowers: Aqua Marine, B, W, G.  Organic Flourishes, Flourished Frame.
Other: ATG,  Glue Dots, Big Shot

Sunday, July 24, 2011

Christmas in July by Chris

I am never one to be ahead of the game so this was quite a challenge for me to shift gears from all those summer projects that are lined up and think of Christmas. I knew I wanted to have nothing to do with SNOW! Searching through my stash I came across my Graphic 45 Christmas Past paper and fell in love with these angels. I fussy cut both sets of them out using my Cutter Bee Scissors and then I scanned it in and printed it on white cardstock so I would have a third layer to work with, and fussy cut that. I cut them apart for layers so they would have depth when I used them.


While I was waiting for the ink to dry on the scanned image, I cut an 8.5x11 piece of white cardstock down to 7.5x11 and scored it at 5.5 with my ScorPal. I then cut a piece of green shimmery paper at 7.5 x 5.5 and used ScorTape to adhere it to the card front. The gold rectangle is another piece of Graphic 45 cut to just a quarter of an inch smaller than the background (also glued with ScorTape). The lace stickers were in my stash and since the matched the green so well that I couldn’t resist adding them to frame the angels. Before I started to build up the angels, I used my Gold Spica pen and traced over the sentiment and glued it down. It really darkened the sentiment and gave it a soft glow that I just love.


Then, using pop dots I built the angels up. I followed the colors on the Graphic 45 and used my Pink and Melon Spica pens to highlight them and the Clear Spica to fill in the white with some sparkle. I hope you can see that because it makes all the difference in the card. My final touch was one of my PDC Poinsettia’s I had made at Christmas time. I used some Glue Dots to set it on the card. And gee, a Christmas card done in July! Maybe I need to be challenged more this summer so my Christmas letters will be all ready before school goes back into session—LOL.
Related Posts with Thumbnails