I started with a center step card. The base was 11 by 5.5 inches and I had some cute paper that looks like tree bark. I decided to use my Scor-Pal and I cut both sides one inch in from the edges and from 1-inch mark to about 6.5 inches. Both sides were then scored between the cut line and the edge at 1 inch (mountain), 2 inch (valley), and 6.5 inches (mountain) and the center piece was scored at 5.5 inches (mountain). I then folded them to make my card shape.


I used my Cricut cartridge Stretch Your Imagination (check with Kim if she can get you this one) and cut the squirrel and nuts with the shift key at 4 inches. I made a shadow piece and using Pop Up Dots raised the acorns up slightly. I used my ATG to glue it down to one of the side steps. I then took my Owl Flourish and embossed some Core’dinations Cardstock, sandpapered the raised image, and fussy cut the owl and flourish out of the paper. I glued this right along the top of the lower fold in the center and added some Cinnamon Stickles for the eyes. I then cut the word "Autumn" from the Stretch Your Imagination cart at 5 inches and rubbed the edges with some Walnut Stain Distress Ink. The shadow is cut from Chestnut American Crafts Glitter Cardstock. I did a multi-cut of 2 to get this out and inked the cut edges with Walnut Stain. I used my Zig Glue Pen to attach the word to the shadow and then pop dotted the shadow up along the base.

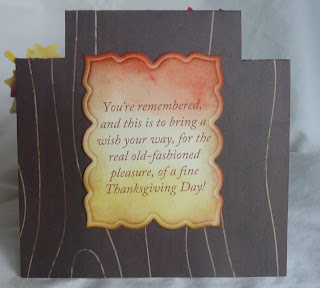
The card needed a sentiment and I decided to use my Spellbinders Labels Twenty Three, printed the sentiment with my computer and inked the edges with Vintage Photo, Mustard Seed, and Ripe Persimmon Distress Inks and glued it to the back of the card.

The card still needed some pizzazz. Taking a fall leaf stamp, a Clear Tim Holtz Distress Ink Pad, my Embossing Magic pad, and some white embossing powder I stamped and embossed the image several times on cream cardstock. I then used several of my Distress Inks (Dried Marigold, Mustard Seed, the Limited Edition of the Fall Colors, Walnut Stain, Spiced Marmalade, and Crushed Olive) and applied them directly to the paper smearing them alongside of each other over the leaves. Then I took my Tattered Angels Dazzling Diamonds and sprayed the heck out of each of the leaves. It looks a mess but be patient. Set them aside and let them dry—totally dry, no rushing. You get a blended, shiny and crisp texture to the cardstock when it dries. (It works terrifically on watercolor paper too.) When the leaves were totally dry, I fussy cut them out and used pop dots to arrange them on the card. I do so hope you can see the shine in the pictures, but if not—take my word for it, it’s great!
I’m thinking that this might look lovely as part of a table centerpiece rather than mailing it out. What do you think?


Super cute card. Love the colors on the leaves. And the fussy cutting of the owl folder.
ReplyDeleteSharon
Very pretty!
ReplyDeleteBeautiful fall card!
ReplyDelete