Showing posts with label Graphic 45. Show all posts

Friday, December 20, 2013

Giftcards by Cindy

Hi everyone,

Today, is my day to share for the Cutters Creek Design Team. My project today is Giftcard holders. I used a tutorial that I found here.

I used the Anna Griffin paper pad that I got in the 6x6 paper pad club, as well as G45 25 Days of Christmas 6x6 paper pad. I also used scor tape and cut images from my Cricut and I also used a stamp from Cat's Pajamas.I also used some bling too.


These giftcards are super easy to make and a fun way to jazz up your giftcard gifts! If you are interested in any of the products that I used today be sure to visit the Cutters Creek store.

Monday, December 16, 2013

Graphic 45 , 12 days of Christmas by Anne


Hi friends, I love, love, love this paper from Graphic 45, The 12 Days of Christmas,  All of the paper used on my scrapbook layout is from that paper pack.  Hope you are getting in the holiday spirit!  Sorry for the bad lighting on this layout!! :(  My Cannon EOS has died, and am jocking for a new one for Christmas.  So for now I have to use my ipad to take pictures!!


Wednesday, November 13, 2013

Gratitude Project by Cindy

HI everyone,
Today, I am sharing a fun project using the smallest Graphic 45 matchbox and some leftover French Country paper. It was a super fun and easy project.

If you would like a more detailed look at my project, be sure to watch the video.


Here are some products that I used from the Cutters Creek Store:
Glue n Seal
Scor Tape
Graphic 45 French Country Paper
Tattered Angels High Impact Paint

Thanks for visiting,
Cindy

Friday, September 27, 2013

Halloween Card by Cindy

HI everyone!

My Cutters Creek Design Team post today is a fun (not scary!) Halloween card.
I used my Cricut cartridge Teddy Bear Parade. I used the Graphic 45 Steampunk Spells 6x6 paper pad for my background paper and the paper that I used for my teddy bear's clothes. I also used the new Tim Holtz glitter on the broom and the hat buckle. Be sure to visit the Cutter's Creek store to get any of the items that I used today.

Graphic 45 Steampunk Spells 6x6 paper pad
Memento Ink in Tuxedo Black
Tim Holtz Distress Glitter

I hope that you like my card today, thanks for visiting.

Wednesday, September 25, 2013

Happy Halloween by Deanna M

Today I have for you a Halloween card that I made using the new Tim Holtz Stamps and Framelit dies.

For my card I started with a 4 1/4" X 5 1/2" black card stock base. I used my Graphic 45 Steampunk Paper for my card as well. The rust color mat is cut at 4" X 5 1/4" and the black dotted paper is cut at 3 3/4" X 5". (the dotted paper is the reverse of the rust paper, got to love two sided paper)! Even though it is sold out in the store, just ask, and Kim can order you some and there are some other great pads, check out the 12 Days of Christmas paper pad.

For my web, I embossed each layer with some WOW! embossing powder in  Black Glint embossing powder. The spider was embossed with the Black Ebony embossing powder. I stamped and cut the web out of white card stock. To age it just a bit I sprayed it with some Old Lace Glimmer Mist.

I layered the cuts of the web with some foam dots between the layers. I then added a foam dot to the very center of my layered spider web and then adhered it to my card front with some Scotch Quick Dry Adhesive. To finish the spider I added some purple stickles to his body. My sentiment is from the same stamp and die set. I stamped it with some Memento Tuxedo Black ink.

I used my eBosser and the Magnetic Shim to cut my die images out.  One of Kim's customers asked if we could do a video showing how to use this shim and the embossing mat. So while working on this project I shot a short video to show you how I use the shim. I hope it will help answer some of your questions.


Wednesday, September 11, 2013

Mini Album Tutorial using Bohemian Bazaar by Cindy

Hi everyone, Today, is my post for Cutters Creek. This week, I have a tutorial on how to make an envelope mini album using Bohemian Bazaar by Graphic 45. I bought my paper from Cutter's Creek in a pre-order. I also used Tattered Angels glimmer mist spray and paint (from a Tattered Angels paint club I am in through Cutter's Creek). I put the album together using Scor-tape. I hope that you all have time to watch the videos and make an album of your own!


If you are interested in any of the supplies that I used be sure to visit Cutters Creek Store.

Wednesday, September 4, 2013

Flower Pot Box by Jearise

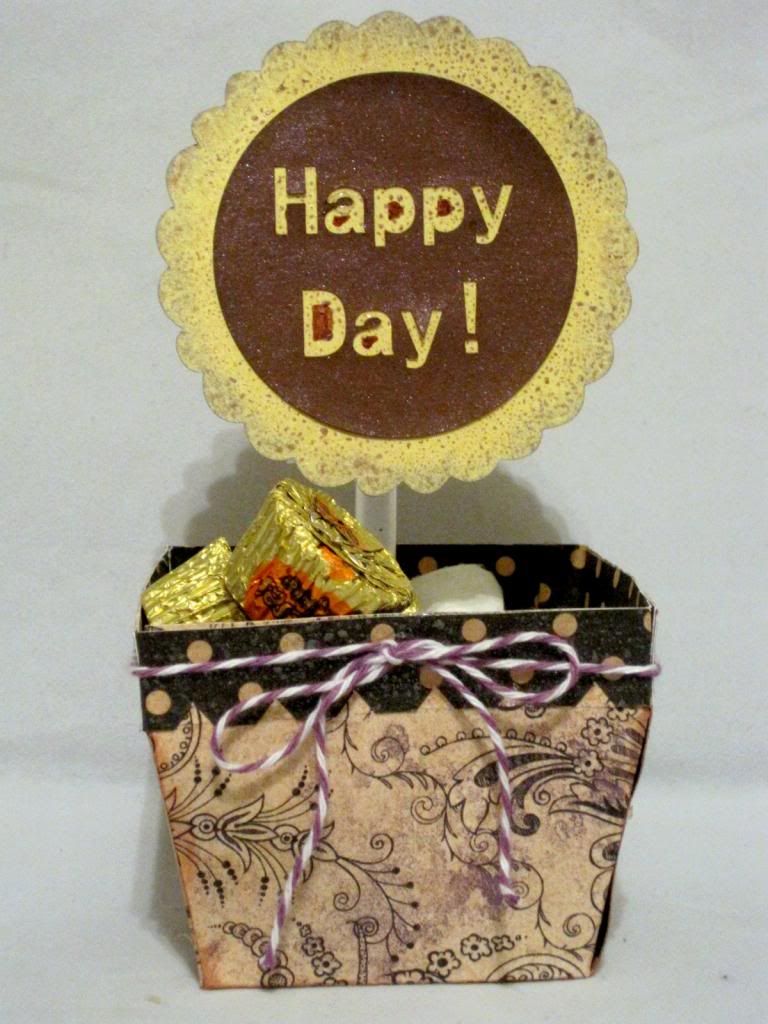
Today I have a flower pot box that I designed and made for a friend's birthday and then filled with her favorite candy.
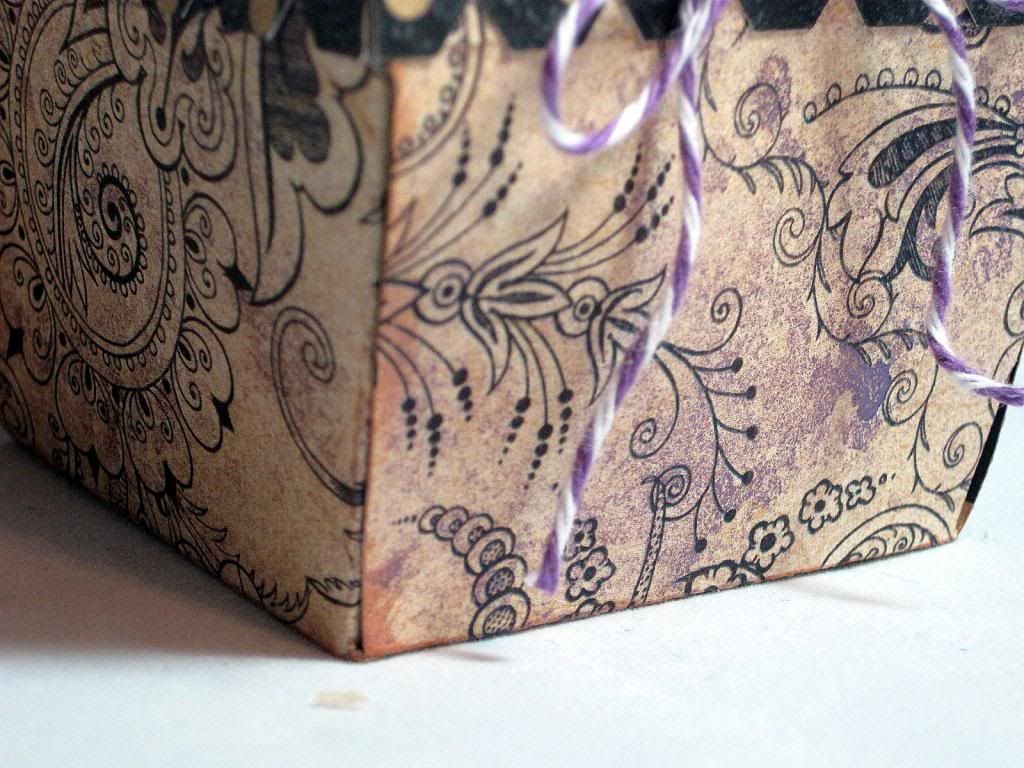
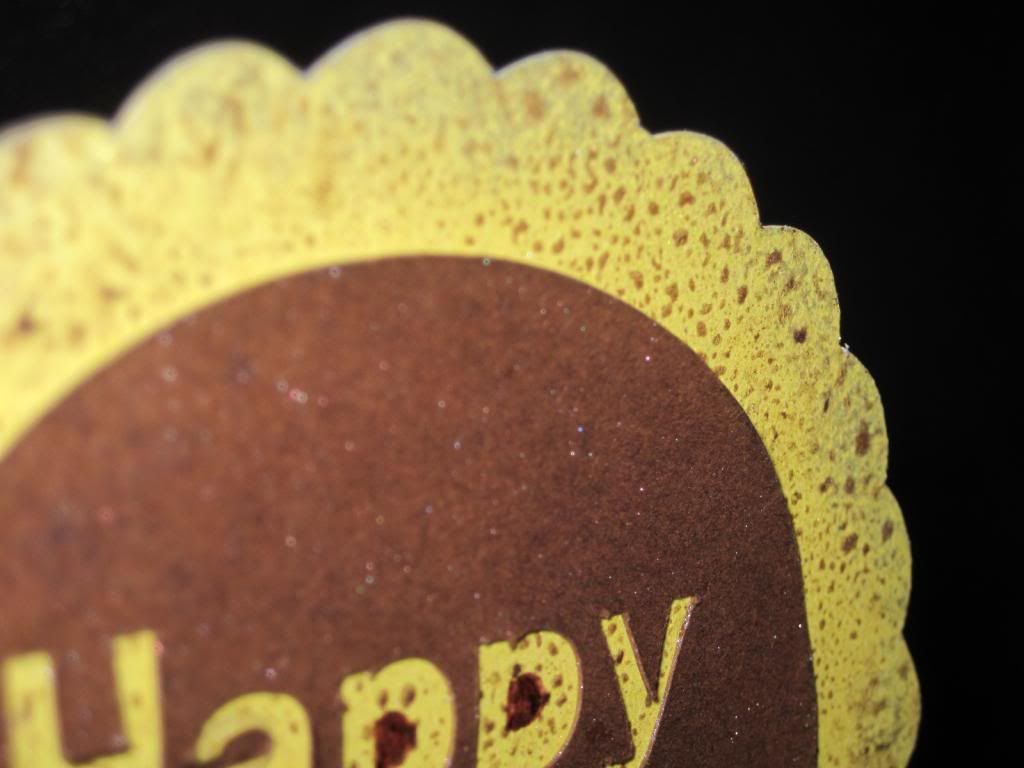
Here is a close up of the glimmer mist and the twine that I used.


Here is a close up of the flower. I love the way I did this. I used Distress Ink to ink the outside of the flower and then when that dried I sprayed my flower with Perfect Pearls Mist. The Perfect Pearls looks like it's still wet when it's not.


Products Used:

Graphic 45 paper
Tim Holtz Distress Ink pad in  Shaded Lilac
Perfect Pearls Mists - Forever Violet 
From Kim's Perfect Pearls Mist club. You can email her about the club and her many different clubs where new releases come first.
ATG Tape dispenser
Scotch Quick Drying Adhesive
Doodle Twine

Thanks for stopping by today and I look forward to next time.

Saturday, August 31, 2013

Just For You Card by Fran


I wanted to stay on the simple side when I thought about my project.   So I chose to use a card base that was originally designed by Bird.  She shares her files and I found one that was quick to cut out on my Silhouette Portrait.


OLYMPUS DIGITAL CAMERA


Card Details:  All solid color papers are from my Stash.  The printed paper is by Graphic 45 (6x6”) paper pad called Indie Bloom.  What I like the most about the card is that it had a cut out area to weave ribbon through.  So it is just like me that I wanted the ribbon to match the green shade in the printed paper.  So I took winter white seam binding and dyed it using Distress Ink pad in two different shades to get the green that closely matched the green in the printed paper.  The colors of the Distress Ink pads used were Shabby Shutters and Peacock Feathers.

TIP:  Seam binding is very soft and making a bow can be challenging.  Once I make my bow I protect the rest of my card and I spray hair spray on the bow.  I let it dry and then form the bow.  The hair spray gives just the right amount of stiffness to give the loops a little body.

The sentiment was stamped using Stampendous Stamp Set called Friendly Messages using Memento Tuxedo Black ink.  The centers on the cut out flower border is Distress Stickles (Spiced Marmalade).   I used a Crop-A-Dile Corner Chomper (Deco). 

I needed to make some adjustments on the the papers so they would be the correct size and for that I used a great tool called  the Perfect Ruler.  And all the pieces are held in place using Glossy Accents and Tombow Mono Permanent Adhesive.  OOPS I almost forgot about the bling on the corners of the sentiment tag.  I used KaiserCraft  Rhinestones in a pretty shade of orange.

The following items can be purchased from the Cutters Creek Online Store:

Distress Ink Pads

Distress Stickles

Tombow  Mono Adhesive

The Perfect Ruler

Glossy Accents

Graphic 45 Paper Pads 

Memento Ink Pad

KaiserCraft Rhinestones

NOTE:  Indie Bloom is no longer in stock but there are other gorgeous Graphic 45 paper pads.  However, if you are interested in Indie Bloom you can always check with Kim Bush and she may be able to special order it for you.

You can contact Kim Bush here about any product questions. 

Thank you for stopping by, Fran

Thursday, August 29, 2013

Steampunk Spells Album in a Box by Cindy

Hi everyone,
Today, I am sharing a fun project using supplies from the Cutters Creek Store. The owner, Kim had a pre-order of Graphic 45's new Halloween paper Steampunk Spells. I used the 12x12 for this project. I also used a pre-made cardboard book box that I got from Michaels - it was found in the unfinished wood section.

To prepare the box, I painted it with Gesso and then black paint. After the paint dried, I rubbed Gold leaf Rub n Buff streaking it in places so the black would show through and I think that it looks aged. I cut the cover images from the paper and attached it to the book box using Glue n Seal. The flowers are also cut from the paper and I used gold stickles on it.

Many of the products that I used for the mini album, I received as part of the Cutters Creek Store Yahoo Group. If you click on the link, you can join the group and get information on how to join the many clubs available. What is nice about the clubs is you can grow your collection and get new supplies monthly in an economical way.


I created the album using scor-tape, Basic Grey magnets and Velcro from the adhesive club. I hope that you like my project today. Be sure to watch the video to see everything in action.

Thanks so much for visiting today,
Cindy

Friday, July 19, 2013

Hawaii Album by Cindy

Hi everyone, Today, is my day for the Cutters Creek Design Team blog post. My project today is dear to my heart, it's my family scrapbook for our summer vacation to Hawaii. I used the tutorial from Enchanted Scrapper on YouTube.


I used Tropical Travelogue from Graphic 45 which is retired but the new Bohemian Bazaar would make a fabulous travel album too. Some of the other products I used include stickles, scor tape (lots of scor-tape!), the Mickey Mouse and Friends and Font cartridge, Robotz, Artiste and Elegant Edges cartridges and flowers. All of these products and many similar ones can be found in the Cutters Creek store.

Wednesday, July 3, 2013

Vintage 4th by Jearise

Well tomorrow we celebrate America's Independence Day and so to show my love for America and for vintage cards, I made this vintage 4th of July card.

This card was easy to make and I like the way the look turned out in the end. I used Graphic 45 (Le Cirque Collection) paper for the striped background. I then used a blue designed 6 x 6 sheet from Echo Park's For the Record 2 pad (Email Kim if interested) for the middle and finally I used used Bazzill paper (Email Kim if interested) to stamp my generic design on.

To get my vintage look, I used Tim Holtz Ranger Distress Ink in frayed burlap and inked the edges and ran the pad across the surface of my bottom and middle. I then used my finger to smudge the ink and to lesson it's color. For the stamped middle, I used Tim Holtz Ranger Distress markers (Email Kim if interested) to color a acrylic stamp. Once the image was stamped, I sprayed it with Perfect Pearls Mist in heirloom gold. Finally, I layered my card using my ATG tape and gun and added the peals for something a little extra.

Happy 4th of July everyone!

Tuesday, June 25, 2013

Bookend Drawers with Lori

I am sad to announce that this is my last post with Cutters Creek. As my kids have gotten older, it seems like a lot more of my time is spent ferrying them places, and I just don't have the time to commit to Kim's Design Team in addition to my own business.  I will still be around the Yahoo group as time permits, and I hope you'll take the time to come visit me once in a while at my blog as well!

For today's project, I wanted to complete this Kaisercraft bookend that I got a while back.  My intention was to make it for my future expanded craft room to hold up my sketch books, but as soon as my daughter saw the pearl paint going on, she tried to claim it for her room.  We'll see who wins in the end, but I think it's gonna be me this time! 


This bookend is one of the wooden items from Kaisercraft that Kim can special order (just ask her!). I coated it first in a white pearl paint that I had in my paint rack.  Once the paint was dry, I used a Tim Holtz Distress Ink pad in Evergreen Bough to add sheer color to the paint while keeping its shiny look.


The chipboard boxes are easy to assemble using Glossy Accents. I hold them in place while I count to 60 or so in order to prevent them from popping open.  Once dry, I used more Distress Ink, in the Evergreen Bough, Spiced Marmalade, and Vintage Photo along the top edges of every drawer. I then
covered the front and part of the sides in paper using Scor Tape.  My papers are from a 6x6 My Minds Eye paper pad. (This one is not in the store, but you're sure to find one that you like!)  I trimmed them down to 2 3/4" high strips, and trimmed them to fit the "finger hole".  I adhered the papers to the front and about halfway around the sides using the 1/4" width of  Scor Tape.


I distressed the edges of the papers using a sanding tool; a nail file would probably work too.  Lastly,
I decorated the fronts with vintage buttons from my stash and some metal brads from the Graphic 45 "Staples" line. Kim does not carry these in the store, but she may be able to special order them for you.

I hope you enjoyed my final project here! I know I sure enjoyed making it, just like the rest of my projects for Cutters Creek.

Friday, June 21, 2013

Bloom with Anne

Hi friends,

Today I wanted to share with you a card I made from all of the Secret Garden 8x8 Paper Pack.  Most all of my paper is gone from here.  I think it's time to reorder...I've only had it a few weeks, but it's so darn pretty, I can't help but gravitate towards it!  Please visit the Cutter's Creek online store for this and many more fun items to paper craft with!  Hope everyone has a great weekend!


Monday, June 17, 2013

Altered Box with Fran


OLYMPUS DIGITAL CAMERA
 
Well I went out of my comfort zone and decided I wanted to cover a paper mache box.  I haven’t done this in such a long time.  And looking at all the wonderful altered boxes the other DT members made I wanted to give it a try.  I used Graphic 45 paper, French Country. 
When I covered the bottom outside and inside I had to see how the lid would go on.  Well it was a little hard to get it on but I got  to fit and stretched it a little.   Considering this I did not decorate the inside of the lid.
I used three prints that I loved to cover the box and made a flower and leaves for the lid.  I added some bling to the side of the lid using red rhinestones by Kaisercraft.  Once I made the flower and leaves and shaped them to my liking I finger painted them with Stickles Glitter Glue (Star Dust).  After looking at the completed project I just felt it needed something else.  So I added wooden balls (3 of them) to the bottom for feet.  I painted the wooden balls using Adirondack Acrylic Paint Dabber in Willow (this color is so pretty).  It actually matches one of the colors in the leaves.  And everything is held together using Inkssentials Glossy Accents.
OLYMPUS DIGITAL CAMERA
The flower was made using Spellbinders  Donna-Salazar Rose Creations Die (S5-050)
OLYMPUS DIGITAL CAMERA

Note:  All underlined items can be purchased at https://www.cutterscreek.com/store/.  If there is something I used to create my project but is not sold in the store just contact Kim here and she may be able to get it for you.
Thank you for stopping by, Fran

Tuesday, June 4, 2013

Le Cirque Graphic 45 tricket box by Jearise

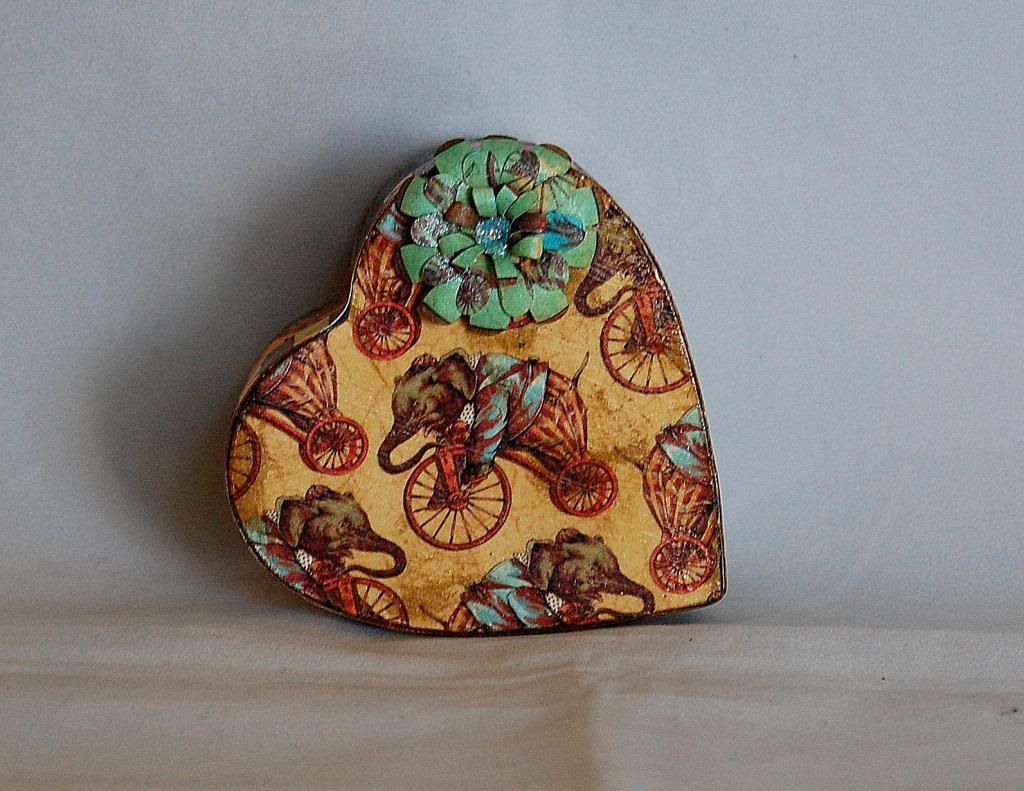
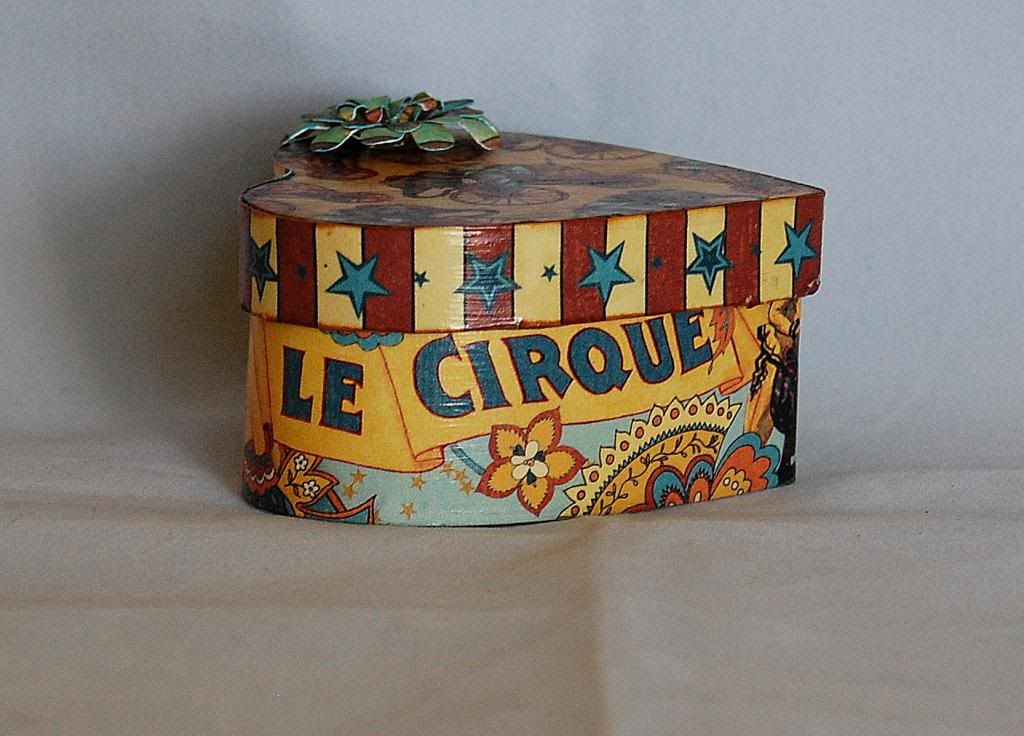
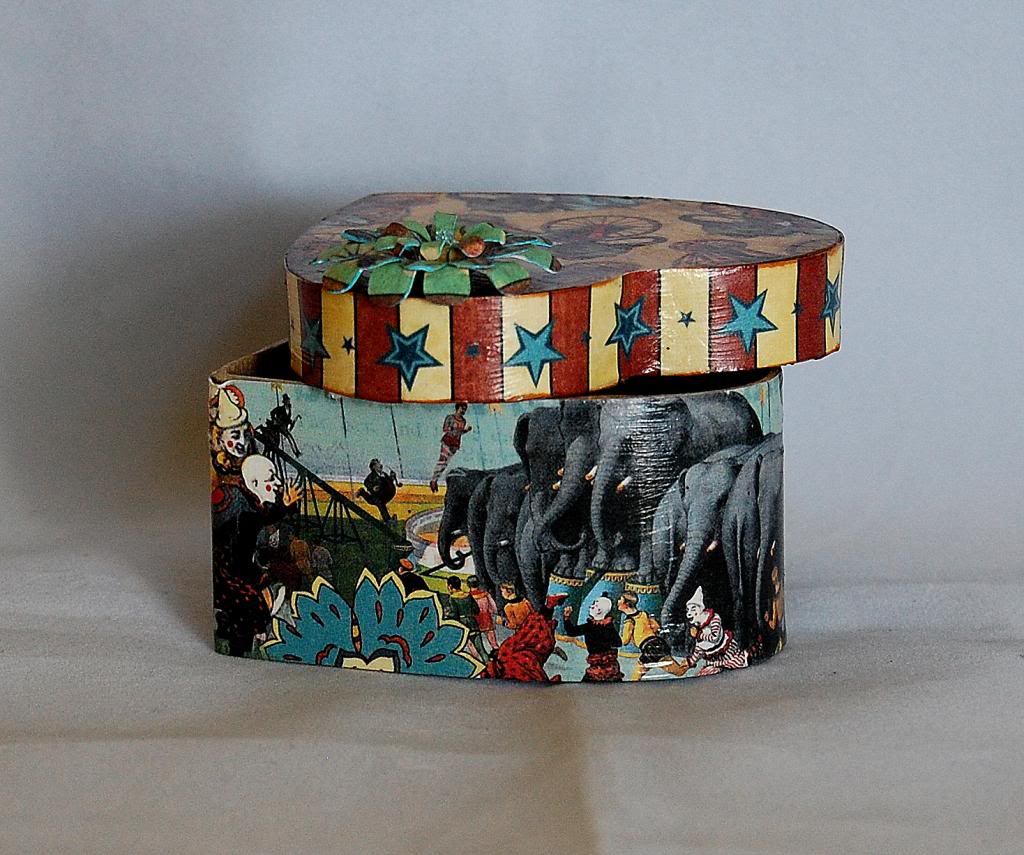
Today I am showing off a paper mache ticket box I decorated using the Le Cirque Double-Sided Paper Pad from Graphic 45. I discovered that Mod Podge works perfecting for attaching the paper and bringing out bright colors. Please contact Kim if you would like to order some Mod Podge.


Here are the directions on how I decorated this box.

First, I measured the sides of the boxes height and then I cut out the strip and played with wrapping it around the box to show different scenes. I decided I liked the elephants on one side and words on the other so I brought the paper together in the middle of the heart and made sure it overlapped some before cutting.  It's important to have it over lap in case you cut it shorter than you thought you were.

Once I had the paper Mod Podged on, I went back and trimmed it down to the edge of the top of the box using my utility knife and scissors.

Then on to the top....

I centered my elephant in the middle of the box and trimmed around the outside edge using my utility knife and scissors and then I Mod Podged the paper on.

I did the same thing with the trim for the top sides that I did with the bottom sides of the box.

I then went back and inked all the edges and added a touch of ink to the paper on the top and sides as well using the Tim Holtz Distress Ink Pad-Tea Dye.

I added some of the Tattered Angle's glimmer mist and a flower I made using the Cricut Cartridge Flower Shoppe. I used some Stickles in Baby Blue for the center of the flower. I attached the flower using Scotch quick dry adhesive.

There you have it in a nutshell, an easy project that is fun to do and doesn't take a lot of time. I even let my 8 year old decorate her own box using my paper scraps.

Have a great day! Jearise


Saturday, June 1, 2013

You're the King - Masculine Card with Lori

It's my turn today to share a masculine card with you.  This one is perfect for the King of your castle, for Father's Day, birthday, anniversary, or just because.


Neutrals or dark colors are perfect for masculine cards, and a pop of color makes them eye-catching. My papers are from Graphic 45's Kraft Reflections paper pad. This is no longer in stock at Cutters Creek, but any of the other paper pads with darker colors would be great! (Basically anything currently in the store except Secret Garden.)


Texture is also a must for masculine cards, because we tend to stick to simpler patterns for them.  I used my faux leather technique and a Tim Holtz buckle to create this "belt" on my card. I added a pop of color by making this "poker chip" using a stamp from my stash and embossing with red embossing powder on red cardstock. I made sure the tones were slightly different so it would still "read" well.


Finally, I added my sentiment, using words from two different stamp sets (you're & the) and an alphabet set (king).

Supplies available at Cutters Creek:
Other supplies:
  • cardstock
  • clear embossing ink
  • red embossing powder
  • sentiment stamps
  • Tim Holtz buckles
I hope I gave you some new ideas for your masculine cards today. Thanks for stopping by!

Wednesday, May 22, 2013

BINGO

For today's post, I made a little Bingo card.  For those of you who are 4-H Mom's, you know how long days are at the county and state fair when your children are showing.  So I made a little card to send out to all the parents in our club to remind them to start collecting their quarters.  We always go and play and cool off in the air conditioned building, while the kids are showing at the horse show...

If you've never used the WOW Embossing Powder there's a great You Tube Video video from CHA that explains everything on the How To's.  It's super easy and a lot of fun.  On my BINGO card I used the powder on the card itself, and on the numbers.

The other items I used were Graphic 45 Paper and  Rich Coco Memento Ink to do some distressing around the white paper.   Everything that has a link to it, except the You Tube Video from CHA, can be found at Cutter's creek Store.  If you have any questions, please feel free to ask.  Hope you enjoy my post!


Wednesday, May 8, 2013

Mother's Day card by Cindy

Hi everyone, Today is my Design Team post for Cutter's Creek. I decided to make a side step stair card for my mom for Mother's Day. I used the tutorial from Splitcoaststampers here. One of my favorite ways to use Graphic 45 paper is to make mini albums. After I made the album here, I still had quite a bit of beautiful scraps that I thought would be perfect for this project.


This is a case of a card from Glenda's Crafts. The Graphic 45 paper is Secret Garden. I also used the Bloom Cricut cartridge for the flower boxes, Elegant Edges for the sentiment mats, the hat and grass is from Everyday Paper Dolls and and the fence is from My Community. 


I used the d'vine swirls cuttlebug folder on the fence. I also used some stickles on the tips of the flowers.

I hope that you like my project today. If you are interested in any of the products I used be sure to visit the store!

Tuesday, May 7, 2013

Fairy Tag by Jearise

Today I decided to showcase a fairy gift tag I made. I rarely ever make a gift tag but after making this one I want to make more. I love how it turned out and hope you like it too.


I used my Cricut Expression and the cartridge Plantin School House to cut out the tag. (Ask Kim and she can order the cartridge for you.) The Fairy image is from Graphic 45 - Once upon a Springtime.  I then sprayed the tag and the fairy image with Perfect Pearls Mists in Perfect Copper. I found a paper flower I had and also used the Perfect Pearls Mists for that. The fairy wings were outlined in Stickles. Finally, I used Scotch Quick Dry Adhesive to assemble all the pieces except the pearls. I used my glue gun on them.

Here are close ups of the wings and flower.


I love the way you can change a plain white paper flower into something so beautiful by just spritzing it a few times.


So until next time, I'm sending you some happy fairy wishes.

Thursday, May 2, 2013

Elegant Cards Made Easy with Graphic 45 & Lori

May is a busy month - on top of all the "usual" things, we Mother's Day and graduations to contend with! Which makes it even more important than usual for me to be able to get projects done quickly, and still look like I put plenty of effort into them.  At least I know cards can be a snap with Graphic 45.  My preferred card size is 5x7, and thankfully G45 has some great 4x6 images in many of their collections which are perfect for that size card.  Here's a beautiful (but quick!) card perfect for Mother's Day, a birthday, and more:


I chose an image I loved from the Secret Garden 12x12 paper pad, along with a coordinating print, and decided to use them with a kraft card base.  I cut the print to 4.75" x 6.75", and inked the edges of it and the image panel using Faded Jeans Distress Ink.  I cut a piece of cream cardstock to 4.25" x 6.25", and inked the edges of it and the card base with Antique Linen Distress Ink.

I layered the image on the cream cardstock, and the coordinating print on the card base.  I added some silver Glitter Tape to opposite corners of the matted image, then adhered it to the card front using foam adhesive. Finally, I used several colors of Copic Spicas to add more sparkly details to the image:


The closeup photos just do not do the actual image justice. I just love how a little sparkle makes these images shine! (No pun intended, lol.)

Cutters Creek supplies used:
Other Supplies: cardstock in kraft and cream (I used CTMH)

I hope today's post has given you some ideas - I'd love to hear what you think!
Related Posts with Thumbnails