Showing posts with label Copic Multiliner. Show all posts

Wednesday, May 18, 2011

Melissa's Anime Image

So today, I wanted to show some really simple, lovely cards I made using one of the oriental weave embossing folders from Cuttlebug.  I was trying to think of an image that would compliment the embossing folder.  So I went to my favorite site for anime images; http://www.deviantart.com/

I LOVE this site.  One of my favorite artists is Princess Elemmiriel.  She has the most gorgeous line art to color.  I chose Lady Rose Dragon . . . I can't tell you how many cards and miscellaneous items I have made with this image in particular.  So while I waited for my printer ink to dry - -you can never wait too long - -I embossed a beautiful Jade Green and a Silver Gray paper from Core'dinations Gemstone pack with my oriental weave embossing folder.  I would highly recommend this paper as well!   I centered them on some back cardstock from my stash and started coloring my images.  Bytheway, these cards are the standard A2 size :o)

So I tried to stay with complimentary colors to the papers I chose.  You don't have to use all the colors I did to get the same effect; I just started tossing in colors while I was playing.  I really tried for a dramatic look with the eyes and lined them with a multiliner and with spicas.  What do you think?


Hair: YR000, E50, E21, E11, E97, E99, E37, E29

Skin: E50, E00, E21
Eyes: G20, YG11, YG17
Makeup: R12, R02, R32, Pitch Black Spica, Peach, Clear
Hairband/Trim: Y32, Y35, Y17
Dress: BG10, BG11, BG23, BG13
Flowers: RV02, R12, R02, R32, R35
Shadows: C00, C1


Hair: C00, C1, C2, C4, N4, N6, N9, 0- Blender
Skin: E50, YR000, E00, YR01
Eyes: G20, YG11, YG17
Makeup: R12, RV91, RV93, Pitch Black Spica, Peach, Clear, Silver
Hairband/Trim: N1, N4, N6
Dress: BG10, BG11, BG23, BG13, BG45
Flowers: BV0000, BV00, BV02
Shadows: C00, C1


thanks for looking!!!


Photobucket


Paper: Bazzill Simply Smooth, Core'dination Gemstone,
Embellishments: Liquid Pearls
Stash: Black Cardstock

Monday, February 28, 2011

Copic Tutorial With Melissa

So I wanted to share with you how I color my images.  I am using an image from The Greeting Farm, Miss Anya Collection.  I LOVE these images.  They are so versatile and adorable! Usually I use the feathering technique when I color hair, but because the image is so detailed I will just blend the colors today.  I am also using my favorite color combinations today so you may see them a lot on my projects. 

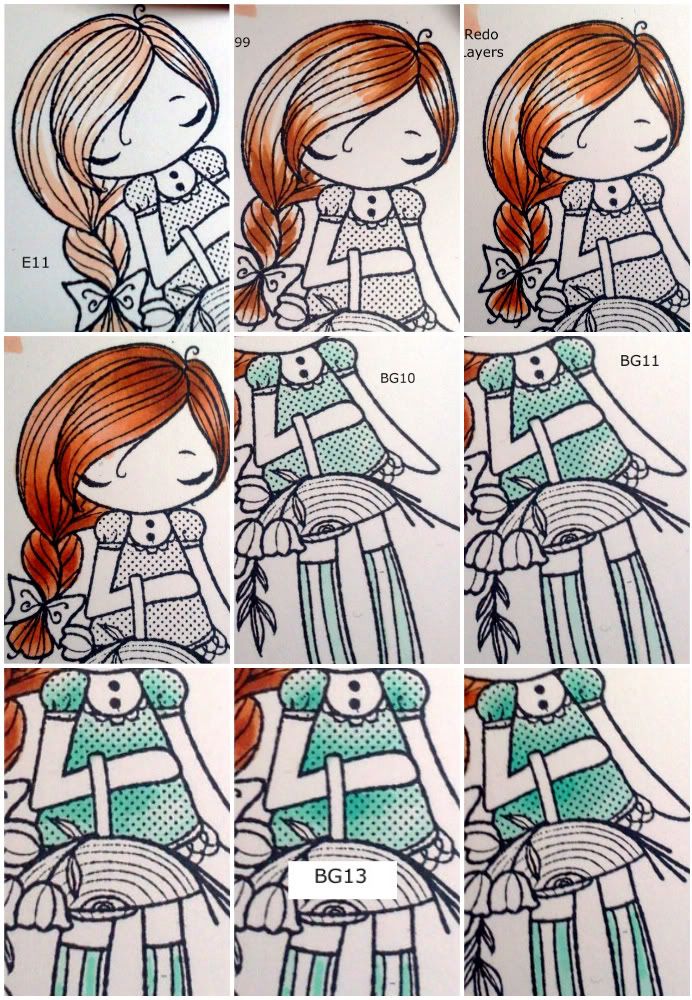
Just click on the pictures for a larger view.  I started with E11 on her hair, deciding the sun is coming from the upper left of the picture.  I than added E97 and E99.  Then I went and added additional layers until I received the blending I was looking for.  If you have any questions on this process let me know and I will put a video together.   
For her dress,  I started with BG10.  I want her dress to look like a satin texture; extremely light colored but dark where there are shadows or creases in the fabric so I colored with deliberate white areas showing.  BG11 was next, with BG23 following.  BG13 was last as it is the darkest of the four colors and was only added close to the skin and basket.  I went over with BG11 to blend in the darker colors.  For her socks, I used BG11 and BG23 and blended with BG10 to give it the same satin feel.  BG18 was added on the ribbon for the dress.

The flowers were very simple. I started with Y000, added Y11 and lastly YR21 and Y35 to the very bottom of the flowers.  I used the clear spica on the very tops of the flowers to add a little shimmer. Next the leaves, YG11, YG13 and a little amount of YG17.
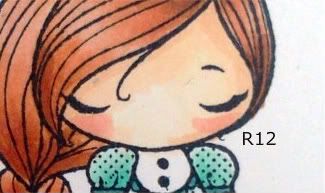
Last was the skin.  The pics are a little out of sequence and I apologize for that.  I started with E50 around the edges of the face, arms and legs.  I than added E00 under the bang and forhead, inner arms and legs under the basket.  E21 added in the same areas as E00 but in a less amount.  I than used R12 (separate picture) to add color for her cheeks; I want to make her look sunkissed.  Lastly, I went back to E50 and blend, blend, blend. 
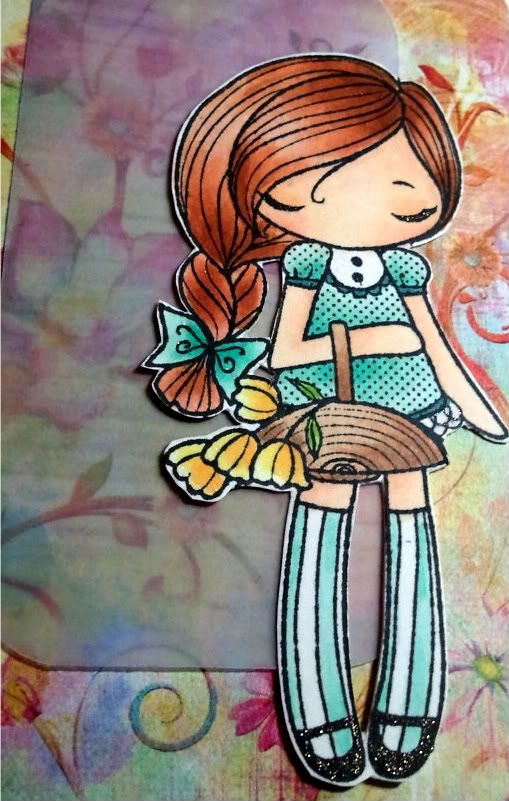
Here is the card finished.  Very simple, but I like it :o)  I used vellum for the paper behind her that was colored with BV02 to make the image pop a little more. 


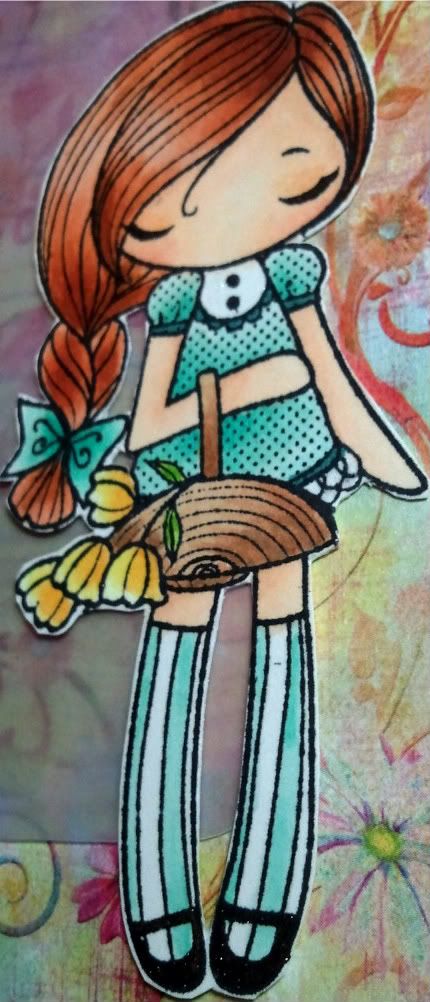
And here is the image completed.  You'll notice the colors are a little more bold as the ink has settled and dried at this point.  I went over the image with my spicas (LOVE these!) and added pitch black to her shoes and eye lashes, and peach above her eyes as an eye shadow and clear on her hair dress and flowers.

thanks for looking!!!


Stamps: TGF Miss Anya Collection, SU! Well Scripted (No longer available)
Paper:   Bazzill Simply Smooth, Prima Paper
Ink:       Memento Tuxedo Black, Copics, Atyou Spicas
Stash:    corner rounder, vellum   
Skin: E50, E00, E21, R12, Peach, Pitch Black Spica
Dress/Socks: BG10, BG11, BG23, BG13, BG18, Clear Spica
Hair: E11, E97, E99, Clear Spica
Basket: E31, E33, E44
Leaves: YG11, YG13, YG17
Flowers: Y000, Y11, YR21, Y35, Clear Spica
Vellum: BV02

Thursday, June 24, 2010

Monogram Sign Project by Melissa


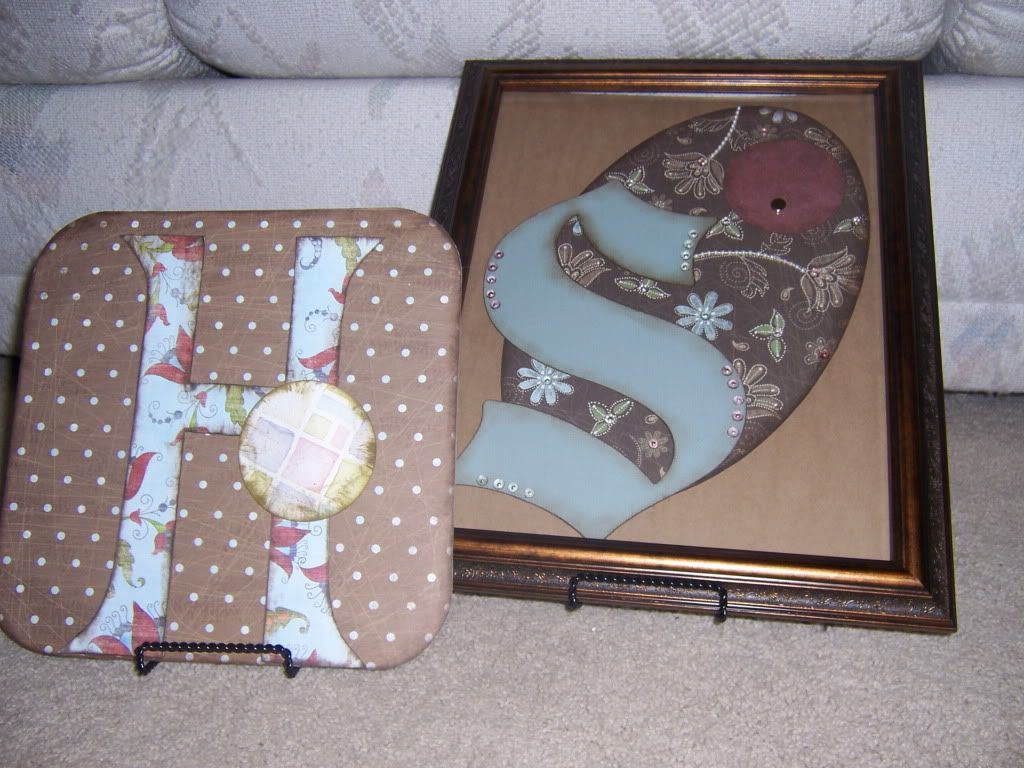
Here is another project I have been pushing off for a while at my house. Months ago, my mom and I had made Monogram signs to use as home decor. She finished hers; mine has been sitting on my craft shelf in the "to do" pile. I decided that it needed to be completed :o) The Letters were cut out with Make The Cut first as paper and than as two layers of chipboard. Mom chose a square background (H) while I did an elongated oval (S). Mom's is on a plate stand while I framed mine to hang on the wall. I attached a magnet to the front of the glass so I won't have to open the picture frame all the time to update the images. I haven't completed it yet as I still haven't found a background I like to go with my letter. I might eventually get a shadow frame with glass on both sides so I don't have to worry about it .. . .hmmmm . . . . .
100_3744.jpg
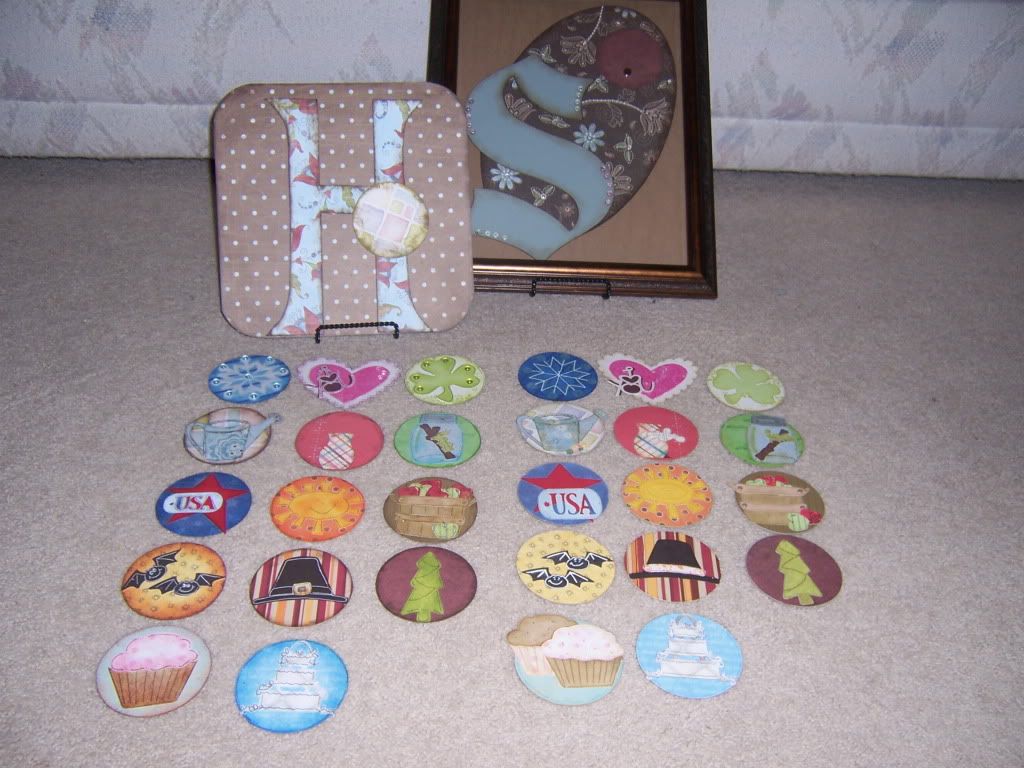
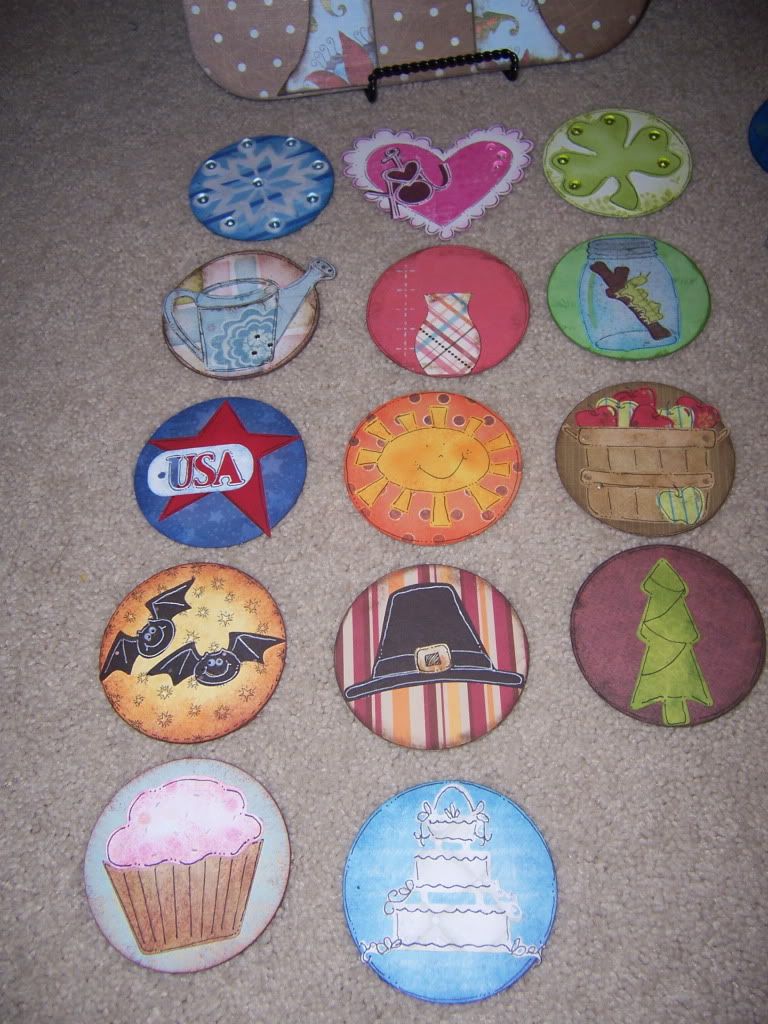
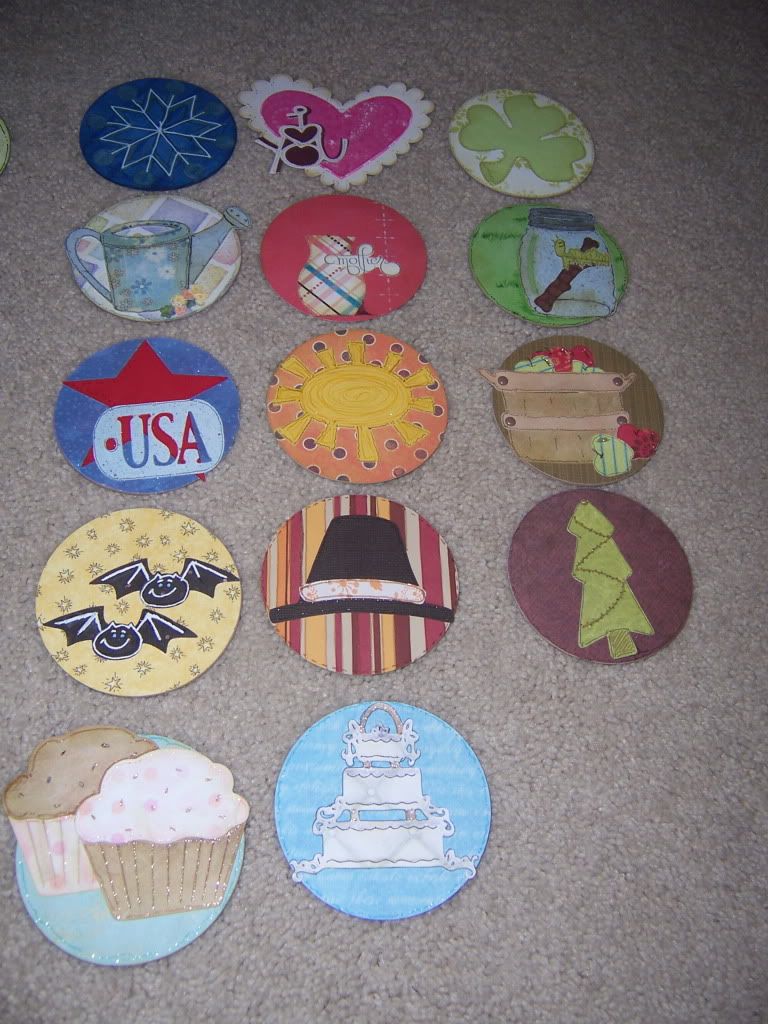
We than cut out 3 1/4" circles from chipboard and coordinating papers for backgrounds for the months and holidays. We only did 14 total circles but I know this something I can create new ones any time I want to! With Design Studio, I cut out multiple images for the coordinating month/holiday. I also listed alternatives or additional circles below- I am already thinking of other circles to create and design!
January-Snowflake/Winter/New Year's
February-Heart/Valentines
March-Spring/St Patrick's Day
April- "showers"/ gardening/Easter
May-"flowers"/Mother's Day
June-June Bugs/Father's Day
July-Popsicles/Fourth of July
August-water/sun
September-Back to School/Autumn/Harvest
October-Halloween
November-Fall/Thanksgiving/Veteran's Day
December-Winter/Christmas/Hanukkah
Birthdays-cupcakes/balloons/name
Anniversary-Heart/Cake/Wedding Bells/Rings
100_3747.jpg
I assembled all of the circles adding my own personal touch to them. In fact, in this picture my circles are on the right and my mom's are on the left. Can you tell where my creativity comes from? By the way, all of the paper used is from my stash and scrap pile - -this is a great way to use those scraps!! All other supplies can be purchased at Cutters Creek. Let me know if you need any measurements or picture close-ups. Thanks for looking!
100_3748.jpg 100_3749.jpg
Supplies Used:
Design Studio
Make The Cut
Chipboard
Adhesive
Atyou Spicas
Copics
Multiliner Pen 0.1
Inkssentials Pen
Twinkle Jewels
Quickie Glue Pen
Basic Grey Small Magnets
Carts-Blackletter, Home Decor, Doodlecharms, Paperdolls, Christmas Cheer, Accent Essentials, Walk in My Garden

Related Posts with Thumbnails