Showing posts with label WOW Embossing Powder. Show all posts

Tuesday, July 15, 2014

Welcome Baby Card by Jearise

There are no up and coming babies that I know of in my family but I thought this Noah's ark stamp I have is so cute that I really needed to finally use it.


I first heat embossed the stamp with WOW embossing powder then I used my alcohol markers to color the stamp. I added some fun details such as clear glitter to the sheep and Noah's beard plus flocking to the waves. I brought everything together by layering my card front and adding a little yellow and white twine bow.


Items from Cutter's Creek Store

WOW embossing powder

Doodle Twine assortment pack - Boy

2 way Zig glue pen

Hope your day is filled with rainbows and sunshine. Jearise :)

Saturday, May 17, 2014

Graduation Card for Boss by Michele

This year is going by fast. It is the time for Graduations, Summer breaks and Father's Day.  I needed to make a graduation card for my mom's boss, she got her Doctoral in Education. Here is what I used:
white and black paper from my stash, WOW Embossing power-Black Glint, Memento Tuxedo Black ink, tomboy adhesive, Creative Imaginations-Signature Collection and Reminisce-Graduation Stripe papers, scallop punch, and a stamp with the saying.
I started out with white card stock 9x6 1/4, then from each end scored in 2-1/4 using my Scor Buddy, the inside middle the black is 4 1/4x 6 and white is 4 1/8 x 5 3/4,. The side panels on the inside and outside 2 1/4 x 6. The band on the outside is 12 x 1, scallop punch, and embossed the saying and embossed congratulations on the white card inside. Please stop by the store to find these items I used as well as other great items. Have any questions please ask KIM and she will be more then happy to help you. Thank for stopping by come back tomorrow when I show you my Father's Day card and tie box I made using my Silhouette Cameo.


Thursday, December 26, 2013

HAPPY NEW YEAR by Fran


I think I got my glitter fix making this card, lol.   I have a stamp set called Dot Spot.  I placed the various dots on my Fiskars Stamp press in the pattern I wanted for my card.  Added VersaMark Watermark to the various dot stamps and stamped the front of the card.   Then to get the WOW effect I wanted I coated the stamped dots with WOW! Embossing Powder (Metallic Platinum Sparkle). The Happy New Year sentiment and banner were created using the Portrait Silhouette. And used 3-D foam pads behind the banner for dimension.   I added the Metallic Platinum Sparkle embossing powder to the edges of the banner using VersaMark Watermark.  Oh a little, just a little Wink of Stella Clear Glitter on the sentiment.

On the inside of the card I cut a 4-1/2” square in white cardstock. I added some of the dots (embossed with metallic platinum sparkle) on two corners to bring the front of the card inside.   And I added silver glitter tape* to the top and bottom edges.

The overall size of the card is 5-1/2” square.

*Glitter Tape was purchased from Cutters Creek’s one of many clubs offered by Kim Bush.  The clubs offer a number of various creating supplies for a set cost each month for 6 months.  The clubs enable you to build on your supplies.

OLYMPUS DIGITAL CAMERA


OLYMPUS DIGITAL CAMERA


Supplies used can be purchased from the Cutters Creek Online Store:

WOW! Embossing Powder

Adhesive – Tombow Mono Permanent Runner

Glitter Tape – this link will take you to Glitter cardstock that can be cut in to strips and adhered to your card.

3-D Foam Pads

If you have any questions about the crafting supplies I used you can contact Kim Bush and she will be glad to assist you.


Happy New Year, Fran


Monday, December 9, 2013

12 Days of Christmas Day 9 by Deanna M

Welcome to the Cutters Creek Design Team's Twelve Days of Christmas. We are so happy you are joining us. Today is day 9 of our event.


Today I have for you a 5" X 7" card.  My card base is white card stock. I cut a piece of dark blue card stock 4 1/2" X 6 1/2". I stamped my image with some Versamark ink and embossed it using Opaque White WOW! embossing powder. To give the allusion that it's snowing, I added some Shabby White Fran-Tage.

Next I cut another piece of white card stock about 3". I used a Memory Box die called Country Landscape to cut the top of my card stock. (AND Yes, Kim can now order the Memory Box dies, just ask). Next I added some glitter to the "snow" so it would glisten and then added it to my blue card stock. Once I had all of that attached to my card base I cut a Snowflake Doily from the Cricut Paper Trimmings cartridge. This was cut at 1 1/2" out of blue card stock. I then cut a 1" circle out of white card stock and embossed my Happy Holidays sentiment using some Bodacious Blue WOW! glitter embossing powder.


Thanks so much for visiting today. Be sure to come back tomorrow for day 10 and another great project from the Design Team. Please leave us a comment and let us know what you think of our projects.

Wednesday, September 25, 2013

Happy Halloween by Deanna M

Today I have for you a Halloween card that I made using the new Tim Holtz Stamps and Framelit dies.

For my card I started with a 4 1/4" X 5 1/2" black card stock base. I used my Graphic 45 Steampunk Paper for my card as well. The rust color mat is cut at 4" X 5 1/4" and the black dotted paper is cut at 3 3/4" X 5". (the dotted paper is the reverse of the rust paper, got to love two sided paper)! Even though it is sold out in the store, just ask, and Kim can order you some and there are some other great pads, check out the 12 Days of Christmas paper pad.

For my web, I embossed each layer with some WOW! embossing powder in  Black Glint embossing powder. The spider was embossed with the Black Ebony embossing powder. I stamped and cut the web out of white card stock. To age it just a bit I sprayed it with some Old Lace Glimmer Mist.

I layered the cuts of the web with some foam dots between the layers. I then added a foam dot to the very center of my layered spider web and then adhered it to my card front with some Scotch Quick Dry Adhesive. To finish the spider I added some purple stickles to his body. My sentiment is from the same stamp and die set. I stamped it with some Memento Tuxedo Black ink.

I used my eBosser and the Magnetic Shim to cut my die images out.  One of Kim's customers asked if we could do a video showing how to use this shim and the embossing mat. So while working on this project I shot a short video to show you how I use the shim. I hope it will help answer some of your questions.


Sunday, July 7, 2013

Fabulous Day Card by Deanna M

I received some new goodies from Kim the other day and OF course I had to play a little this weekend. This is what I made.

I started with some green card stock cut and scored to make a 4 1/4" X 5 1/2" portrait card base. I add a yellow mat cut at 4" X 5 1/4" then I added another green mat cut at 3 3/4" X 5". I then cut another piece of yellow card stock at 3 1/2" X 3 1/2 and ran it through my eBosser and embossed it with my new Anna Griffin Matelassé embossing folder. (I love this one, and Kim can and will order if for you, just ask her. You can contact Kim through the store site here.)

I adhered all my layers together with my ATG gun. After I adhere the embossed yellow mat, I added a piece of Washi Tape to the base as a border. (OK, I admit, this is my free gift from Kim at the end of the club, but she can likely order this too.)

Next I stamped a small piece of card stock cut to 2" X 2" with my flower image with some Memento Tuxedo Black Ink. I colored my flower image with some chalk. I then went back and using a blue water colored pencil to add a bit of shading. I blended everything together with my Dove blending pen. I matted my image on another piece of green card stock cut to 2 1/4" 2 1/4" and adhered it to my card front with some Kool Tak clear foam squares.

Finally I added my sentiment using some VersaMark embossing ink and the new Saraha WOW! Embossing Powder I just received from Kim. The new Desert Sand Limited Edition set. LOVE IT!!! So sparkly.  Okay, so now confession time, I really had bad luck and did not enjoy using embossing powders on my projects until Kim started selling the WOW! embossing powders. The others I tried to use just didn't melt and give me the results I expected. The WOW! embossing powders melt beautifully. If you haven't tried them yet, you should, you won't regret it.

I would love to know what you think of my project and this embossing folder. I think it is beautiful and am so excited that I now own it.


Wednesday, May 22, 2013

BINGO

For today's post, I made a little Bingo card.  For those of you who are 4-H Mom's, you know how long days are at the county and state fair when your children are showing.  So I made a little card to send out to all the parents in our club to remind them to start collecting their quarters.  We always go and play and cool off in the air conditioned building, while the kids are showing at the horse show...

If you've never used the WOW Embossing Powder there's a great You Tube Video video from CHA that explains everything on the How To's.  It's super easy and a lot of fun.  On my BINGO card I used the powder on the card itself, and on the numbers.

The other items I used were Graphic 45 Paper and  Rich Coco Memento Ink to do some distressing around the white paper.   Everything that has a link to it, except the You Tube Video from CHA, can be found at Cutter's creek Store.  If you have any questions, please feel free to ask.  Hope you enjoy my post!


Monday, May 20, 2013

65th Birthday Card by Deanna M

One of my friends at work is turning 65 this week and I told her I was going to make her a card that celebrated her special birthday. This is what I came up with.

My card is a  5" X 7" white card base. I added a dark purple mat cut at 4 3/4" X 6 3/4" and a patterned paper mat cut at 4 1/2" X 6 1/2".

For my 65 I used the Cricut Craft Room and the Craft Room Basics and the shadow  feature to weld together the 65 purple base. I then cut the main layer out of a reddish pink card stock.Papers are from my stash. I sprayed the this layer with two coats of the Pink Glitter Dust Spray. My numbers were cut out at 4".

I used Scotch Quick Dry adhesive to adhere my number layers together. I also used the adhesive to attach my numbers to my card front.

My banner is cut from the Create-A-Critter 2 cartridge. (Kim can order this for you). I cut it at 3 1/4" out of some lime green card stock. I stamped my sentiment with some VersaMark embossing ink (Kim can probably get this for you). I formed my clear stamp so it followed the curve of the banner and stamped it. Since purple is my friends favorite color I embossed the image with some Presido Purple WOW! Embossing Powder. I attached my banner to my card using some 3D pop up glue dots. I used one glue dot on each end and two glue dots stacked in the middle so the banner has a wavy appearance.

This was a fun card to make. I hope you enjoyed it.

Friday, May 17, 2013

Graduation Card by Michele

Hello,
I wanted to share with you  2 graduation cards I made for a co-worker.  The first card I made was with some black card and a graduation paper I found in my stash.  The card is 9x6, and at the end I scored it in at 2 1/4 on both sides.
I added my graduation paper on the flaps.  To close it I added a band that is 1 1/2 wide and you can adjust the length.  I used a die-cut from Spellbinders Lacey Ovals
A closer look

From my collection of stamps, I stamped congrats grad! and then I embossed it in WOW! embossing powder-Primary Ebony.  Then I add some bling.  The inside of the card I added a piece of white card stock and stamped congratulations
 

I also made another graduation card.  The size is 5x7 and the base is white and found some orange color paper and another graduation paper I had at home.  I just did half and half of each paper and in the middle I added some white ribbon. 


The saying I printed out from my computer and then added pop up dots.  The hat(a stamp I had in my stash) I cut out and added some Diamond Stickles. The inside I stamped congratulations.


Hope you like the cards.  If you like anything I did and would like to order some items please contact Kim she will be able to help you get the items you want and check out the store for more amazing items.  Thanks for stopping by to check out my card


Saturday, April 13, 2013

One Layer Card by Fran


I love watching You Tube videos and one of my favorite card makers is Kristin Werner.  I just love her style.  Not long ago she made a Birthday card that I fell in love with and I just had to scrap lift it.  My card by no means looks as good as her card but I think I did a fairly good job.  If you like to watch the video on how she made the card  you can view it here:
Friday Focus–Birthday Card # 8 by Kristin Werner
I never was one to use white dashed lines on my cards but I thought this one really screamed white dashed lines needed.  I went a little further and stamped the inside of the card to match the outside.  I thought it gave it a neat look.  And I like the idea of a one layer card.  So easy to mail too.  Details on my card are below my photos.  In addition, I did not have any white embossing powder so I used WOW Embossing Powder in a Clear Glitter.  So in order to balance out the glitter in the embossing powder I added Stickles Glitter Glue in Star Dust on some of the dots on the flower centers and on some of the small dots throughout the stamped design.  The white dashes balance out the white I used to color in the flowers.
(You can click on Photos to see larger view)
One Layer Card-Front View
Card Size is an A2 – 4-1/4” by 5-1/2”
OLYMPUS DIGITAL CAMERA
(photo 1 taken without flash and photo 2 was taken with flash)

Card Recipe:  All materials used are from my stash.  Items linked is where I purchased some of the materials.  And if you see something you like and its not linked to the Cutters Creek Store you can always check with Kim Bush here and she may be able to order it for you.  WOW Embossing Powder; Stickles Glitter Glue; Neenah Desert Storm Card Stock; Gelly Roll White ink pen; Stamp by W Plus 9 Design Studio called Embroidery Bouquet.

Thank you for stopping by,
Fran


Tuesday, February 19, 2013

Washi Tape Die Cutting by Deanna M

I wanted to share the technique I used to make the flower on this birthday card. For all of you in the Cutters Creek Washi Tape club or Adhesive Club (even better, both!) should like this one as it uses Washi Tape and Inkssentials Glue n Seal. I love this adhesive.

A co-worker is redoing her bathroom in black and white tile and her favorite color is red so I decided to incorporate all 3 colors into a birthday card for her.

My card base is white card stock cut and folded to make a 4 1/2" X 6" card base. I added a black mat cut at 4 1/4" X 5 3/4" and then another white mat cut at 4" x 5 1/2" and finally a black patterned paper mat cut at 3 3/4" X 5. My flower is die cut using a sizzix die and I embossed the sentiment with some WOW! Opaque Bright White embossing powder. (it is currently sold out but I am sure Kim will be adding more to the store soon). I added a black stitched white ribbon and tied a knot bow on it.


For the flower I cut a piece of white card stock big enough to fit my die and lightly coated it with some Inkssentials Glue n Seal. I then added rows of Washi Tape to my card stock in a diagonal pattern (just because I wanted to).

Here is a short video showing you how I did this.

On my original sample I cut the excess Washi Tape off, in the Video I did not. However I think it is better to cut the excess of. To finish my flower I added some Kool Tak clear adhesive foam squares between my layers of my flower as well as to adhere the flower to the card. For the center of my flower I first added a 3d Glue Dot to the center. Then I took another 3d Glue Dot and dipped into some Strawberry Ultra Fine Flower Soft and attached it to the glue dot already in the center of the flower. To finish the card I also added some white faux stitching with my white gel pen.

As I said in the video, I think this would be a great technique for a background mat on a card as well. I sure hope you will give this technique a try.

Tuesday, February 12, 2013

My Heart Belongs 2 U....by Laura C

Sometimes....don't you want to just get inky and have fun?
That is what this project is about....just pulling out
different inks, paints, stamps.....and having a 
crafter's paradise of playtime!


I started with a blank base tag.....then I stamped and
embossed the heart (a Tim Holtz stamp) using WOW embossing
glitter in Angel Wings then inked the rest of the tag up
with Distress Inks:
Festive Berries, Barn Door, Shaded Lilac.
I dripped water on it to give the background
a more distressed look. 

After using a distressing tool around the edges of
the tag....I reinked with more Barn Door ink.
Then I lightly brush the tag with Adirondack
Paint Dauber in Pearl.  I also used the daubers
on the metal #2....first Red Pepper, then while
still wet....some Pearl to mix it into a silvery pink.
I also used the Pearl to fill in the word "Cherish" on
the metal tag and brushed it around the edge of
the plastic TH fragment piece under the letter
"U".....that piece was also colored with Red
Pepper Alcohol Ink.  Then I inked up the
love definition stamp from the TH
"Love Struck" set in white, and stamped
randomly on the tag.  Then it was just finishing
touches....a bit of TH tissue tape under
the letter U (which is a TH sticker) and
attaching TH baubles, charms, and some
seam binding ribbon.

Many of these fun items are in Cutter's Creek,
if you can't find them in store....please ask Kim,
she is glad to order for you as well!

Take some time to have a little of your own
creative playtime....hope we can inspire you to
do just that!

Saturday, February 9, 2013

Valentine card and Shabby Chic Pearl pendant by Ms. Pebbles


This card was so fun to make...and fast! I used all card stock and printed paper from my stash.

 After cutting all of my layers, I used my eCraft Purpleberry to cut the heart. I inked the edges of the base of the card, the pink card stock, the printed paper and the heart. I embossed the word "Love" with some red embossing powder. After I glued all of my pieces down, I added some Stickles to the corners of the red card stock and around the heart. I also added a heart shaped gem as a last minute touch.

I wanted to share this Shabby Chic Pearl pendant I made as a gift to one of my scrapbooking friends. I made a smaller one some time ago and added to the "Altered Box". There's a link to my tutorial on my blog.

Thanks for looking! Here's a list of the supplies you can use to create a card like the one above.

eCraft Purpleberry
Distress Ink pad
Stickles-Xmas Red
Stickles-Cotton Candy
Wow Embossing powder
Scor Tape

Friday, January 18, 2013

Oh Wow oh Wow - Embossing Powders by Tee

 Hi Everyone, I want to share with you a project I made at CHA this past week using the Wow Embossing Powders and some of their newest stamps and powders called Girls Night Out and Vodka Sparkle....

I first inked the dress form with versamark and added a coat of pink embossing powders.....Inked again and added a second coat.. I then added a coat of the extra thick for that glossy glassy look on top.

I then used the embossing pen and draw on the bottom of the dress and added some new vodka sparkle...

The wings has three coats of silver then while the embossing was still wet I pressed a decorative stamp into... Look how lovely they turned out..

The tag was stamped with one of their new burlap stamp pads and first embossed in silver than stamped again and embossed in black.  Love these embossing powders


Wednesday, January 2, 2013

Valentine's Day Cards by Deanna M


It is hard to believe that 2012 is over with and we have entered 2013. If time moves as quickly has it has been Valentine's Day will be here before you know it. Here are a few easy cards to get you started on creating yours.

All of my cards have a white card stock base and are 4 1/4" X 5 1/2". My mat layers are 4" X 5 1/4" and 3 3/4" X 5. All of my paper is from K & Company and are from older paper pads.

All of my little critters are from Create A Critter 2. I cut the Teddy Bear and Koala bear at 3 1/2" and the Love Bug is cut at 3".

 For my Teddy Bear I used some onyx pearls liquid pearls for his eyes and a white gel pen to add some faux stitching to my heart. I used white distress stain to stamp my little sentiment on my heart. He is attached to the card with an Action Wobble.


For my Koala I used my Imagine and the Baby Boutique color pallet for my grey colors. The black and red I cut with my Expression. Again I added some faux stitching to my heart and the ribbon. I embossed the sentiment with some Opaque White WOW! Embossing Powder.

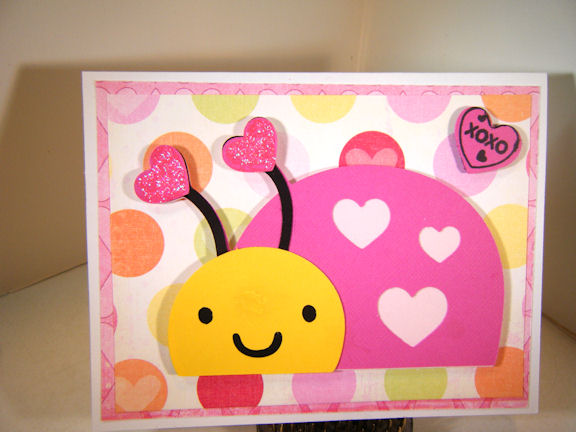
For my Love Bug I added some Glam Pink stickles to the heart shaped antennas. My sentiment on this one is stamped in Memento Tuxedo black ink and is tamped on the larger heart that cut out from the bugs body.


This is the Hero Arts stamp set I used for all of my sentiments. I got it awhile back and have been anxious to use it.This item is not a standard stock item in the store but Kim at Cutter's Creek can order it for you so don't hesitate to ask her.


Sunday, December 23, 2012

Advent Calendar by Deanna M


Here is the advent calendar I made this year. The tree is from Kaisercraft and Kim special ordered it for me. (Thanks Kim!)

I painted the edges with some green acrylic paint as well as the little wooden pieces for the numbers. I used some Glue and Seal to adhere my paper to the front and back of my tree. The paper is from my stash. I added some Washi Tape by My Minds Eye for my garland.

Next I cut a star from the George and Basic Shapes cartridge at 2 1/2" and I covered the whole thing front and back with some WOW! Gold Rich Ultra embossing powder.

Next I cut the countdown to Christmas out with my Silhouette out of some red card stock and then embossed it twice using the Clear Gloss WOW! embossing powder.

Finally I cut my numbers out of red vinyl and adhered them to my wooden pieces.

Sunday, December 9, 2012

Gift Tags and More! by Deanna M

Well, I finally got my Christmas tree decorated this morning. So now I have a place to put those presents I have been buying once they are wrapped. However, before I can wrap them I decided I better get some gift tags made so I know whose gift goes to who. (I am famous for wrapping presents and putting them under the tree without tags. Keeps everyone guessing).

For these tags I cut some Bazzill white card stock 3" X 3". I then used cut some patterned paper 2 7/8" X 2 7/8" and 2 3/4" X 2 3/4". I used papers from the Echo Park Holly Jolly and Season's Greetings and My Minds Eye Winter Wonderland. The upper left tag I added a piece of white card stock that I rounded the corners and then stamped it with some embossing ink and embossed it with the WOW! Cable Car Red Embossing powder. For the tag with the Trees and the Stocking I used some of the stickers from the Holly Jolly collection. The Poinsettia tag was made using the Spellbinder Poinsetta die. I inked the poinsettia with some of the Festive Berries Distress Ink and I added some gold Liquid Pearls to the center. I am going to try to get a better picture of the tags in the morning, hopefully it will be much brighter than this even. Finally I used my crop-a-dile and punched a hole in the corner of each tag and added some Doodlebug Twine.
Next I made a couple of gift card holders. I found the directions here. Again my paper is from the Echo Park paper pads. I rounded the corners of the top of the gift card holders and the stamped my sentiment with some Evergreen Bough Distress Ink. I die cut the sentiments out using a Spellbinder die and my eBosser.

Wednesday, November 14, 2012

Quick and Elegant Christmas Cards by Deanna M


Today I have for you two versions of a quick but elegant Christmas card that would be easy to mass produce.

I started with a prefolded 5" X 7" white card base. I ran each of my card bases through my eBosser and embossed it with a Spellbinders MBossabilities folder called Holiday Magic. This folder is not in the store but Kim special ordered it for me and I love it. It is a 5" x 7" folder and worked perfectly with this project. I sprayed my embossed card front with some Glitter Dust, I used gold on one card and silver on the other. Once that was dry I added some ribbon from my stash. The snowflake is cut from the Winter Lace cartridge at 4". I used the pink and irridescent glitter dust on the snowflake. I cut a mat for my sentiment out of elegant edges at 2" and stamped my sentiment. I used the pink glitter dust on the shadow for the sentiment mat. For the gold card I cut a mat out of the Once Upon a Princess cartridge at 2" and embossed my sentiment with some WOW! gold embossing powder. I adhered everything to my card fronts with some super stickly 3D glue dots.

I have a short video for you because the photo does not do these cards justice. I hope you like the cards.


Sunday, November 4, 2012

The Stockings Were Hung... by Deanna M


I  have a quick and easy card Christmas card today. It is not too early to start on yours as well.

I started with a white card stock base scored and folded to make a 4 1/4" X 5 1/2" card base. I added a dark green mat cut at 4" X 5 1/4" and then my patterned paper mat cut at 3 3/4" X 5". My patterned paper is from the Echo Park Holly Jolly 6"x 6" paper pad. I then cut a red mat at 4 3/4" X 3 1/2". I ran that through my eBosser (love this great machine!) and embossed all but the last inch or so of the paper using the Tiny Mosaic Cuttlebug embossing folder. I then used a sponge dauber to sponge Black Soot and Fired Brick distress ink randomly over my "bricks". My stocking was cut from the Tis the Season cricut cartridge at 3". Again this paper is from the Echo Park Holly Jolly 6"x 6" paper pad.

My sentiment was embossed using the WOW! Tea Garden Green embossing powder.  I attached my stocking to the front of the card with some foam tape and added an adhesive nail head from my stash. 

Saturday, October 27, 2012

Holiday Blog Hop-Mousetrap Memo Keepers by Chris


Welcome to the Cutters Creek Design Team Holiday Blog Hop! We want you to hop along with us and play for some awesome Blog Candy. The objective for our Blog Hop this weekend is to provide some inspiration to help you get your holiday crafting underway! Our Design Team has come up with some fabulous projects and we have a little bit of everything, from cards to gift ideas, and home décor items. So we invite you to hop along with us and get your creative juices flowing!


I first used a pair of pliers to remove all extra hardware from wooden mousetraps (leave just the mouse clip) and then,  painted the edges with paint dabbers and under the middle spring. I cut two pieces of decorative paper for each trap—one at 1 3/4x2” and the other at 1 3/4x1 5/8”. Edges were inked and then pieces were glued down with my ATG. I wrapped each base with ¼” scortape with which I adhered the chosen trim. Each trap was decorated differently (see below) and magnetic strips were added to the back so they could be hung on a refrigerator.

Ornament: Red Pepper Paint Dabber with Ideology Holidays Past base paper, inked with Festive Berries Distress Ink. Christmas Cheer cartridge: ornament cut at 4” from Inkessentials Shrink Paper. Image was colored with Copics: R29, YG67, Y28, B05, shrunk, and decorated with Gold Stickles. Red Tinsel Twine used for edges.

Snowman: Sailboat Blue dabber with MME Winter Wonderland base paper, inked with Tumbled Glass Distress Ink. Christmas Cheer cartridge: snowman cut at 1 ¾”. Decorated with Stickles: Cinnamon, Orange Peel, Black Soot, Tumbled Glass Distress stickles and Marvy Liquid White.

Snowflake: Snow Cap paint dabber with MME All is Bright, inked with Peacock Feathers Distress Ink. Joys of the Season cartridge snowflake cut @ 2”, embossed with Wow Neutral Ultra Shimmer. Blue Tinsel Twine edging.

Tree: Bottle paint dabber with MME Winter Wonderland and covered with Picket Fence Distress Stickles. Christmas Cheer cartridge tree cut @ 1 ¾” embossed with Peeled Paint Distress Embossing Powder. Gold stickles and green Tinsel Twine to finish.

Candy Cane: Red Pepper paint dabber with MME All is Bright paper, MME Winter Wonderland Tape, and Festive Berries Distress ink. Christmas Cheer cartridge candy cane cut at 1 ¾”. Bottom layer embossed with red embossing powder and red Tinsel Twine used as the edging.

Poinsettias: Bottle and Snow Cap dabbers used with Ideology Holidays past paper and MME All is Bright paper. Spellbinders Poinsettias cut from mulberry paper. Stickles: Silver, Gold and green Tinsel Twine to decorate.

Poinsettia Print: Snow Cap paint dabber with MME All is Bright paper. Picket Fence Distress Ink, and edged with blue Tinsel Twine.

Check out Cutters Creek Store for:

Now for details on blog candy! In honor of Breast Cancer Awareness Month we are giving away  the Ink Pink Collection by Jillan Vance.


The Ink Pink Collection includes:
• Pray for the Cure Stamp Set in your choice of Round or Rectangle
• Pink Acrylic Stamp block in either 3x3 for the Round set or 3 x4 for
the Rectangle set
• 5 Charming Jilly Charms, Breast Cancer themed, made of fine pewter
right here in the USA!
• 5 A Jillian Vance Design Pear Pins to attach the Charms onto your
projects.
• A sample of Rinkle Ribbon, vintage ribbon to wrinkle and crinkle, ½”
wide and Made in the USA.
This collection is worth over $45!!
In addition to all the wonderful products in this collection, they
coordinate with Spellbinders Nestabilities!!!
The Round Set coordinates with:
Spellbinders Nestabilities
Beaded Circle S4-292
Classic Scalloped Circles S4-124
Standard Circles Small S4-116
The Rectangle Set coordinates with:
Spellbinders Nestabilities:
Large Labels S4-168

 To enter to win all you need to do is leave a comment on each blog as you hop along.You will have until 12:00am on Monday October 29th to leave a comment with a way for us to get a hold of you.   We will use Random.org to select a winner on Tuesday, October 30th and will post the winners name by 9:00am.

Here is the complete blog hop line up in case you get lost along the way:

Don’t forget to leave a comment before hopping along to Kims blog. Thanks for hopping by and we hope you enjoy the hop and get many wonderful ideas!


Related Posts with Thumbnails