Wednesday, March 5, 2014
Mardi Gras Time by Mindy
Sunday, October 13, 2013
October is Breast Cancer Awareness Month
The Cutters Creek Design Team is dedicated to raise awareness through our projects and for today I made a tag. Tags are one of my favorite things to create. In my stash I have some tags made of metal foil. After doing some research I found how cool the metal foil tags look embossed.
I embossed my tag with a Sizzix embossing folder called Flowers. It’s the A2 size which was perfect for the size of my tag (approx. 2-1/2” x 4-3/4”).
I used my Cuttlebug to emboss the tag. I don’t know if you are like me but some of my craft supplies have dust on them from not using them much. But I finally dusted off two of my Adirondack Alcohol Inks in Wild Plum and Red Pepper. I don’t have many colors but I was hoping that these two colors would give me a nice pink color. It turns out that I got a very deep pink which I loved a lot. I took an applicator felt and applied it to the applicator tool. A few drops of each color goes a long way. Plus I added some Adirondack Blending Solution to help lighten the color. Then I spread the color on my embossed tag (both sides). Once the ink dried I sanded the embossed tag to take some of the color off to expose the silver metal foil. I love how it turned out. And I would love to know what you think.
I added the word HOPE (used clear glitter using a Wink of Stella glitter brush). And added some pretty ribbon and braided pink trim.
I used a Tombow Mono Adhesive Permanent Dispenser on the ribbon to hold in place. I glued the word Hope using Inkssentials Glossy Accents since I was gluing to metal foil. And some hot glue to the braided ribbon to keep it in place.
Supplies: Tombow Mono-Adhesive Permanent Dispenser; Inkssentials Glossy Accents.
Side Bar: If you are interested in using metal foil to cover tags and more you can purchase it at the Cutters Creek Online Store. Its called Inkssentials Metal Foil Tape Sheets. Cutters Creek carries a lot of the Ranger Products and if you don’t see what you are looking for you can contact Kim and she may be able to special order it for you. She loves keeping her customers happy.
Thank you for stopping by, Fran
Saturday, June 15, 2013
Wedding Card by Cindy
Thanks for visiting my Cutter's Creek Design Team post. For my project, I decided to make a wedding card. I don't go to a lot of weddings but on occasion I have need of a card or I am asked by my sister to make her a card so it's nice to have one on hand. I used some scraps from a wedding album that I made and the swiss dots cuttlebug folder. I also used stickles and a pearl. I attached my flower to my card using Fabric Tac but 3M Scotch Quick Dry works equally well. My car cut is from the SweetHearts Cricut Cartridge and my flower is from the CTMH Artiste cartridge.
To see how it all gets put together, be sure to watch the video.
To shop for these products and more be sure to visit the Cutters Creek Store.
Tuesday, August 7, 2012
Birthday Card by Deanna M
I have a fun birthday card for you today! I made this for my son's girlfriend. Sure hope she likes it.
My card base is white card stock and is cut and folded to make a 4" X 9" card. This card will fit in a regular #10 business envelope. I added a pink mat cut at 3 3/4" X 8 3/4". My next dilemma was that the paper pad I wanted to use was a 6" X 6" paper pad but I need an 8 1/2" tall paper for my card. So what I did is I took two different coordinating papers from the My Minds Eye "Life's A Party" paper pad. This paper has not been added to the store yet but if your interested in it, let Kim know. Here is a picture of the paper pad.
I cut the blue patterned paper in the middle of my card at 3 1/2" X 4". I then found a piece of paper in the pad that had strips for borders and cut that at 3 1/2" X 2 1/2" and placed that at the top of bottom of the blue piece on my card. Then the reverse of the border print paper had the same pattern as the blue but it was pink so I cut a 1/2" X 3 1/2" piece of that paper to place over the seams, My birthday ice cream cone is cut at 6 1/2". I ran the cone part through my Cuttlebug and embossed it with a Sizzix Argyle embossing folder. (This Cuttlebug embossing folder is very similar and would work well.)
To finish my ice cream cone I added some Key Lime Liquid Pearls for my sprinkles and some Orange Peel and Paprika stickles to my candle. I added my Ice Cream Cone with some foam tape to my card front.
Sunday, June 24, 2012
Happy 4th of July by Deanna M
I have a quick 4th of July card for you today. Perfect to use as a party invitation or to just let someone know you were thinking of them.
My card base is white Bazzill Simply Smooth card stock cut and scored to make a 4 1/4" X 5 1/2" card base. I added a dark blue mat cut at 4" x 5 1/4" and a red mat cut at 3 3/4" X 5". Both of these mats are Core' de nations Card stock (Cutter's Creek is out of this paper but Kim can likely order it for you). I then used a piece of the Whitewash Cut and Emboss card stock. I ran that through the Cuttlebug and embossed it with the Stars embossing folder and sanded it so that the red from the back side showed through. I cut the 4th of July image from the Stand and Salute cartridge at 2 1/2". I cut the shadow twice once out of white and once out of red and offset them just slightly. I cut the top layer out of a dark blue and added some Midnight Blue stickles to the blue layer. Popped up the sentiment with some foam tape. I also added some blue and white and red and white Doodlebug bakers twine to my card. Finally I added a couple of star buttons from my stash and threaded them both with more of the twine and tied a knot.
Wednesday, May 2, 2012
Krafty Card for Baby with Lori
This is a pretty easy technique to do - the trick is just finding embossing folder patterns that work well together. You can usually do pretty well by choosing one large-size pattern, one medium pattern, and one small pattern. Also, try to keep the styles similar - I went traditional, but you could also go all modern or all grungy (think Tim Holtz folders).
Every embossed pattern here is a separate piece of cardstock, layered up. My focal image is also popped up using foam adhesive tape for added dimension.
I used a variety of border punches to stack "eyelet" borders along the bottom of the card. At the top of the stack, I added pale pink ribbon and a bow trimmed with my I-magicut ribbon cutter.
Here's a list of the supplies I used to make this card:
Cutters Creek
- I-magicut ribbon cutter
- Kassie's Brocade 5x7 Cuttlebug embossing folder
- Swiss Dots A2 Cuttlebug embossing folder
- ATG adhesive
- Close To My Heart kraft cardstock
- Close To My Heart Baby Pink cardstock
- Close To My Heart Mocha Opaques adhesive pearls
- Cricut machine and Mother's Day LE mini
- pink ribbon to match CS
- Fiskars border punches, Diamond and Effervescence
- Fiskars embossing border punch, Scalloped Daisy
- Sizzix/Basic Grey embossing folder, Santa Baby
Saturday, January 21, 2012
Almost White On White Card with Chris
Resources from Cutters Creek:
Nestabilities: Labels Ten, Labels Twenty Three, Labels Four, Small Deckled Rectangles
Impressabilities: Flourish
Tattered Angels Glimmer Mist: Pearl
Cuttlebug embossing Folder: Madison
Self-Adhesive Pearls: Champagne
Glossy Accents
Copic Markers: R46
Sunday, January 15, 2012
A Valentine Tag with Chris
What are you making for Valentine’s Day?
Resources from Cutters Creek:
Tim Holtz Distress Inks—Broken China, Antique Linen, Barn Door, Aged Mahogany, Clear
Super Fine Embossing Powder—Gold
Acrylic Sheets
Embossing Folders—Cuttle Bug or Sizzix
Gold Stickles
Glossy Accents
Glue Dots—Pop Up, Craft Dots
Flower Soft Adhesive
Diamond Range Flower Soft—Ruby
Tattered Angels Glimmer Mist—Gold Metallic
Friday, December 9, 2011
Telescope Card by Chris
Monday, November 21, 2011
A Beautiful Autumn Card by Chris
I started with a center step card. The base was 11 by 5.5 inches and I had some cute paper that looks like tree bark. I decided to use my Scor-Pal and I cut both sides one inch in from the edges and from 1-inch mark to about 6.5 inches. Both sides were then scored between the cut line and the edge at 1 inch (mountain), 2 inch (valley), and 6.5 inches (mountain) and the center piece was scored at 5.5 inches (mountain). I then folded them to make my card shape.

I used my Cricut cartridge Stretch Your Imagination (check with Kim if she can get you this one) and cut the squirrel and nuts with the shift key at 4 inches. I made a shadow piece and using Pop Up Dots raised the acorns up slightly. I used my ATG to glue it down to one of the side steps. I then took my Owl Flourish and embossed some Core’dinations Cardstock, sandpapered the raised image, and fussy cut the owl and flourish out of the paper. I glued this right along the top of the lower fold in the center and added some Cinnamon Stickles for the eyes. I then cut the word "Autumn" from the Stretch Your Imagination cart at 5 inches and rubbed the edges with some Walnut Stain Distress Ink. The shadow is cut from Chestnut American Crafts Glitter Cardstock. I did a multi-cut of 2 to get this out and inked the cut edges with Walnut Stain. I used my Zig Glue Pen to attach the word to the shadow and then pop dotted the shadow up along the base.
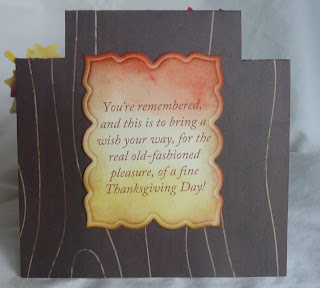
The card needed a sentiment and I decided to use my Spellbinders Labels Twenty Three, printed the sentiment with my computer and inked the edges with Vintage Photo, Mustard Seed, and Ripe Persimmon Distress Inks and glued it to the back of the card.
The card still needed some pizzazz. Taking a fall leaf stamp, a Clear Tim Holtz Distress Ink Pad, my Embossing Magic pad, and some white embossing powder I stamped and embossed the image several times on cream cardstock. I then used several of my Distress Inks (Dried Marigold, Mustard Seed, the Limited Edition of the Fall Colors, Walnut Stain, Spiced Marmalade, and Crushed Olive) and applied them directly to the paper smearing them alongside of each other over the leaves. Then I took my Tattered Angels Dazzling Diamonds and sprayed the heck out of each of the leaves. It looks a mess but be patient. Set them aside and let them dry—totally dry, no rushing. You get a blended, shiny and crisp texture to the cardstock when it dries. (It works terrifically on watercolor paper too.) When the leaves were totally dry, I fussy cut them out and used pop dots to arrange them on the card. I do so hope you can see the shine in the pictures, but if not—take my word for it, it’s great!
I’m thinking that this might look lovely as part of a table centerpiece rather than mailing it out. What do you think?
Sunday, August 28, 2011
Flower Soft Can Make Your Project Bloom
Thank you for taking the time to read all the details about my project. I hope you have a wonderful day.
Fran
Saturday, July 30, 2011
Melissa's Christmas in July
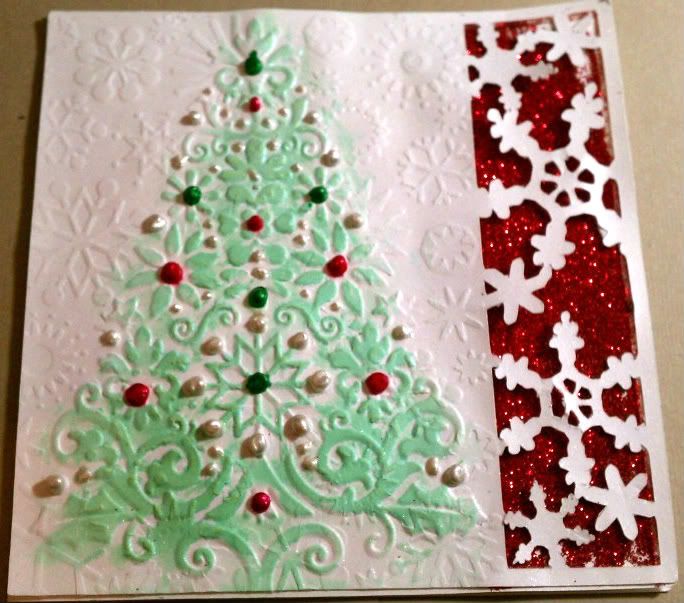
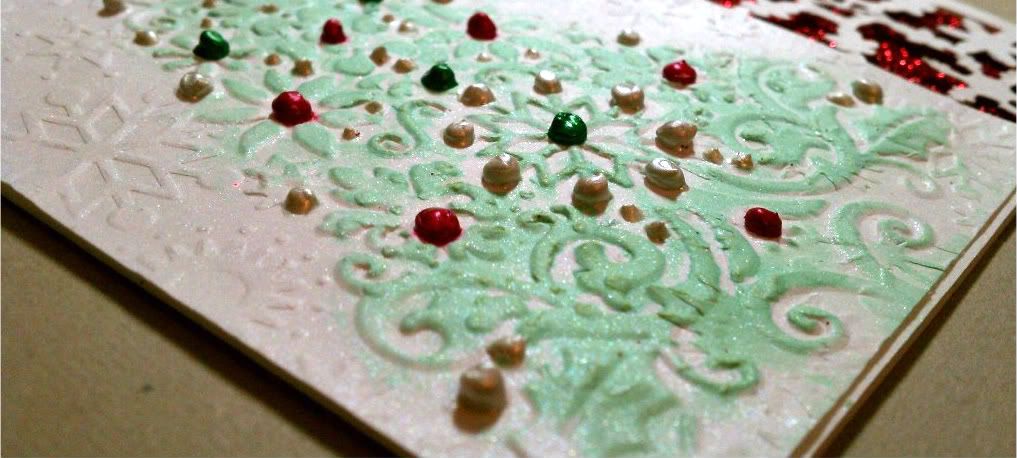
Ink: Glimmer Mist: Lily Pad, Dazzling Diamonds
Embellishments: Perfect Pearls: Emerald Green, Ruby Red, White Opal
Other: ATG, Big Shot, Cuttlebug -Lace Tree (retired), Snowflakes, Cricut
Stash: red glitter
Monday, July 25, 2011
Melissa's Summer Cards
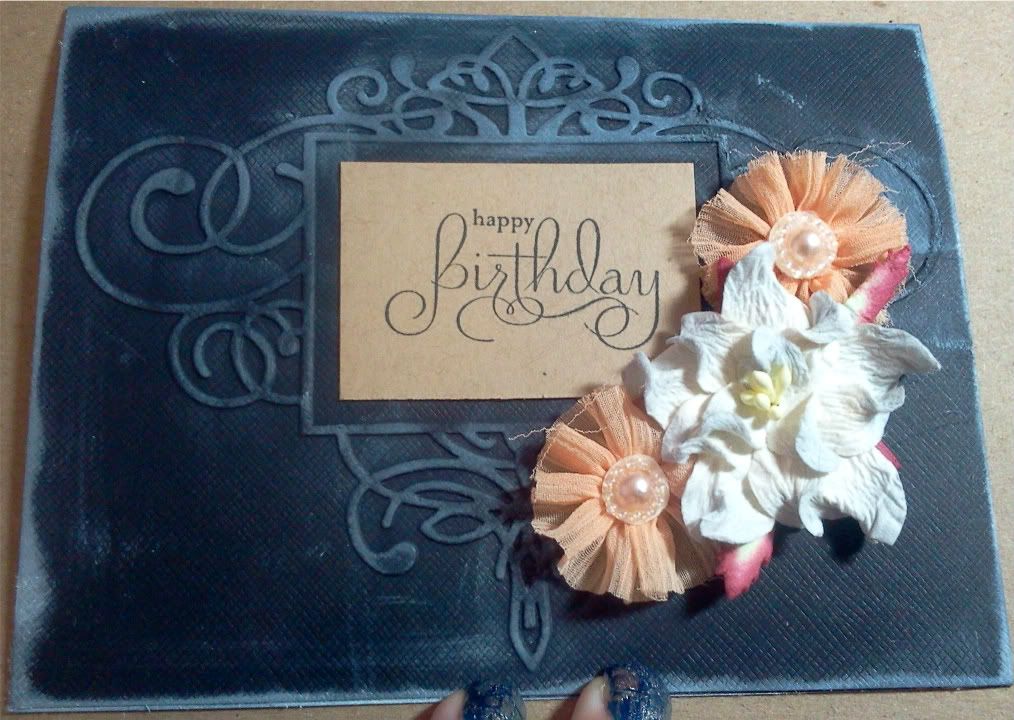
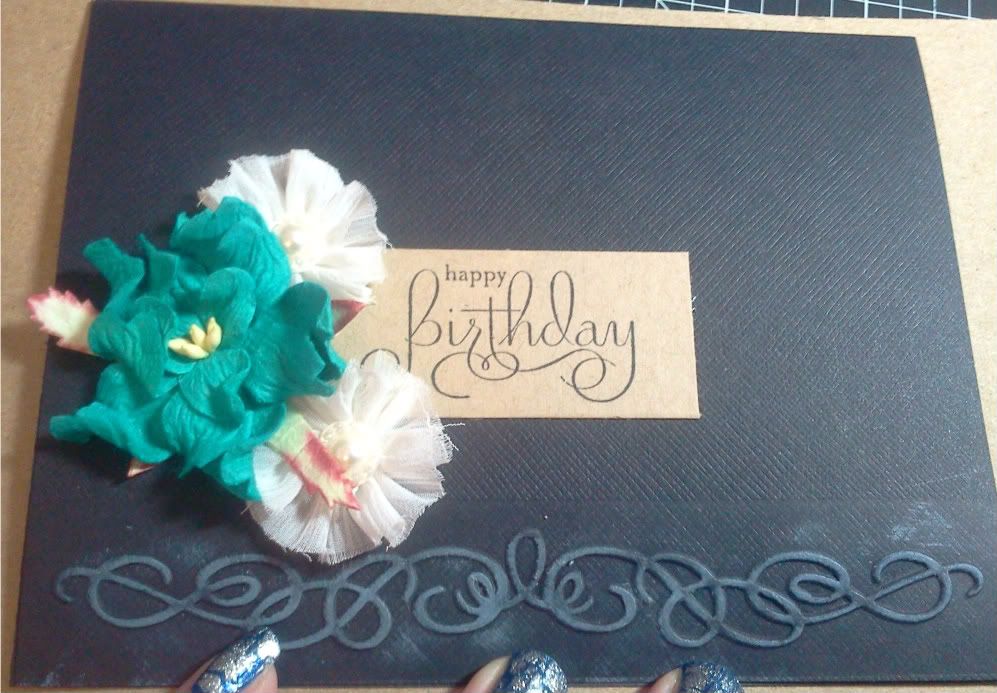
I really like the look of white ink on black paper, so I wanted the white to look a little messy on the embossed images. The first card I used Flourished Frame and added the white ink and flowers after stamping my words on some Kraft paper from my scrap paper. Who says brown and black don't go together :o) I topped it with someCuttersCreek branded and Prima flowers.
Paper: stash
Embellishments: Prima Flowers: Dimmet, Aurora. CC Flowers: Aqua Marine, B, W, G. Organic Flourishes, Flourished Frame.
Other: ATG, Glue Dots, Big Shot
Friday, July 15, 2011
Celebrate Everything! by Deanna M
Thursday, July 14, 2011
A White Christmas with Lori
Supplies I used:
- American Crafts glitter cardstock, Silver
- Scor-Tape
- Cardstock
- Cuttlebug embossing folder, Snowflakes
- Stamping Ink
- Glimmer Mist, Pearl
- Sentiment Stamp, Inkadinkadoo
- Silver Embossing Powder
- Heat Tool
- i-Rock tool
- i-Rock gems, silver
- ATG adhesive
- Ribbon
- pop-up foam adhesive
Thanks for stopping by today! I'd love if you'd hop over to my blog and check out my giveaway, and the next several days of White Christmas.
Tuesday, May 31, 2011
Tutorial Tuesday - Faux Metal with Lori
First, let me say that, yes, I know there are metallic papers and such available to buy out there. But I can guarantee that they look nothing like this! This technique uses just a few supplies:
- metallic ink pad (my samples are shown in copper, gold, and silver)
- Glimmer Mist in complementary colors (more details below)
- heat gun
- embossing folder of your choice (Cuttlebug or Tim Holtz/Sizzix)
- cardstock (more details below)
Based on what I had on hand, I used Pearl for the gray CS, and Bronze for the gold. (I used both Bronze and Patina for the copper, not shown.) After the CS is damp, place it right-side-up on the embossing folder and emboss, then dry with the heat gun.
After drying the cardstock, I used my metallic ink pads and rubbed color over the cardstock directly from the ink pad. You will want to cover the cardstock pretty well, but unevenly if possible, so some areas are more "inky" than others. Finally, dry the ink with the heat gun.
At this point, it isn't going to look like anything very special, just some inky cardstock. So we are going to spray on more layers of Glimmer Mist for depth and highlights. You can also use a metallic white ink for some added highlights; just be sure to dry with the heat gun between Glimmer Mist and ink pad!
For the gold, I used both Bronze and Chocolate Glimmer Mist. For the silver, I used Pearl and Denim Blue. For copper, I used Bronze and Patina, not shown.
| Gold |
| Silver |
Thanks for stopping by today - we look forward to seeing you again next time! If you'd like to see the other two cards I made, they are on my blog here.
Friday, May 27, 2011
Simple & Elegant Congratulations Card with Vicki

When you need a card in a hurry, the Cuttlebug is a great, easy way to put a simple and elegant card together.
I started with a standard white A2 card. I used the Cuttlebug Emboss A2 Musical Flourish
(http://cutterscreek.com/store/index.php?main_page=product_info&cPath=350_399&products_id=4241&zenid=7qtvhu05i9jihv4n6s76f0k2s6)
to emboss the entire front of the card. Next, I found a paper print I liked from the Echo Park Splash 6x6 Paper Pad (http://cutterscreek.com/store/index.php?main_page=product_info&cPath=380_402&products_id=4267&zenid=7qtvhu05i9jihv4n6s76f0k2s6).
As soon as I saw the little whale print, I knew that was the one! I found two solid coordinating papers, and made two nested rectangles with a slim 1/8" border. I then nexted my whale paper within those rectangles, with the same slim border. I wanted this ribbon-like strip to stand out, so I attached it using 3D Foam dots similar to the Joy! Foam Pads carried in the store
(http://cutterscreek.com/store/index.php?main_page=product_info&cPath=304_316&products_id=3764&zenid=7qtvhu05i9jihv4n6s76f0k2s6).
Next, I pulled out my Gypsy, and created a title using the Quarter Note cartridge. I thought it would be fun to do a play on words with the print. The title "Whale Done" was cut on plain coordinating card stock. I attached it with my Sakura Quickie Glue Pen
(http://cutterscreek.com/store/index.php?main_page=product_info&cPath=118&products_id=982&zenid=7qtvhu05i9jihv4n6s76f0k2s6).
The result is a quick and easy card, that can be used for any job well done!
Thursday, May 26, 2011
Mandie's Butterfly Card

... this beautiful card! So here's what I did to create this. It all began with a one of the Tim Holtz Texture Fade Embossing Folders. The one I used is called Patchwork Card which isn't currently in the store but a great substitute would be the Postal Folder. First I embossed a sheet of plain white cardstock which I had cut to fit the folder (4 x 5.5 if I remember right). Then I grabbed my Yellow Daisy, Walnut Gold and Coffee Shop Glimmer Mists and started spraying. I dried everything with my Heat Tool and then used the Tim Holtz Walnut Stain Distress Ink with my sponge dauber to bring out the embossing even more. Then I tore the edges off my paper down both sides and inked those too.

Then I grabbed my Echo Park For The Record 6 x 6 Paper Pad and started flipping through it. I will admit, I LOVE the smaller paper pads for card making not only because of the scaled down size but also I don't feel like I'm *wasting* a whole sheet of 12 x 12 paper that I may want to use in my scrapbook one day (yes, I'm a TOTAL paper hoarder)! Anyway, I selected a few sheets and decided that I wanted a big butterfly for the front of my card. I used the Once Upon A Princess Cricut cartridge to cut out my butterfly and inked all the edges of my cuts with the Walnut Stain Distress Ink. I actually used a makeup sponge to get into the small spaces on my cut. Then I added the patterned paper to the background of my card and decided to adhere my Glimmer Misted Patchwork Card at an angle. I trimmed it to fit and inked all the way around the card. To adhere my butterfly I used some Pop Up foam only on the body of the butterfly so the wings can flap. I inked my Baker's Twine a bit and wrapped it around my card 3 times and tied it off. Then I decided to add antenna to the butterfly with a scrap of the twine. I wish I had thought of it before I had adhered the butterfly but I just tied a knot in it and stuck it on with a Glue Dot. Then I stamped "Fly" on a scrap and matted it with another scrap after inking them both. Finally I added my green buttons with more Glue Dots. I love the way my "experiment" ended up and I can't wait to play more!
Wednesday, May 25, 2011
Chris' Key To My Heart Card
I then took two chipboard letters and sprayed them with Rum Punch Glimmer Mist (a fantastic new color), and set them aside. I also cut a length of seam binding and sprayed that with the mist and scrunched it up as I dried it with my heat gun. I then tied 3 knots in it and adhered it to the left edge of the card with Glue Dots.
Next I used my Vintage Collage set to cut out the pointing hand, the key, and the heart. Since I wanted each one to be different colors, I cut three times. Before I removed the finger from the folder, I lifted the inking panel and used Tea Dye Distress ink on the hand and Faded Jeans Distress ink on the cuff of the shirt. I used American Crafts Glitter Cardstock (Chestnut) for the key (you can’t really see the embossing, but the glimmer is sufficient for me), and a piece of scrap red cardstock for the heart.
To assemble the card I Scor-Taped the rectangle close to the upper right-hand corner. Using quick-drying glue and some pop dots, I laid out the letters, hand, and key, added a few words typed and colored on my computer and edged the heart with Christmas Red Stickles. And since my DH is an oldies fan, I think he’ll love having a line from the Isley Brothers song on the cover of his card.
Monday, May 23, 2011
Tutorial Tuesday: Cuttlebug Tapestry by Laura
You've seen so many great tutorials this month!! The trick today, is a super easy way to add dimension.....but at the same time, losing it. Um, confused yet?....lol. Well the above card, is made using this technique!!It all started with the Tim Holtz Sizzix Bigz Die: Caged Bird.....
I cut the cage out of the Chocolate Box Core'dnations Cardstock and the bird out of a warm red color from my stash (I used 2 B plates with the die to do this). Next, I sanded the birdcage for a distressed look, and then inked the bird with an ink tool to apply Tim Holtz Distress Ink in Walnut Stain. The bird was placed on a 2 1/2" square of kraft cardstock with rounded corners, which gave me this:
Nice, but then, I taped the bird down with Scor-Tape, and then used a tapestry type of A2 Cuttlebug Folder and ran the entire piece through the Cuttlebug. The result, after being swiped with a bit of the Walnut Stain Ink was this:
The image is almost imbedded into the other cardstock, it looks like it was printed that way. So much more interesting!! I then layered up the card starting with a large 4 5/8" by 6 1/2" kraft base, used some of the gorgeous Mariposa Mat Stack from DCWV, and the finishing touches, pretty Prima Roses, ribbon, a stick pin I made, and Kaiserkraft Pearls.Here is a close up of the sweet little bird in its finished cage..... (the cage is slightly bowed and attached with foam dots)......
Hope you get a chance to play with your Cuttlebug and try some of the fun techniques you've learned this month.....so many different ideas!! Happy Crafting!!Available at Cutters Creek:
Tim Holtz Sizzix Bigz Die (Caged Bird)
Core'dinations Cardstock (Chocolate Box)
Scor-Tape
Tim Holtz Distress Ink (Walnut Stain)
Prima Roses (coral and poppyfield)
Kaiserkraft Pearls (Chino)
Cuttlebug Embossing Folders (tapestry)
DCWV Mariposa (mat stack)