Monday, August 25, 2014
Cutie Patootie by Deanna M
I finally had a chance to spend some time crafting this past weekend. A good friend of mine from work recently became a grandma for the first time to a sweet and adorable baby girl. So this is what I made for her.
I used some dark pink Heat Transfer Vinyl and cut the words Cutie Patootie out and ironed them on to the front of this adorable floral onesie.
Of course I had to a card as well. I found this adorable blackboard a-frame blackboard card in the Silhouette store. The card fits in an A-2 perfectly. I made a couple of modifications to the card. I added some button brads to each corner. I stamped my sentiment with some Colorbox white pigment ink. The little banner items were strung across the card with some pink and white doodlebug twine.
Finally I made a little gift box to put the onesie in. I cut the base of the box out of white card stock. I then cut the decorative patterned paper layers out of some patterned paper from a K & Company paper pack that I have had for several years. I thought it turned out adorable and loved the look of the card.
Monday, August 18, 2014
Just Poppin' in to Say Hello
I know Kim has been busy packing and shipping orders but she is also checking her inventory and has found a few items that went up in the store that weren't previously there. She has been working on the as time allows for her so please just pop in occasionally to see what's available and take advantage of the 50% off clearance sale.
Thursday, July 31, 2014
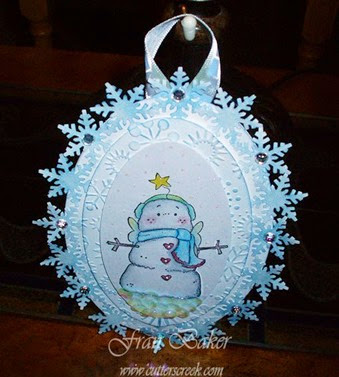
Snowman Ornament by Fran
Sunday, July 27, 2014
Happy Birthday Issy! by Kim Bush
Everything in the store is now 50% off so this is a great time to stock up on not only Flower Soft, but many more products at cutterscreek.com.

Saturday, July 26, 2014
Christmas in July By Michele
The blue card stock measures 3 3/4 x 3 3/4, 2 1/2 x 4,
and white card stock for merry Christmas is 2 1/4 x 3 . I used 3D foam dots for the big picture and for the white saying.

Be sure to head on over to Cutters Creek to stock up on your crafting supplies. The store is closing and everything is 50% off and Kim is randomly sending surprise little extras with orders so don't miss out.
Supplies used:
Memento ink: Danube Blue
Stamp: Hero arts- Snowy Winter Nights
Card stock from stash and white ink, and Merry Christmas
Friday, July 25, 2014
Just Add Water by Deanna M
Be sure to head on over to Cutters Creek to stock up on your crafting supplies. The store is closing and everything is 50% off and Kim is randomly sending surprise little extras with orders so don't miss out.
Thursday, July 17, 2014
Art Deco Tag by Jearise
I stamped the image on white card stock and then went to work adding Tim Holtz Distress Inks and using my alcohol markers. I like the way the frame around the woman pops and there is the vintage look I was going for so I am happy with the way this turned out.
Making of the tag:
1. Stamped image on X press blending card stock
2. Colored various parts of image with alcohol markers
3. Dab on different shaded of Tim Holtz Distress Ink
4. Spritz with water and let the colors blend
5. Add your bling! and adhere to your tag.
Products from Cutters Creek store are listed here:
Tim Holz distress ink pads in various colors
Zig 2 way glue pen
rhinestones (in flowers)
X Press Blending Paper for Copic markers
Enjoy and a question for you... Are you into Art Deco?
Tuesday, July 15, 2014
Welcome Baby Card by Jearise
I first heat embossed the stamp with WOW embossing powder then I used my alcohol markers to color the stamp. I added some fun details such as clear glitter to the sheep and Noah's beard plus flocking to the waves. I brought everything together by layering my card front and adding a little yellow and white twine bow.
Items from Cutter's Creek Store
WOW embossing powder
Doodle Twine assortment pack - Boy
2 way Zig glue pen
Hope your day is filled with rainbows and sunshine. Jearise :)
Monday, July 14, 2014
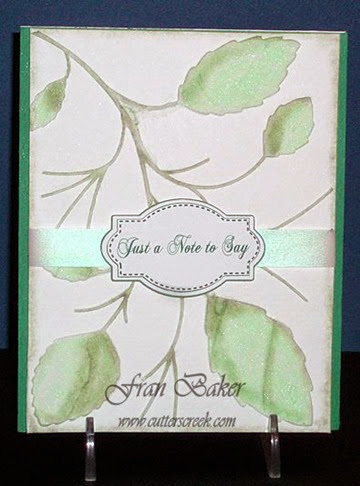
Just A Note To Say….by Fran
I tried a new technique (for me) on my card. I’ve been wanting to use embossing paste for a while now and thought this was as good as time as any. I used a stencil called Garden Whimsy Branch by Memory Box. And the embossing paste is by Studio 490.
Details: All papers used are from my stash. I used water color paper for my embossed background. Once the embossing paste dried I colored the leaves using Distress Ink Pad in Mowed Lawn (my favorite green color). In between the card base and the embossing layer is a layer of green card stock that matched the mowed lawn. I wrapped a vellum band around the card and placed a label created on my Silhouette using the Print and Cut feature. Inside I stenciled a smaller branch in mowed lawn and used the silhouette to cut out the sentiment “Hello”.
I thought it would be hard using embossing paste but it only took me two tries to get the look I wanted. I plan to use this technique more often.
Pull out your stencils and embossing paste and have some fun with it. So what if you don’t get it the first time. You know it takes practice to do a new technique. Once you get the look you are after then the rest is easy. And I would love if you share your embossing paste technique with the Cutters Creek Online Group.
Items used to create my card:
Summer Seasonal Distress Ink Pads
If there are any products I used that are not currently sold on the Cutters Creek Online Store you can contact Kim Bush to see if she can special order it for you.
Fran
Wednesday, July 9, 2014
Making Waves by Deanna M
Today I have a fun summer card for you! The image is an SVG file that I cut with my Silhouette. I cut him about 5" wide. My card base is white card stock folded to make a 5" X 6" card base. I added a black mat cut at 4 3/4" X 5 3/4". My patterned paper is from my stash. The blue is cut at 4 1/2" X 5 1/2". The reverse side of the blue wave paper is the brown patterned paper. I took a strip of the brown pattern paper and tore it and then cut it to 4 3/4". I then inked the paper with some Tea Dye Distress Ink.
For his glass, I added a coat of Glossy Accents to it. I then added some Stampendous Mica Pearlized fragments so his drink had some ice cubes in it. I also sprinkled some Distress Glitter in Rock Candy on the wet Glossy Accents. Once it dried I added a second coat to add some additional dimension to the glass. To add the look of sea spray I added some of the Stampendous Frantage Embossing Powder in Shabby Blue.
I stamped my sentiment in some Memento Tuxedo Black ink. To finish my card I added some rhinestones and a small shell from my stash.
To attach my surfer penguin I used an Action Wobble so he could "surf".
Thanks for visiting us today. I would love it if you could leave me a comment and let me know what you think.
Saturday, July 5, 2014
Thank you card by Michele
I hope you like this simple and clean card. Please stop by the store to find the products I used and what new items Kim has.
Saturday, June 28, 2014
Michele's 4th of July Project
Have a great 4th of July and I hope you liked my simple card. Thank you.
Thursday, June 26, 2014
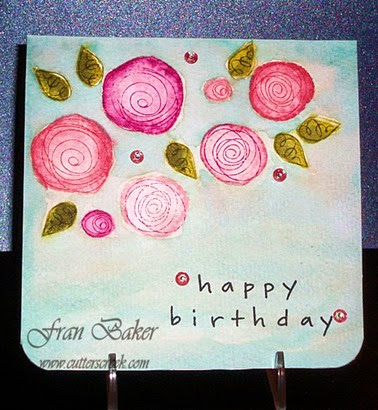
Happy Birthday by Fran
My new passion is water coloring. I was so surprised how easy it is to water color. And the best part it doesn’t have to be perfect! My card today is water coloring stamped images.
My card design was inspired by this You Tube Video.
DETAILS:
The card is 5-1/4” square. I used water color paper that is 140 lb. weight and cold pressed. Paint medium used is Distress Ink by Ranger. The stamp used is called Favorite Flowers. I placed tiny sequins and rhinestones on the front of the card for a little bling. And I used glossy accents to hold the sequins in place. What I love about water coloring is all the imperfections that happen once it dries and yet it has such a neat look. You should try water coloring you would love how easy it is. If you have Distressed Inks in your stash then all you need is some water, water color brush, and water color paper. Using Distress Inks makes water coloring FUN!
You can get the following items from Cutters Creek Online Store:
Thank you for stopping by and I hope that I inspired you to try the water coloring technique.
Fran
Sunday, June 22, 2014
A Little Bug 4 u
Please stop by the store for all your scrapbook supplies. If you do not see something please ask KIM and she will be happy to find that special item you are looking for.
Friday, June 20, 2014
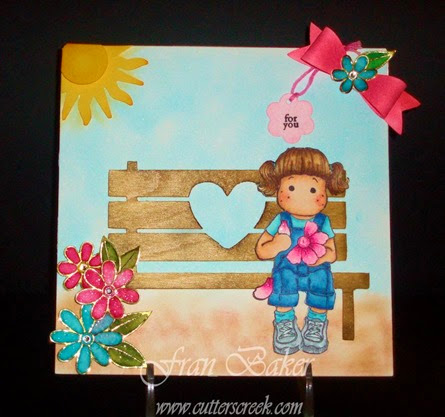
For You by Fran
DETAILS:
The card measures 5-1/2” square. Background done in Chalks by Pebbles, Inc. The bench was cut from real wood paper and then stained using Vintage Photo Distress Ink. The bow in the corner was cut using the Silhouette Portrait and colored with a Copic Marker. The flowers were created using a gold frame sticker and water color paper. Colored the flowers using water color paints. The Magnolia Image was colored using Copic markers. Rhinestones on the flower centers and small sentiment tag are from my stash. Used Pop-up Adhesive dots behind flowers, bench and Magnolia image. And Glossy Accents is holding the bow in place.
Items you can purchase from the Cutters Creek Online Store:
Highlighted items can be special ordered through Cutters Creek. Contact Kim here.
Thank you for stopping by and I hope I inspired you in some way today.
Fran
Tuesday, June 17, 2014
A June Hello
What makes this card special is the summer colors and the layering I did.
The paper used is from Echo Park's 6 x 6 paper pad: For the Record 2 by Lori Whitlock
The circle cut out in the top left corner and the fancy cut out in the lower left corner were made with Cuddlebug 5 x 7 Embossing Plus-Embossed Tags folder
Used for the touch of green on the yellow cut out was Tim Holz Ranger Distress Ink in peacock feathers.
Roses were spritzed with Perfect Pearls Mist in Sunflower Sparkle
Glue to hold it all together - Scotch Quick Dry Adhesive
Enjoy your June and I'll see you back here with some July fun for Cutters Creek On Line Store.
Thursday, June 12, 2014
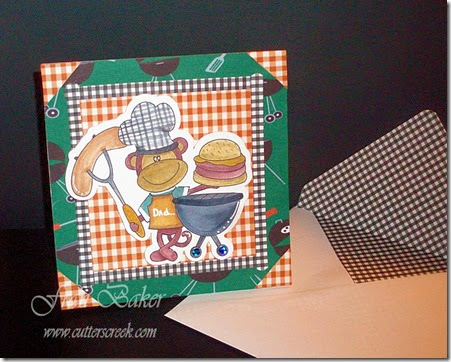
Happy Father’s Day by Fran
Details: The BBQ Monkey is a digital image by Digi Boutique. The image was colored using Inktense Pencils. Everything is held together using Scotch Quick-Dry Adhesive. Digital papers and black check printed paper are from my stash. The envelope was created using the We R Memory Keepers Envelope Punch Board. The card is 5-1/4” square. The envelope is 5-1/2” square. Other tools used were Paint Shop Pro and the Silhouette Portrait.
I made this card for my younger grandsons to give to their Dad. My son-in-law loves to cook especially on the grill. I think he will get a charge out of the card.
The items highlighted above are items that Kim of Cutters Creek Online Store can special order for you. You can contact Kim here. Take some time to visit the store to see all the neat crafting tools and accessories for scrapping and card making.
Thank you for stopping by and I hope in some way I have inspired you.
Fran
Tuesday, June 10, 2014
Best Dad Every Card
I had trouble getting the card to stand at first but I started folding and gluing and then added the car with glue dots so it stuck out further and this was the solution to my "make the card stand" problem.
Here is a list of products I used from Cutters Creek Store to help me build my project:
Scor Pal
Perfect Pearls on the television remote control, windshield, and red nob of bbq grill
Scotch Quick Dry Adhesive
Glue Dots to attache the car
Have a great week and a happy Father's Day to all those wonderful fathers out there.
Friday, June 6, 2014
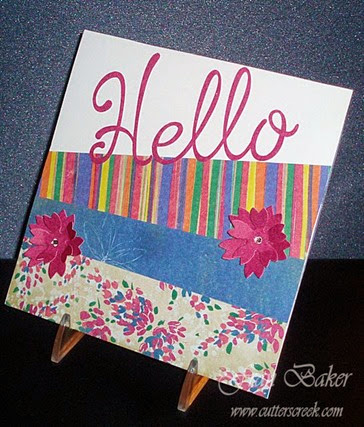
HELLO by Fran
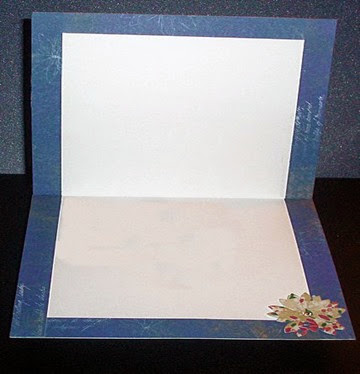
(Inside view)
I love cards that have many layers and lots of dimension but there are times you just don’t have the time to spend on elaborate cards. Do you ever feel that way? So I am working on making more simplistic cards that are appealing to the eyes. I was inspired by a card I saw on the Internet. Below are the details.
Details: The card measures 5-1/4” square. For the the odd size cards I use my Envelope Punch Board by We R Memory Keepers to make my envelopes. This was a special order through Kim.
The three strips on the card are not any particular size. You make them the size that appeals to you according to the size of your card base (make them a little wider than the card base). I used a 6x6” paper pack from my stash so that the strips blended with each other. I glued them on an angle and trimmed the edges to match the card base edge.
The Flowers were made using a die from Memory Box called Petal Party. I used the remnants from the strips of paper to make the flowers. Then added a rhinestone in the centers for some added bling. Love that bling!
The sentiment “Hello” was cut on my Silhouette Portrait that I ordered through Kim. Tip: When you have a delicate and very thin sentiment like the “hello” gluing it can be messy and frustrating. So I squeezed some glue on my craft mat and spread it out thinly with my finger. Then I placed the “Hello” on top of the glue using slight pressure. You get just the right amount of glue and there is no glue mess.
Inside I just added 1/2” strips using the same printed card stock that is on the front of the card. Added a flower using the same card stock I used on the front of the card too. This look brings the outside to the inside.
The best part of one layer cards is they are so easy to mail and the postage is so affordable.
If there are any products I used you can always contact Kim and ask if she could special order it for you. And remember Kim has a Lay Away Plan. And don’t forget to check out the Cutters Creek Online store for all your crafting needs.
I hope my card inspired you to pull out your scraps of paper or that paper pack you haven’t used yet. Thank you for stopping by the blog.
Fran
Tuesday, June 3, 2014
Dad Card by Deanna M
My card base is Kraft card stock cut and scored to give me a 4 1/4" X 5 1/2" card base. I added a white mat cut at 4" X 5 1/4" and the patterned paper mat cut at 3 3/4" X5". I inked the edges of the two mats and the ties with some Tim Holtz Tea Dye Distress Ink.
I cut my ties twice, Once out of white card stock with the letter. Then I cut the patterned paper tie. Both of these were cut at 1.15" X 3". I adhered the tie layers together than added the knot. I used a black gel pen to add some stitching to my ties. I then adhered them to my card with some foam squares. To finish the card I added some copper colored mosaic squares to each corner of the card.
Sunday, May 25, 2014
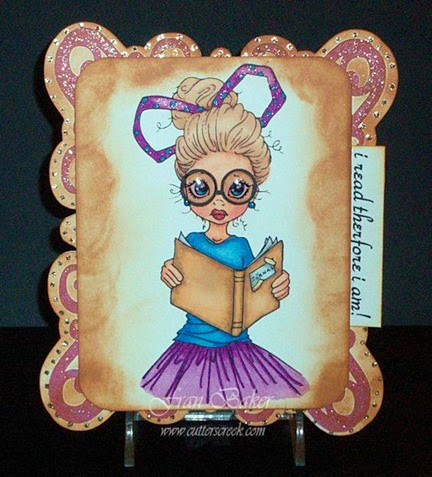
The Reader
(I went overboard with the edge coloring but it grew on me)
Details: The card measures approx. 5” by 6”. The shaped card is from the Silhouette Store. I used Neenah 80# Solar White card stock. The image is by Saturated Canary called “Reader”. I used Copic markers to color the skin. And Promarkers for the rest of the image. The shading was done using Tea Dye Distress Ink Pad. And the glitter dots were created using Stickles, Platinum. The sentiment is from the Internet and created using Paint Shop Pro. And I added Glossy Accents to the glasses for effect.
Stop by the Cutters Creek Online Store for some awesome crafting accessories. And if you have any questions about the products you can contact Kim Bush.
Thank you for stopping by, Fran
Friday, May 23, 2014
Masculine Card by Guest Designer Gloria
We all know how hard masculine cards are to make, well Gloria makes it look easy with this great masculine card, perfect for the upcoming Father's Day, or a man's birthday, or as Gloria has done, a thinking of you card.
Hello Everyone! I am to pleased to be a guest designer for Cutter’s Creek. I do believe this is my first time. Thanks so much for having me here today!
I want to share this gate fold card with you. It is not the traditional gate fold but one that I found on YouTube. I would call this an off center gate fold. Don’t you just love that YouTube? Papers for the card are all from my stash.
To make this card start with a card base cut at 5 1/2" X 8 1/2". Score the base at 2 1/2" and 6 3/4". Fold both scorelines toward the center of the card. Using a bone folder make sure you get a really good crease. This will give you a gate fold card with the left front panel being 2 1/2" wide and the right front panel being 1 3/4" which results in a slightly off center gate.
Next you can add your decorative panels to the card base. Your left panel is cut at 2 1/4" X 5 1/4" and the right panel is cut at 1 1/2" X 5 1/4". Mine are the brown card stock pieces.
The piece that goes on the front is cut at 3 X 4 3/4" for the base mat and 2 3/4" X 4 1/2" for the decorative mat. For my decorative mat, I stamped a piece of plain cardstock with a wood grain stamp and some Rich Cocoa memento ink. Adhere to the left panel of the card base by applying adhesive to the left side of the front mat only. Now it is time to embellish the card.
I cut my ship out of black card stock at 2" using the My World Cricut Cartridge. I cut the ship's helm using a die from My Favorite Things, (these are a Cutters Creek special order item, just ask). To finish off the card I added my sentiment.
Thanks you so much for letting me visit. If you would like to see more of my work, feel free to visit my blog. Enjoy and God Bless!

