Tuesday, April 29, 2014
Celebrate Spring
My card base is 4 1/4" X 5 1/2". I added a black mat cut at 4 1/8" X 5 3/8". The pink patterned paper is cut at 4" X 5 1/4". I then cut another black mat at 3 1/2" X 4 3/4". The smaller patterned paper piece is cut at 3 1/4" X 4 1/2". Both patterned papers come from the Olive Collection which is a Anna Griffin 6" X 6" Paper Pad that I got through Cutters Creek.
I after adhere the larger mats together and the smaller mats together, I adhered the first two mats to my card base using my ATG gun. I then used some foam squares to pop up the smaller mats.
I pulled out an old Cricut cartridge and cut my poppy from the Storybook Cartridge. I added some pearls to the middle of the flower and adhered it to my card front also with some foam squares.
My sentiment is stamped with Memento Tuxedo Black ink. To finish the card I added 3 more pearls to the lower left hand corner and some white doodle dots to the flower that I added with my white gel pen.
Monday, April 28, 2014
Michele's-Crown princess card
 Crown: Y13, Y17, Y19, Hair: E17, E15, Skin; EOO, E11, Dress:
V15, V09, Shoes: E49, Stockings: V12, Cake; RV04. RV09, Candles: R27, B14. Then
I added some diamond Stickles to the candle flames, crown and the lapel of her
dress. I used the TomBow adhesive to adhere everything down and the paper I
used was Authentique Collection: Remembrance. I used Memento Tuxedo Black to
stamp my image.
Crown: Y13, Y17, Y19, Hair: E17, E15, Skin; EOO, E11, Dress:
V15, V09, Shoes: E49, Stockings: V12, Cake; RV04. RV09, Candles: R27, B14. Then
I added some diamond Stickles to the candle flames, crown and the lapel of her
dress. I used the TomBow adhesive to adhere everything down and the paper I
used was Authentique Collection: Remembrance. I used Memento Tuxedo Black to
stamp my image.Sunday, April 27, 2014
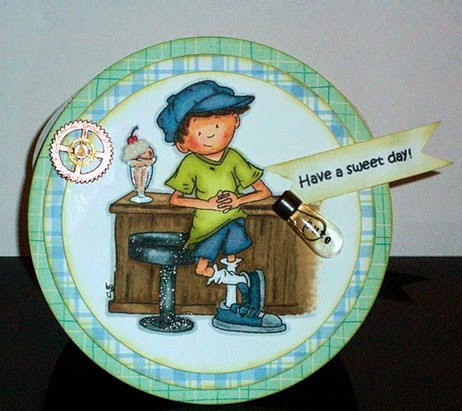
Have A Sweet Day by Fran
The image is by Sassy Cheryl and I remember going to a drug store as they were called back when I was young. I would love to sit at the counter and order a Root Beer Float. One time I bought a banana split and two of my friends and I shared it. Oh it was so good! And my favorite Sundae was a Chocolate Nut Sundae with a cherry on top. Did I stir up any memories for any one?
(the little white dots on the stool are glitter)
I love round shaped cards. It was so much fun coloring this image. I used both Copic markers and Promarkers. My card measures 5-1/2”. The card base, printed papers, elements (gears and light bulb) are from my stash. The sentiment was created in Paint Shop Pro. I used Glossy Accents to hold things together. And Shabby Shutters Distress Ink was used to color the edges of the all layers on the card. I used a mini ink blending tool to apply the shabby shutters.
Items that can be purchased from the online store:
Distress ink pad (Shabby Shutters)
You can purchase these items from the Cutters Creek Online Store and other neat things too. And don’t forget to stop by the CC DT Blog to view many projects from the Design Team. I would love if you left a comment to let me know what you thought of my card. I love reading them. You could even ask a question and I will get you an answer about any of the products used on my card. And if you have any questions about the online store you can contact Kim here.
Have a Sweet Day! Fran
Thursday, April 17, 2014
Birthday Girl with Mindy
Monday, April 14, 2014
It's an Easter egg thing by Jearise
This is my last hanging egg for this year and I got a little bumpy with it but I like the way it turned out.
There are only three steps to making this egg:
1. Use Adirondack dabber to dab on the paint color of your choice. I used wild plum from Cutters Creek.
2. Spray with gloss acrylic spray to give a shine and seal the egg.
3. Add half pearls in various colors and sizes. I used purple ones but you can use pretty much any color you would like. Cutters Creek has some great self adhesive steal blue ones that would look pretty on most any colored egg.
Leave the ribbon on or hot glue ribbon on for looks or hanging and you're done!
Hope you enjoyed this quick step by step tutorial and I look forward to showing you more of my creations in the future.
Sunday, April 13, 2014
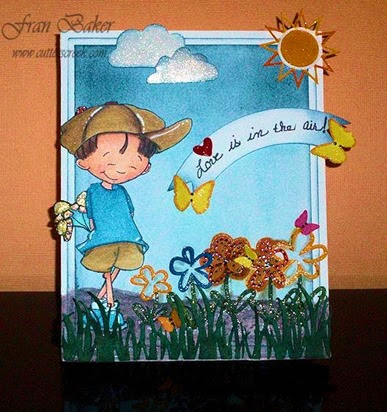
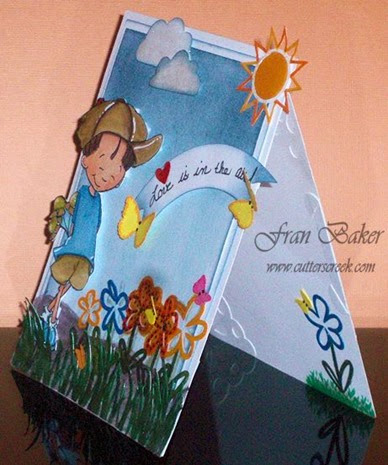
Love Is In The Air! By Fran
The digital stamp is called First Love by Sassy Cheryl. And so I took it one step further and made it mine with Love Is In The Air! I was going for whimsy but maybe I over did it. But any who I still like how it turned out.
My Recipe: My card is 4-3/4” by 6”. All elements were cut on my Silhouette machine except for the butterflies (MS Punch).
The background paper is watercolor paper. I used the new Tim Holtz Spritzer (my new favorite item) and Distress markers in two colors and spritz the paper. Then I used a paintbrush to water color in the sky. If you haven’t bought yourself one of those spritzers you are missing out on a awesome tool. It is not hard to use once you find your rhythm. I used the new smaller blending tool to enhance the edges. And Glossy Accents which is my most favorite medium.
All the coloring was done with several different mediums: Copic Markers, Prisma Colored Pencils, Inktense Pencil, Distress Ink Pads and Markers, and Wink of Stella Glitter brushes
Copic Markers: Olive, Apricot, Golden Yellow, Baby Blue, Veronese Green, Frost Blue, Light Grayish Cobalt, Pink Flamingo, Egg Shell, Brick Beige, Warm Gray #3, and Blush.
Prisma Colored Pencils: Chocolate, Ginger Root, and Denim Blue.
Inktense Pencil:: Dark Chocolate
Distress Ink Pad: Stormy Sky
Distress Markers: Stormy Sky and Tumbled Glass
Stop over the Cutters Creek Store and check out the new items and the all time favorite items. And if you have any questions you can contact Kim.
Friday, April 11, 2014
Michele's Birthday Card
 The yellow strip of paper is the same as the blue, the size is 5.5 x 1.25. Then I used a piece of white card stock, 4.5 x 3 and used some stamps I had to stamp the present and butterflies. I used my copic markers to color in the present( bowB18, lid B12, box B04) and butterflies(Y13, Y19, B18,Y17 for the dots). Then I added diamond stickles to the butterflies and the present so it would sparkle. I used Tom Bow adhesive to adhere the paper down. I used a stamp I had to stamp happy birthday on white card stock 1x3. At the ends of happy birthday I used some flower bling. I used some glue dots on the flowers and 3-d pop up dots for the saying.
Hope this card inspires you to go through your stash and see what you can make with all your scraps. If you would like any of the products I used to make this card please stop the store and if you need something special please ask Kim and she will help you get what you need.
Thursday, April 10, 2014
Hanging Easter Eggs Design 2 by Jearise
These were so simple to make and they turned out awesome. I used two colors of Adirondack Acrylic Paint Dabbers. For the top egg, I first dabbed on espresso to cover the whole egg and then when that was dry, I dabbed on gold. For the bottom egg, I first completely covered the egg in pool color and then dabbed on copper.
Thanks for stopping by again today.
Jearise
Wednesday, April 9, 2014
Hanging Easter Eggs with Jearise
Monday, April 7, 2014
Girls Just Want to Have Fun by Deanna M
Got to love my eBosser. I love not cranking and it just flows through smoothly.
I then used a new die I also go as part of my package with the Anna Griffin embossing folders. It was cut out of a dark turquoise card stock from my stash. I adhered my mats together with some Scotch Adhesive Dot Roller Adhesive. Kim doesn't stock them in the store (hint, hint) but she can order them and the refills for you.
Okay, so call me crazy, but I really wanted that die cut image popped up! So Kool Tak 3D Clear Foam on a Roll to the rescue! I love this product and it is one of my favorite products I have bought from Cutters Creek!!
The advantage to using the Kool Tak Clear Foam is that it is clear. I also love the one on the roll so I can cut any size I need. It worked perfect to pop up my die cut.
Finally, I cut a small square piece of what card stock and used a border punch on it. Then cut a lavender piece of card stock that embossed my sentiment with Wow! embossing powder. I used Port and Brandy from a limited edition set called Girls Nigh Out! Love this embossing powder.
Want me to let you in on a little secret. I could not emboss with embossing powder if my life depended on it!! UNTIL I found the Wow! embossing powder.. So this too, is one of my favorite products I have ever purchased from Cutters Creek. If you haven't tried you, you should order a few colors and give it a try. You won't regret it!
So pop on over to Cutters Creek and get your supplies ordered and start crafting!!
Tuesday, April 1, 2014
Perfect Layers Mini with Kim B


