Showing posts with label The Greeting Farm. Show all posts

Tuesday, July 5, 2011

Fun in the Sun Tutorial Tuesday by Mandie

Glad you could drop by for another edition of Tutorial Tuesday here on the Cutters Creek Design Team Blog! Before I get started I just want to remind you that you can sign up to subscribe to our blog posts and also subscribe to the store newsletter in the side bar!

July is going to be an exciting month for us here on the blog because we have Summer CHA coming up and that means Kim is going to be adding some great new products to the store again... This month we are going to be focusing on the i-rock gems on Tutorial Tuesday and here's the card I made:


First I stamped out the image from The Greeting Farm, Cheeky Beach, and colored her in my my Copics. I've been very slowing expanding my collection so I actually have a couple colors besides the skin tones now! I'm still learning about my Copics too... like use GOOD paper, this one got a bit runny. My coloring wasn't awful but the colors traveled in this paper. But I still thought she was cute enough to use! If you click the close up picture you can see how I added a bit of sparkle with my Stardust Gelly Roll Pen.


Next I made the sandy layer. I started with a tan cardstock for my base then used Yellow Daisy, Walnut Gold and Coffee Shop Glimmer Mist to create the sandy look. Then I grabbed my Echo Park Summer Days 6 x 6 Paper Pad and grabbed the blues for the sea and sky. I tore the paper by hand for the "waves" and I really like how they came out. Once the sea, sand and sky were in place I decided that I needed a big blingy sun! So I cut a 5/8" circle from white cardstock and used the Yellow Daisy Glimmer Mist to color it. Then I grabbed my i-rock and the Hot Rocks Compact and added the yellow rhinestones to my sun.


Finally I stamped "Fun" and "Sun" with some alphas from my stash and wrote "in the" in between for my sentiment. What a fun summery greeting to send! Thanks so much for joining us for another Tuesday! Make sure you check back often, we have a surprise filled month!

Monday, June 27, 2011

A Few of Mandie's Favorite Things!

Hey everyone! Hope you've enjoyed learning a bit about all of the Design Team members this month and hearing about some of our favorite products! Before I talk about MY favorite things I'd like to point out TWO new features on our side bar... you can now subscribe to the blog and have posts sent directly to your inbox. Make sure you sign up so you don't miss a thing... I know with CHA on the horizon we *may* have some goodies for our readers, and you don't want to miss it! Also, you will notice that you can sign up for the brand new Cutters Creek Newsletter! If you sign up for it you will receive updates about new products and COUPONS for shopping in the Cutters Creek Store.

Now on to my Favorite things.... I decided to use American Crafts Glitter Cardstock, Stickles, Glimmer Mist, The Greeting Farm Stamps and my Cricut to create this card.


It is a bit hard to capture all of the Bling Factor in this card in a photo but it really sparkles! I started with a piece of black cardstock. I guess-timated where to cut the star on a larger piece so I could cut it down exactly. I used my Cricut and the Plantin SchoolBook Cartridge to cut the star out at 3 1/2". Then I cut it to fit the 5 x 6 1/2" card base that I had.


Next, I spot spritzed with my Gold Glimmer Mist. I wanted a kind of blobby look so I depressed the sprayer slowly and only about 1/2 way with each spray. The gold on the black really pops! The picture above has my plain black paper and the spritzed one for comparison.


Before I put away my Glimmer Mist I stamped the phrase "you Twinkle more than stars" from The Greeting Farm Because of You Stamp Set on a scrap piece of white cardstock with my Staz-On Black Ink and spritzed that with some Glimmer Mist too. I matted it on a piece of the spritzed black before I added it to my card.


Next I grabbed my bottle of Golden Rod Stickles. This one seems to match the Glitter Paper perfectly. I added a few stars and a few little dots here and there for even more dimension. I also decided to cut a few tiny stars out of the Glitter Paper as well. Then I used a scrap of the American Crafts Gold Glitter Cardstock along the bottom to put under my sentiment.


Finally, I adhered my 4 x 4" square of American Crafts Gold Glitter Cardstock to the base of my card, under where my cut out is. Then I used some Pop Up Dots to attach the front of my card. I love the look of this card and I can't wait to use it!

Monday, May 30, 2011

Melissa's Miss Anya

So, I decided to try again with a purple colored card.  I think this one went a little smoother :o)  I started with one of the images from the Miss Anya Dressy Collection - -I love these images by The Greeting Farm!  I also stamped it on a post it so I could stamp the leaves and flowers without worrying about my image being ruined. 

I colored my image with my copics and used B000 and G0000 to blend in the background as sky and grass - - just very light colors, but enough to show the white edges on the Curved Rectangle where is was embossed.  The background paper is from Prima Reflections and I used different papers in the collection for the butterflies as well.

Hope you like it!!


Paper: Bazzill Simply SmoothPrima Reflections,
Ink: Memento Tuxedo Black, Copics,
Embellishments: Martha Stewart Punch (Stash)
Other: ATG, 1/4" Scor-Tape, Glue Pen, Curved Rectangles, Big Shot
Stash: Purple Cardstock, Post-it Notes

Hair: E11, E97, E99, E19
Skin: E50, E00, E21, E11
Dress: BV0000, V93, V95, V99
Flowers: Y000, Y11, Y15
Leaves: YG13, YG17, YG23
Background: G0000, B000
Shadows: N0, N1, N3

Photobucket

Monday, May 16, 2011

Howdy Card by Mandie

Howdy, ya'll! Thanks for dropping by the blog today! Since my card has a sort of Western theme I thought I'd get in the spirit of things! LOL! I'd like to share this fun card that I made.


I had so much fun creating this one! I started with a 5x6.5" card blank. I cut a sheet of black card stock to 5"x6.5" to cover the front. Then I used the Echo Park's For the Record 6x6 paper pad and cut my papers down. The floral is 4.75 x 2.5" and the newsprint is 4.75 x 3.75". I stamped out the Cheeky Shooter image using my Memento Tuxedo Black Ink. I didn't have a red marker that matched my papers so I decided to stamp my image on a piece of red and white polka dot paper from the paper pad and cut out the elements that I wanted red (hat, scarf and skirt). Before I glued them down I colored the rest of my image. For the skin tones I used Copics E000, E00 and E11 and the cheeks are R20. I used Bic Mark-It's to color the rest because I'm still trying to build my Copic collection. I used my Quickie Glue Roller Pen to adhere the red paper to my image. Then I trimmed my white sheet to about 3x3.25" and inked the edges with Tim Holtz Walnut Stain Distress Ink. Then I added the black mat to make it pop even more. I also inked all of my papers before adhering them. I decided that I wanted to add a bit more texture to my card and normally I'd grab some ribbon. Since we are talking about Cuttlebug techniques this month I decided to pull out my machine! I used the Gridlock Texture Fades embossing folder and embossed my strip of gold cardstock (I think it's 2" wide). Then I inked up a sponge dauber with more Distress Ink and swirled it over the pattern and the edges. Then I used the alphas from the For the Record Collection (not currently in the store, but I bet if you asked real nice Kim could get it) to spell out "Howdy". I still wanted just a little more... something, so I decided to add some Bling! I pulled out my i-rock and added some black gems under the letters. I am thrilled with how this card turned out!!!

Cutters Creek Shopping List:
Echo Park's For the Record 6x6 paper pad
Cheeky Shooter
Memento Tuxedo Black Ink
Copic Markers: E000, E00,E11 and R20
Quickie Glue Roller Pen
Tim Holtz Walnut Stain Distress Ink
Gridlock Texture Fades
sponge dauber
i-rock Gems

Wednesday, May 11, 2011

Time To Celebrate with Mindy

It's always great to have some extra birthday cards on hand for when you need them. I try to make at least 1 out of every 4 cards I make a birthday card. I love this Birthday Anya image from The Greeting Farm.


The little cake on her head reminds me of Alice in Wonderland. I colored Anya with my Copic markers. The price on copics will be going up soon , so grab them now while they're still cheap at Cutters Creek. I matted Anya onto to a labels fifteen nestabilitity and then matted it again with a larger size label 15 nestie in a nice dark brown shade. I took two patterns of paper and sewed them onto a dark brown square to serve as the base for the image. I also used one of the patterns for Anya's skirt.

I wanted to keep this card simple and not get too fussy with it. There are levels of birthday cards. The highest level cards (level 4) are the ones that are so fantastic and you spent so much time and money making them that you don't actually want to give them to just anybody. If your neighbor's birthday was the next day, you know you're not giving her that card. This is why when I make birthday cards, I try to make them level 2- cute, but relatively simple. That way I can give it away and not feel like my heart is being ripped out of my chest. When you find out your BFF's birthday is coming up, you don't want to give her a plain card, but since there is so much unembellished space left on the level 2 card, you can add some flowers and bling and take it from drab to fab (otherwise known as level 3).

Cutters Creek Shopping List:

Copic Markers
BG15, BG13, BG11, Y02, Y11, R35, R32 E02, E00, E000, E0000R20,
E35, E33, YR23, YR21, Y11, Y000
Birthday Anya stamp from the Greeting Farm
Spellinbinders labels 15 nestability
Bazzill cardstock


Wednesday, April 20, 2011

Melissa's Easter Card

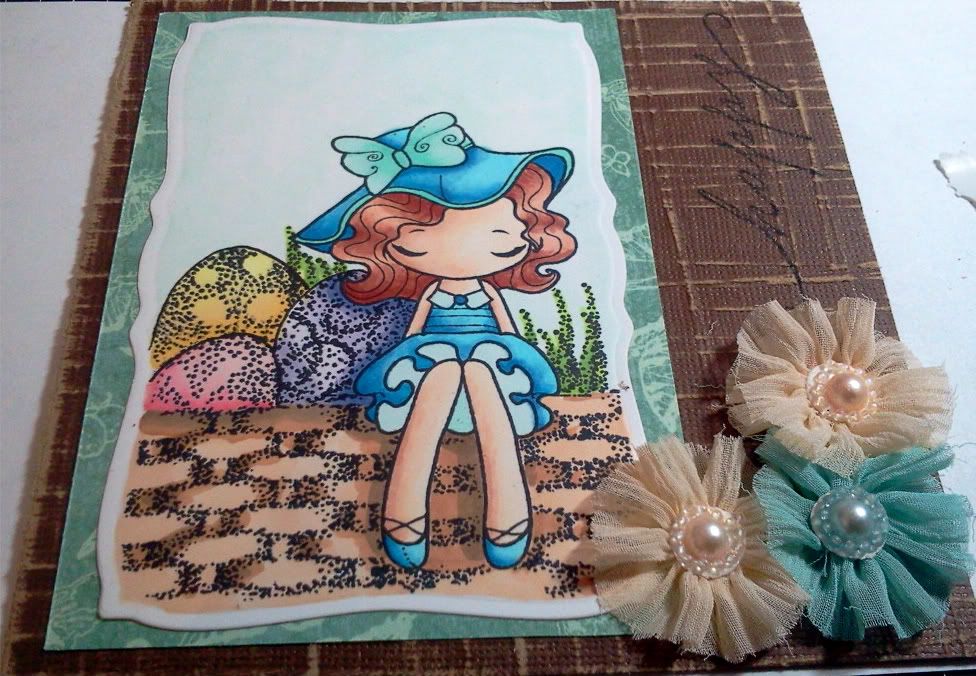
So I am trying so new techniques I learned at the Copic Intermediate Certification and decided to use the Miss Anya Dressy Collection as the stamps leave so much open for interpretation as far as shading and placement.  Making an Easter card I decided she should be sitting on the edge of a basket.  There was a lot of stamping and post-it notes involved; just as a reminder or hint, make sure you wash your hands between cutting the image on the post- it note and  placing it on your stamped image.  Ink spreads in case you didn't know :o)

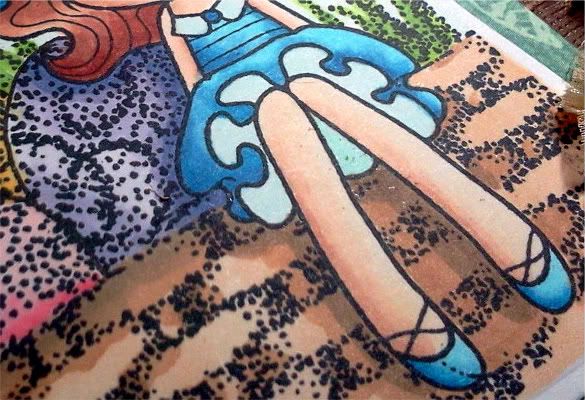
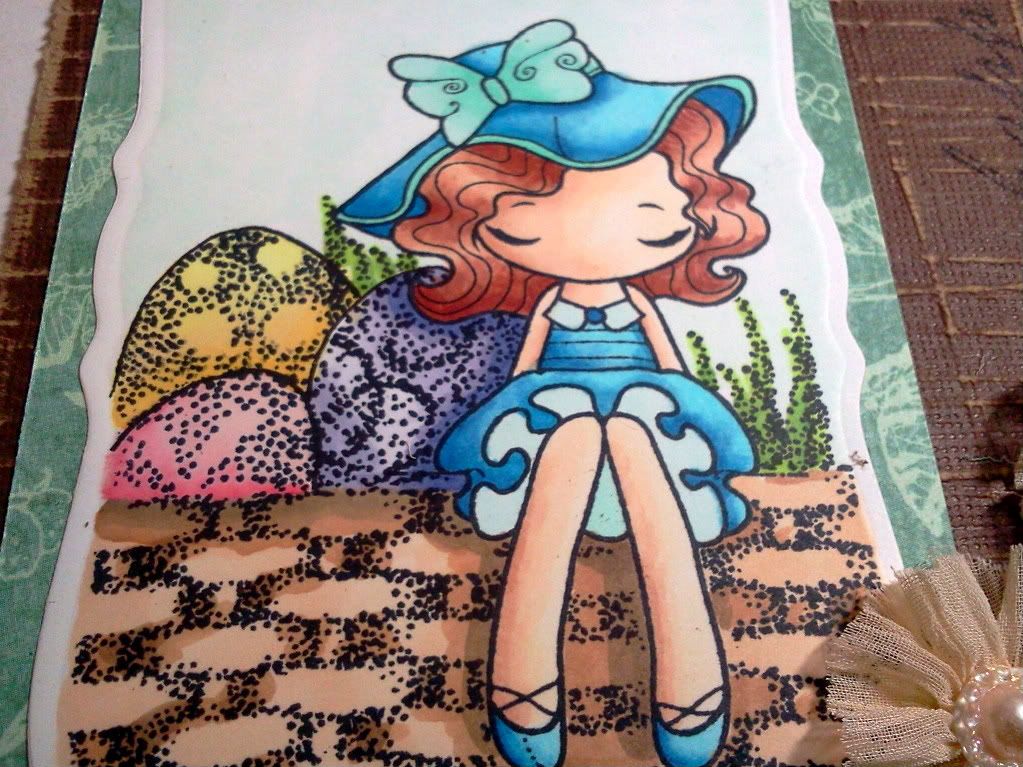
I used the Linear Light template from Marianne Walker's Shadows and Shading Book to determine my light source to create a  more realistic picture; the upper right side.  Now, I colored my images paying attention to shadows and cast shadows in particular.  Cast shadows are shadows created by an object being reflected on another surface.  Does it look like shadows of her legs on the basket and her hair and side on the eggs?


I cut out the stamp using Curved Rectangles, embossed the edges and placed this over some Graphic 45 paper to make it pop!  I than took some Core'dinations paper and sanded it to use as my card base.  I stamped 'happy' on the top right, 'Easter' is on the inside, and used the new Prima Flowers as a corner accent.  What do you think overall? 


Photobucket

Stamps: TGF- Miss Anya Dressy, CTMH Eastertime (Stash)
Paper: Bazzill Simply Smooth, Graphic 45, Cosmo Cricket
Ink: Memento Tuxedo Black, Copics
Embellishments: Prima Flowers: Aurora. Splash
Other: ATG, Curved Rectangles, Embossing Mat, Scor-Pal

Stash: Post-It Notes, Shadows and Shading Book by Marianne Walker

Basket:  E21, E34, E44
Sky:      G0000
Eggs:     BV0000, BV00, BV11, BV04
             R30, R32, R35
             Y11, Y32, Y35
Grass:   YG23, YG03, YG17
Skin:     E50, E00, E11, E13
Hair:     E11, E13, E17, E19
Dress:   B00, B14, B16, B26
Trim:    BG10, GB11, GB23 

Tuesday, April 19, 2011

Tutorial Tuesday: Custom Stamped Embellishments wihth Lori

Welcome to another installment of Tutorial Tuesday!  This month features stamping, and I thought that this week I would share an unexpected combination of products used to make some cute custom dimensional embellishments.  So, we'll be using stamps (of course) and the new to Cutters Creek iBond cordless glue gun with colored glue sticks!

Have you ever looked at colored glue sticks for glue guns and wondered what on earth you would want to use colored glue for?  Today I have just one splendid little answer for you.  Let's make dimensional embellishments!  But first, I have to say that I LOVE the iBond glue gun - the cordless feature makes it so easy to get things done without wondering how the heck to get that cord out of the way.  In fact, I have several other projects I can already think of that I''ll be using this for this year.

Now, rather than ruin the surprise, I'm going to make you wait until after the tutorial steps to see what I've made.  Just check out these steps:

First, you will need a non-stick surface (the Bazzil splat mat is a good choice) and your iBond loaded with the glue sticks of your choice.  Turn on your iBond and let it rest on the mat.  (Another great feature of the iBond - there's a light at the tip so you ALWAYS know when it's turned on!)

While that's warming up, you will want a few additional items.  Choose a small stamp image, stamping block if acrylic, and ink for your stamp.  You need to ink up your stamp for this process, but most ink will not stay on our stamping surface.  You can just use a clear ink for no color, or Staz On if you want your image colored.  I chose to use a red Staz On for my image, just so it would show up better in the photos.

First step: coil a circle of hot glue slightly larger than your stamp image, making sure your coiled glue lines are touching.  You may want to experiment with the thickness for some different effects.  (I apologize for the odd picture here - it's hard to glue left-handed and take a picture right-handed!)  I tried to keep mine about the thickness of the stream that comes out of the tip.  Colored glue tends to be stiffer than clear, but you should still have plenty of time before it hardens up.

Once your circle is made, quickly ink up your stamp and press it into the hot glue.  Leave the stamp in place for a minute while the glue cools, then you can pull the stamp out of the glue and peel the glue off of the non-stick surface.

You now have two options with your stamped piece: leave it in a circle, as I chose for my card, or trim it down around the image.  A nice thing about using glue is that it trims super easily with a pair of fine-tip scissors.  At left is an example of a trimmed image.  This would look cute at the center of a ribbon bow, or perhaps three in a row on a card front, mounted on circles or squares.  When left whole, these embellishments give the appearance of wax seals, with a lot less fuss.

Now, on to my end product!  I created a card and used my embellishment as an accent piece in my design.


Using a card sketch and some papers from my stash, I got to work!  The cute girl stamp image is Cheeky Howdy from The Greeting Farm and the cherries stamp image is from the Kitchen Classic stamp set from Crafty Secrets.  Cheeky Howdy's outfit is paper pieced (see last week's Tutorial Tuesday!), and the scalloped mat/frame is from the Elegant Edges Cricut cartridge.  I adhered the stamped glue embellishment to my rosette using Glossy Accents to ensure it stays put.  As a finishing touch, I added stickles to the cherries in my girl's hair and the circle cut-outs in the frame.

Items available at Cutters Creek:

Monday, February 28, 2011

Copic Tutorial With Melissa

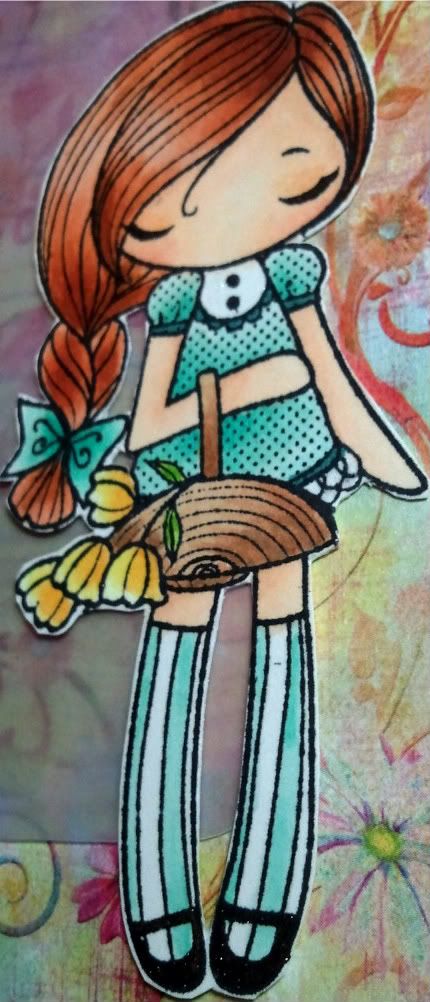
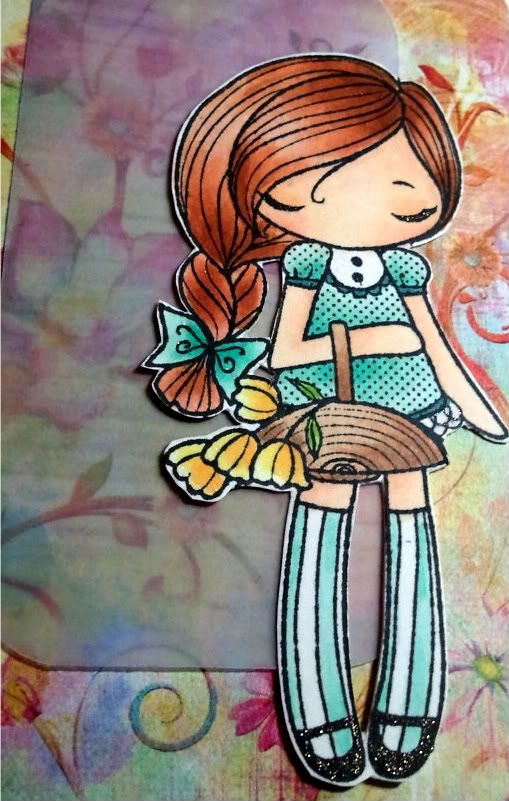
So I wanted to share with you how I color my images.  I am using an image from The Greeting Farm, Miss Anya Collection.  I LOVE these images.  They are so versatile and adorable! Usually I use the feathering technique when I color hair, but because the image is so detailed I will just blend the colors today.  I am also using my favorite color combinations today so you may see them a lot on my projects. 

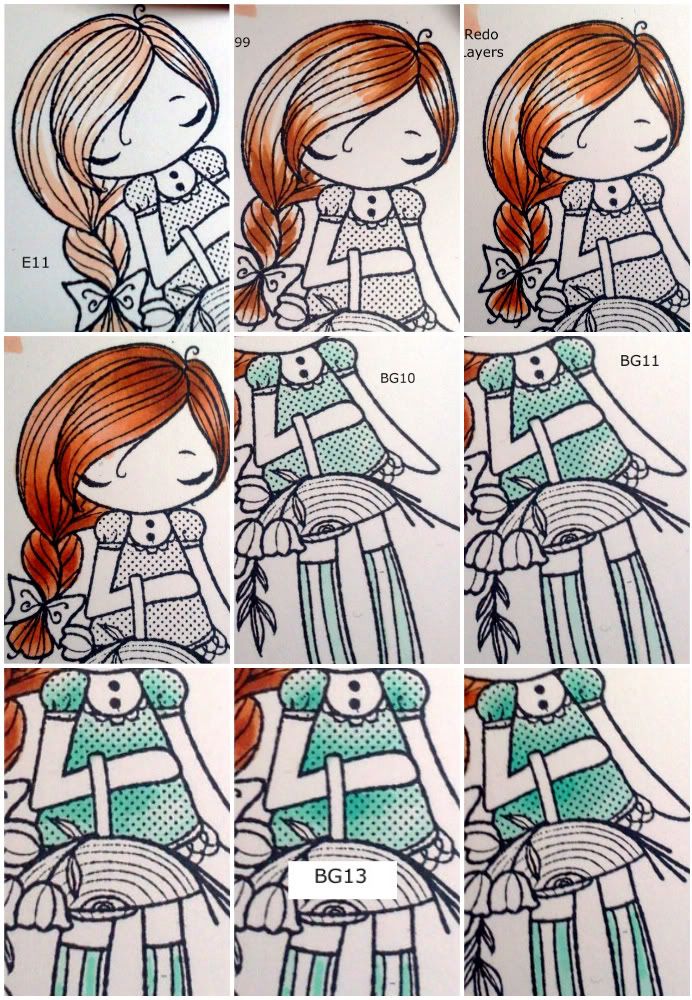
Just click on the pictures for a larger view.  I started with E11 on her hair, deciding the sun is coming from the upper left of the picture.  I than added E97 and E99.  Then I went and added additional layers until I received the blending I was looking for.  If you have any questions on this process let me know and I will put a video together.   
For her dress,  I started with BG10.  I want her dress to look like a satin texture; extremely light colored but dark where there are shadows or creases in the fabric so I colored with deliberate white areas showing.  BG11 was next, with BG23 following.  BG13 was last as it is the darkest of the four colors and was only added close to the skin and basket.  I went over with BG11 to blend in the darker colors.  For her socks, I used BG11 and BG23 and blended with BG10 to give it the same satin feel.  BG18 was added on the ribbon for the dress.

The flowers were very simple. I started with Y000, added Y11 and lastly YR21 and Y35 to the very bottom of the flowers.  I used the clear spica on the very tops of the flowers to add a little shimmer. Next the leaves, YG11, YG13 and a little amount of YG17.
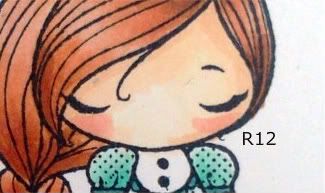
Last was the skin.  The pics are a little out of sequence and I apologize for that.  I started with E50 around the edges of the face, arms and legs.  I than added E00 under the bang and forhead, inner arms and legs under the basket.  E21 added in the same areas as E00 but in a less amount.  I than used R12 (separate picture) to add color for her cheeks; I want to make her look sunkissed.  Lastly, I went back to E50 and blend, blend, blend. 
Here is the card finished.  Very simple, but I like it :o)  I used vellum for the paper behind her that was colored with BV02 to make the image pop a little more. 


And here is the image completed.  You'll notice the colors are a little more bold as the ink has settled and dried at this point.  I went over the image with my spicas (LOVE these!) and added pitch black to her shoes and eye lashes, and peach above her eyes as an eye shadow and clear on her hair dress and flowers.

thanks for looking!!!


Stamps: TGF Miss Anya Collection, SU! Well Scripted (No longer available)
Paper:   Bazzill Simply Smooth, Prima Paper
Ink:       Memento Tuxedo Black, Copics, Atyou Spicas
Stash:    corner rounder, vellum   
Skin: E50, E00, E21, R12, Peach, Pitch Black Spica
Dress/Socks: BG10, BG11, BG23, BG13, BG18, Clear Spica
Hair: E11, E97, E99, Clear Spica
Basket: E31, E33, E44
Leaves: YG11, YG13, YG17
Flowers: Y000, Y11, YR21, Y35, Clear Spica
Vellum: BV02

Tuesday, February 15, 2011

The Greeting Farm Stamps with Mandie

So Kim and I are back from CHA and sort of back to normal now... it's hard to believe how being gone for a week can throw you off so much! (See my note at the end of the post regarding Tutorial Tuesday.) It was so amazing to see all of the new products! I'm so happy that Kim decided to add The Greeting Farm stamps to the Cutters Creek store. They are made from high quality, deep-etched, red rubber for wonderful impression every time! They are also mounted on gray cling cushion. All you have to do is trim and use with acrylic blocks. I have two cards that I created with these images. I used some of my favorite Echo Park Paper scraps (and one piece of patterned cardstock from my stash) on both of these cards.


The first card I used the Cheeky Shooter stamp from The Greeting Farm! When we saw the Cheeky Cherry Collection we were both super excited! These stamps are great to color and they stamp beautifully! I hope you guys love these images as much as I do! I used my Flesh Toned (E000, E00, E11 and R20) Copics for her skin and my Bic Mark-It's and Tombow Markers for the rest.


Then I accented the gun, star on the boots, studs on the belt and her eyelids with my Sakura Gelly Roll Stardust Pure Glitter Pen. After she was all beautifully colored just the way I wanted I grabbed my oval cutter... and realized that I need to get a set of the Spellbinder Ovals, LOL! So I inked up the edges of my oval with a little Tim Holtz Distress Ink in Walnut Stain to disguise the imperfections... The outer oval I actually just colored with the same marker I used on the cowgirl hat.


Then I used some Pop Up Glue Dots to lift my ovals off the card. The only other addition I made was a piece of brown felt ric rac adhered with some Scor Tape. Oh, and I should mention I used my Pink ATG to adhere everything else on both of my cards! I am sooooo happy that I broke down and bought one. I have loved using it!

The second card uses the Because Of You sentiment set from The Greeting Farm. When I saw the "I like you more than puppies" phrase on there I BEGGED Kim to add this set to the store! The other phrases on this set are: Today is Brighter because of You, It Doesn't Get Much Better than This, Everyone Needs a Friend Like You, You're the Rainbow After the Storm, Life Would be Boring without You, and You Twinkle More than Stars. What a great multi-purpose set!

And at only $14.99 - what a STEAL! I'm sounding like a serious commercial right now, LOL! But I'm super excited about this set. The little girl I used is from the "Roll Call" set which isn't currently in the store BUT I'm sure if you ask nice, Kim could look into getting it. The set comes with 8 of the characters plus a set of phrases and retails for $48.00. I used my Flesh Toned (E00, E11 and R20) Copics for her skin and my Bic Mark-It's for the rest.


I added the Sakura Gelly Roll Stardust Pure Glitter Pen to her shoes, shirt and bows and a little for eyeshadow. Then I added one of the Color Me Crazy flowers with a corduroy yellow brad for the center.

I hope you enjoyed both cards I have to share today. I will be doing the Tutorial Tuesday post on THURSDAY this week due to the mouse that is trying to share my scrapbook desk. Make sure you check out my post because there will be some BLOG CANDY posted too..... Oh, and I will have the announcement of our Glimmer Mist Challenge Winner too!!!

Cutters Creek Shopping List
Cheeky Shooter stamp from The Greeting Farm
Because Of You sentiment set from The Greeting Farm
Echo Park Paper
Copic Markers: E000, E00, E11 and R20
Sakura Gelly Roll Stardust Pure Glitter Pen
Spellbinder Ovals
Tim Holtz Distress Ink in Walnut Stain
Scor Tape
Pink ATG
Color Me Crazy
Related Posts with Thumbnails