Friday, April 29, 2011

Mini Tilda Create Card by Chris

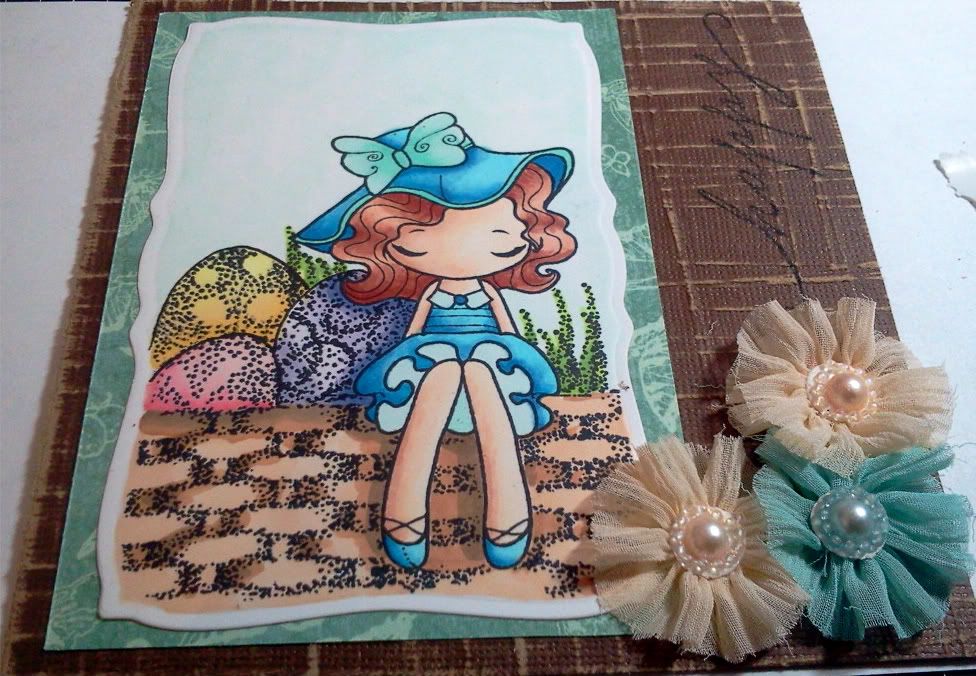
I started with an A2 size card base of cream cardstock, scored and folded at 4.25 inches and then, used Fiskar decorative edge scissors to trim the edges. Using Distress Ink Pad Dusty Concord and my Tim Holtz Adirondack Alcohol Ink Applicator and Inksenntials foam pads, I colored the edges. The ink was a bit darker than I wanted so I spritzed some water into the air and wafted the card through the mist. Immediately the ink softened and blended just the right amount—amazing Tim products and techniques. The card was now a bit smaller than an A2 size so I cut another 4.25x5.5 piece from purple cardstock to back it. It looked too plain and needed a little bit of lovin’, so I grabbed the Flower Soft Silver Peel Off Stickers to trim the edges. I also knew that this silver would echo the main accent of the card, but I was really pleased with how easy these are to use. I just pulled up a strip and laid it along the edge, trimmed the overlap and worked my way around the rectangle. EASY PEASY! (Thanks Kim for showing us how to use these!) Used my ATG to glue down the cream card onto the purple base.


Another strip of purple was edged with a MS deep edger (finished size 3 inches by 5.25). I created an original ribbon by using chalk white seam binding, some silver pigment ink, and a “create” stamp. Just stamp the design along the fabric and let dry. (I wish the binding had been a wider piece because I was hoping to use it vertically with a series of Tilda’s on it—oh, well; if you try this, please share. I’d love to see how it comes out for you.) Scor Tape helped adhere the ribbon across the middle and was tied in a knot on the side.

American Craft Silver Glitter Paper was used with my new Spellbinders Shapeabilities Parisian Accents. I also cut a 1.5 inch circle from the cardstock and some fun foam. I ran both circles through my Xyron and mounted the cardstock on the foam and the foam on the center of the Shapeabilities. I also inked the edge of the circle with Dusty Concord. (Be sure to rub off the excess glue around your circle. I run an old crochet hook around my images before lifting them off the Xyron glue paper.) I glued the Accent down with a zig pen and went to work on Tilda.

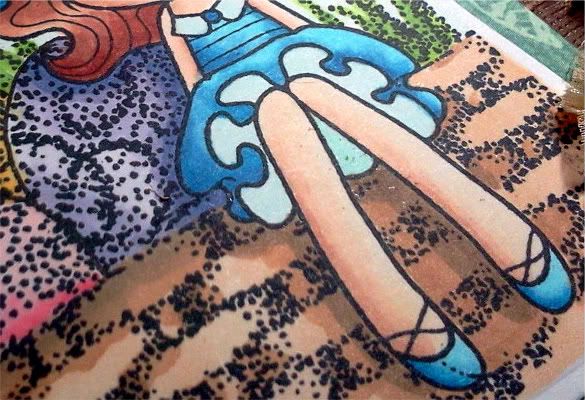
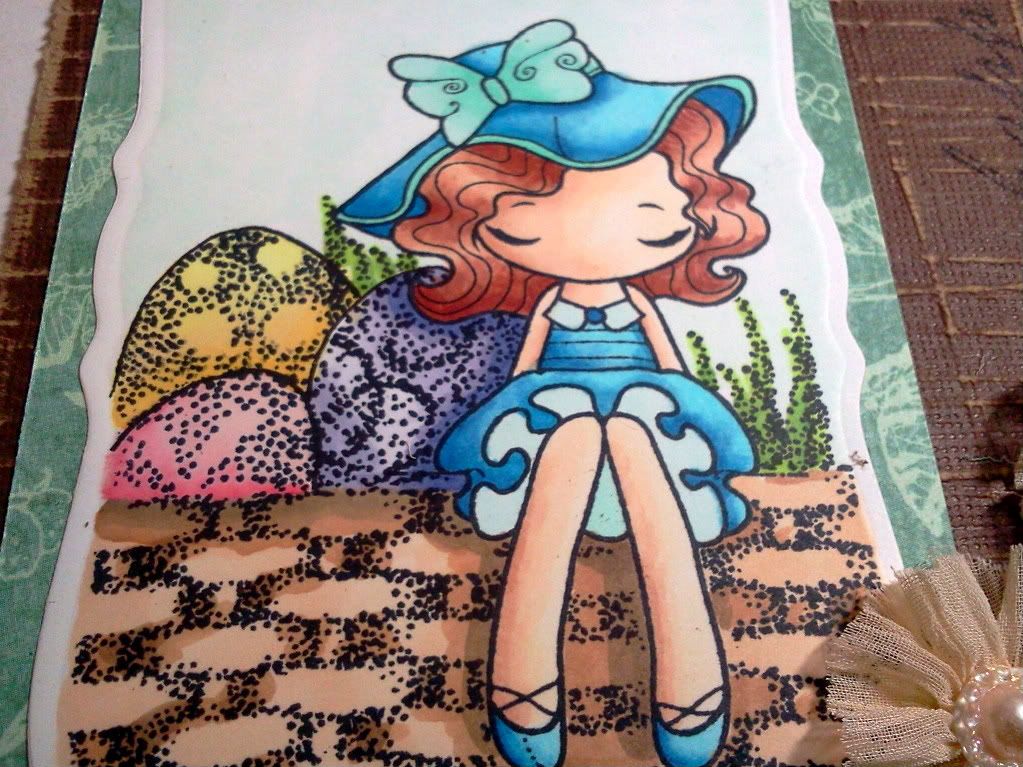
Sweet Tilda was stamped with Black Memento Ink on cryogen white paper and colored with my Copics. Once colored, I trimmed her with my Cutter Bee Scissors and used a couple of Glue Dots to stand her on the purple circle and colored a bit of shadow to the left and under her dress.

Skin: E00, E21, E50
Dress & Shoes: C1, C2
Slip & Socks: V91, V93, V95
Hair: E31, Y11
Shadow: C1

Another sweet project done with stamping and Minis. What are you up to?

Wednesday, April 27, 2011

Mother & Daughter Layout by Vicki

I am more of a scrapbooker than a stamper, but I wanted to take an opportunity to show that stamps aren't JUST for cards. You can use them in your scrapbook too!


Our family took a cruise two years ago, and we enjoy getting professional pictures taken by their staff. (This is typically some of the only photos of ME, since I'm usually the one with the camera!) As we're coming up to Mother's Day, I thought this picture of me with my daughter would be appropriate.

This is a large 8x10 picture, so I didn't want to overwhelm it with lots of fancy papers. I started with a plain white piece of cardstock, and dressed it up with Inkadinkadoo Sketchy Flourishes stamps (special order). I used an embossing ink, like the Tim Holtz Distress Ink Pad-Clear (For Embossing) and stamped the image on my page. Next, I sprinkled an ample amount of Ranger Super Fine Embossing Powder over the stamped image. Once the image is covered in powder, gently lift the paper, and lightly tap the paper to get rid of the excess powder. Finally, using a heat tool such as the Heat It Craft Tool, warm up the stamped and powdered image on the paper. It's important not to get too close to the paper with the heat gun or your paper will discolor! It's amazing to see that embossing powder turn into a shiny stamped image. Don't keep the heat gun on too long, or it will actually over melt the embossing powder. I did two images in black, and a third image with some red glittery embossing powder from my stash.

I actually did make a mistake - and had a fourth image embossed - but it didn't turn out at all...so instead of starting over, I artfully hid that corner with paper! I used a black Bazzill corner, and topped that with a piece of American Crafts Foil Cardstock.

To finish this off, I made a title on my Gypsy, using one of my new favorite fonts from Quarter Note. I welded the words Mother and Daughter, and cut each of these on more American Crafts Foil Cardstock in silver and red.

I am really pleased with the way this simple layout turned out. Hopefully, my daughter will treasure it for a long time!

Sunday, April 24, 2011

Cutters Creek Treat & My Fabulous Design Team!

A couple weeks ago, I sent my entire Design Team a little "treat" from me and asked all of them if they would be kind enough to create something and let me show off their talent.  They were all so very excited and I told them that they could use anything they wanted to use and my only stipulation was they used the product and do something geared to all those Moms out there, as Mother's Day is quickly approaching.  My hope is all their moms will be getting the gorgeous things they came up with!

As a side note, I would like you to take a moment to think of one of our Designers, Laura.  She is dealing with and ailing parent and she felt horrible that she did not get a project done.  In my book, family ALWAYS comes first and I know she would have something wonderful to show me and all of you.  The entire Design Team sends you hugs Laura, and we are all here for you and hoping you are well........

So what did I send the Cutters Creek Designers?  I sent them each a set of Cutters Creek Branded Flowers!!  They all got the Micro Roses and I sent each one of them a different color.  So here are your Cutters Creek Designers!!!  Please leave them all a comment to let them all know that they did an awesome job.  I know I think so!!!!

Mandie:

Vicki:

Lori:

Chris:

Melissa:

Mindy:

Deanna:

Laura:


Didn't they do a wonderful job?  I know I am so very proud of each and everyone of them!  Cutters Creek Branded Flowers come in many colors and the Micro Roses have 15 stems (grouped in three bunches of five) that you can pull apart or leave them together with three complimentary bows.  To see them, please click HERE!  I hope everyone enjoyed the challenge I gave the Cutters Creek Design Team!!!

(Laura's project added 4/28/11)

Thursday, April 21, 2011

Bella Gift Bag by Laura C


I love the way stamping can "dress up" a plain and simple item, like
this inexpensive dollar store gift bag. With just a little bit of paper
and ink, it's a great addition to any gift!!

The new In Style Stamps at Cutters Creek are awesome! I chose
to use "Bella" and stamped her in embossing ink, and embossed in
black on a 7&3/4" by 4" piece of kraft cardstock. I also stamped
her in Memento Tuxedo Black on Bazzill Simply Smooth White
Cardstock. The "Bella" on the white cardstock, was colored with
Copic Markers: R17 & R27 for her dress and headband, C7 & 100
for her shoes, E57 & E33 for her hair, and E51 for her skin.

The bag is put together using the new Graphic 45 Curtain Call
paper, each pattern is cut 7&3/4" by 3", inked with Vintage Photo
Distress Ink, and adhered to the bag using Scor-Tape. The
embossed "Bella" piece was inked and then adhered to the middle
of the bag. The gorgeous "frame" is the new Fleur De Lis Squares
from Spellbinders cut from black cardstock, and then adhered
with foam tape. The colored Bella is cut out and adhered with foam
tape as well. A lacey border punch and red ribbon finish the project.

A great choice for a birthday, Mother's Day, or any special gift
giving occasion!! Keep an eye out for the matching card in a few
days.......

Available at Cutter's Creek:
Graphic 45 Curtain Call 12x12
Tim Holtz Distress Ink (Vintage Photo)
In Style Stamps (Bella)
Copic Markers (R17, R27, C7, 100, E 33, 51 & 57)
Bazzill Simply Smooth Cardstock
Memento Ink (Tuxedo Black)
Spellbinders Nestablities (Fleur De Lis Squares)
Scor-Tape

Wednesday, April 20, 2011

Melissa's Easter Card

So I am trying so new techniques I learned at the Copic Intermediate Certification and decided to use the Miss Anya Dressy Collection as the stamps leave so much open for interpretation as far as shading and placement.  Making an Easter card I decided she should be sitting on the edge of a basket.  There was a lot of stamping and post-it notes involved; just as a reminder or hint, make sure you wash your hands between cutting the image on the post- it note and  placing it on your stamped image.  Ink spreads in case you didn't know :o)

I used the Linear Light template from Marianne Walker's Shadows and Shading Book to determine my light source to create a  more realistic picture; the upper right side.  Now, I colored my images paying attention to shadows and cast shadows in particular.  Cast shadows are shadows created by an object being reflected on another surface.  Does it look like shadows of her legs on the basket and her hair and side on the eggs?


I cut out the stamp using Curved Rectangles, embossed the edges and placed this over some Graphic 45 paper to make it pop!  I than took some Core'dinations paper and sanded it to use as my card base.  I stamped 'happy' on the top right, 'Easter' is on the inside, and used the new Prima Flowers as a corner accent.  What do you think overall? 


Photobucket

Stamps: TGF- Miss Anya Dressy, CTMH Eastertime (Stash)
Paper: Bazzill Simply Smooth, Graphic 45, Cosmo Cricket
Ink: Memento Tuxedo Black, Copics
Embellishments: Prima Flowers: Aurora. Splash
Other: ATG, Curved Rectangles, Embossing Mat, Scor-Pal

Stash: Post-It Notes, Shadows and Shading Book by Marianne Walker

Basket:  E21, E34, E44
Sky:      G0000
Eggs:     BV0000, BV00, BV11, BV04
             R30, R32, R35
             Y11, Y32, Y35
Grass:   YG23, YG03, YG17
Skin:     E50, E00, E11, E13
Hair:     E11, E13, E17, E19
Dress:   B00, B14, B16, B26
Trim:    BG10, GB11, GB23 

Tuesday, April 19, 2011

Tutorial Tuesday: Custom Stamped Embellishments wihth Lori

Welcome to another installment of Tutorial Tuesday!  This month features stamping, and I thought that this week I would share an unexpected combination of products used to make some cute custom dimensional embellishments.  So, we'll be using stamps (of course) and the new to Cutters Creek iBond cordless glue gun with colored glue sticks!

Have you ever looked at colored glue sticks for glue guns and wondered what on earth you would want to use colored glue for?  Today I have just one splendid little answer for you.  Let's make dimensional embellishments!  But first, I have to say that I LOVE the iBond glue gun - the cordless feature makes it so easy to get things done without wondering how the heck to get that cord out of the way.  In fact, I have several other projects I can already think of that I''ll be using this for this year.

Now, rather than ruin the surprise, I'm going to make you wait until after the tutorial steps to see what I've made.  Just check out these steps:

First, you will need a non-stick surface (the Bazzil splat mat is a good choice) and your iBond loaded with the glue sticks of your choice.  Turn on your iBond and let it rest on the mat.  (Another great feature of the iBond - there's a light at the tip so you ALWAYS know when it's turned on!)

While that's warming up, you will want a few additional items.  Choose a small stamp image, stamping block if acrylic, and ink for your stamp.  You need to ink up your stamp for this process, but most ink will not stay on our stamping surface.  You can just use a clear ink for no color, or Staz On if you want your image colored.  I chose to use a red Staz On for my image, just so it would show up better in the photos.

First step: coil a circle of hot glue slightly larger than your stamp image, making sure your coiled glue lines are touching.  You may want to experiment with the thickness for some different effects.  (I apologize for the odd picture here - it's hard to glue left-handed and take a picture right-handed!)  I tried to keep mine about the thickness of the stream that comes out of the tip.  Colored glue tends to be stiffer than clear, but you should still have plenty of time before it hardens up.

Once your circle is made, quickly ink up your stamp and press it into the hot glue.  Leave the stamp in place for a minute while the glue cools, then you can pull the stamp out of the glue and peel the glue off of the non-stick surface.

You now have two options with your stamped piece: leave it in a circle, as I chose for my card, or trim it down around the image.  A nice thing about using glue is that it trims super easily with a pair of fine-tip scissors.  At left is an example of a trimmed image.  This would look cute at the center of a ribbon bow, or perhaps three in a row on a card front, mounted on circles or squares.  When left whole, these embellishments give the appearance of wax seals, with a lot less fuss.

Now, on to my end product!  I created a card and used my embellishment as an accent piece in my design.


Using a card sketch and some papers from my stash, I got to work!  The cute girl stamp image is Cheeky Howdy from The Greeting Farm and the cherries stamp image is from the Kitchen Classic stamp set from Crafty Secrets.  Cheeky Howdy's outfit is paper pieced (see last week's Tutorial Tuesday!), and the scalloped mat/frame is from the Elegant Edges Cricut cartridge.  I adhered the stamped glue embellishment to my rosette using Glossy Accents to ensure it stays put.  As a finishing touch, I added stickles to the cherries in my girl's hair and the circle cut-outs in the frame.

Items available at Cutters Creek:

Monday, April 18, 2011

Deanna's Easter Bunny Card


With Easter just a week away I made this cute Easter card for you. My card base is white card stock cut at 7” X 10” and scored at 5” and folded to make a 5” X 7” card base. I then used some scraps from my stash to cut a 4 ¾” X 6 ¾” mat out of plaid paper. The green mat is also from my stash and was cut at 4 ½” X 6 ½”. My bunny was cut at 3” out of brown card stock from the Easter 2010 seasonal Cricut cartridge. To make my bunny really stand out, I sprayed him with some Coffee Shop Glimmer Mist then let him dry. Once was dry I adhered him to my card with my ATG gun.
Once my bunny was attached to my card I decided he needed some grass so I pulled out my Flower Soft. I started with drawing a line with my Flower Soft Adhesive underneath my bunny and applying some Meadow Flower Soft. Working in sections, I then filled in the area from under the bunny to the bottom of my green mat with adhesive and applying the flower soft. Once I had the flower soft all over the adhesive I pressed down on it gently with my hand to make sure it was well adhered to the glue. I let it dry for a few minutes and then gently taped off the excess flower soft.
Now my bunny needed some Easter eggs. I again pulled out some scraps of paper and a couple of small egg stamps that I picked up last Easter. I used some Memento Ink to stamp my eggs. The colors I used were Rosebud and Bahama Blue ink to stamp my eggs. For the purple egg, I used some watermark ink. I hand cut the eggs out using a small pair of scissors. To bling up my eggs I add some Turquoise, Glam Pink, and Purple Stickles. On the solid eggs I added some matching colored I-Rock gems to the center of the flowers and a black gem to the eye of the bunny. Once my eggs were all decorated and dry and attached them to the grass with my Flower Soft Adhesive.
To finish my card I added a brown pompom that I lightly sprayed with the Coffee Shop Glimmer Mist to the tail of my bunny, tied a narrow purple ribbon around his neck and stamped my sentiment with Rosebud Memento Ink.

Thursday, April 14, 2011

Vicki's Peek-A-Boo Layout

I was lucky enough to attend a weekend crop last weekend, and I was able to get 19 pages done in 2 days! Here is one of my two-page layouts, using my Cricut and my Gypsy. The page base is a tan Bazzill cardstock, and I added some printed paper from my stash to fill the bottom of the page, and the top and center stripes. My photos were mounted on a coordinating sage cardstock.


After I laid out the photos, it was time to add the title and embellishments. On my Gypsy, I used the bracket from the Disney - Hannah Montana cartridge, and welded it to a simple rectangle from George & Basic Shapes, to give it a more solid shape. I cut two of these brackets in the same paper as the top stripe. Since the trees in the photographs was lacking most of its leaves, I selected one of the bare trees from Paper Doll Dress Up. I cut that in a chocolate brown, but it didn't stand out against my printed paper enough, so I cut a large circle from the same shade of paper as my base pages.


The Peek-A-Boo title was welded from the Quarter Note cartridge. If you are looking for a nice script font that welds together easily, this is the cartridge to do it! I used my Zig Glue pen to glue the title to the page. I added a journaling box to balance out the layout, and used the bracket cutouts to highlight both the title and the journaling box.


To make the brackets appear as if they were sewn on the page, I used a brown Sharpie to draw stitch marks on each of them. I also outlined each of the brackets with the same marker, after they were adhered to the page. Finally, to bring more continuity to the page, I wanted to place a dotted line along the sides and bottom of each page. I'm a little bit of a perfectionist, and I didn't want my dots to appear too haphazard, so I pulled out my Tim Holtz Design Ruler, which has awesome holes evenly spaced all the way down the ruler. Using a paper piercer, I lightly pierced every other hole all the way around the pages. Then I went back afterwards with marker and placed a dot on each of my piercing marks.

Items from Cutters Creek:
Zig 2-Way Glue Pen
Tim Holtz Design Ruler

Cricut Cartridges: *note - Kim can special order these or any other cartridges you might want!
Paper Doll Dress Up
George & Basic Shapes
Disney - Hannah Montana
Quarter Note

Tuesday, April 12, 2011

Tutorial Tuesday with Mindy

Hi it’s Mindy and it’s my turn to host Tutorial Tuesday.  We are focusing on stamping this month and I thought I would share one of my favorite stamping techniques- paper piecing.  I used to see cards that were paper pieced and I loved how they looked but I wasn’t quite sure how they were made.  I finally figured it out and I’ve loved it ever since.  To start with you need to pick your image and make sure it has a large enough area to paper piece.  You don’t want to drive yourself crazy when it’s time to cut it out.  Then you need to pick a patterned paper with a pattern that is small enough to repeat inside your area.  Papers with small patterns or 6 x 6 papers are great for this.  For my card I chose to paper piece the egg part of this Tilda stamp.  I started by stamping the image on my white paper. 

step 1

Then I stamped the same image on my patterned paper.  I printed a small rectangle on my Imagine and filled it with a pattern from the Hop Scotch cartridge. 

step 2

Next I colored the parts of my image that weren’t going to be covered with the paper.  I used copic markers to color Tilda.  Her shirt is a combination of R24, R22, and R20.  Her skin is E02, E00 and E000, and her hair is E37, E35, and YR23.  I also added a little R20 to her cheeks. 

Then I cut out the egg part of the image stamped on the pattern paper.  You need to use some small sharp precision scissors to do this.  It is also good good to cut a little bit inside the stamped line or right on it so that it will fit just inside the part of the image it’s intended to replace when you piece it together.  For this image I needed to cut the bottom and the top half of the egg. This is what my image looked like when I had the bottom of the egg in place.

step 3 [1280x768]

Finally I glued the top half of the egg in place and assembled my card.  All papers are from the Imagine Hop Scotch cartridge. I hope you have enjoyed my tutorial and that you give paper piecing a try.  It is great to cover large areas you don’t want to color or an easy way to add pattern to an image. 

step 4 [1280x768]

Cutters Creek Shopping List

Copic sketch markers

Cricut Imagine Hop Scotch cartridge

Sunday, April 10, 2011

Happy Easter

I love my Cricut and I look for any excuse to use it.  I thought my new cartridge Kate’s ABC’s would be perfect for an Easter card. 

kates abcs easter_edited-1

I picked this sweet little bunny cut and filled all the layers with colors from the Cricut Imagine cartridge Lori’s Garden.  I ran some yellow cardstock through my Cuttlebug and embossed it with one of the folders from the cricut companion sets.  I love how these sets come with a couple 5 x 7 folders.  These work perfectly when you want the entire front of a 4 1/4 x 5 1/2 card embossed like I did here.  I cut this little top note shape, which is one of the stock shapes that comes with the Imagine, and used that to mat my image.  The pattern in the shape is also from Lori’s Garden.  I pop dotted the little bunny and the butterfly up off the background and put little pearls in the center of the flowers.  I finished it off by cutting another Imagine shape in pale yellow and stamping a sentiment on it.  Using your cricut enables you to make some great cards in a relatively short amount of time. 

Friday, April 8, 2011

A Quick and Easy Bunny Card by Mandie - and a WINNER!!!

Today I thought I would share a super simple card that could easily be mass produced! All you need is some cardstock, your Cricut, Zip Dry Paper Glue and some Polar White Flower Soft.


I cut my card base from light pink cardstock at 5" x 10" and folded it in half to make a 5" x 5" card. Then I cut the dark pink layer from the Stretch Your Imagination Cricut Cartridge at 5" from using the Card Frame function. The little bunny is on the same key with a basket. I used my Gypsy to hide the basket in the cut and the layer. I set the size to 2 3/4", then I cut the top layer in white and the bottom in dark pink. I used the Zip Dry Paper Glue to adhere everything because it won't make the paper wrinkle. Then I added some Polar White Flower Soft to his tail so it would be super fluffy!


Here's a closer look at my happy little bunny. You could easily use this card for invitations to an Easter celebration or just as a sweet card to mail out to friends and family!

And now, I'd like to share our WINNER of the March Flower Soft giveaway. As usual, I let Random.org do the hard work and it chose....


Congrats, Dorothy! I will be sending you an email shortly! Thanks to each and every one of our fabulous readers who left wonderful comments throughout the month of March! We really appreciate the support of our readers!!!

Thursday, April 7, 2011

Princess Tilda Card by Chris

Have you checked out the new Magnolia Mini Stamps that are now available at the Cutters Creek store? They are all mini versions of the original Magnolia stamps and they fit perfectly on the A2 card size!


Love these minis! I decided to try the bleaching method to make my background. I put a small amount of bleach in a Pyrex dish and folded a paper towel into it to absorb the bleach. I then used that as my stamp pad and stamped the image on my red cardstock. (A tip from Lori: Be sure your cardstock is a solid core piece and not one where the color is printed on — e.g., Core'dinations, Worldwin, CTMH.) It took a few tries before I got a good image. At first I had too much bleach and it just ran and bled out the image, and then, I did too little and got only part of an image, so I suggest practicing on scraps before moving to the cardstock you want to use.


Also be sure to wash the bleach off the stamp immediately after using. Once that was dry I glued it onto a 10x5 base folded to a 5x5 inch card and rounded the corners using my Corner Chomper.

I then stamped the Mini Princess Tilda with Memento Black Ink twice. I colored one using my Copics and the other I cut just inside the outside edge to use as a mask later.
Skin: E21, E00, E50
Hair: E07, R14, YR23
Crown: Y28 and Gold atyou Spica
Dress: Y23, Y21 (Note to get the medium color here I picked up Y23 with my Y21 pen and shaded.)
Bodice Trim, Slip, and Socks: YG21, YG23
Shoes: E31, E33, E34
Using my Nestabilities Classic Scallop Oval Small Set I cut and embossed Tilda. Using removable tape I placed my Tilda mask over the colored Tilda while it was still in my Nestability. I then used some Tim Holtz Distress Ink in Mustard Seed and a stipple brush to color the background by pouncing the brush up and down over the image.


Using my Spellbinders Beaded Oval Set I cut and embossed the larger layer and used red pearl pens to give some dimension to every other oval. Once dry I stacked the two ovals and adhered them to the card base. The smaller oval was raised with pop its. Finally, I added a small bow using Glue Dots.

Tuesday, April 5, 2011

Tutorial Twofer Tuesday with Lori

Stamping Your Own Patterned Paper AND Masking

Happy Tuesday everyone, and welcome to our first installment of Tutorial Tuesday for April!  This month we're focusing on stamping, and since I am the self-proclaimed Simple Stamping Guru, I'm jumping right in with two easy techniques today.  Initially, I was just going to focus on making your own custom patterned paper, but I needed to mask an image for my card anyway, and since it's an easy yet oh-so-useful technique, I just added it right in.  Trust me, I don't like doing things that are "hard", require a lot of products, or take a lot of time.  So, make yourself comfortable and see for yourself how easy stamping can be!

Let's start with a technique called "random stamping" to make your own patterned paper.  It's really a misnomer, as it's not random at all, but when you're done it certainly looks that way.  This is such a useful technique, for times when you don't want to search for the "right" paper for a project, or just don't have something in the right colors.  I have been known to be slightly obsessive (OK, maybe not slightly) about my papers matching my pictures in my scrapbook pages; to the extent of making my own patterned papers that match the clothes my kids are wearing in the pictures.  But that's a story for another day...

I'm making a card, because the smaller size makes it easier to learn the technique.  (If any of the pictures are too small for you, just click on them to see them larger.)  To begin, stamp a single image near the center of your paper.  I stamped right on my 5 x 7 card base, choosing to make my entire background patterned.  For this project, I am using a single stamp for my pattern, but as you practice, you can add more stamps, and/or rotate the stamp(s) for more variety.

Next, stamp the image twice more, forming a triangle shape with the three images.  I chose to keep my images all facing the same general direction, but you can rotate for a different effect.

Continue stamping images, creating more and more triangles on your paper.  Make sure that when you approach the edges that you allow the images to go off the edges of the paper where they would naturally fall.  (Ever notice that patterned paper you buy doesn't usually contain only whole images, that shapes run off the edges of the paper?)

Since I used a line drawn stamp, I chose to color my images with Copic markers.  I colored using a very informal style, freely going outside the lines, as it was easy to color each petal and leaf by simply laying the brush tip against the paper for each one.

Don't worry about making your image spacing or your coloring perfect.  Trust me, no one will notice when you're done!  Now, on to masking:

This technique allows you to group images together, making them look like one is in front of another.  There is no limit to the number of images you can combine into a scene, but I most commonly use only two images together.  It looks so much more "advanced" when you mask than if you just stamp the images next to each other.  The only additional supply needed is a Post-It note (or if you don't have any, use a piece of printer paper and adhesive tape.

First, stamp the image you want to appear in the front of your scene on your cardstock.  Then stamp it again on your Post-It note.


Cut out the image you stamped on your Post-It, and stick it directly on the image you stamped on cardstock.

Next, stamp the other image right next to the first, slightly overlapping where you want it to appear behind the first image.

Peel off the Post-It note, and voila! You have a masked scene.  For my purposes, I cut out my masked images, added some extra detail and colored them.

To assemble my card, I also stamped and colored a border and cut it out.  I trimmed 1/4" off the right edge and adhered my border image and some ribbon.  Then I popped up my stamped image on a matted panel, added a custom sentiment, and DONE!

I thought this would make a great card for a  couples shower, casual wedding, or a fun anniversary card.  Just add the additional sentiment to the inside of the card and you're ready to roll.

Products available at Cutters Creek:

Friday, April 1, 2011

Design Team Update!

As with all things in life, there are always changes going on around us.  Cutters Creek has been very blessed to have some wonderful designers join our team and they always make me so very proud.  Starting April 1st, I have a brand new member to the Cutters Creek Design Team.  She has let me share show so many of her projects as a Guest Designer, I just had to ask if she would like to join my team.  So everyone welcome Deanna to our Team!  I am so excited to see more of her creations along the way.

I would be remiss, if I didn't mention another new member who has been with us since March 1st.  Mindy is now a part of our team as well and has already been dazzling us with her creations this month.  I have been a fan of her work for quite some time and am so pleased she is on our team as well. 

We are now a full and well rounded Design Team with eight lovely ladies!  Our Head Design Team Leader is Mandie and our other members are Vicki, Chris, Laura, Lori, & Melissa.  Keep following what they do, as they are always coming up with great projects that are just dazzling!  I think this month, they are going to be inking up some stamps and as this is not my forte, I am looking forward to their tricks and tips this month and our Tutorial Tuesdays!  Stay tuned........................
Related Posts with Thumbnails