Monday, December 31, 2012

Sewing Mends The Soul.


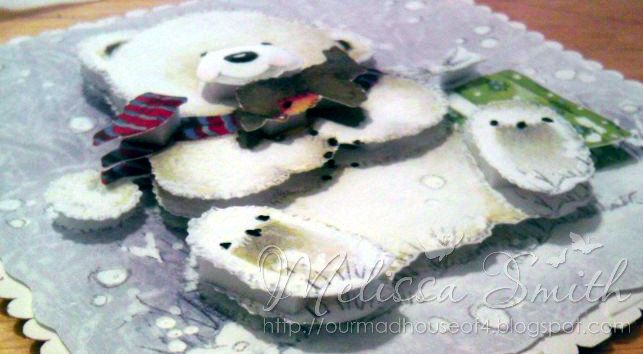
With the end of the Holidays approaching quickly I was fresh out of ideas since all I was doing was making Holiday projects.  I really wanted to do something that was out of my comfort zone pertaining to designs.  So I went on an excavation (that is what my craft room is like to me) to see what I have that I never used.  And what I have that I love using.  So I came up with a TAG.  Now what theme do I use?  So I excavated more and found tucked in a drawer a die and a stamp that I hadn’t used since I purchased it last year some time.  And what started out as a plain manila tag turned into a antique style sewing theme tag.  The photo tells it all.  And below the photo will be all the items I used to make it.  Once I got started it came together pretty quickly and I am liking it more and more every time I look at it.  I hope you like it too.  And got some inspiration to pull out all those new items you got for Christmas and favorite items and make something out of your comfort zone.

OLYMPUS DIGITAL CAMERA

(click on photo for a larger view)


Recipe:       Tim Holtz Alterations (Movers & Shapers) Magnetic Die Dress Form & Spool

                  Tim Holtz Alterations  Paper Rosette Die

                 Tim Holtz Distress Stains:  (Purchased through Cutters Creek Club:      (Tarnished Brass, Evergreen Bough, Festive Berries, & Brushed Pewter)

Tim Holts Distress Ink Pad – Walnut Stain

Tim Holtz Stamp Collection – Sewing Machine Linen Thread Spool

American Crafts – Dear Lizzy Enchanted – Mixtape (ON SALE 30% OFF)

KaiserCraft Wood Flourishes – Scissors

KaiserCraft – Pearls (self adhesive, Blush)

NOTE:  If you see items listed in the Recipe that are not linked to the Cutters Creek Store please contact Kim Bush of Cutters Creek and she may be able to purchase those items for you.  All other elements are from my stash.


Thank you for stopping by and hope the New Year brings you Health, Peace, & Prosperity,

Fran

Thursday, December 27, 2012

Hello Kitty using Cricut Markers

I have had the Cricut Markers for about a year but just recently pulled them out to play. I used to be intimated by using markers but figured, what the heck do I have to lose? Ruin the markers I have had in the drawer for a year, maybe ruin a few sheets of paper.... hahaha - so I jumped head first and started playing...


First, I used the marker with the Silhoutte feature on the Hello Kitty Cartridge. I used the settings recommended by Cricut for my first few but then found that pressure 3 and speed 3 or 4 worked much better. I then cut the image out using the Blackout feature.


I used a black marker to fill in the outer lines as seen here.... Sharpie worked great but It did bleed a little when I colored and stickled (see below)


Then I went crazy and colored it in with markers, added bling and cut the Card feature.... The end result was sooooo cute!!!  I then got a bright idea to make a bunch of these, put it into a spiral book and give it to my great niece with markers for her birthday... Let her color them in!  I know she is going to love it.

Break out your Markers, if you have them. If not, Kim can order them in for you. Don't be afraid, just whip them out and have fun!

~Tee

Winter Wishes by Laura C

Hey there everyone!  Hope you had a
wonderful holiday!!  And of course,
the New Year is right around the corner!

I am notorious about sending holiday
greetings at the last minute....or, yes,
I am ashamed to say....a little late.

But when you send a beautiful card
that is heartfelt and handmade....it's
ok if it's a wee bit late....right?

If you still need a card or two for the
winter holidays....don't fret....tone down
the "holiday", shift focus to the winter,
and send those "winter wishes" along
with cards like these:


Here's a close-up and details for this card:

This is soooo simple! Started with a basic
white cardstock base, then layered on the
super cute American Crafts Washi Tape.
I also used it to cover a piece of 2x3
cardstock completely....that I then layered
another 2x3 piece that I punched out the
2 snowflakes from and then sprayed with
gorgeous pink Glitter Dust.  I framed that
piece with more washi tape, and then used
foam tape to pop it up over the other piece.
A little bling and twine....and I call this one
done!


The next card:


I used Tim Holtz Christmas paper on a white
cardstock base....rounded corners to give it
a little different look.  Now if you notice....I
saved my "negative space" scraps of TH
frosted film, from my burlap panel project
from a few days ago, and used it on this card
as a mask of sorts.


This is before I applied it:

And this is how it looked after....
Frosty goodness!  And to finish the card....
the pattern paper strip from the TH pad,
a strip of the AC Dear Lizzy Washi Tape,
a sweet reindeer from the TH mirror sheet
(using a TH die....Kim is always glad to
order these items), I dressed up the reindeer
with a bit of TH tinsel twine and pearls from
my stash.  The punched out snowflake was
sprayed with silver Glitter Dust, and a stamped
sentiment and some bling are the finishing touches.

So don't give up.....it's not too late to send some
"Winter Wishes" along to someone....take some
time to craft up some winter fun! 


Monday, December 24, 2012

Happy Holidays

Kim and all the Cutters Creek Design Team want to wish all of you a very Happy Holiday!


Sunday, December 23, 2012

Advent Calendar by Deanna M


Here is the advent calendar I made this year. The tree is from Kaisercraft and Kim special ordered it for me. (Thanks Kim!)

I painted the edges with some green acrylic paint as well as the little wooden pieces for the numbers. I used some Glue and Seal to adhere my paper to the front and back of my tree. The paper is from my stash. I added some Washi Tape by My Minds Eye for my garland.

Next I cut a star from the George and Basic Shapes cartridge at 2 1/2" and I covered the whole thing front and back with some WOW! Gold Rich Ultra embossing powder.

Next I cut the countdown to Christmas out with my Silhouette out of some red card stock and then embossed it twice using the Clear Gloss WOW! embossing powder.

Finally I cut my numbers out of red vinyl and adhered them to my wooden pieces.

Friday, December 21, 2012

Mixed Media Holiday by Laura C

Well, I truly love a chance to "play" don't you?
Get out paints, Stickles, ink, mix different textures,
and all kinds of goodies, and just create. 

I've dabbled around this time to make
a mixed media canvas:

The base is a Tim Holtz (TH) burlap panel,
and I built up from there, first, I cut a
piece of acrylic to fit the 6x6 canvas
size, and I used Snow Cap paint dauber
around the edges:

Then I cut out the TH Frosted Film using
an On the Edge die and applied that to
the edges and added metal corners:

Next was embellishing....the ornament was
made using TH kraft core paper embossed
with a swirl pattern before it was cut with
the TH die, then sanded, then inked with
a bit of Vintage Photo Distress Ink.  I used
some other TH embellishments...the Season's
Greeting sentiment from TH Christmas stack,
the "wish" ticket that was distressed using
Vintage Photo Ink and Snow Cap paint,
the "simplify" charm that was enhanced
with the Snow Cap paint, blue tinsel twine,
and the "25" and ornament top were cut
from TH mirrored sheets. The holly is also a
TH die, and the red pearls are from
Want2Scrap.  The snowflakes were
punched from white cardstock, and
dabbed with Aqua paint dauber, then
blinged with Stickles.  Beads, wire, twine
and seam binding ribbon from my stash are
the finishing touches.  Here's a close up of
the the ornament and embellishments:


Ok, your turn....go get messy with some ink,
paint, and different media....we're never too
old to play!! 

Note: Any of the TH dies can be special
ordered thru Kim at Cutter's Creek....most
other items are in stock!


Thursday, December 20, 2012

Easy Gift Bags With Lori

With Christmas rapidly approaching and teacher gifts finally completed, I realized I needed some git bags to pop them in.  Scor Pal to the rescue!  You can use your Scor Pal to make nearly any size bag you want, and I can show you how.

Based on the size of my gift, I decided to make a bag 6" wide by 2.5" deep. (Sorry, I can't show the actual gifts yet, since they are being given Thursday & Friday and I don't want to spoil the surprise, just in case!)  So, it's easy to figure out how much paper you need based on the size of the bag, plus a 1/2" - 1" flap for adhering.  Just add up all of the sides: 6 + 2.5 + 6 + 2.5 = 17  Since this is larger than 12 inches, I know I will need 2 sheets of cardstock.  I will need a flap on each piece to attach them, and I choose a 1/2" flap, so I will need 2 sheets cut to 9" x 12". The 12" is height plus bottom, so lay your cardstock on the Scor Pal vertically, like this:


Next, score the cardstock for the 2 side measurements and flap.


When you have scored both lines, your cardstock should look like this:


Next, you will rotate your cardstock one turn (90 degrees). It doesn't matter which way you turn it, as long as you do both sheets of cardstock the same way.  When you are done, the cardstock will look like this:


This corner piece I have scribbled through gets removed completely.

Next, you will cut the flaps for the bottom of the bag:


The arrows I drew in show where pieces are cut to make the flaps.  Note that the piece we cut completely out in the previous step is next to a bottom flap.  Next, we need to attach the two pieces of cardstock and assemble the bottom of the bag.


Lay your cardstock so the fold of the skinny side flap is a "mountain" fold.  Put your adhesive on the top side of this skinny flap on both pieces of cardstock.  Now adhere the flap on the first piece of cardstock to the "inside" of the second piece of cardstock.  Then adhere the flap on the second piece of cardstock to the inside of the first piece of cardstock.


Next you will put adhesive on the "outside" of the smaller side flaps, and fold over one of the larger side flaps on top of them.  Set it flat on the table and push down the smaller flaps from the inside of the bag to make sure they are adhered.


Finally, you will put adhesive on the "inside" of the final flap and adhere it to the rest of the bottom.  Your bag is now finished.  If you are going to want to put a topper on your bag, you can use your fingers to crease the small sides in half partway down the sides of the bag.

Now, on to the fun part - making the bag pretty!  Here is how mine turned out:


I opted for a simple topper since my paper had a pretty design.  The 6"x6" paper pads in the store are perfect for this! I just folded mine in half.  I wanted to make my bag reusable, so rather than permanently attach the topper, I wanted to tie it on.  I held my folded topper over the folded bag and punched 2 holes through all of the layers at once.  I used eyelets from my stash to reinforce the holes in the topper only.


Since my paper had a pretty design, I left it alone and just traced over some of the design elements with my Copic Spica pens.


I also traced over some of the stamped elements on this tag with the Copic Spics pens.  I reinforced the hole in the tag with another eyelet.  I threaded twine through the holes in the bag & topper, then through the tag and tied it in a shoestring bow.  Easy to open and easy to reuse!  (Note: if you want to see the gifts I made, you can visit my blog Friday to see them.)

The following products to make this are available in the Cutters Creek store:

Other materials used:
  • cardstock in coordinating color(s)
  • Cricut Artiste cartridge (for tag)
  • stamps of your choice (for tag)
  • eyelets and punch (I used a Crop-a-dile)

Sunday, December 16, 2012

A Quick Merry Christmas!

 Hello everyone! Sorry I couldn't get a better pic for this but I made this card using these wonderful card toppers! They come in a pack of 6 and I have used everyone in a different way! I love them!


 On this particular one I cut a piece of red card stock to cover the front of the card and inked the edges with distress ink. Added a ribbon on one side from my stash. Then I added some gold Stickles to rim of the curtains, tie backs, and flames on the candles. After adding Glossy Accents to the bows, and other various place I was done! Quick, easy and beautiful!
Thanks for looking! :)


Friday, December 14, 2012

Joy and Peace


OLYMPUS DIGITAL CAMERA

OLYMPUS DIGITAL CAMERA

If you all know me you know that I love bling.  And I wanted this sweet Angel to be surrounded by lots of bling.  And I wanted her to be standing on a soft cloud (lots of cotton balls in this case) with chunky glitter pieces by Martha Stewart on the cotton balls. 

I had a little difficult time with the sentiment for the front of my card. And after I colored the Angel by (La La Land) the words Joy and Peace popped in my head.  The Sentiment was created in Paint Shop Pro using the font call Lavanderia (free font) and was cut using my Cricut.  The sentiment and background was sprayed with the iridescent glitter dust. The snowflakes were cut from my Die-namics die and the center of one of the snowflakes made the cutest star so I used them to surround my Angel. 

The snowflakes and stars were covered with Diamond Glitter Glue by Ranger.  And then I used clear Rhinestones by Kaisercraft on the snowflakes and stars.  Two of the rhinestone swirls were from my embellishment supplies but I added more to them using more of the Rhinestones by Kaisercraft. 

My Angel was colored with Prisma Colored Pencils using the Gamsol technique.  Her wings, halo and trim on her dress also has Diamond Glitter Glue on them.  The pretty roses in her hair and on her sash was touched with glitter using a Spica Clear glitter  pen.  It gave it just the right touch  for a  soft shimmer.  Spica pens are awesome and in my opinion should be part of every one’s craft supplies. 

The Ribbon was from a leftover remnant that gave me just enough to make a small bow.  And it has pretty snowflakes on it too to pull the theme together.  The Rhinestone flower on the ribbon center is from my craft supplies. The card base is from my pack of chalkboard paper which had the perfect color to compliment the card front using Neenah card stock and colored with Faded Jeans Distress ink pad by Ranger.

Well there you have it all the details of how I made this card. I really loved coloring the Angel and putting all the details together.  Sometimes its great to have what you want to make already in your head.  But this time I did not have a plan.  I just went with the precious Angel guiding me on how she wanted to be adorned.  What do you think?

Card RecipeLa La Land Stamp Angel MarcieDie-namics Snowflake Die Set, Kaisercraft Rhinestones, Ranger Glitter Glue, Spica Pens, Therm-o-Web Glitter Dust, Distress Ink Pads

If there is something I used and not listed in the Card Recipe or if the item is sold out please contact Kim of Cutters Creek and she may be able to get it for you.  Hurry because things are flying out of the store quickly.

Thank you for stopping by, Fran

Tuesday, December 11, 2012

Winter Frolic Christmas Tags

Hi Everyone and Happy Tuesday to you - Can you believe Christmas in just around the corner? Thankfully, I do very little shopping since I don't have any non 4 legged children and all my nieces and nephews prefer money even over gift cards, however, I do have a few special people in my life that still appreciate a beautifully wrapped gift. Since I am a horrible wrapper I try and make up for it with a beautiful tag..... So, her at the ones I made this year for my 6 special friends/family who still get a wrapped gift.

Supplies Used:
Tags Bags Boxes and More - All the tags cut at 3.5"
Winter Frolic - All characters were cut at 3"
Stickles - lots of different colors
Perfect Pearls - Black and Copper

~Tee


Dress up your die cuts

I have found some really cute graphics lately that you can either use in digital scrapbooking or print them out and use them traditionally.  I decided to print some out and dress them up a little bit.  I printed this little dog image and the sentiment.  I wanted to add something to the image to make it pop a little more.

photo(11)

I thought liquid applique would be perfect for this.  I added to the dog’s puffs.  Liquid applique puffs up when it is heated with a heat gun.  Ideally you should let it dry overnight, but I just gave it an hour or so and then hit it with the heat gun and it worked fine.  I love the three dimensional look. Here is a close up.

photo(12)

  I mounted my image on some Echo Park paper with some ASI clear foam and I have a super quick and simple card done.

 
For this next image,  I decided to try something a little different.

photo(13)

I thought the fur on the Santa suit would look great with some fun flock.  I covered the fur in glue and the dropped the fun flock on to it.  It helps to kind of push the flock into the glue to get it to stick really well.   Then I decided to make his boots and belt look like patent leather.  I added some crystal laquer to make them look shiny.  To finish off the belt buckle, I added some stickles.  This little cow image is so whimsical I decided it would be perfect to attach with an action wobble to give it some movement. 
The next time you see some cute graphics, print them out and dress them up a little bit. 


Cutters Creek supplies
fun flock
liquid applique
stickles
echo park
Cutters Creek branded flowers
action wobble

Sunday, December 9, 2012

Gift Tags and More! by Deanna M

Well, I finally got my Christmas tree decorated this morning. So now I have a place to put those presents I have been buying once they are wrapped. However, before I can wrap them I decided I better get some gift tags made so I know whose gift goes to who. (I am famous for wrapping presents and putting them under the tree without tags. Keeps everyone guessing).

For these tags I cut some Bazzill white card stock 3" X 3". I then used cut some patterned paper 2 7/8" X 2 7/8" and 2 3/4" X 2 3/4". I used papers from the Echo Park Holly Jolly and Season's Greetings and My Minds Eye Winter Wonderland. The upper left tag I added a piece of white card stock that I rounded the corners and then stamped it with some embossing ink and embossed it with the WOW! Cable Car Red Embossing powder. For the tag with the Trees and the Stocking I used some of the stickers from the Holly Jolly collection. The Poinsettia tag was made using the Spellbinder Poinsetta die. I inked the poinsettia with some of the Festive Berries Distress Ink and I added some gold Liquid Pearls to the center. I am going to try to get a better picture of the tags in the morning, hopefully it will be much brighter than this even. Finally I used my crop-a-dile and punched a hole in the corner of each tag and added some Doodlebug Twine.
Next I made a couple of gift card holders. I found the directions here. Again my paper is from the Echo Park paper pads. I rounded the corners of the top of the gift card holders and the stamped my sentiment with some Evergreen Bough Distress Ink. I die cut the sentiments out using a Spellbinder die and my eBosser.

Saturday, December 8, 2012

3D Christmas Card


Here is a simple Christmas card made from the 3D White Bear.  It is a very simple and quick card.


After I used the Foam pads to "build it up", I used my pitch black and clear spicas and my cool grey copics to add a little depth and glimmer to the  images.  I wish the pictures would show much it made it sparkle for snow.


Overall, I love the final product and how fast it went together.  I am definitely going this route for future Christmas cards as it is a huge time saver and still has a personalized touch!


Enjoy!


Stash: Paper

Friday, December 7, 2012

Tent Topper Card by Fran


This style card has been around for quite a while but I never made one.  So I chose to make one with a Christmas theme.  Before I get in to how I made the card I want to share the link where I saw the tutorial on how to make the Tent Topper Card here (Splitcoast Stampers).
I used Kraft paper for the base of the card.  The size is a 4-1/2” square card.  The front of the card and inside is made using the beautiful papers from Graphic 45 Christmas Emporium.  This paper is so pretty you hate cutting it apart.  To embellish the card I used Liquid Pearls by ranger in Rouge and Gold Pearl.  If you haven’t tried this product you need to get yourself at least one color and then you will be hooked on it.  It is so diverse.   On the inside I cut three holly leaves using my Cricut out of the Graphic 45 Christmas Emporium paper and then coated the leaves with Stickles Glitter Glue by Ranger (Green) for added bling.  Not much to say about Stickles because it speaks for itself.
Other items used to complete my card are from my own craft supplies:  Just Rite Stamp Oval Stampers from the Christmas Joy Set.  I used Tim Holtz Distress Ink Pad (Pine Needles ) to stamp the sentiment.  Spellbinders Nestabilities Classic Ovals Large for the front and inside of the card.  And added some half pearls by Opaline to the corners of card front. Ribbon is a sheer gold.  This card went together so quickly I amazed myself.
OLYMPUS DIGITAL CAMERA
TentTopperCard_InsideView_FB
 
All items that are linked can be purchased from the Cutters Creek Store. And if you do see something you are interested in you can always contact Kim Bush of Cutters Creek and she will try to get it for you.

Thank you for stopping by and I hope you will let me know what you think of the card by leaving a comment.
Fran
 
Related Posts with Thumbnails