Just click on the pictures for a larger view. I started with E11 on her hair, deciding the sun is coming from the upper left of the picture. I than added E97 and E99. Then I went and added additional layers until I received the blending I was looking for. If you have any questions on this process let me know and I will put a video together.
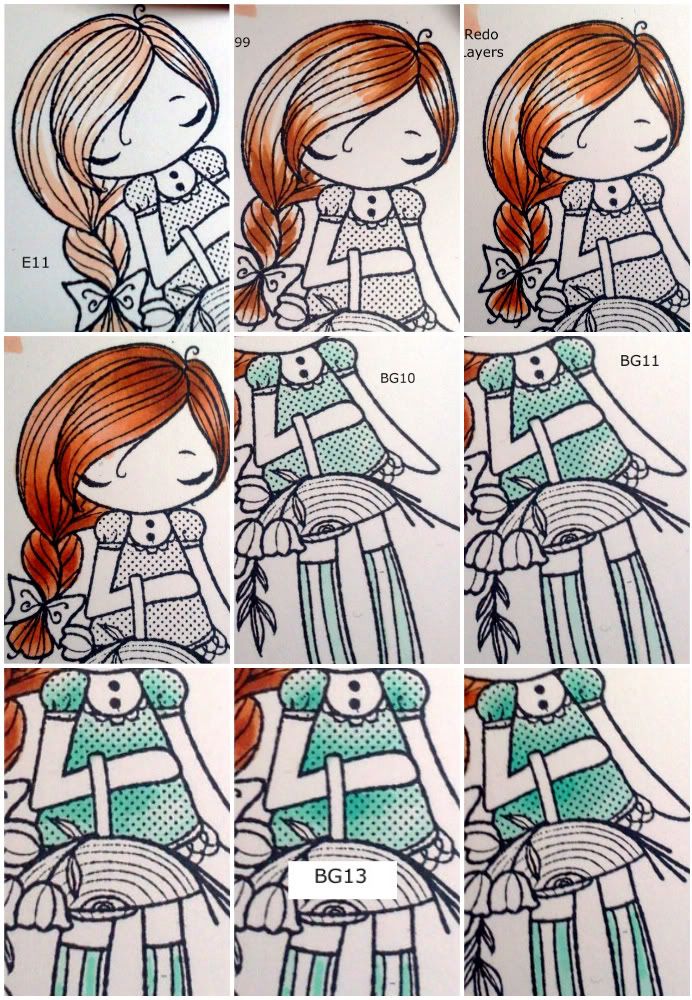
The flowers were very simple. I started with Y000, added Y11 and lastly YR21 and Y35 to the very bottom of the flowers. I used the clear spica on the very tops of the flowers to add a little shimmer. Next the leaves, YG11, YG13 and a little amount of YG17.


Last was the skin. The pics are a little out of sequence and I apologize for that. I started with E50 around the edges of the face, arms and legs. I than added E00 under the bang and forhead, inner arms and legs under the basket. E21 added in the same areas as E00 but in a less amount. I than used R12 (separate picture) to add color for her cheeks; I want to make her look sunkissed. Lastly, I went back to E50 and blend, blend, blend.


Here is the card finished. Very simple, but I like it :o) I used vellum for the paper behind her that was colored with BV02 to make the image pop a little more.


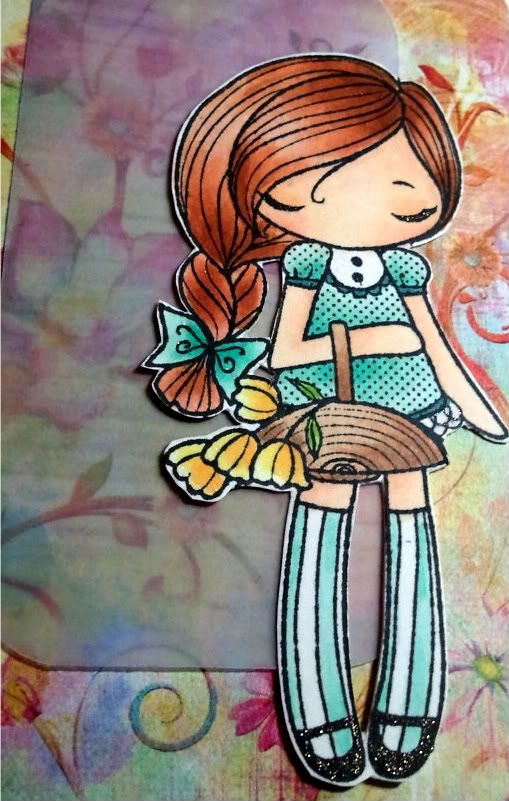
And here is the image completed. You'll notice the colors are a little more bold as the ink has settled and dried at this point. I went over the image with my spicas (LOVE these!) and added pitch black to her shoes and eye lashes, and peach above her eyes as an eye shadow and clear on her hair dress and flowers.
thanks for looking!!!
Stamps: TGF Miss Anya Collection, SU! Well Scripted (No longer available)
Paper: Bazzill Simply Smooth, Prima Paper
Ink: Memento Tuxedo Black, Copics, Atyou Spicas
Stash: corner rounder, vellum
Paper: Bazzill Simply Smooth, Prima Paper
Ink: Memento Tuxedo Black, Copics, Atyou Spicas
Stash: corner rounder, vellum
Skin: E50, E00, E21, R12, Peach, Pitch Black Spica
Dress/Socks: BG10, BG11, BG23, BG13, BG18, Clear Spica
Hair: E11, E97, E99, Clear Spica
Basket: E31, E33, E44
Leaves: YG11, YG13, YG17
Flowers: Y000, Y11, YR21, Y35, Clear Spica
Vellum: BV02


Wonderful tutorial!!!!! Loved it and how yougot all of your shading!!!
ReplyDeleteYou did a great job here! It will be a real good tutorial for anyone wanting to learn about the shading.
ReplyDeleteExcellent Tutorial, Melissa!!! I need to buy more Copics :) I'm gonna be asking you for some advice!!! Thanks!
ReplyDeleteJust a quick note to let you know that a link to this post will be placed on CraftCrave in the Cutting category today [01 Mar 12:00am GMT]. Thanks, Maria
ReplyDeleteFantastic tutorial! Thank you so much.
ReplyDeleteGreat tutorial.
ReplyDelete