Friday, May 4, 2012

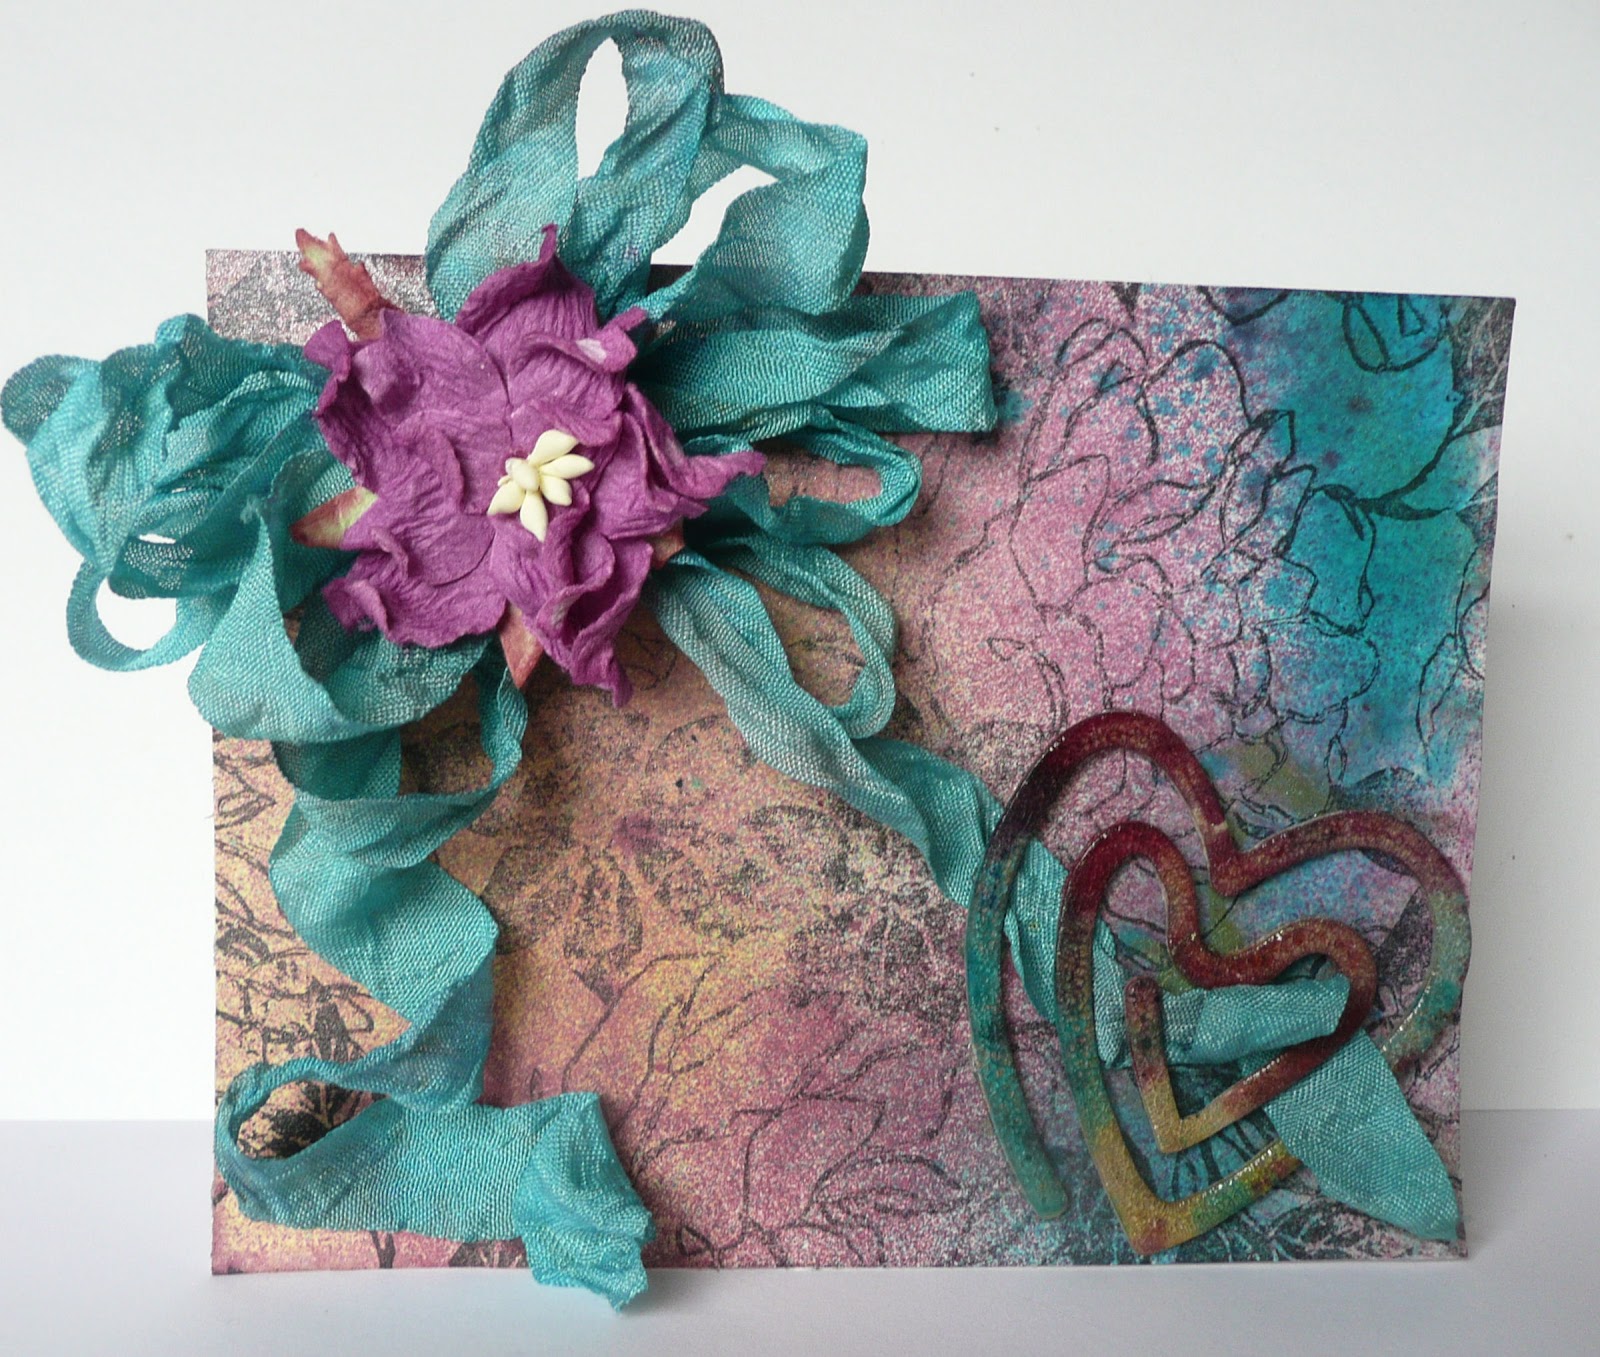
Glimmer Mist Background by Chris


The background was done on a 4.25 x 5.5 inch piece of cardstock. I pooled several different colors of Tattered Angels (Electric Blue, Pomegranate, Dragonfly, Sun Sisters) on the cardstock—no soft sweeping here--and used my heat gun to dry them. Once the background was dried, I stamped the image using Staz-On ink and used my ATG to adhere it to the card base. I then cut a length of white seam tape and dyed it to match the card with Electric Blue Tattered Angels Glimmer Mist. A multi-loop bow with a Cutter’s Creek Flower glued in its center was adhered to the card base using Glue Dots. The embellishment is a Sizzix die cut with my Big Shot, slathered with Rock Candy Distress Crackle Paint and set aside to dry. Once it was dried and crackled, I used the same Tattered Angels Glimmer Mists to color the heart. (This Technique called Shattered Stains. It is in T. Holtz’s second compendium, page 48, if you’d like the specifics.) I wove one ribbon tail through the heart and used mini Glue Dots to loop both tails in place, added a sentiment inside, and my mother’s card is done.

Wednesday, May 2, 2012

Krafty Card for Baby with Lori

So, I've been seeing a lot of all-white cards on Pinterest lately.  Super cute, but of course I feel the need to be different... plus, I needed a baby shower card and I wanted a bit of a vintage feel.  I also wanted to add just a bit of color to the monochromatic base.  So... ta-da!


This is a pretty easy technique to do - the trick is just finding embossing folder patterns that work well together.  You can usually do pretty well by choosing one large-size pattern, one medium pattern, and one small pattern.  Also, try to keep the styles similar - I went traditional, but you could also go all modern or all grungy (think Tim Holtz folders).

Every embossed pattern here is a separate piece of cardstock, layered up.  My focal image is also popped up using foam adhesive tape for added dimension.

I used a variety of border punches to stack "eyelet" borders along the bottom of the card.  At the top of the stack, I added pale pink ribbon and a bow trimmed with my I-magicut ribbon cutter.

Here's a list of the supplies I used to make this card:


Cutters Creek
Other
  • Close To My Heart kraft cardstock
  • Close To My Heart Baby Pink cardstock
  • Close To My Heart Mocha Opaques adhesive pearls
  • Cricut machine and Mother's Day LE mini
  • pink ribbon to match CS
  • Fiskars border punches, Diamond and Effervescence
  • Fiskars embossing border punch, Scalloped Daisy
  • Sizzix/Basic Grey embossing folder, Santa Baby
 That's it for today - thanks for stopping by!

Tuesday, May 1, 2012

Tuesday Tutorial-Spellbinder Edgeabilties Dies by Deanna M

So I have a video for you today on using the Spellbinder Edgeabilities dies. These are new to me and I learned a couple of things so just thought I would share what I found out for anyone else who hasn't used these. I used the Spellbinder Edgeabilities Decorative Inserts and the Classic Edges Two set.


Now, here is a photo of the card I made and shared in the video.


As I said I used the Spellbinder Edgeabilities Decorative Inserts and the Classic Edges Two for the the bee border. My card base is 4 1/4" X 5 1/2" Yellow Core'denations card stock ( suspect Kim can special order this card stock for you). I added a black mat cut at 4" X 5 1/4" mat and then a paper patterned mat from the My Minds Eye Howdy Doody 6" X 6" paper pack cut at 3 3/4" X 5". This paper already had a flower image in the upper left hand corner that worked perfectly with my bee. I cut the bee at 3 1/4" from the Garden Soup Cricut Cartidge (another item that Kim can likely special order for you.) I added my bee border and some black and white gingham ribbon to my card. Then used some foam tape to add my bee to my card and added some buttons from my stash with some glue dots. I am so pleased how this card turned out. Thanks for visiting us.

Sunday, April 29, 2012

More Twine Fun...Note to Self....Gift Giving Ahead by Laura C


It's time for Mom's, Grads, and Dad's gifts!  This little set is an easy gift to make for any of these occasions!  Using the "Note to Self" collection by Echo Park, I made a quick and easy sticky note pad cover as you see above.  Super simple to do....if you are using a 3x3 note pad, you cut your paper 7.75" x 3.25".  Then score....leaving 1/4" sides for the note pad and a 1/2" for the "flap".  The "title" and the hand are stickers from the kit, and that cork board paper is so cute!  You can really see it on the "cork board" push pin tin here:


I used Scor Tape on the back of the cork board paper first, and used that to secure my twine around the piece in a criss-cross cork board pattern.  I added a bit more Scor Tape, then adhere this piece to the tin.  The tags are fussy cut from one of the patterned paper sheets from the EP Note to Self, and the letters are from the kit as well.  A few little black rhinestones finish the "board" and then more Scor Tape to wrap twine around the edge of the tin as a finishing touch....here's a close up:

A great little tin, you can actually put some push pins in to use with the note pad (would be cute to give with an actual cork board for an office or dorm room!) and/or you could use the tin for a gift card! 

And I just wanted to share a little "commercial" if you will....for the self adhesive "kool tak" tabs.  Wowzer, were these easy to use as the closure for my little note pad!!  Much better, and way less bulky than traditional velcro!   It was the first time I had used them....and they truly are AWESOME!! 
They are sold out in store, but I'm sure Kim would get them for ya! 


Hope you enjoyed this little gift idea...especially with all those occasions coming up!

Enjoy some crafty gift making time today!

Friday, April 27, 2012

Magnolia Card by Mindy


 Isn't this such a cute image. Did you know that  Cutters Creek now carries Magnolia stamps . For my card I used a Magnolia stamp,  Spellbinder Nestabilities- circle, scalloped circle, and labels 4, stickles on her wings, and dew drops on the bubbles. Tilda is colored with Copic markers of course.

Thursday, April 26, 2012

Cupcake Box by Tee


Hi everyone, this is Tee and my first project as a guest designer here at Cutters Creak. I am excited to share with you the cupcake box I made using the Sweet Tooth cartridge. Cricut made it easy to ensure a cupcake fits in each box by providing recommended cutting sizes on each project. I cut my box at 11" using cherry patterned paper and bazzill paper.
 I covered my icing with stickles and added two different widths of ribbon for a big bow on the back. I then cut a 2" rosette from the Ribbons and Rosettes cartridge and rolled paper with twine to make a candle. I then added some stickles to the top of the twine. I also added rhinestones to some extra bling. 


I hope you enjoyed my project as much as I enjoyed eating the cupcake I used as a prop for this box.

Monday, April 23, 2012

Twinerific Tuesday by Laura C

Today's "Tutorial Tuesday" has had a little "takeover"....lol.
It's still a "mini" tutorial, but it's mainly meant to show you
just how to think outside the box and have a little fun with
twine! It comes in a rainbow of colors (especially the fun
Doodlebug Twine in the store!) for all kinds of projects and
ideas, and the card above is a result of my playing with a few
of my twine ideas.

Step one....pretty simple....instead of cutting an 8.5" x 11"
piece of white cardstock in half to make a 8.5" x 5.5" piece,
I cut it into an 8.5" x 7.5" piece (left 2 extra inches). The
8.5" width was scored at 4.25" (as usual to make a card),
but I also scored the 7.5" width at 1" on each side (this
leaves a 5.5" width to the actual card after these are
folded). Next, I cut out the "extra rectangle" on the back
side of my card ONLY. The result is this piece:

Those extra "flaps" are then marked with evenly spaced holes....
I used a ruler for this and a paper piercer, then punched holes
with my crop o dile, creased and folded the flaps and had this:

Next, I set eyelets in those holes on each flap, then decorated the
front of my card (I used Echo Park This & That Charming, and
the new Spellbinders Square Swatches), then I put the twine
through the eyelet holes, as if I was lacing my shoes....I did
bottom to top on this card....and then added a button to the
twine, tied a bow, and secured the button, and the top of each
"flap" with some Scor Tape.

Here is a close up of the laced up twine:

And once more the complete card.....with a chipboard accent...
this could easily be a stamped image, flowers for Mother's Day,
any accent would be great!


Hope you enjoyed this little bit of twinerific fun!!
Related Posts with Thumbnails


