.jpg)
Tuesday, June 11, 2013
Wish with Anne
Happy Friday friends! I wanted to share with you today a card I did with a magnificent paper pack from Echo Park Paper. It was a happy day on Monday when I went to the mail box! I went into my craft room and made this card, all with the paper pack from "Charming". I cannot tell you how much I adore this pack! It is just awesome! The Gold Rhinestones, and Green Self Adhesive rhinestones can all be found at the Cutter's Creek Store. Hope you enjoy my post today! Have a great weekend!
.jpg)

Sunday, June 9, 2013
4th of July Wreath by Deanna M

I had a lot of fun making my project today. I found my inspiration on Pinterest and put my own twist on it. I go there sometimes when I need to give my mojo a kick in the pants!
For my wreath, I used my Silhouette Cameo to cut my cones at approximately 5". I cut 4 red, 4 white, and 4 blue. I used my Scor-Tape to secure the cones once they were cut.
Next, I used my Gypsy and the George and Basic Shapes cartridge to cut an 8" circle out of white card stock. I wanted to use chipboard but didn't have any so instead, I cut 3 8" circles and adhered them together for my wreath base. I used Bazzill Simply Smooth card stock to cut my circles. This is my go to card stock for just about everything and I love it!!.
I used my Scotch Quick Dry Adhesive to adhere my cones to my circle base. For the center of my wreath I cut two 2" X 12" strips of some card stock and scored it every 1/2". I did a mountain, valley fold and used Scor-Tape to adhere the two strips together to make a Rosette and adhered that to the center of my wreath.
Next I used the print and cut feature with my Silhouette and print and cut my bear at approximately 7 3/4" tall. I used some of my super strength craft glue dots to adhere my bear to the center of my wreath.
Now what is the 4th of July without some sparkle and shine???? Once my wreath was assembled, I sprayed the entire wreath with Iridescent and Silver Glitter Dust. ( I used both colors because I ran out of the Iridescent).
The last finishing touch to my wreath was to add a dark blue ribbon using my Tim Holtz Tiny Attacher to attach the ribbon to my circle base.(Kim can order you the tiny attacher if you want one).
This is so easy to make and could easily be adapted for just about any occasion, or holiday. I hope you will give it a try.
Saturday, June 8, 2013
A Shirt Box for Dad
Since Father's Day is about a week away, I decided to make something different than a card. I made a shirt box for my dad. The products I used were from my stash at home.
I made this by using the Cricut cartridge Tags, Bags, Boxes and more 2. I used some white card stock as my base.
 Next, for the tie and pocket I used paper from a 6x6 paper pad Little Sport by Heidi Larsen. Then I used a black pen and made lines all around the shirt. The box is small (2x2 1/4) , so I put in some wrapped candy that he likes. So, I hope liked my little shirt box as a small gift for Father's Day.
 (a closer look at the detail )
Please visit the store for many wonderful items. Just ask Kim if she can get the Cricut cartridge, the paper pad, or any item you are looking for.
I made this by using the Cricut cartridge Tags, Bags, Boxes and more 2. I used some white card stock as my base.

 (a closer look at the detail )
Thursday, June 6, 2013
Photo Freedom
When I first got into paper crafting, I was a scrapbooker. All I did was make scrapbook pages. The more involved in the hobby I got, I started making cards also. Once I started making cards, I didn’t stop. They’re easy, they’re quick, and you need to have pictures developed to make them. As my pictures sat and sat in my computer dying to get out, I realized I needed to start scrapbooking again. I was nervous and afraid I wouldn’t remember how to make a scrapbook page and my pictures would be stuck in the computer forever.All I really need for this page is to add 2 more photos and it’s done. So quick and easy and not stressful at all. If you would like to give pocket scrapbooking a try, let Kim know so she can order you some supplies and you can get started.
Then I discovered project life or pocket scrapbooking. It was exactly what I needed- a quick and easy way to get my pictures into an album. There are several brands of products you can use in pocket scrapbooking. For this project I am focusing on Echo Park’s version called Photo Freedom.
Photo Freedom comes as a kit. The kit contains photo sleeves in different designs, patterned paper that you can cut into 3x4 and 4x6 squares, and a sticker sheet. Cutters Creek does not have Photo Freedom listed in the store currently, but Kim can order it for you. The kit I used is called Today’s Story and the colors are great.
This design of page protector has spaces for 4 x 6 items and 4 3x4 items. You can use as many photos or fillers as you want. You can also cut your photos smaller and use them in in the 3x5 slots, the possibilities are endless. Each of the page elements is double sided giving you double the options.
Here is a picture of what one of the pages looks like from the back with nothing additional added to it.


Tuesday, June 4, 2013
Le Cirque Graphic 45 tricket box by Jearise
Today I am showing off a paper mache ticket box I decorated using the Le Cirque Double-Sided Paper Pad from Graphic 45. I discovered that Mod Podge works perfecting for attaching the paper and bringing out bright colors. Please contact Kim if you would like to order some Mod Podge.
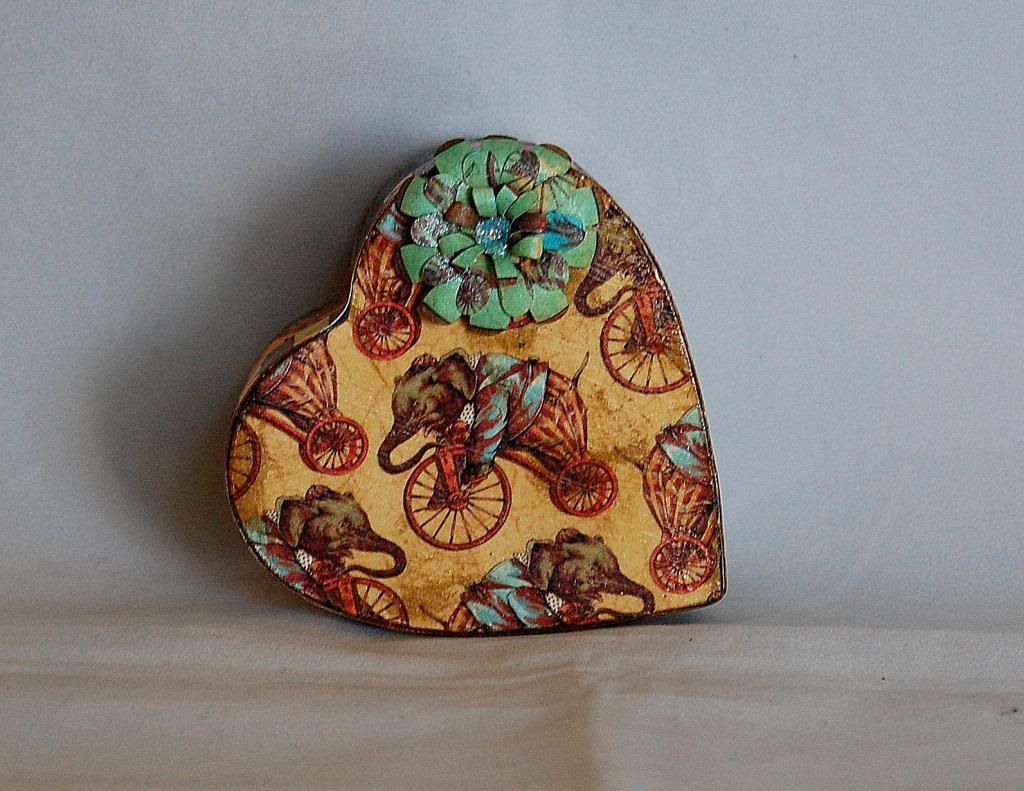
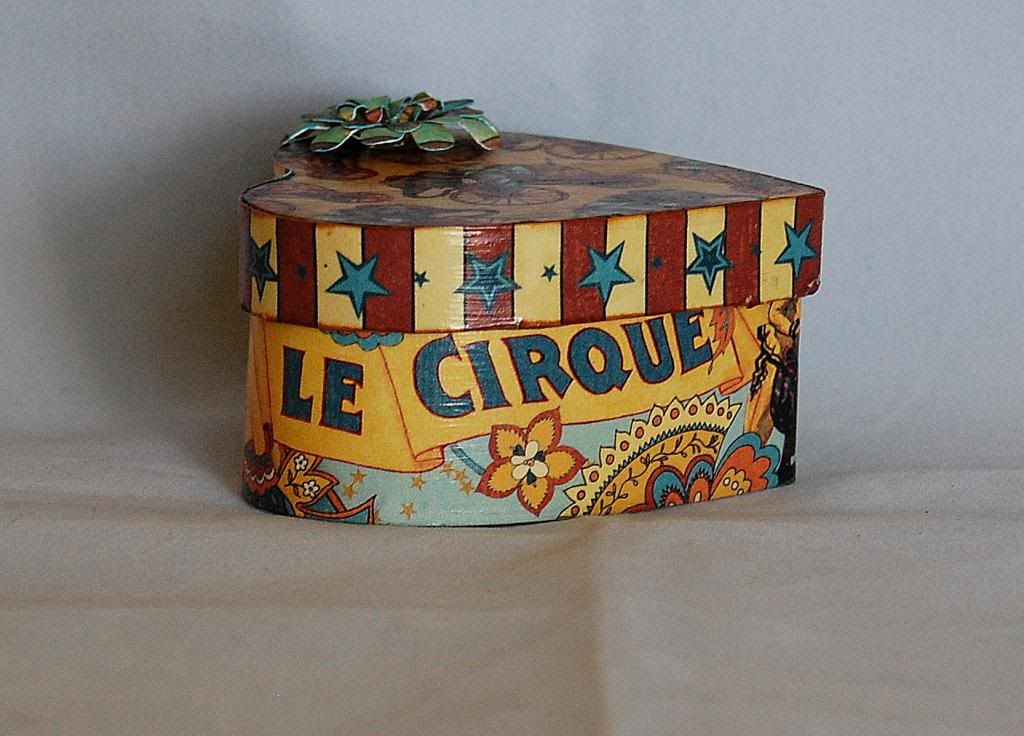
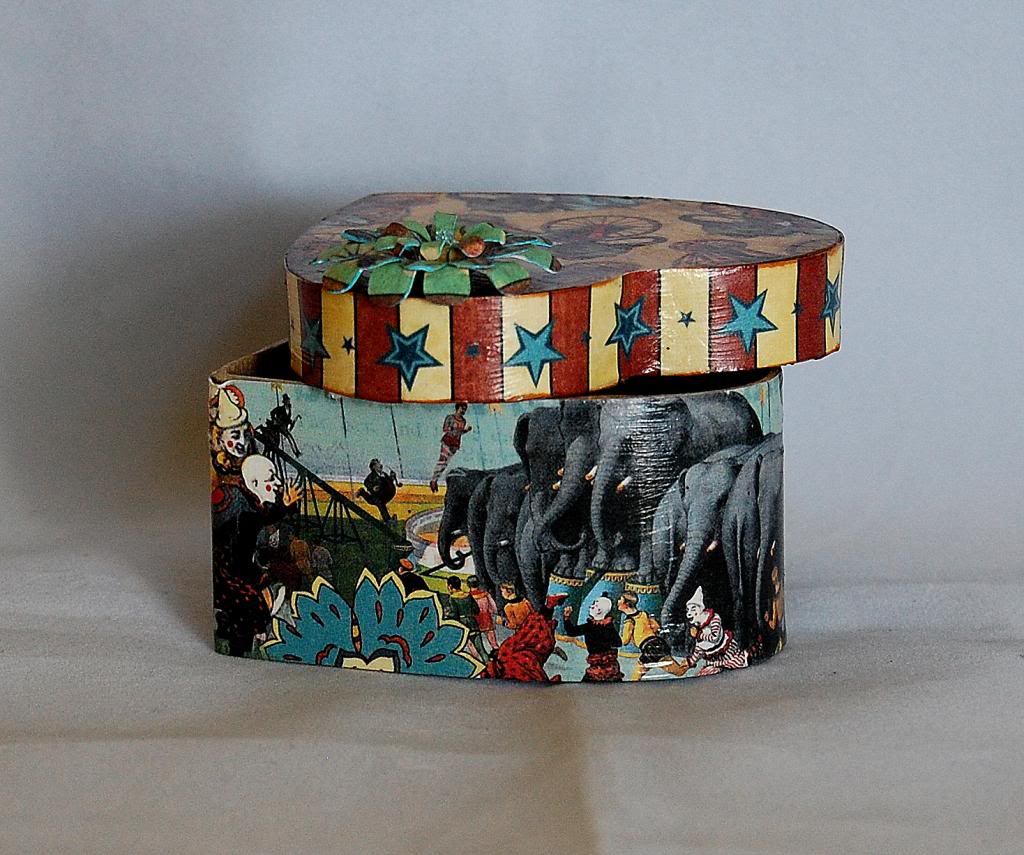 Here are the directions on how I decorated this box.
First, I measured the sides of the boxes height and then I cut out the strip and played with wrapping it around the box to show different scenes. I decided I liked the elephants on one side and words on the other so I brought the paper together in the middle of the heart and made sure it overlapped some before cutting. It's important to have it over lap in case you cut it shorter than you thought you were.
Once I had the paper Mod Podged on, I went back and trimmed it down to the edge of the top of the box using my utility knife and scissors.
Then on to the top....
I centered my elephant in the middle of the box and trimmed around the outside edge using my utility knife and scissors and then I Mod Podged the paper on.
I did the same thing with the trim for the top sides that I did with the bottom sides of the box.
I then went back and inked all the edges and added a touch of ink to the paper on the top and sides as well using the Tim Holtz Distress Ink Pad-Tea Dye.
I added some of the Tattered Angle's glimmer mist and a flower I made using the Cricut Cartridge Flower Shoppe. I used some Stickles in Baby Blue for the center of the flower. I attached the flower using Scotch quick dry adhesive.
There you have it in a nutshell, an easy project that is fun to do and doesn't take a lot of time. I even let my 8 year old decorate her own box using my paper scraps.
Have a great day! Jearise
First, I measured the sides of the boxes height and then I cut out the strip and played with wrapping it around the box to show different scenes. I decided I liked the elephants on one side and words on the other so I brought the paper together in the middle of the heart and made sure it overlapped some before cutting. It's important to have it over lap in case you cut it shorter than you thought you were.
Once I had the paper Mod Podged on, I went back and trimmed it down to the edge of the top of the box using my utility knife and scissors.
Then on to the top....
I centered my elephant in the middle of the box and trimmed around the outside edge using my utility knife and scissors and then I Mod Podged the paper on.
I did the same thing with the trim for the top sides that I did with the bottom sides of the box.
I then went back and inked all the edges and added a touch of ink to the paper on the top and sides as well using the Tim Holtz Distress Ink Pad-Tea Dye.
I added some of the Tattered Angle's glimmer mist and a flower I made using the Cricut Cartridge Flower Shoppe. I used some Stickles in Baby Blue for the center of the flower. I attached the flower using Scotch quick dry adhesive.
There you have it in a nutshell, an easy project that is fun to do and doesn't take a lot of time. I even let my 8 year old decorate her own box using my paper scraps.
Have a great day! Jearise
Sunday, June 2, 2013
Masculine Project With Kim B
I hope everyone has enjoyed our Design Team bringing you some wonderful masculine projects. As crafters and a large majority of us being women, I know a lot of us struggle to make these type projects because we are drawn to the "pretty" and things like florals, pinks, frilly, etc... Some of you crafters out there only have males to craft and scrap for so I am sure it is a bit easier for you to accomplish what a lot of us struggle to do. I still use flowers, ribbon, glitter, etc... when doing masculine projects, I just try and tone it down a bit..............lol! I just can't give up my bling!
So here are two Father's Day cards I created for a new friend if mine who has recently started purchasing cards from me.

I should have taken photos of the inside, however I forgot to do that so you could see how I completed the interior of the cards. I used Ecstasy Crafts products for the front and some Flower Soft Peel Offs for the corners. The ribbon was from my stash and the papers were scraps in my stash. These cards went together so quickly because I used Ecstasy Crafts so the thinking was removed for me. I just had to match up the rest of the items to complete my cards.
Thank you for looking and I hope you enjoyed our projects! Please leave the team a comment on the items you liked and tell us what you would like to see more of. Thank you!
Saturday, June 1, 2013
You're the King - Masculine Card with Lori
It's my turn today to share a masculine card with you. This one is perfect for the King of your castle, for Father's Day, birthday, anniversary, or just because.

Neutrals or dark colors are perfect for masculine cards, and a pop of color makes them eye-catching. My papers are from Graphic 45's Kraft Reflections paper pad. This is no longer in stock at Cutters Creek, but any of the other paper pads with darker colors would be great! (Basically anything currently in the store except Secret Garden.)

Texture is also a must for masculine cards, because we tend to stick to simpler patterns for them. I used my faux leather technique and a Tim Holtz buckle to create this "belt" on my card. I added a pop of color by making this "poker chip" using a stamp from my stash and embossing with red embossing powder on red cardstock. I made sure the tones were slightly different so it would still "read" well.

Finally, I added my sentiment, using words from two different stamp sets (you're & the) and an alphabet set (king).
Supplies available at Cutters Creek:

Neutrals or dark colors are perfect for masculine cards, and a pop of color makes them eye-catching. My papers are from Graphic 45's Kraft Reflections paper pad. This is no longer in stock at Cutters Creek, but any of the other paper pads with darker colors would be great! (Basically anything currently in the store except Secret Garden.)

Texture is also a must for masculine cards, because we tend to stick to simpler patterns for them. I used my faux leather technique and a Tim Holtz buckle to create this "belt" on my card. I added a pop of color by making this "poker chip" using a stamp from my stash and embossing with red embossing powder on red cardstock. I made sure the tones were slightly different so it would still "read" well.

Finally, I added my sentiment, using words from two different stamp sets (you're & the) and an alphabet set (king).
Supplies available at Cutters Creek:
- Graphic 45 Paper Pads
- Cuttlebug embossing folder
- Clear embossing powder
- Memento stamp pads in black and red
- Foam Adhesive squares
- cardstock
- clear embossing ink
- red embossing powder
- sentiment stamps
- Tim Holtz buckles
Subscribe to:
Posts (Atom)







 Posts
Posts


