I cannot even hope to fill Wendy's shoes, but I have been doing my studying on these wonderful Copic Markers. Wendy shared with you the basic coloring techniques in her last installment, and some of her favorite color combinations. At first glance, all of those colors are so intimidating! As Wendy showed us, we can create so much depth with just three markers in the same color family.
One of my first questions was, "Well, that is great, but how do I make the skin look like skin or the jeans look like jeans?" Like many of you, I wanted to be able to color basic images I had in my "stash" or ones I had traded with others.Today let's start with the skin tones. I had heard I needed E000, E00, E11, R20 (Blush) for skin, but how do I combine those to really make it look like skin? Could I do it? I was surprised the answer was yes. Let me show you what I learned!
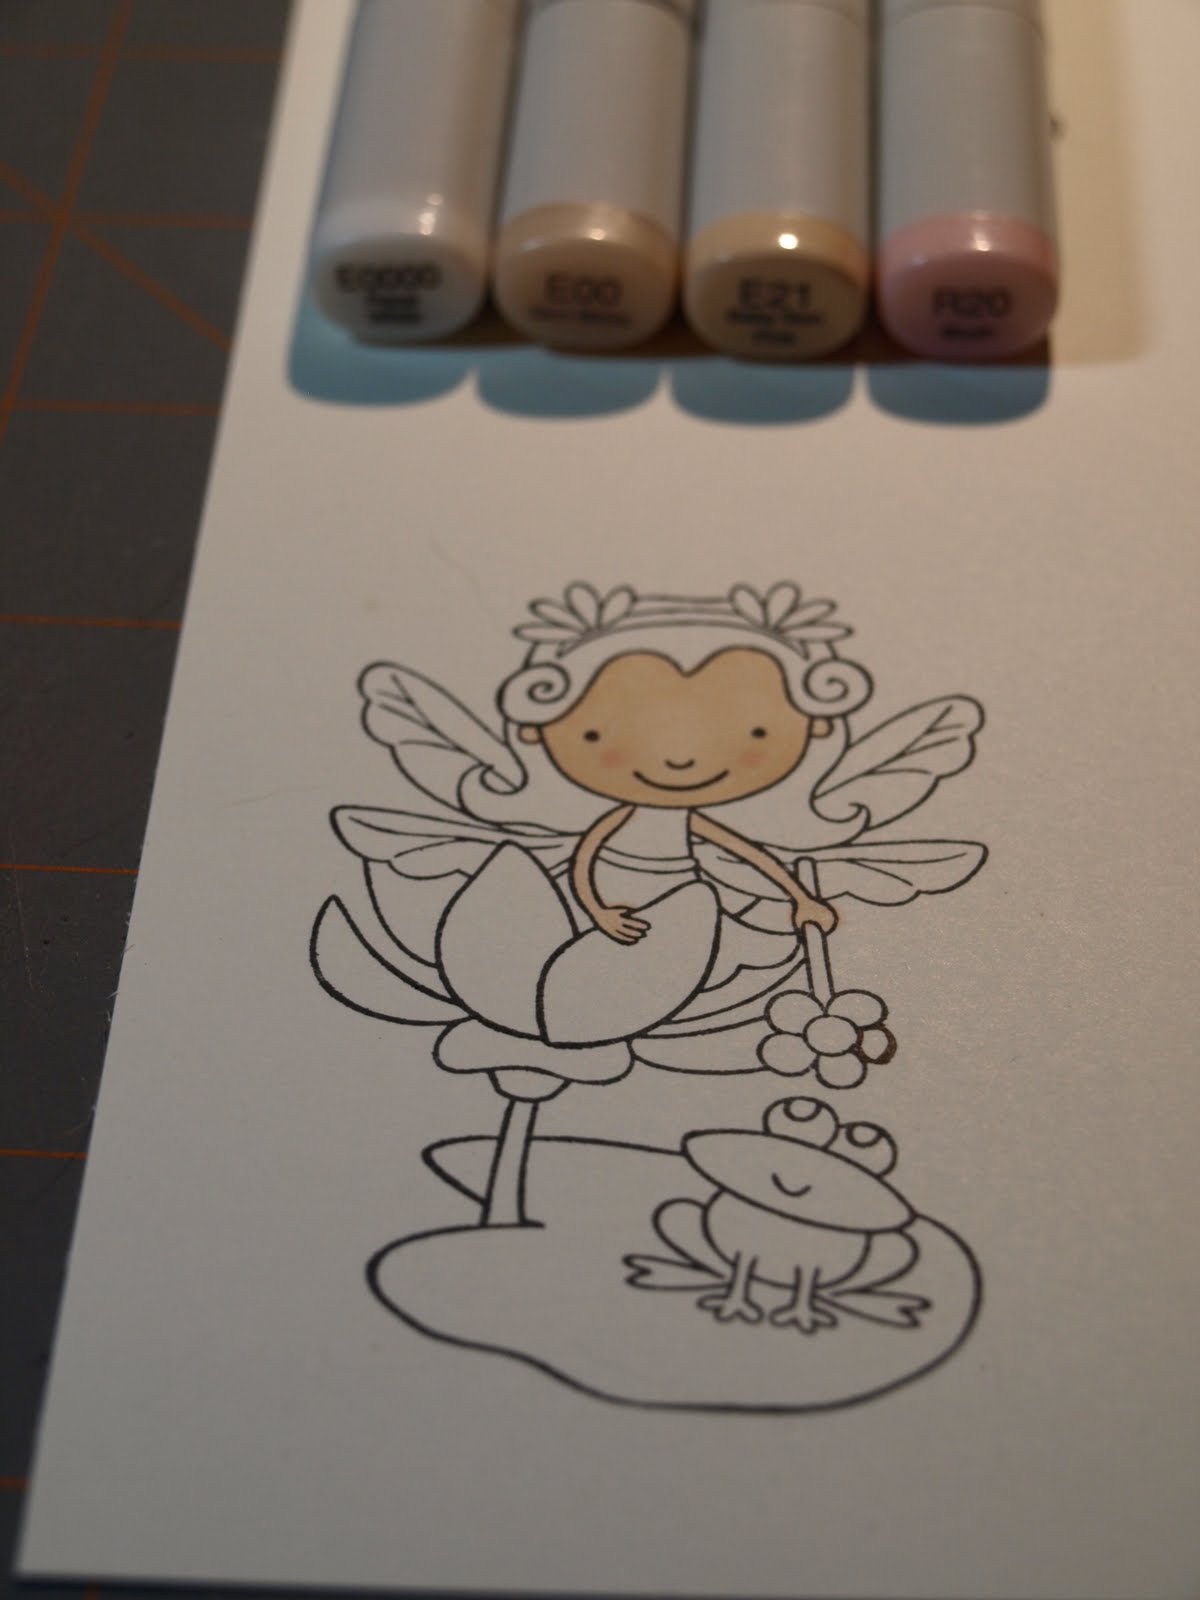
First stamp your image on quality cardstock using a good ink like Memento Black Ink. I love the Bazzill cardstock at Cutter's Creek, and that is what I used. The stamp in this project is from Pink Cat Studios (Enchanted Lily Collection).
First you want to cover the entire area using your E000 or E0000. You don't have to worry about perfection, here. You are putting down your "base" coat. Work in small circles to get good coverage. Take your time, and get the feel of your pens.
One of my first questions was, "Well, that is great, but how do I make the skin look like skin or the jeans look like jeans?" Like many of you, I wanted to be able to color basic images I had in my "stash" or ones I had traded with others.Today let's start with the skin tones. I had heard I needed E000, E00, E11, R20 (Blush) for skin, but how do I combine those to really make it look like skin? Could I do it? I was surprised the answer was yes. Let me show you what I learned!
First stamp your image on quality cardstock using a good ink like Memento Black Ink. I love the Bazzill cardstock at Cutter's Creek, and that is what I used. The stamp in this project is from Pink Cat Studios (Enchanted Lily Collection).
First you want to cover the entire area using your E000 or E0000. You don't have to worry about perfection, here. You are putting down your "base" coat. Work in small circles to get good coverage. Take your time, and get the feel of your pens.

Next we are going to add in E00. Again working in small circles. Choose where your light source will be, and leave those areas of the face lighter in your coloring. For my project, the light was coming straight on to Lily's face. I let her nose and forehead be slightly lighter than the rest of her face.

Next I added my facial shadows using E21. Around the hairline, the lower part of the face and ear area would all be the darker parts of the face. This is a a subtle variation in color. I lightly outlined the areas I wanted darker. Go sparingly. You can always return and add more color if you feel your shadows aren't quite right.
To give her cheeks a cute "glow", I reached for my R20. I made two small circles of blush area on her cheeks. I like this technique for cartoon type images.
Next I returned to my E00 to blend the colors together. Again, I kept the areas of the nose and center forehead lighter.
For her arms I used the E00 and the E21 for some shadow with the same technique.
Next time we are going to do the hair colors. I am going to cover the basic colors you will need for blond, brunette and auburn and black hair colors. I will be making Lily a blond, but you can do any hair color you choose.
Thanks for following along! I can't wait for the next installment!
Cutters Creek Products Used:
White Bazzill Cardstock
Copic Sketch Markers, E000 (or E0000), E00, E21 and R20
Memento Black Ink
Pink Cat Studios Stamps - Enchanted Lily


This is great, thanks for picking up where Wendy left off! This was awesome!
ReplyDeleteHi Lisa!! This is the "other" Lisa! Thanks so much for the wonderful comment you left on my blog! To answer your question, we order the "spring kit" from Magnolia Sweden. They release a small sampling from a new collection four times a year before you can buy them in any store. The catch is that you never know what you are going to get since it is a pre-order. This one had about 15 stamps in it and it only $53ish with shipping, it is a great value! You can sign up for the Summer kit stamp club at www.magnolia.nu
ReplyDeletethis was my first kit and I definately plan on ordering the other kits as well, I was extremely happy with what I received. You have to mount them on peel and tack but it was worth it!
By the way, I love copics too!! Great tutorial!
hugs,
Lisa A
Love your tutorial, thank you doing this. I'm looking forward to the next one.
ReplyDeleteGlad you like it, everyone. Please let me know if there is anything special you would like to see!
ReplyDeleteLaura